Appearance
Agent Groups
The Agent Groups feature solves this by letting you organize your support staff into dedicated departments—such as a "Sales Team," "Billing Department," or "Technical Support." Once your teams are grouped, you can assign tickets to the whole department at once, automate how tickets are routed, and track how well each team is performing.
Here is everything you need to know to get started with Agent Groups.
1. Create an Agent Group
Creating a group is the first step to organizing your team. You can create as many groups as you need to fit your business structure.
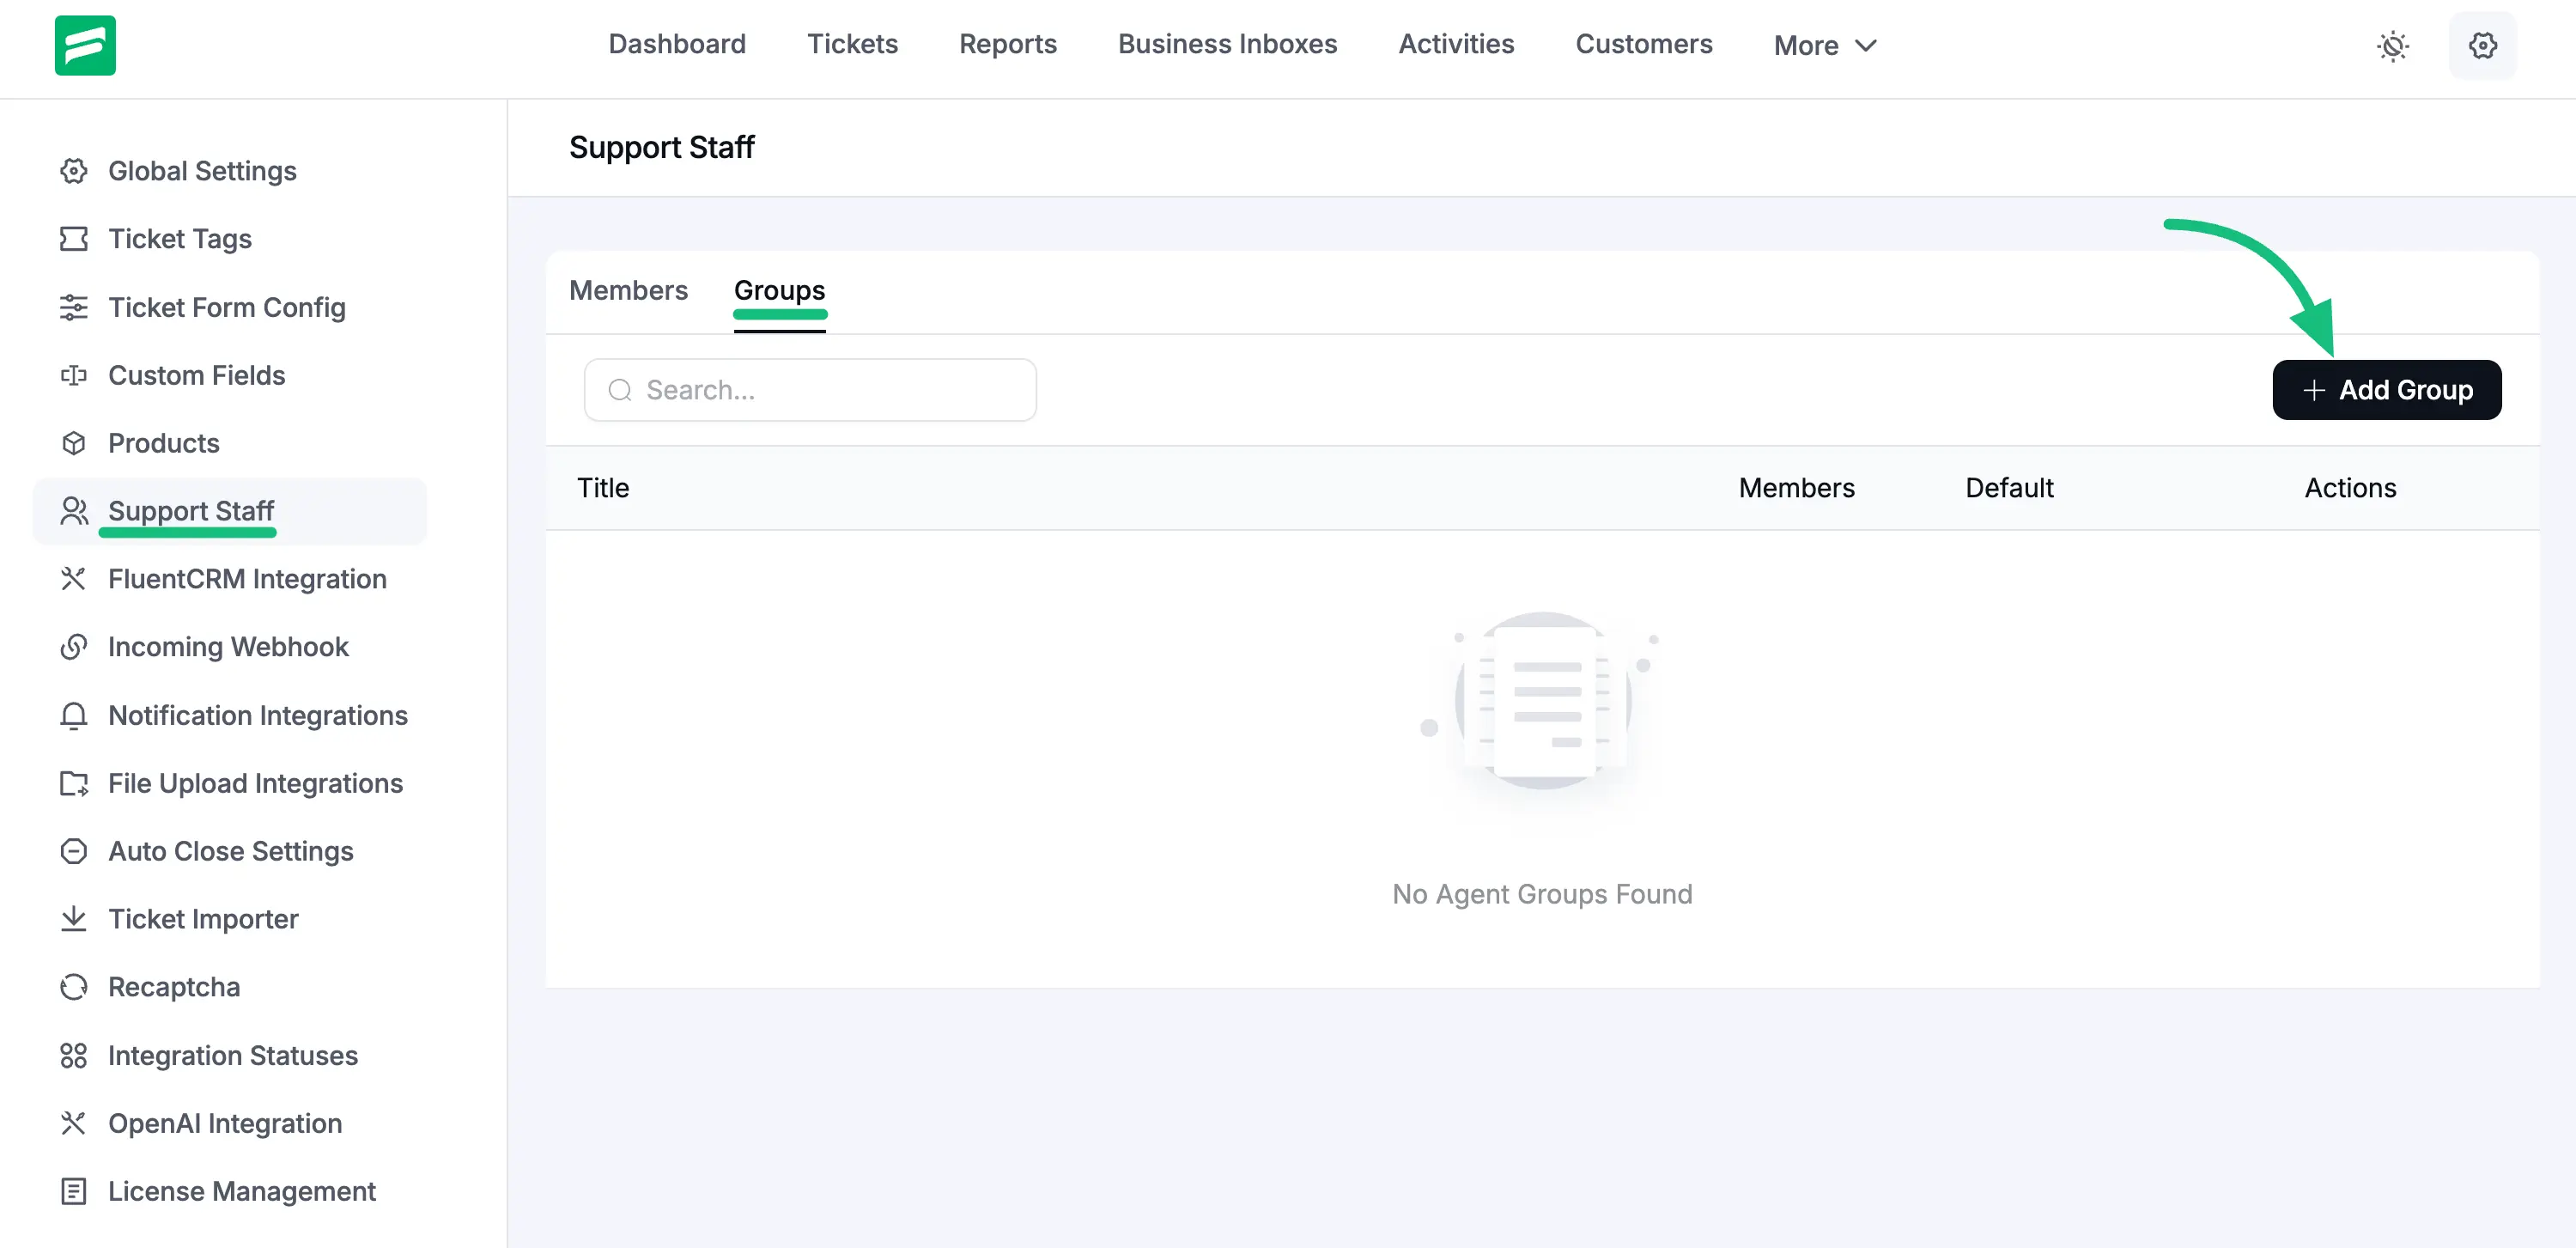
- From your FluentSupport dashboard, navigate to Global Settings and click on Support Staff in the left-hand menu.
- At the top of the screen, you will notice two tabs: Members and Groups. Click on the Groups tab.
- Click the black + Add Group button on the right side of the screen.
A pop-up window will appear where you can customize your new team:
- Title: Give your group a recognizable name, like "Level 1 Support" or "Refunds Team."
- Description: Write a short note about what this group handles. This helps keep your dashboard organized as you add more teams.
- Agents: Click inside the dropdown box to select the staff members you want to add to this team. You can add multiple people here.
- Set as Default Group: If you check this box, any new ticket that comes in without a specific assignment will automatically be routed to this group.
- Click the Add Group button to save. You will now see your new team listed, along with the total number of members in it.

2. Bulk Assigning Tickets to a Group
Instead of opening five different tickets to assign them to the same team, you can do it all at once directly from your ticket inbox.
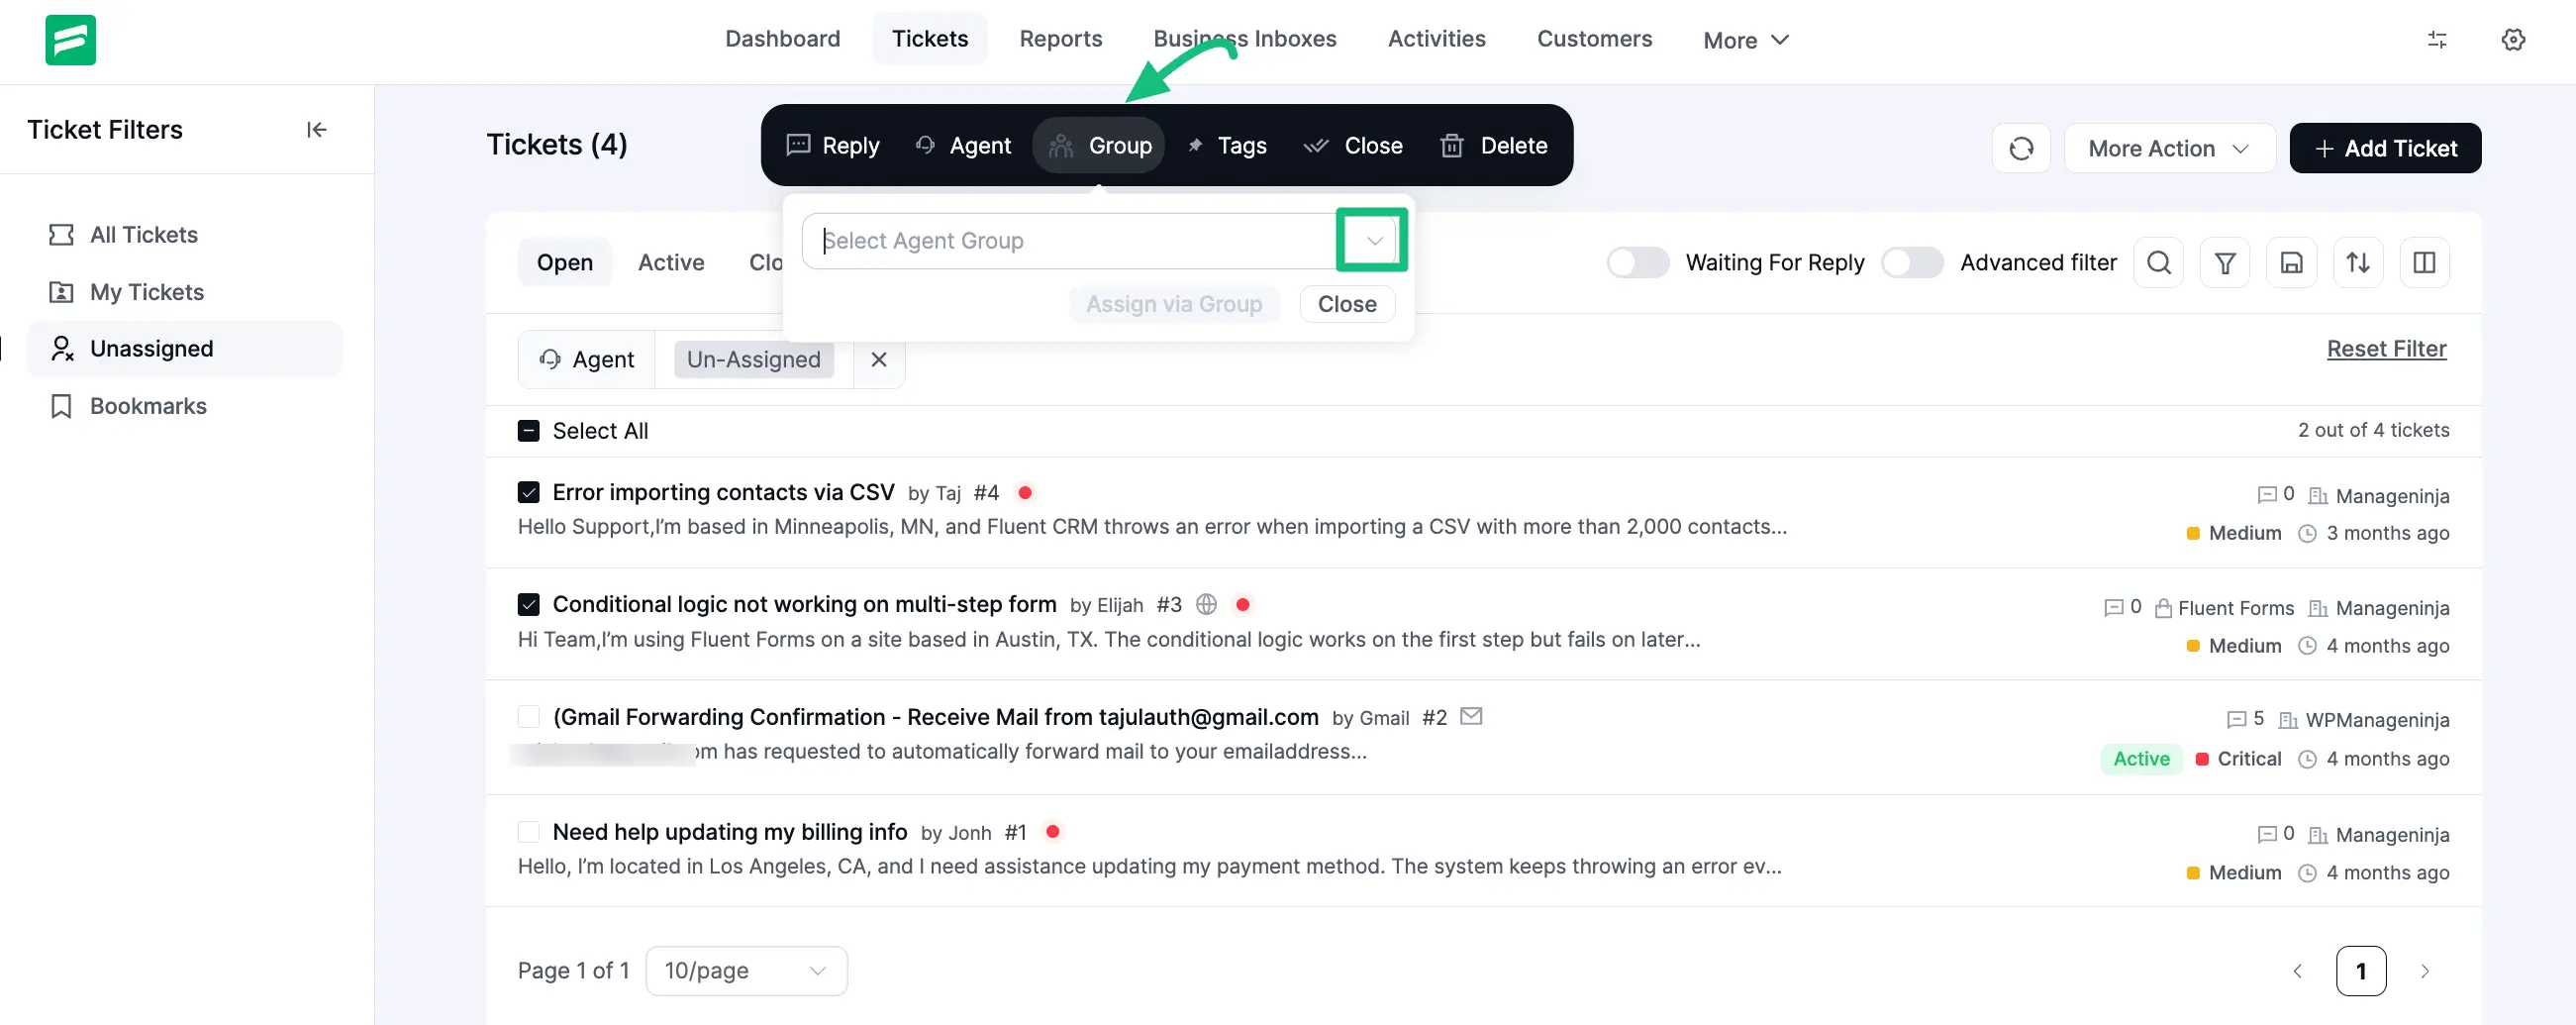
- Navigate to your main Tickets dashboard.
- Select multiple tickets by checking the small boxes on the left side of each ticket's title.
- Once you select a ticket, a black action bar will appear at the top of your screen. Look for the Group icon (it looks like a cluster of people) next to the Agent and Tags options.
- Click Group and select the team you want to handle these tickets from the dropdown menu. All selected tickets are now instantly assigned to that department!
3. Automating Ticket Routing with Workflows
The most powerful way to use Agent Groups is by connecting them to Automatic Workflows. This allows FluentSupport to act like an automatic dispatcher, sending tickets to the right team the second they arrive.
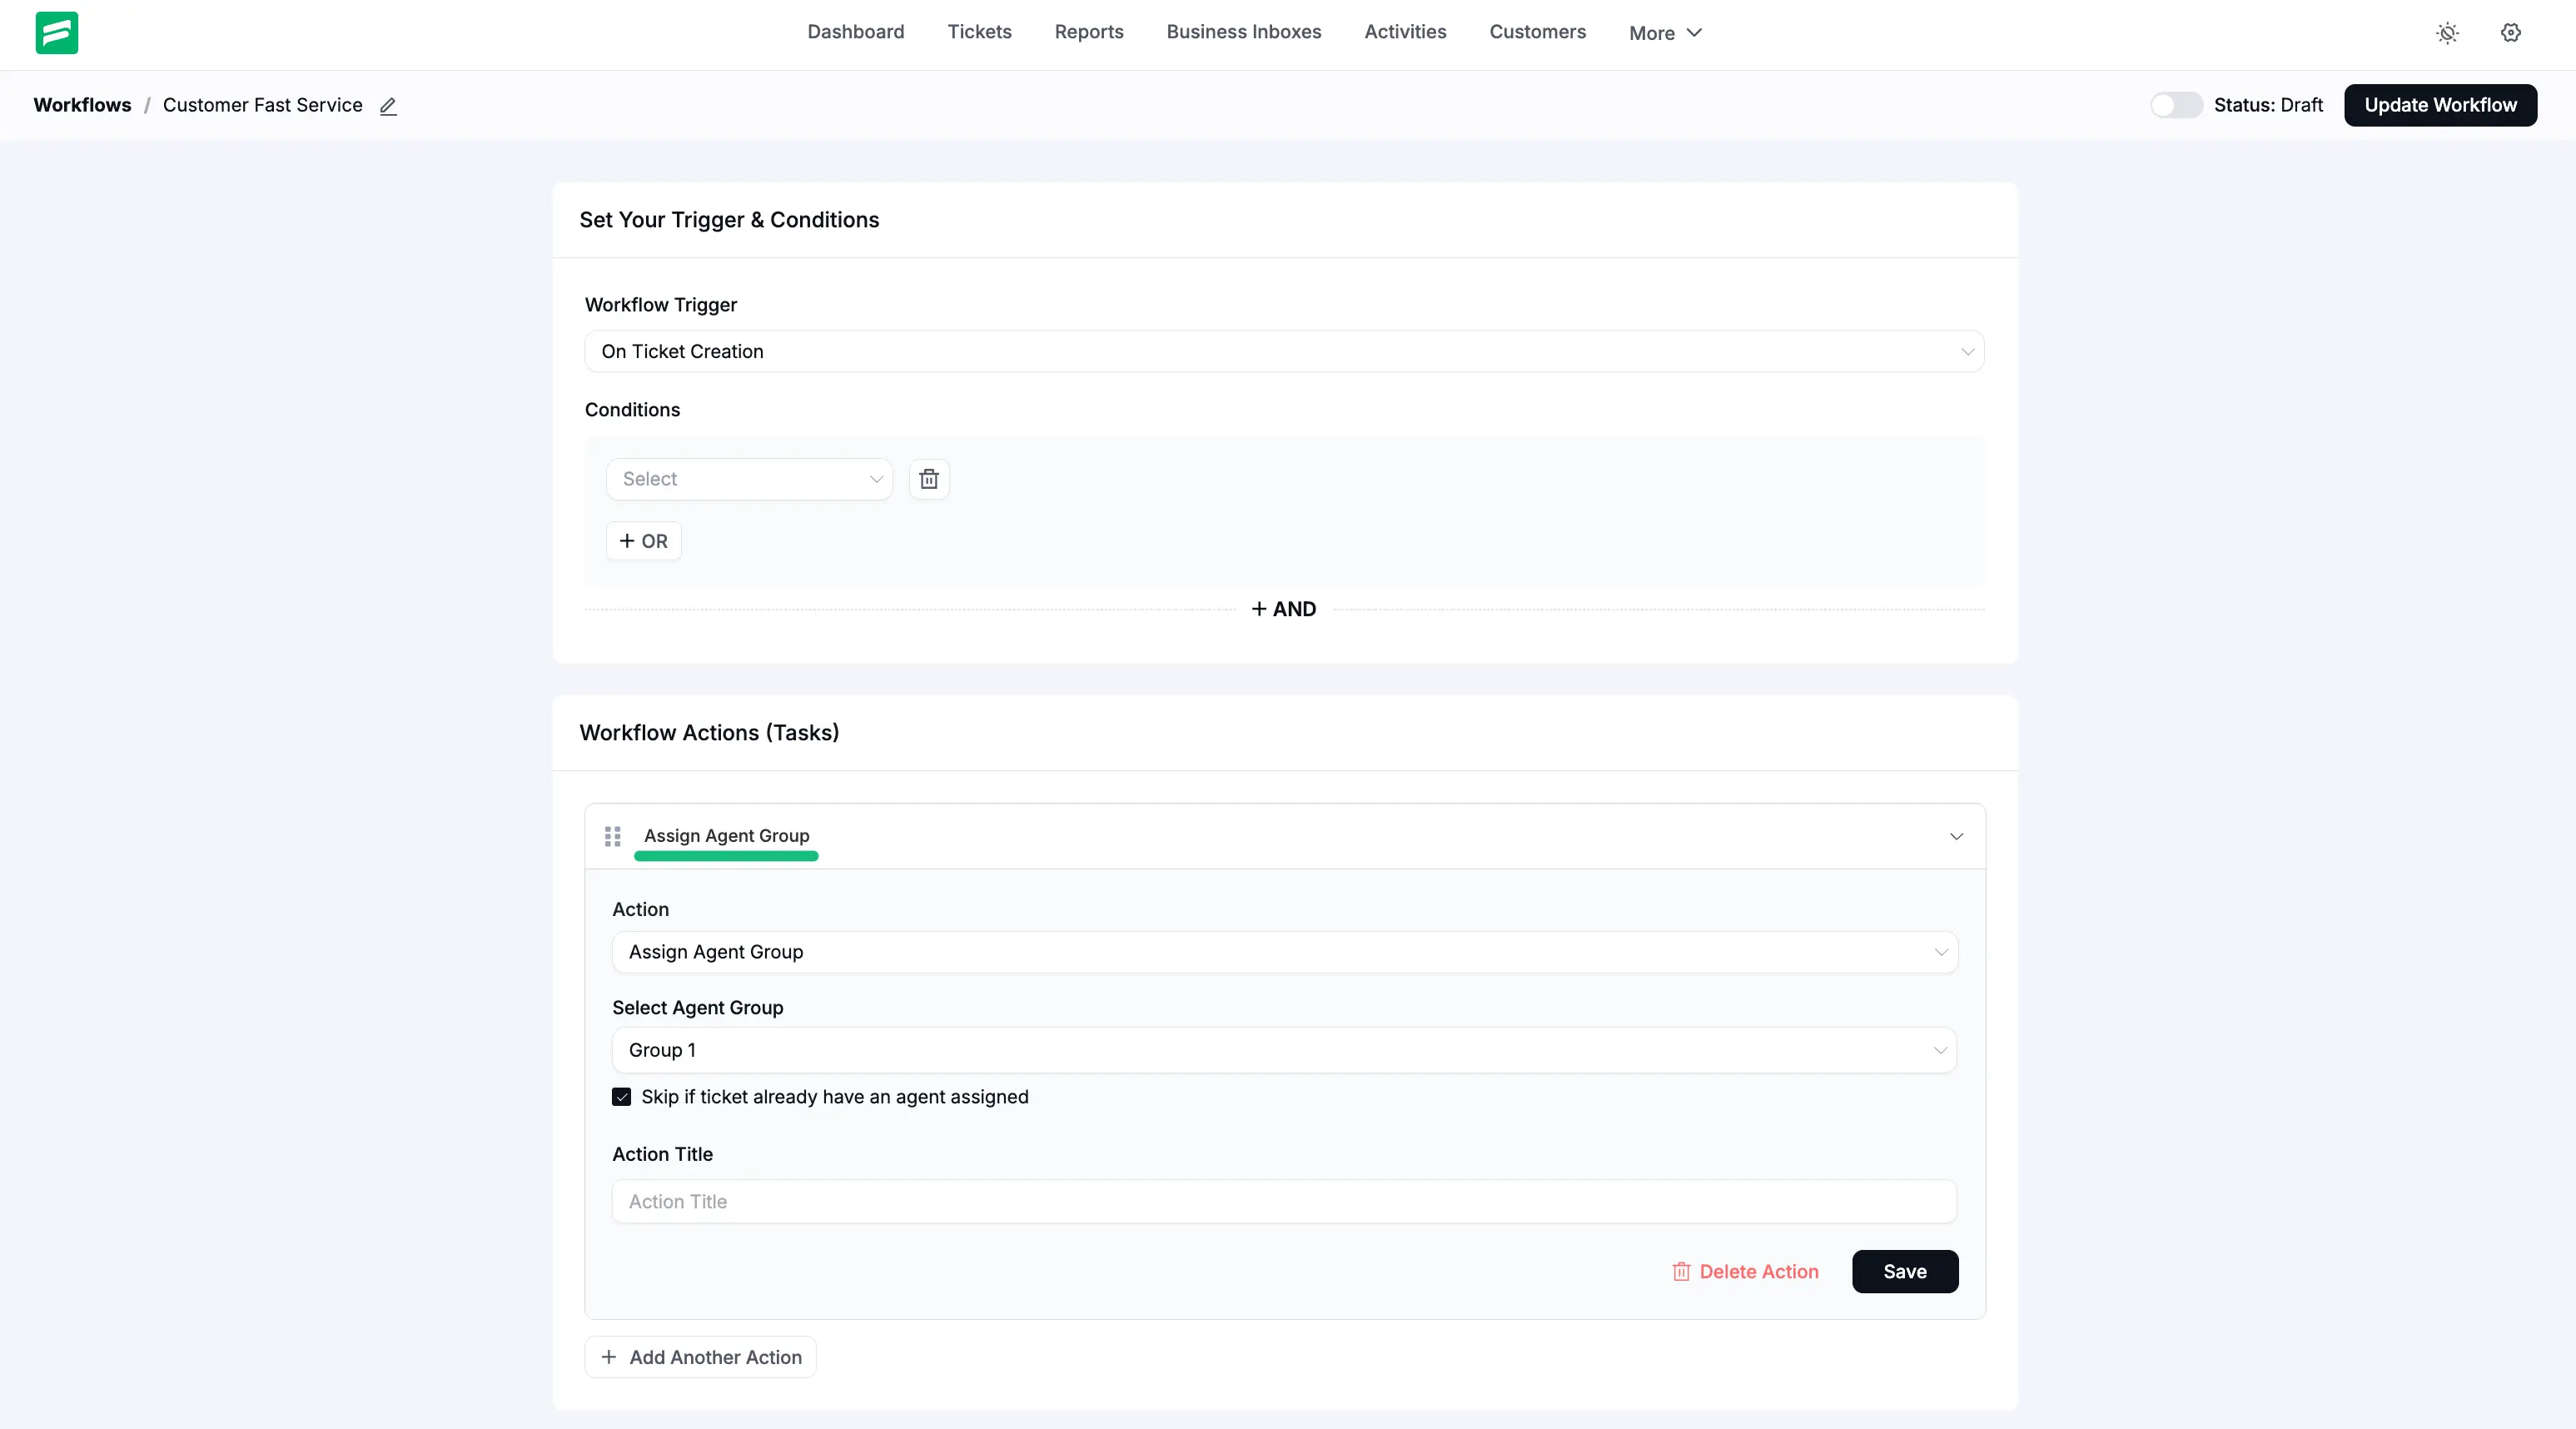
- Go to your Workflows dashboard and click to create a new workflow (or edit an existing one).
- Set your Workflow Trigger. For example, you might select On Ticket Creation.
- Scroll down to the Workflow Actions (Tasks) section and click the dropdown menu.
- Select Assign Agent Group as your action.
- In the Select Agent Group dropdown, choose the specific team that should receive these tickets (e.g., "Group 1").
Tip: Check the box that says "Skip if ticket already have an agent assigned." This ensures that if a ticket was already manually given to a specific person, the automation won't steal it away from them.
4. Tracking Your Team's Performance
Once your groups are handling tickets, you'll want to know how they are performing. FluentSupport includes a dedicated reporting dashboard just for Agent Groups.
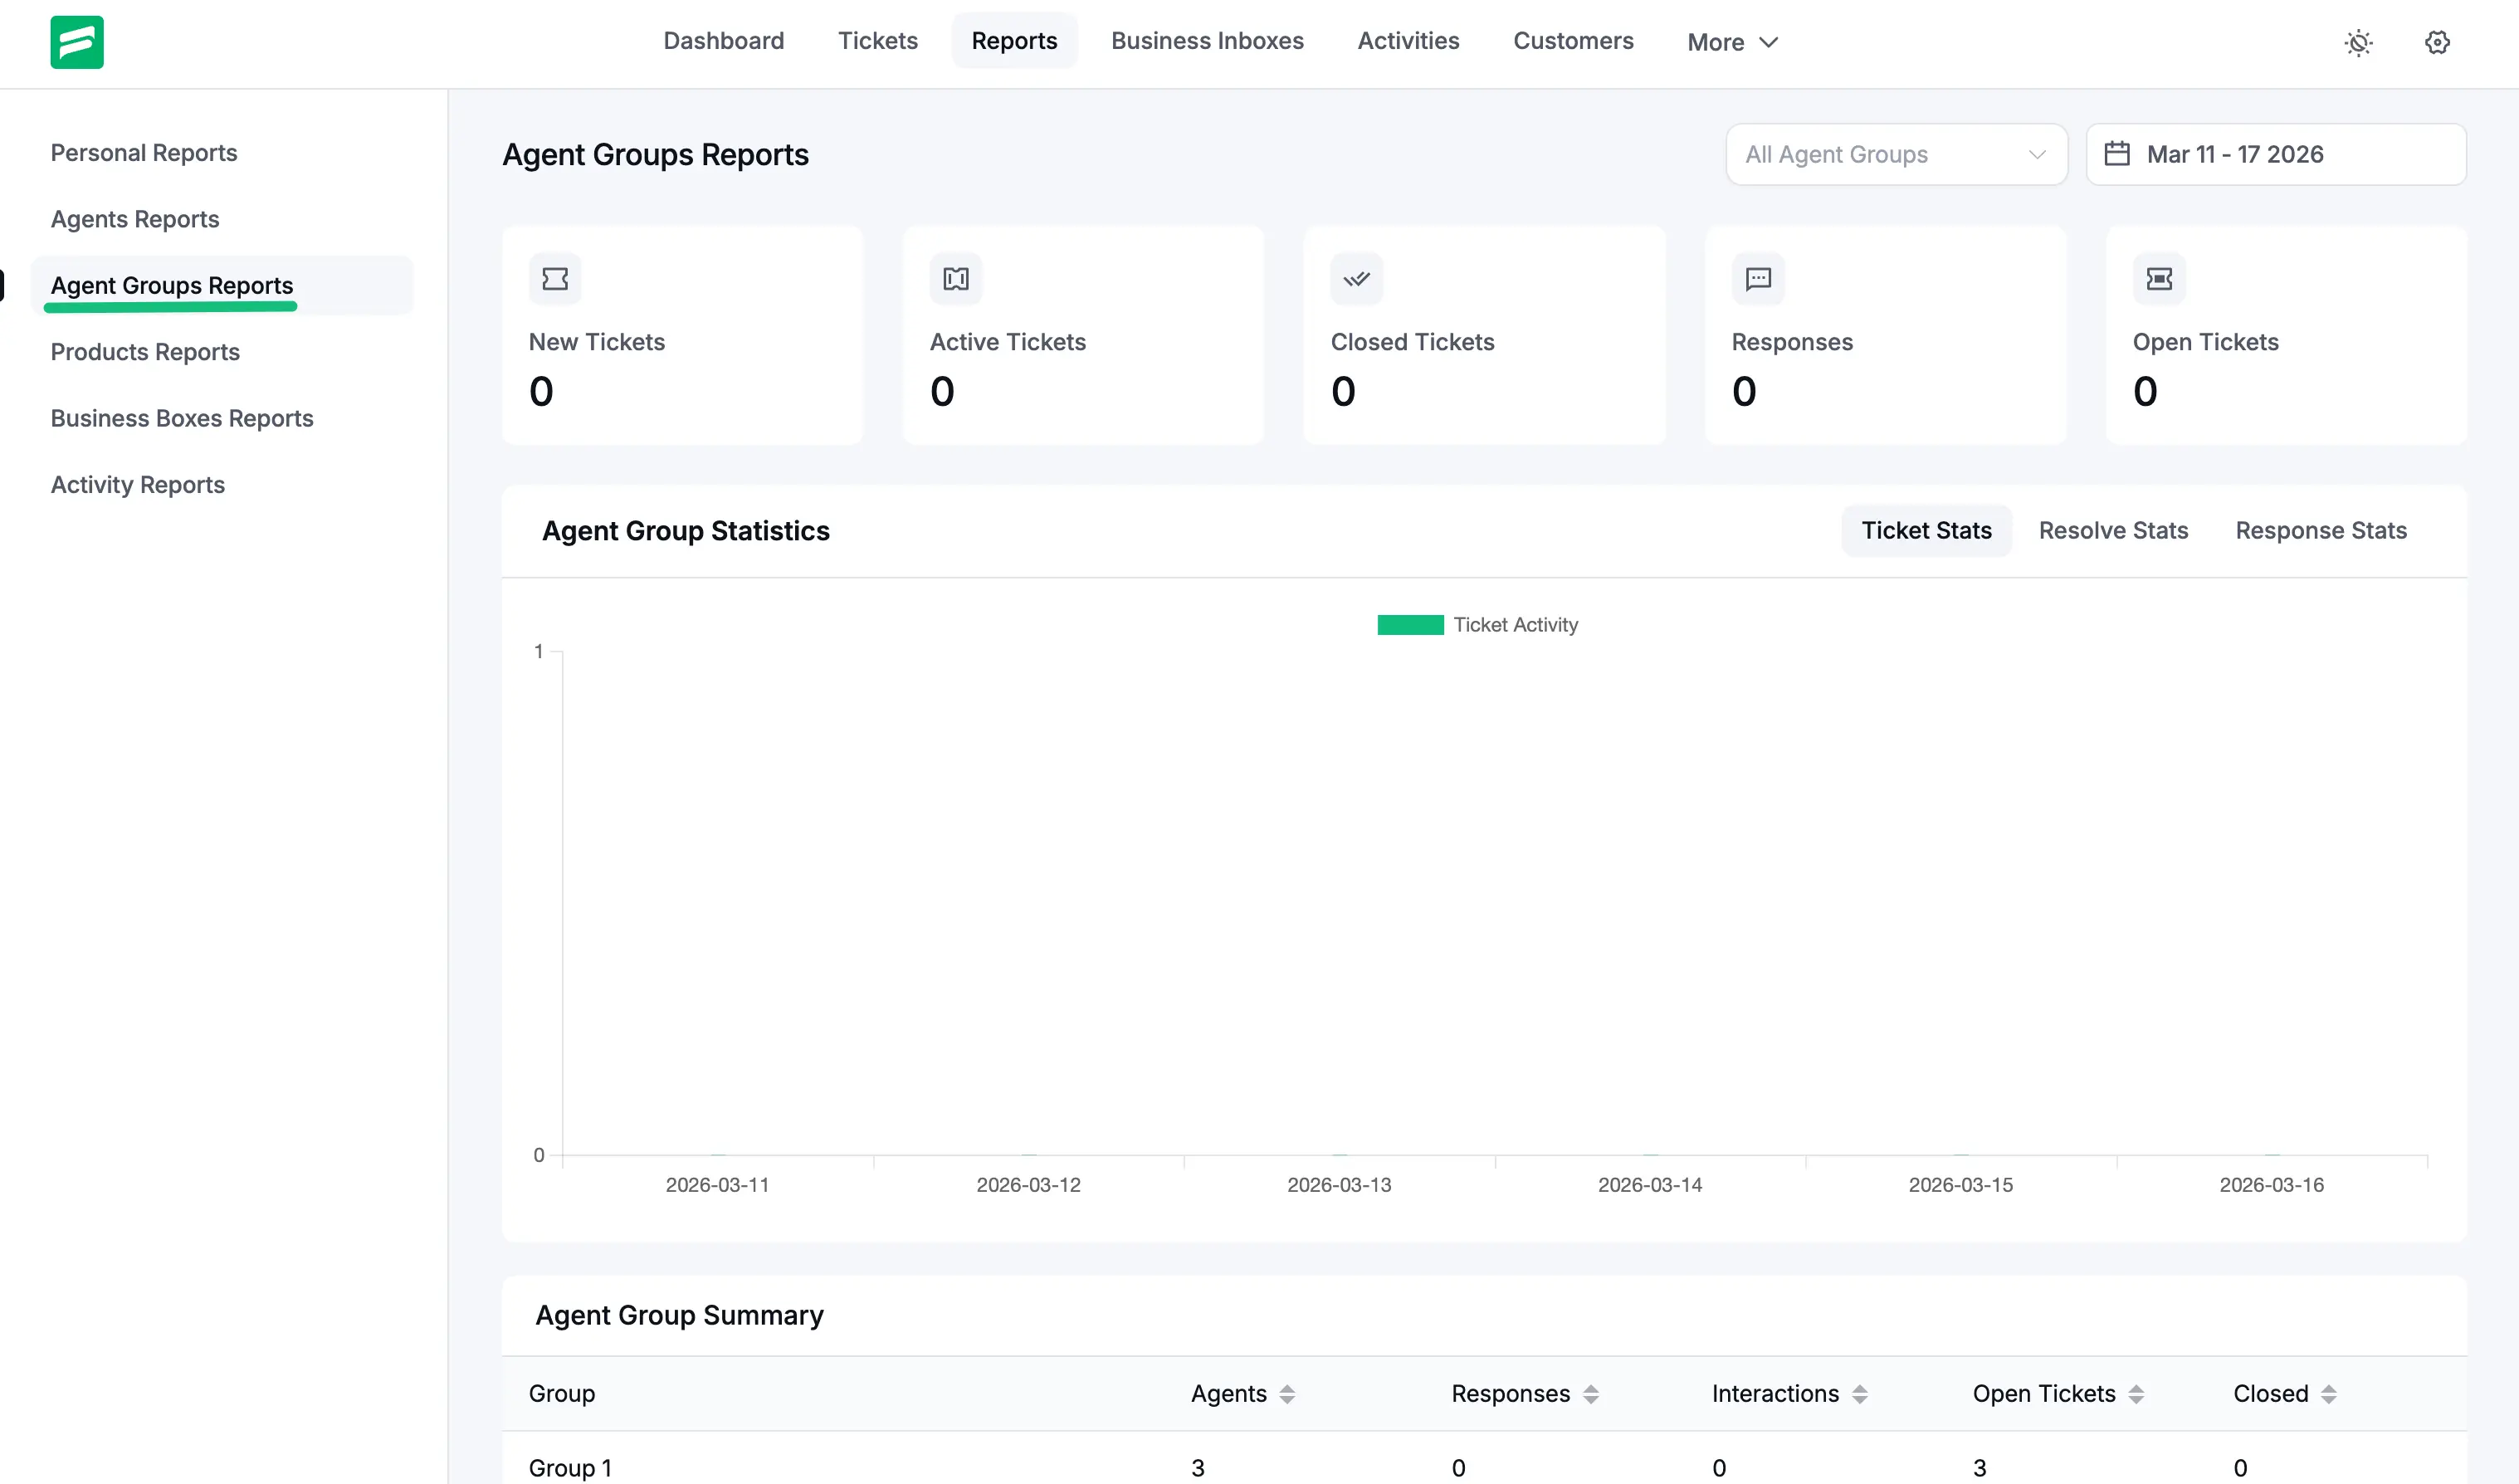
- Click on the Reports tab in your main top navigation menu.
- In the left-hand menu, select Agent Groups Reports.
This dashboard gives you a complete bird's-eye view of your teams' productivity:
- Quick Stats: At the top, you can instantly see the number of New, Active, Closed, and Open tickets, as well as total Responses for the selected date range.
- Visual Charts: The interactive graph lets you view Ticket Stats, Resolve Stats, and Response Stats over time so you can spot trends or busy periods.
- Group Summary Table: At the bottom of the page, a detailed table breaks down the performance of each individual group, showing exactly how many agents are in the group and how many interactions they've had.