Appearance
Connecting Cloudflare R2 with FluentSupport
This guide provides a detailed, step-by-step walkthrough to help you connect Cloudflare R2 to your FluentSupport system. Cloudflare R2 is an excellent choice for storing ticket attachments because it is fast, secure, and doesn't charge "egress fees," which are the costs usually associated with downloading your files.
Follow these three simple phases to get your storage running.
Phase 1: Setting Up Your Cloudflare Bucket
The "bucket" is the digital container where all your support files will be kept.
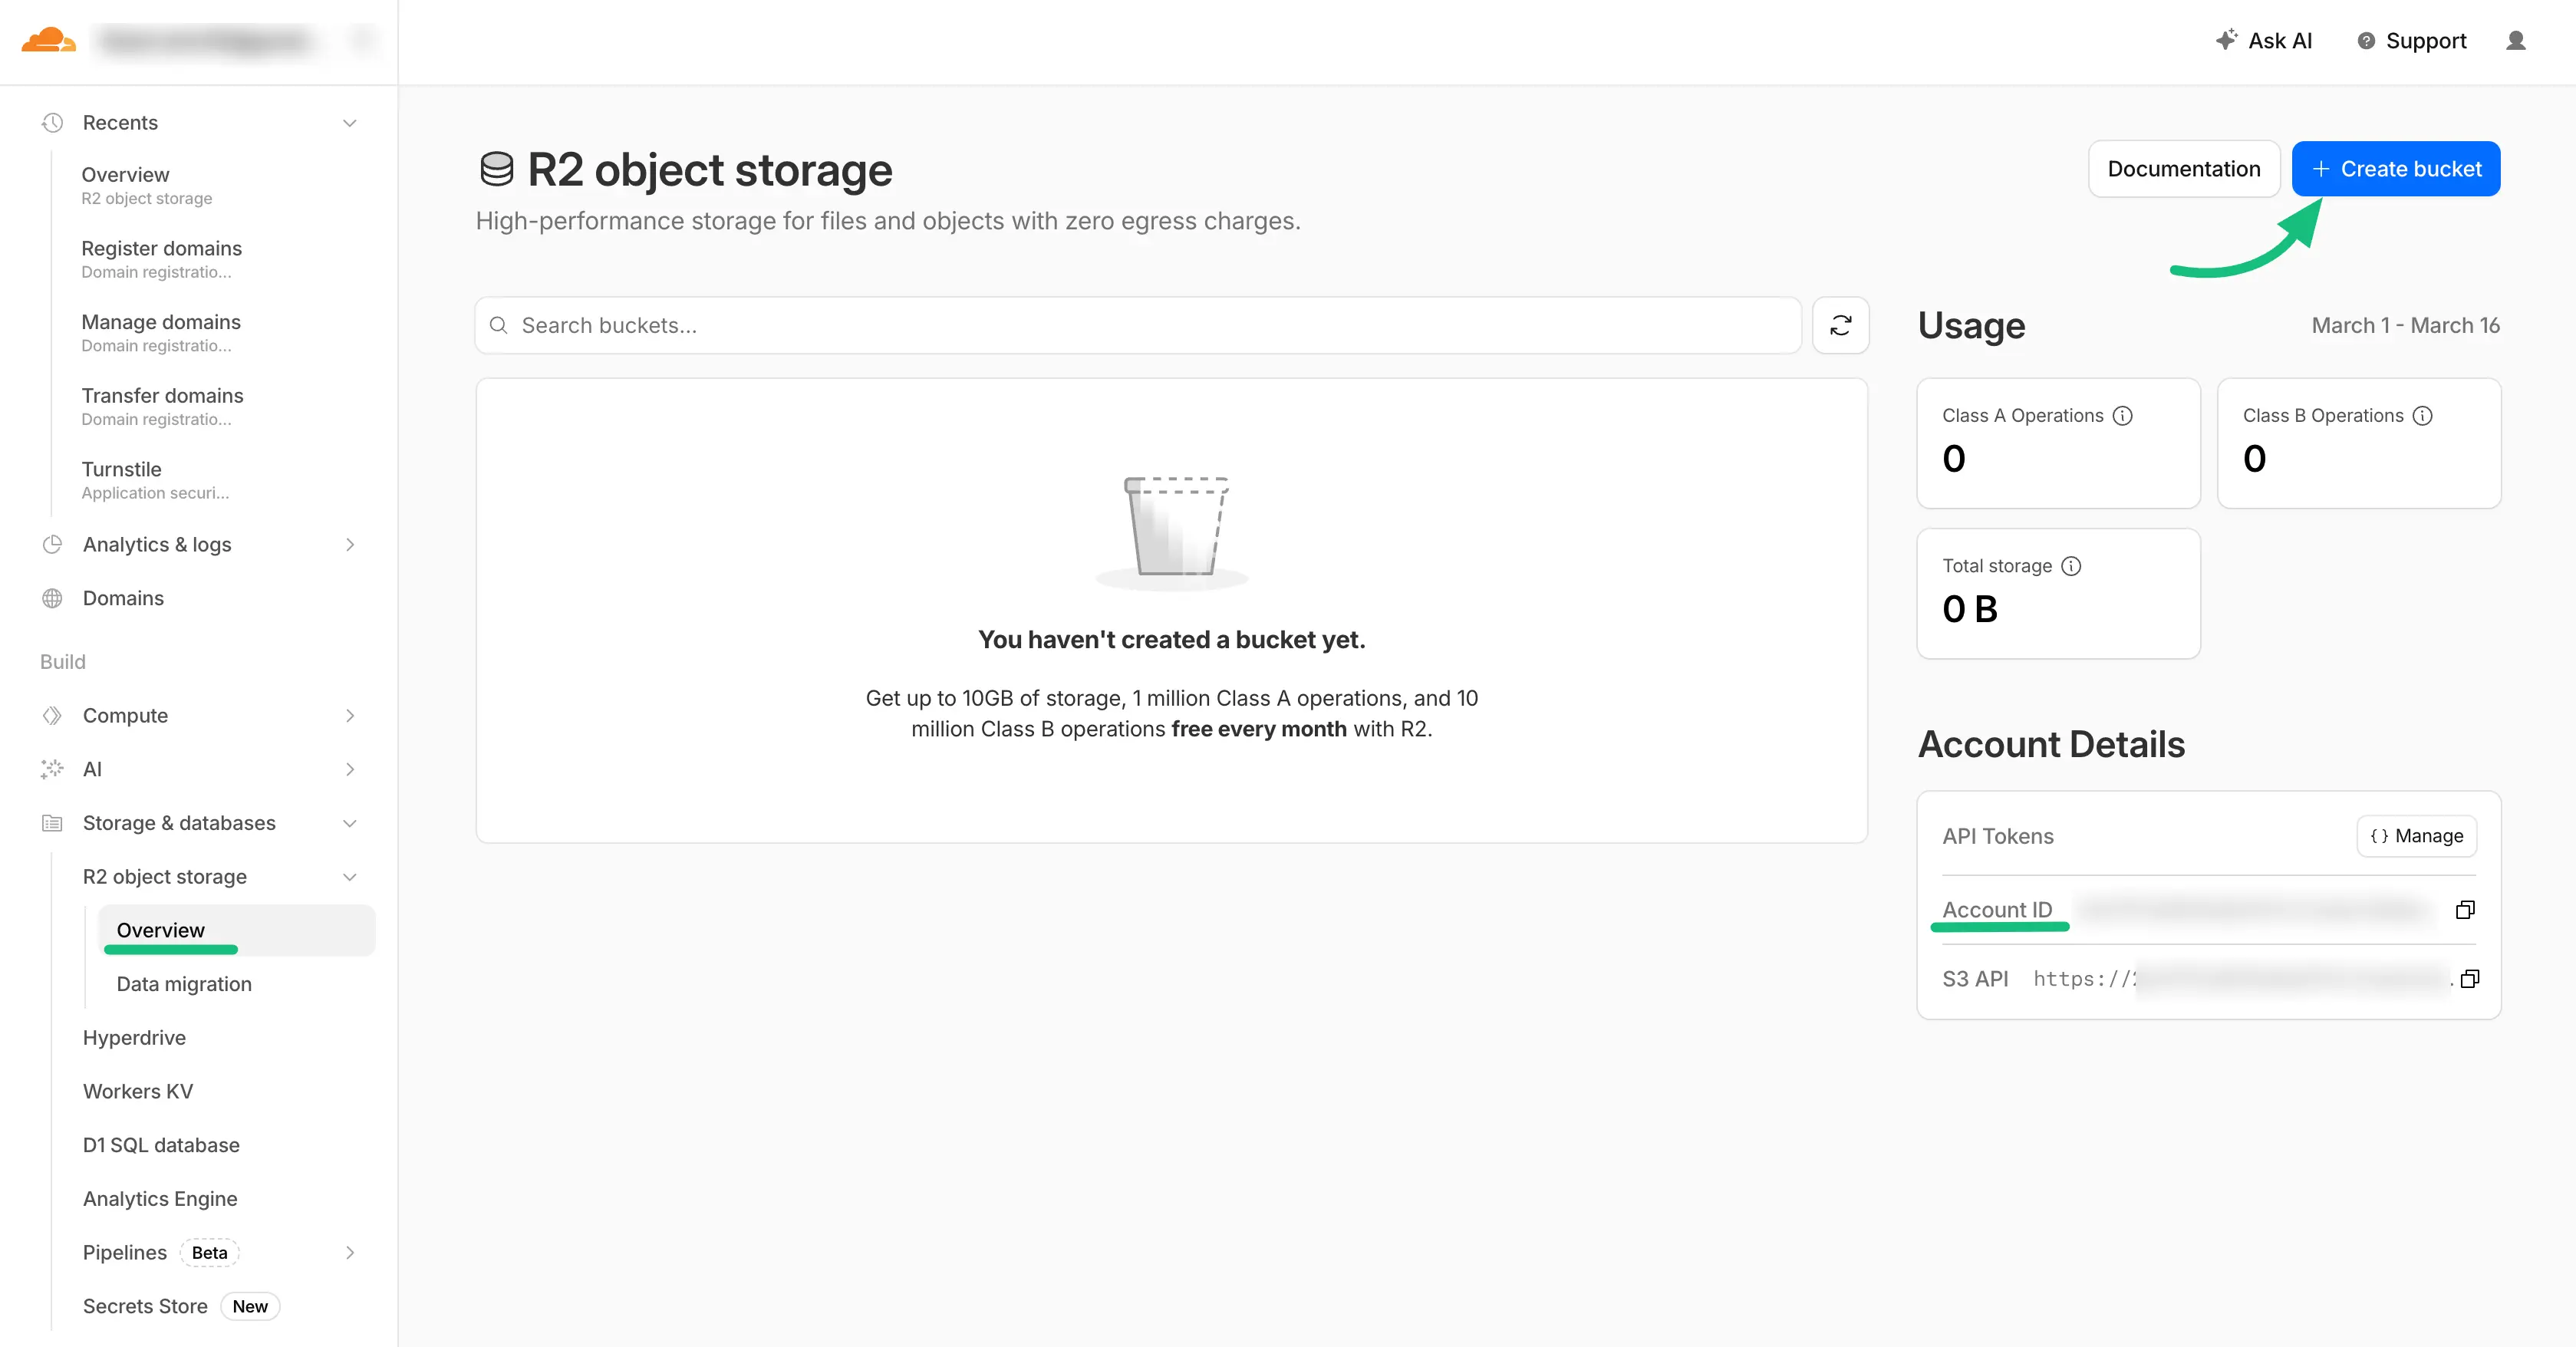
- Find Your Account ID: Log in to your Cloudflare account. Go to R2 object storage and then click on Overview. On the right side of the screen, you will see a long string of letters and numbers labeled Account ID. Copy this and save it in a safe place like a notepad.
- Create the Container: Click the blue button labeled + Create bucket.
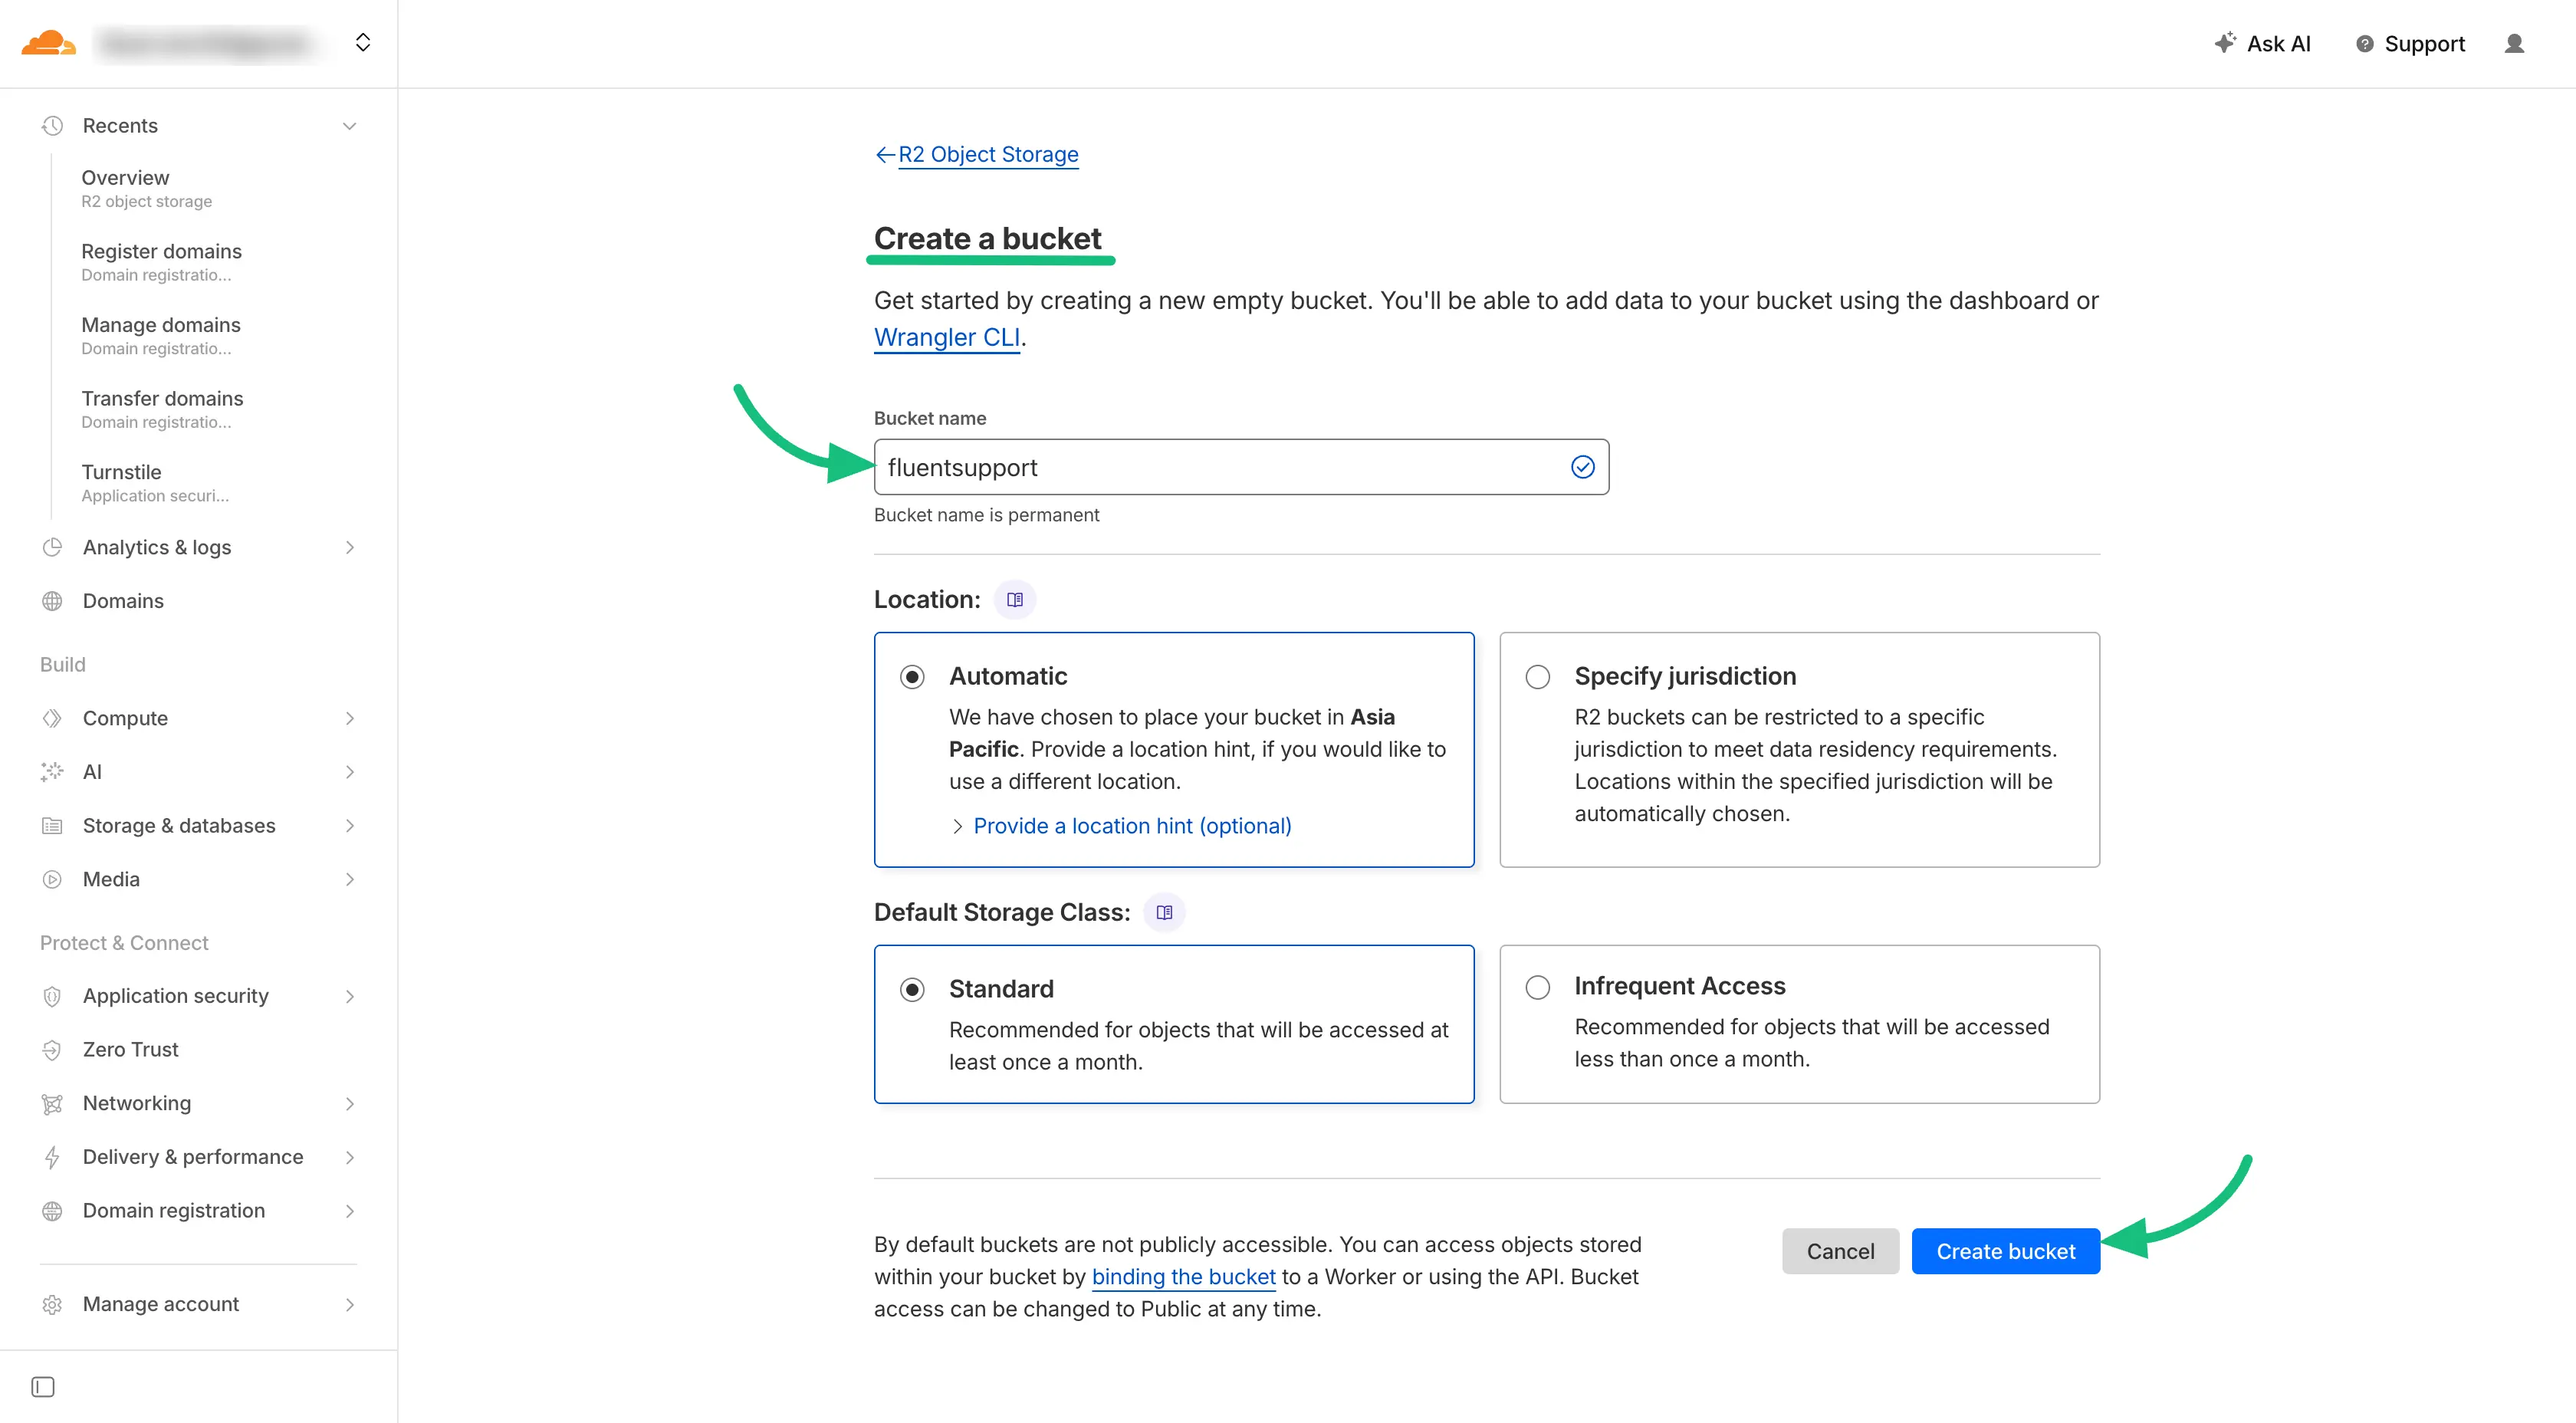
- Name Your Bucket: In the Bucket name box, type a name you’ll recognize, such as
fluentsupport-files. This name is permanent, so choose carefully. - Finalize the Setup: Leave the Location as Automatic (unless you have a specific reason to change it) and keep the Storage Class as Standard. Click the Create bucket button at the bottom. Your bucket is now ready to hold files.
Phase 2: Generating Your Digital Keys (API Token)
For FluentSupport to "talk" to Cloudflare, it needs special digital keys called an API Token.
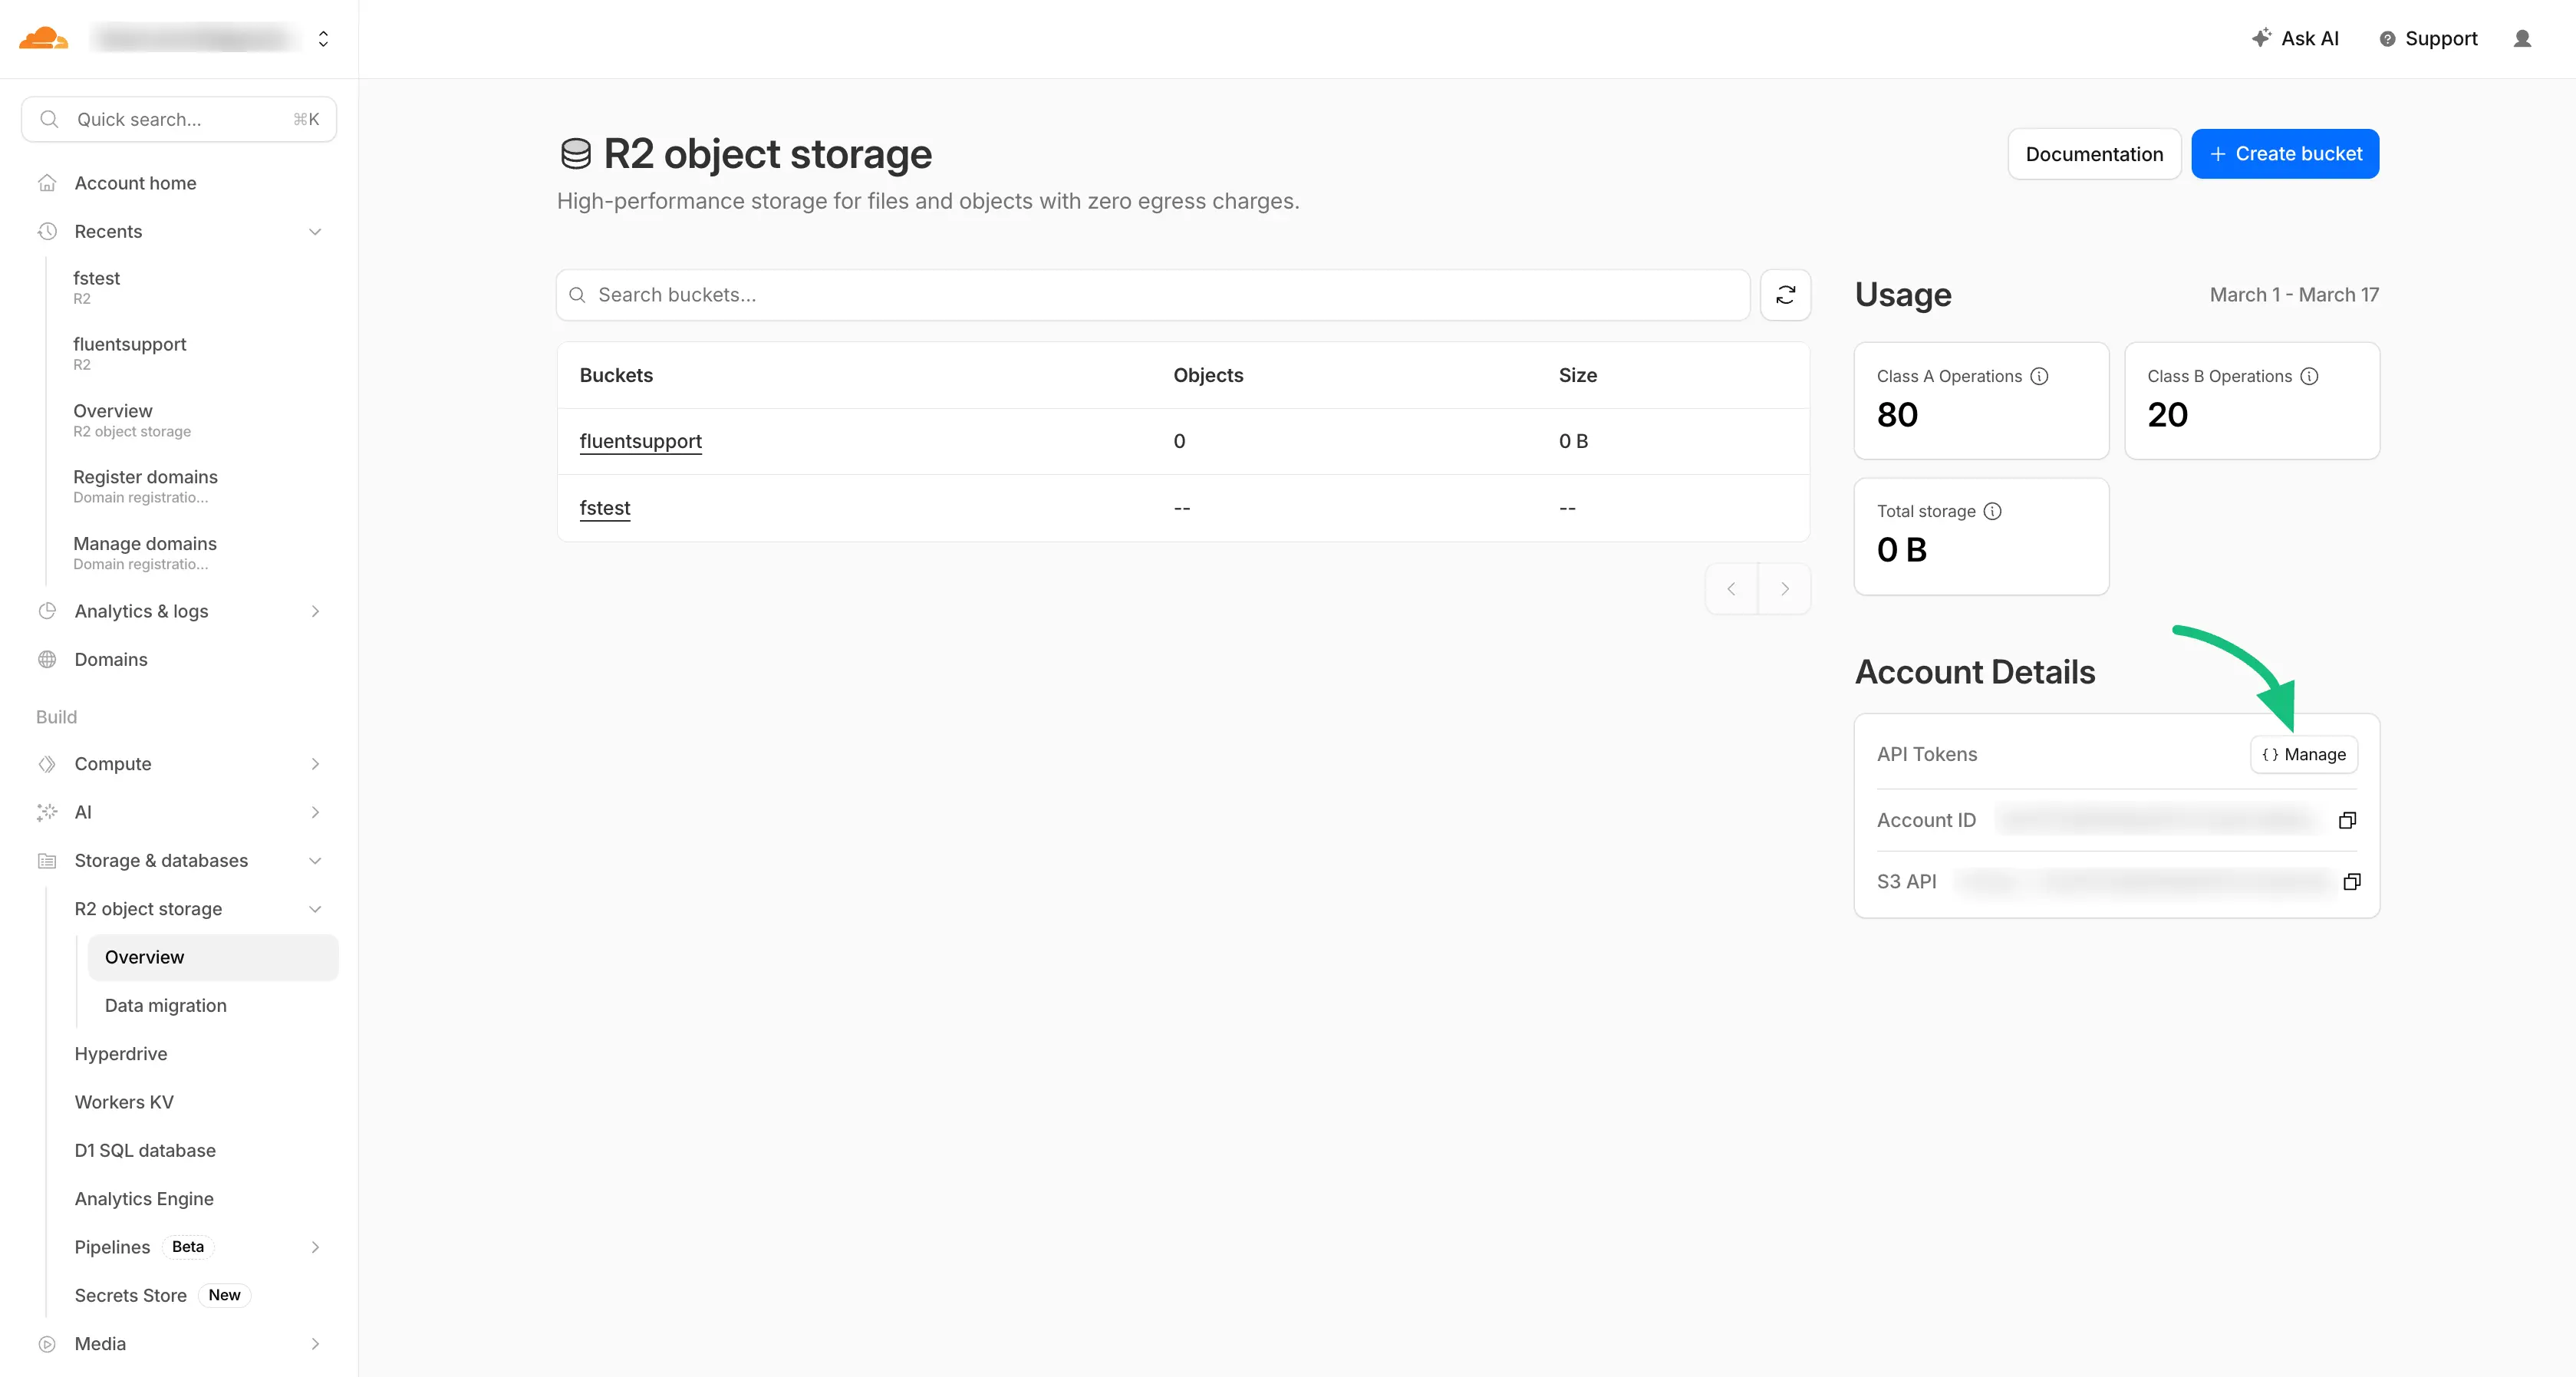
- Start the Token Process: In your Cloudflare dashboard under R2 Object Storage > Overview, look for the API Tokens section. Click on the Manage button.
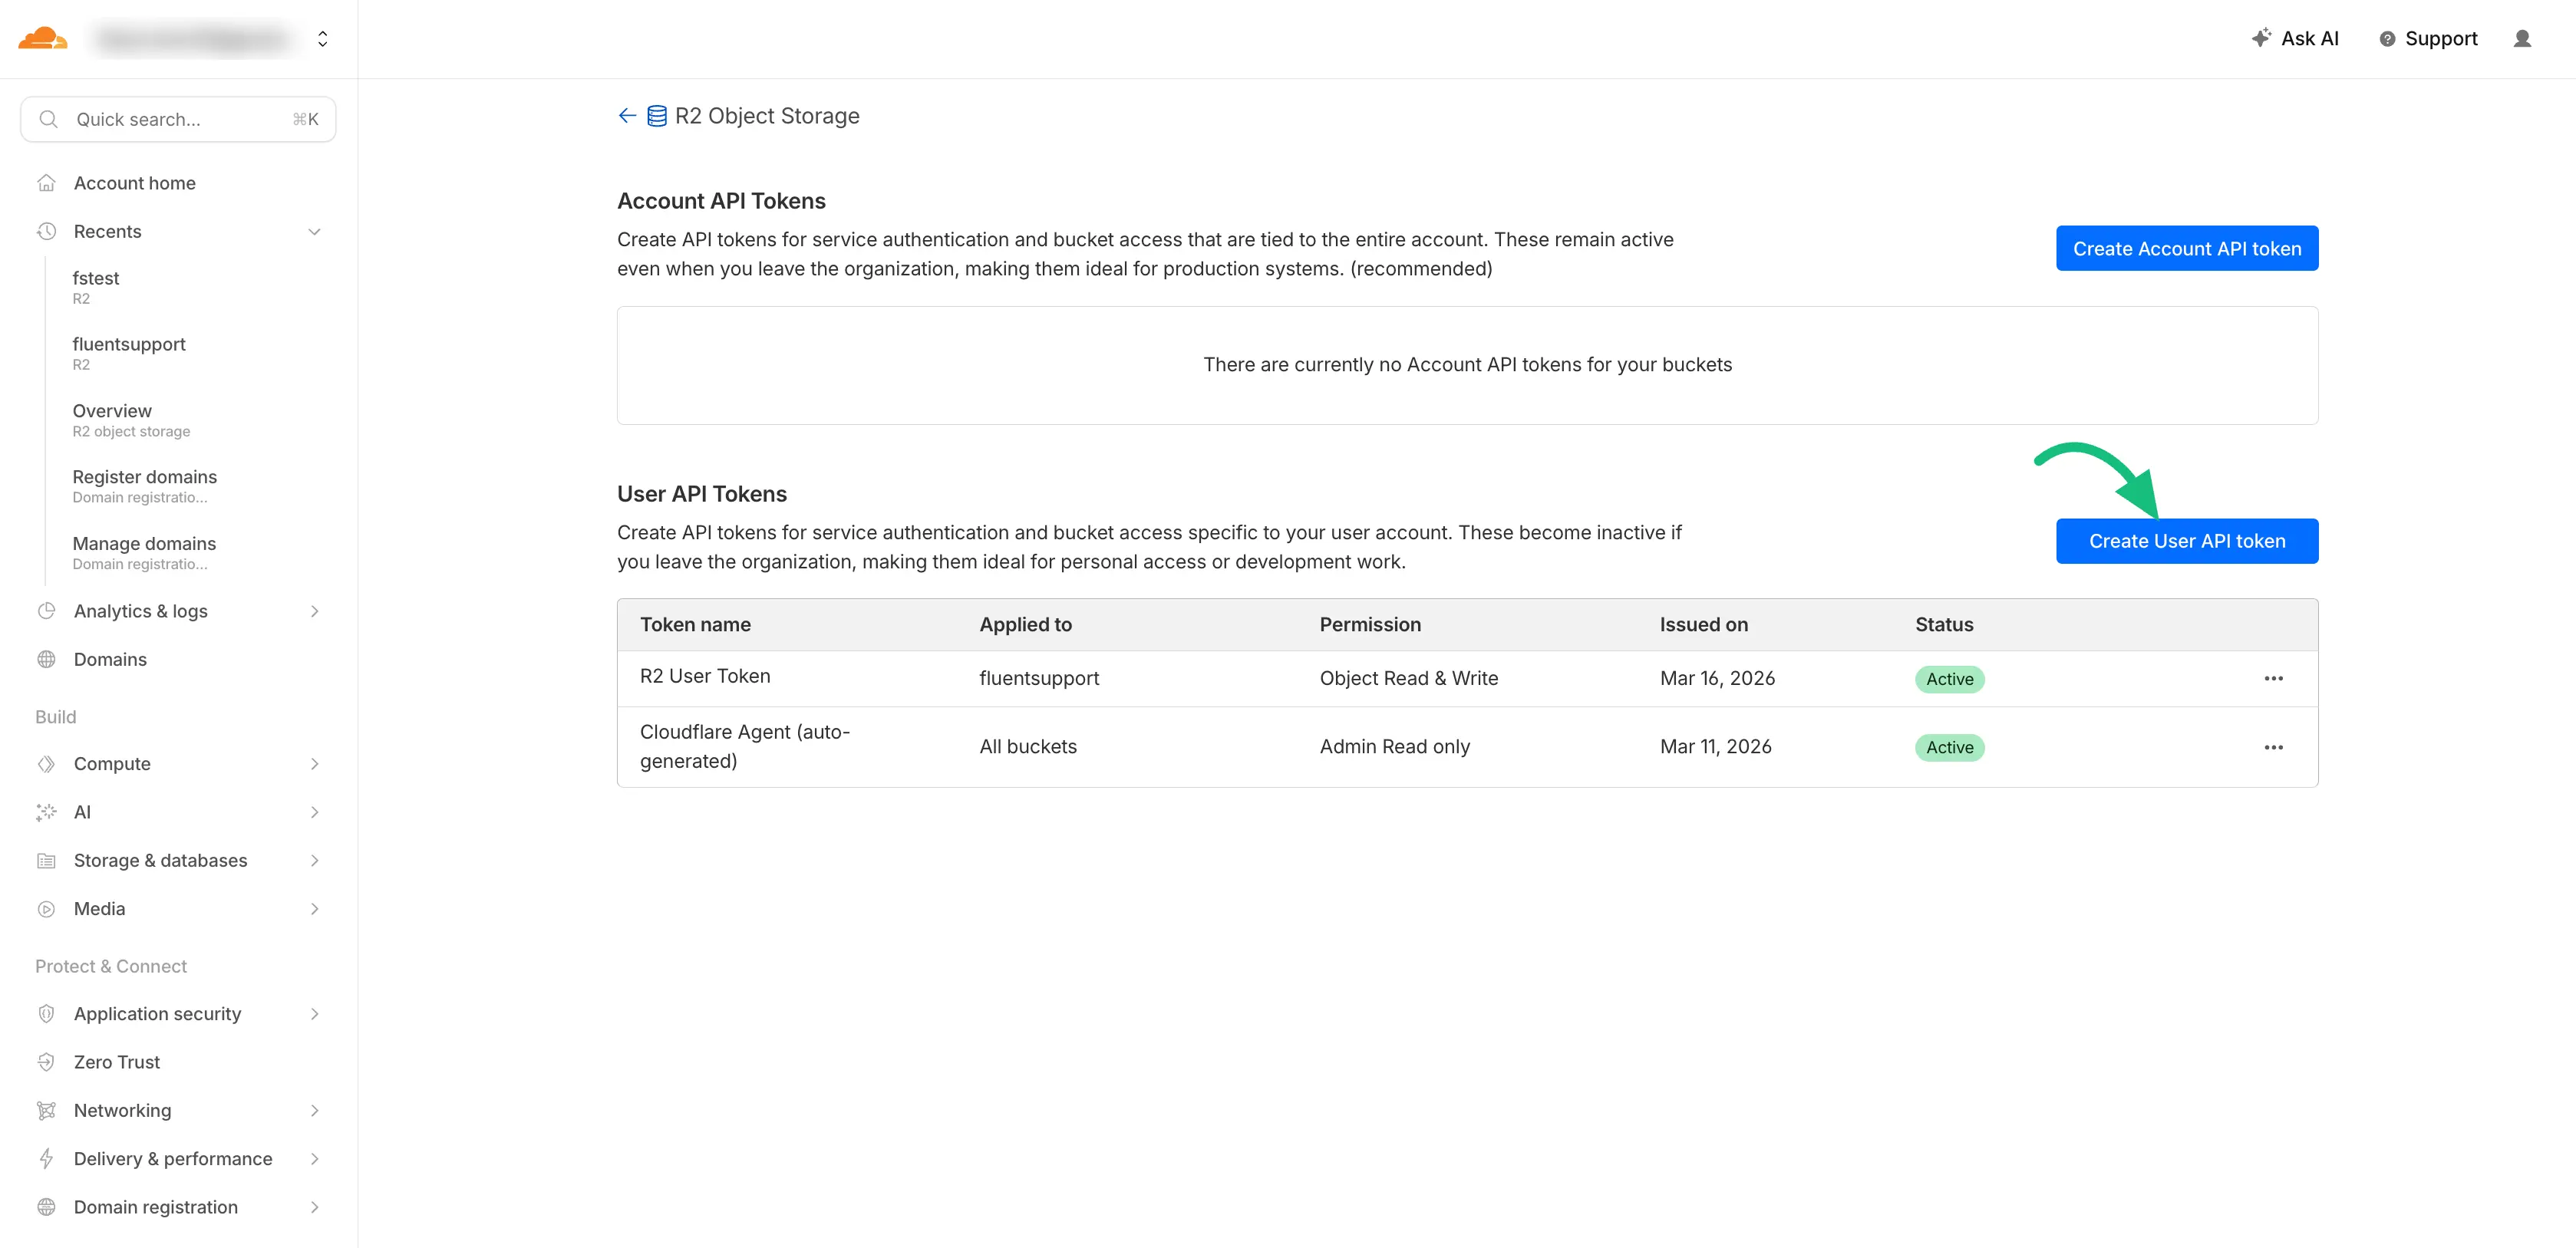
- Create Token: Now click on the Create User API Token button.
- Name the Token: Give it a name like
FluentSupport-Connectionso you remember what it’s for. - Set Permissions: Under the Permissions section, look for Object Read & Write and select it. This allows FluentSupport to both upload new files and let your agents read them later.
- Pick Your Bucket: In the Specify bucket(s) area, choose Apply to specific buckets only and select the bucket you created in Phase 1 from the list.
- Finish and Copy Keys: Click Create User API Token at the bottom.
⚠️ IMPORTANT: Cloudflare will now show you your Access Key ID and Secret Access Key. You MUST copy these and save them immediately. For security reasons, Cloudflare will never show these keys to you again once you leave this page.

Phase 3: Linking Cloudflare to FluentSupport
Now, you just need to paste those keys into your WordPress dashboard.
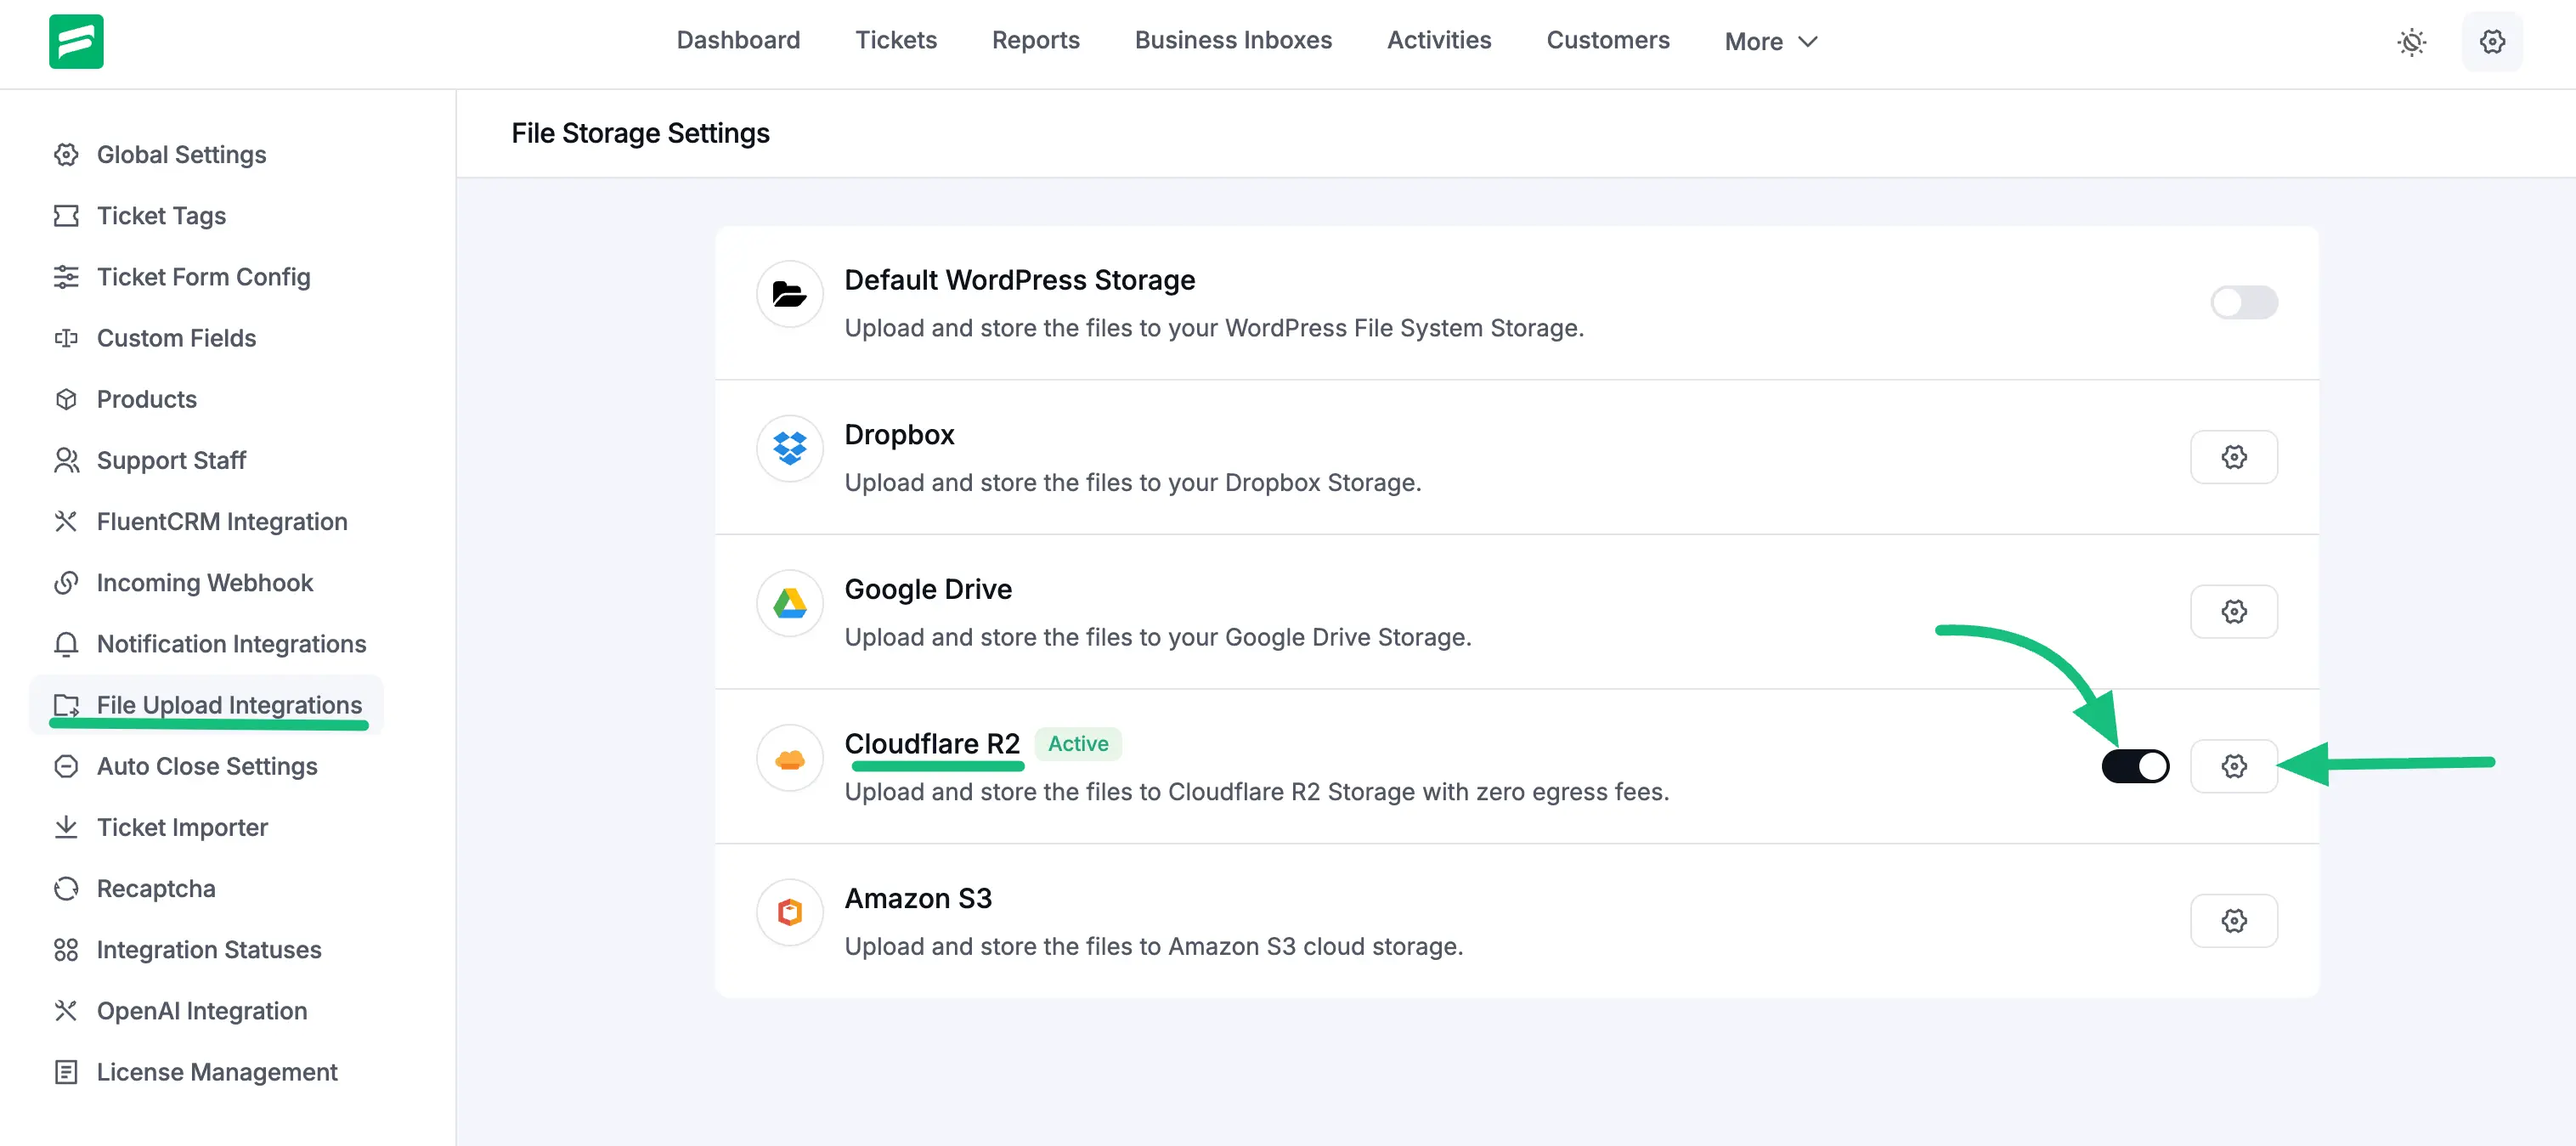
- Open Storage Settings: Log in to your WordPress site. Go to FluentSupport > Settings > File Upload Integrations.
- Open Cloudflare Config: Find the Cloudflare R2 option. Enable Cloudflare with the toggle switch and click the small Settings (gear) icon on the right side.
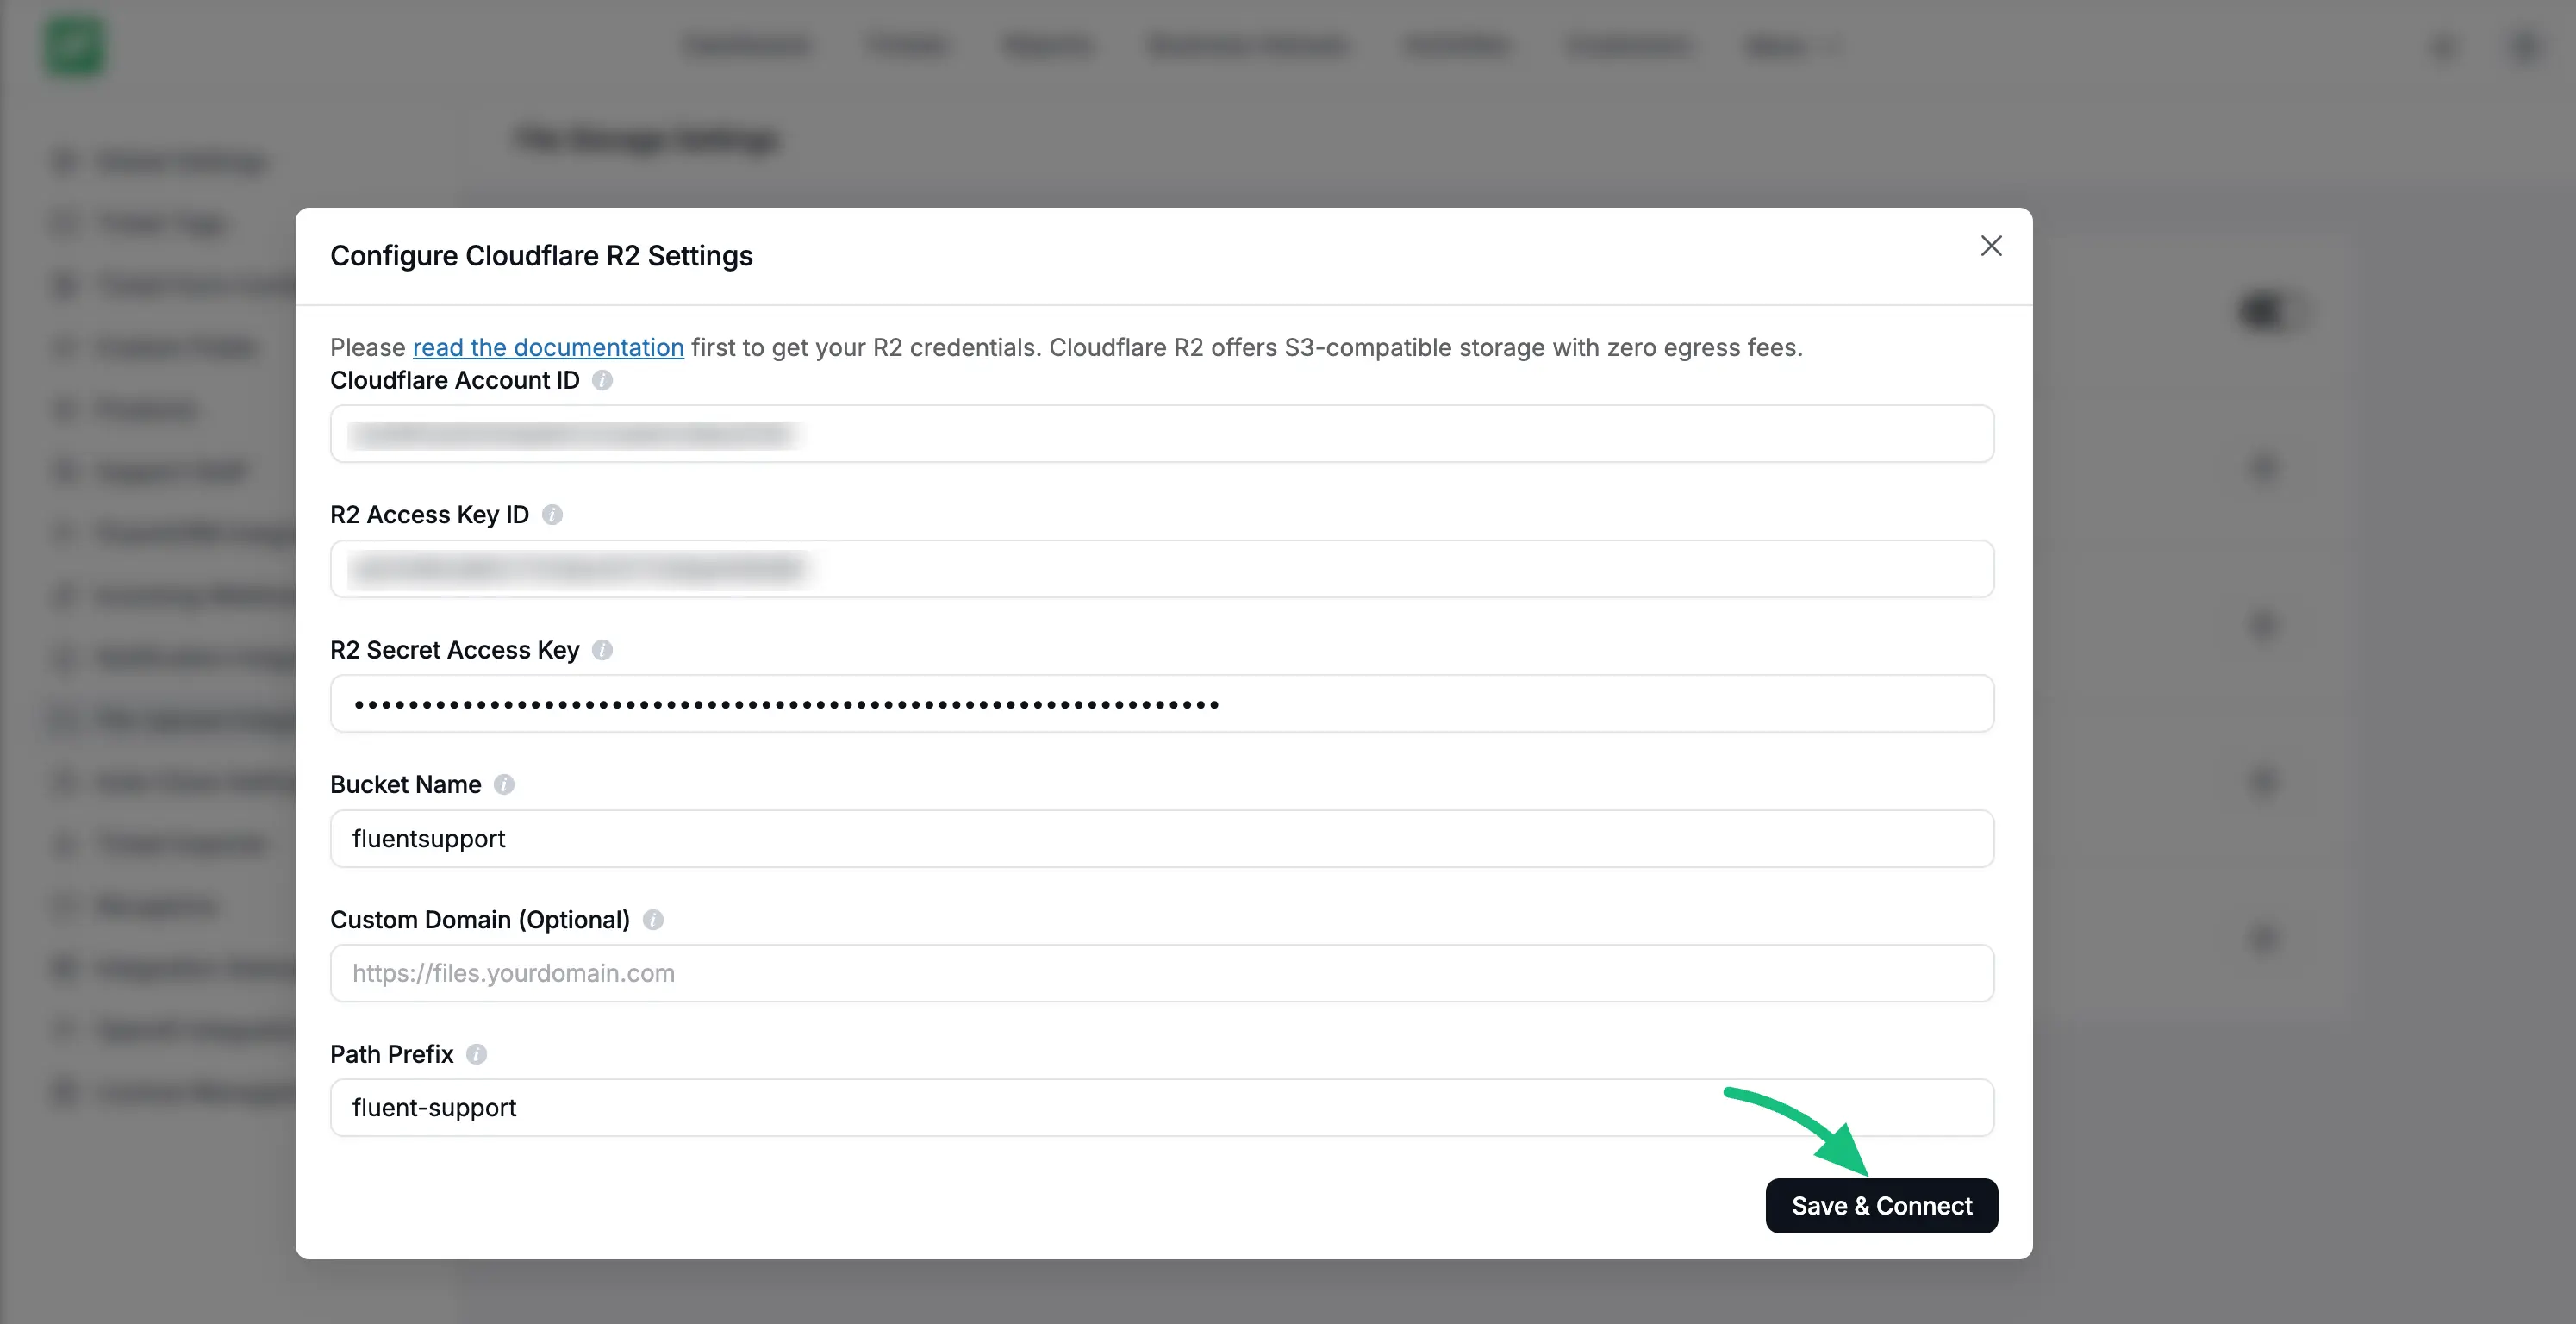
- Fill in the Details: A popup window will appear. Carefully paste your information into the matching boxes:
- Cloudflare Account ID: Paste the ID you found in Phase 1.
- R2 Access Key ID: Paste the key you saved in Phase 2.
- R2 Secret Access Key: Paste the secret key you saved in Phase 2.
- Bucket Name: Type the exact name of the bucket you created (e.g.,
fluentsupport-files). - Path Prefix: You can type
fluent-supporthere to keep your files organized in a specific folder inside your bucket.
- Save: Click the Save & Connect button.
Congratulations! Your FluentSupport system is now connected to Cloudflare R2. All future images, documents, and screenshots uploaded to your tickets will be safely stored in your new Cloudflare bucket.