Appearance
FluentBooking Integration
The FluentBooking Integration lets your support agents share meeting links and offer available time slots directly from a Fluent Support ticket. It's the perfect option when a ticket needs a live call, an onboarding session, a product walkthrough, or a quick troubleshooting meeting.
Once FluentBooking is installed and active on the same WordPress site, Fluent Support automatically detects it and adds a meeting tool right inside the ticket reply editor. No manual setup, no extra plugin connection step — it just works.
Remember, you do not need to integrate FluentBooking manually with Fluent Support; it connects automatically when both plugins are installed on the same site.
What You Can Do With This Integration
With FluentBooking connected to Fluent Support, your agents can:
- Insert booking links while replying to a ticket.
- Pick a FluentBooking meeting type from the reply editor.
- Preview real available time slots before sharing them.
- Share selected time slots or the full booking link with the customer.
- Copy available meeting times to the clipboard.
- Let customers book directly from the support portal.
- View upcoming meetings from the ticket sidebar widget.
- See booking confirmations right inside the ticket timeline.
Before You Start
Make sure you have:
- Fluent Support installed and activated.
- FluentBooking installed and activated on the same WordPress site.
- At least one active FluentBooking event type (calendar).
- The event type set to be publicly available so customers can book it.
Step 1: Enable the FluentBooking Integration
Before the meeting tool appears in the ticket reply editor, you first need to turn the integration on from Fluent Support's settings.
- Go to Fluent Support from your WordPress dashboard.
- Click the Settings (gear) icon at the top right.
- From the left sidebar, open Global Settings.
- Scroll down to Enable Fluent Booking Integration and check the box.
- Click Save Settings at the top right.

INFO
This option only appears when FluentBooking is installed and active. If you can't see it, make sure FluentBooking is activated on your site.
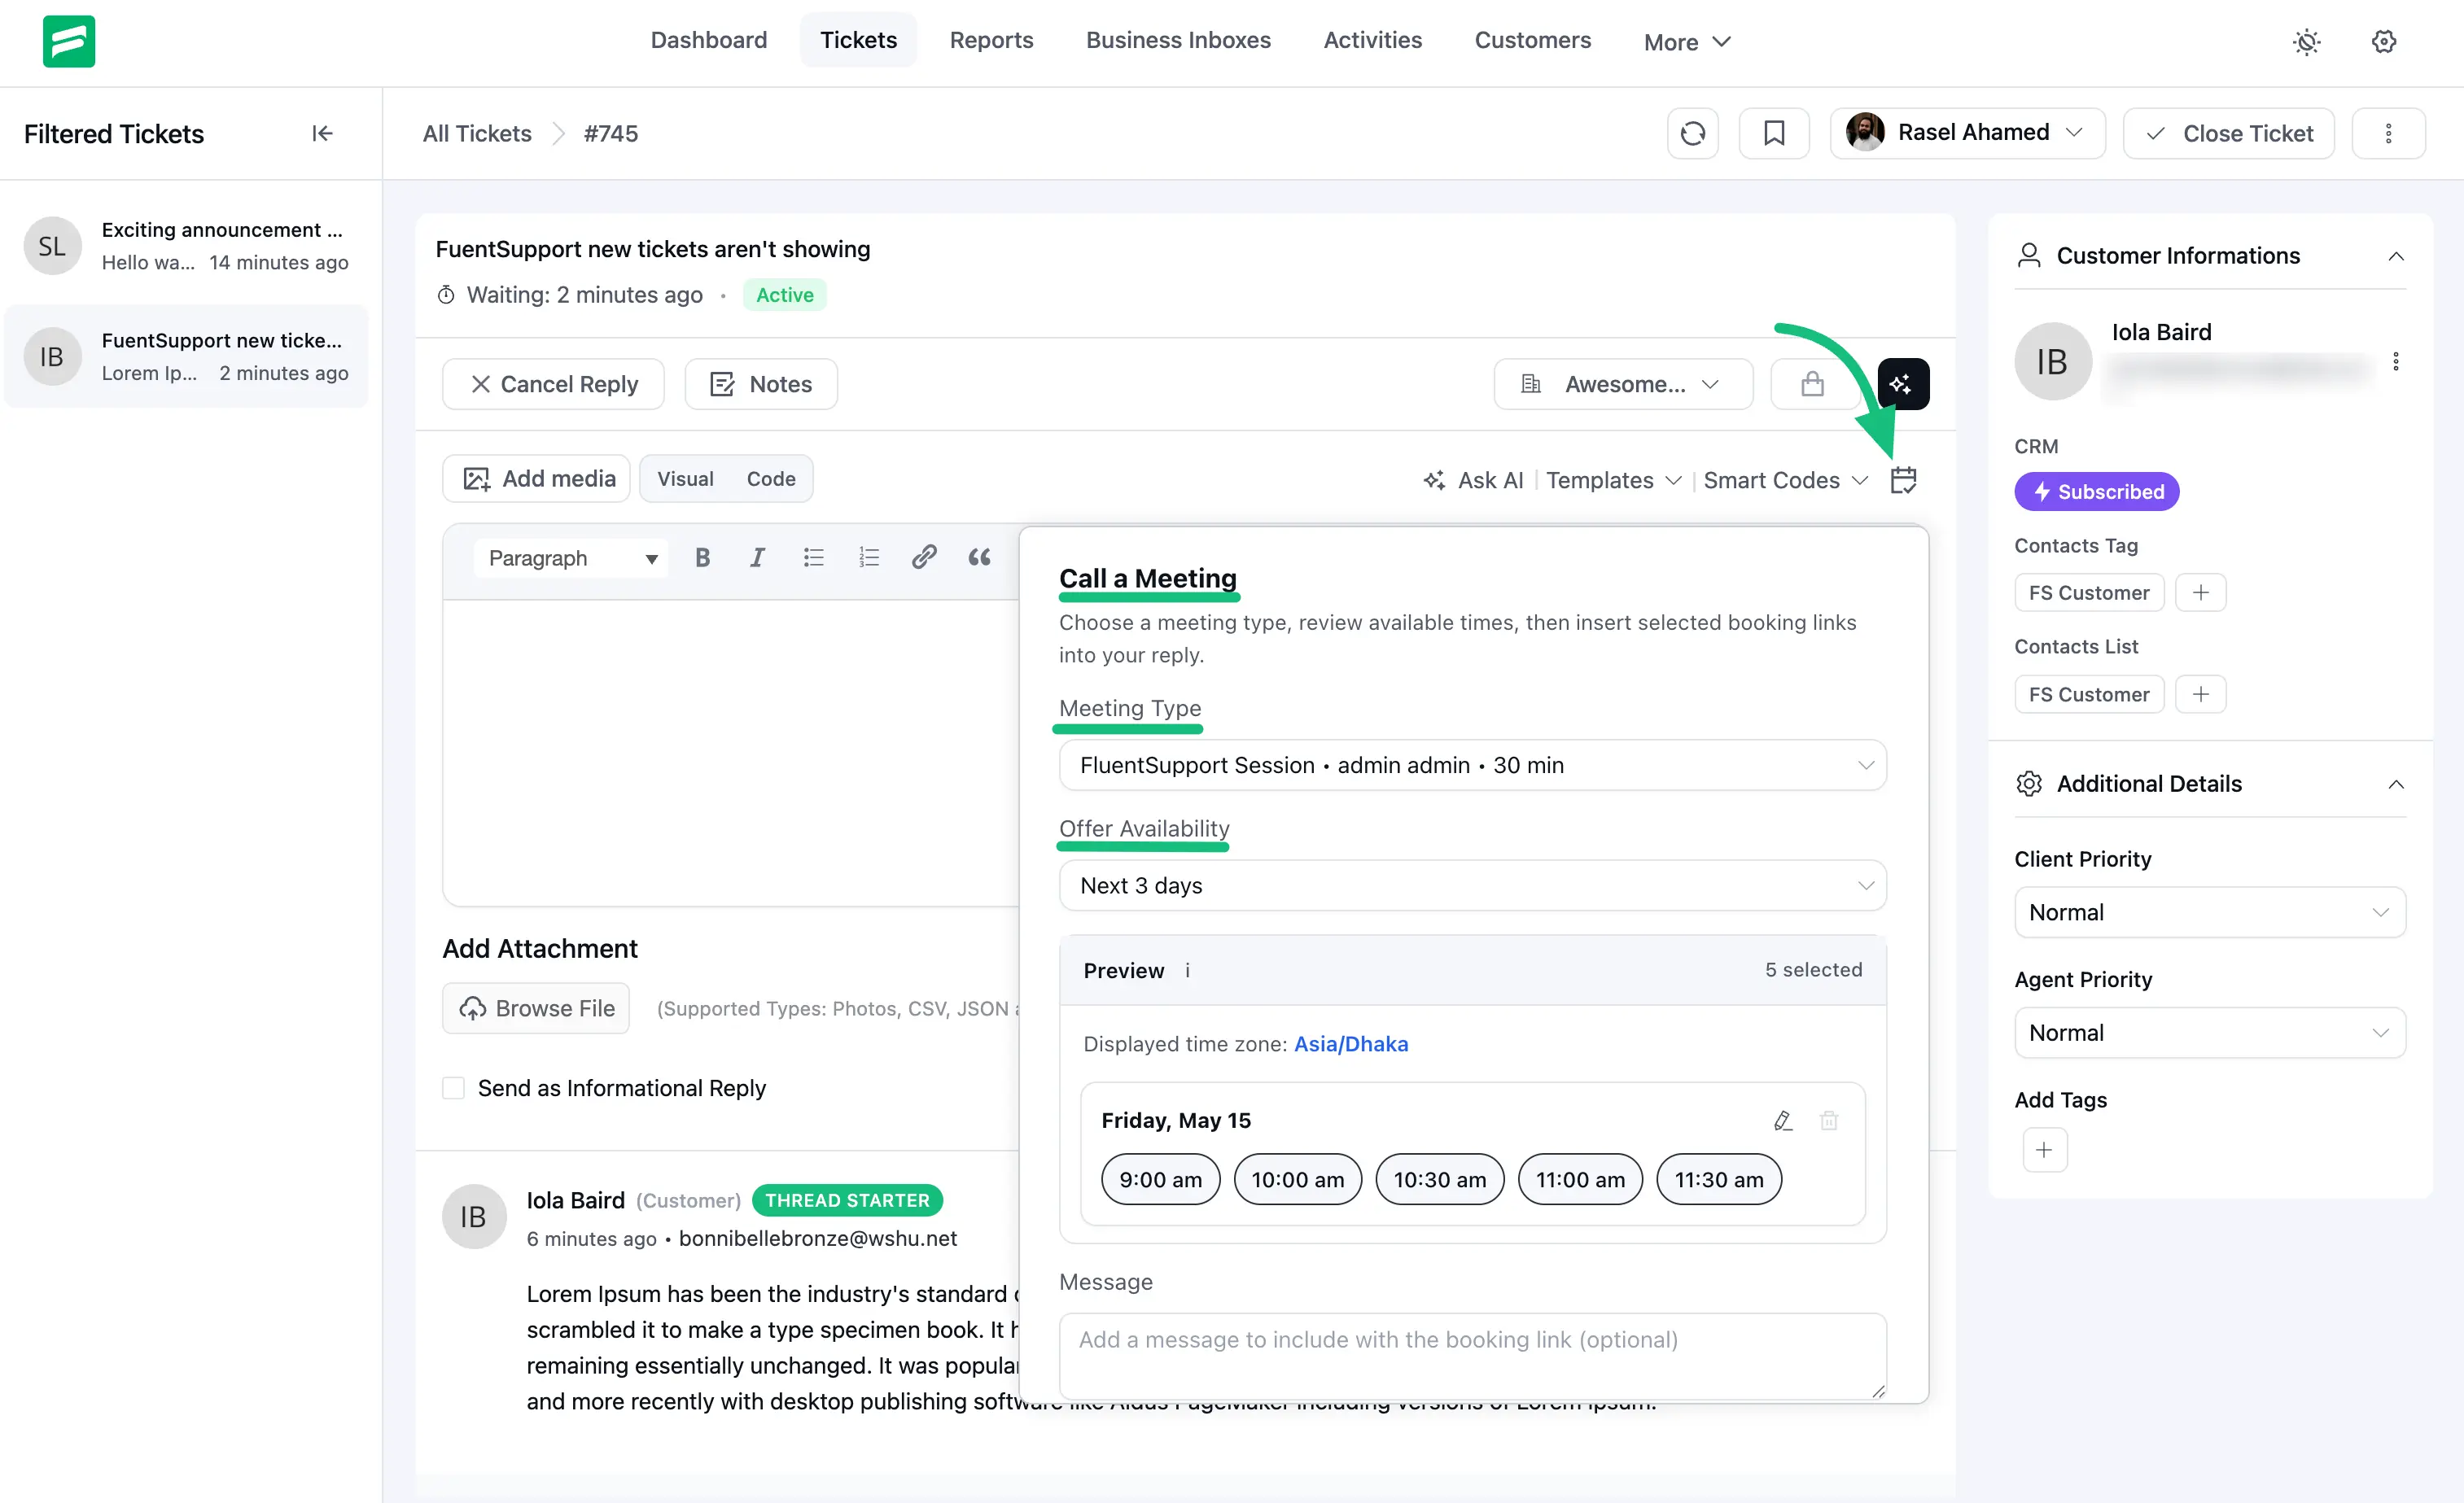
Step 2: Open the "Call a Meeting" Panel
Once the integration is enabled, every ticket reply editor will have a new calendar (Call a Meeting) icon at the top right of the toolbar.
- Go to Tickets from the Fluent Support dashboard.
- Open the ticket where you want to schedule a meeting.
- Click the Reply button to open the reply editor.
- Click the calendar icon on the right side of the editor toolbar.
This will open the Call a Meeting panel right inside the ticket.
Step 3: Choose a Meeting Type and Availability
Inside the Call a Meeting panel, you can configure exactly what the customer will see in your reply.
Meeting Type: From the dropdown, pick the FluentBooking event you want to share. The list shows the event title, host, and meeting duration so you can choose the right one without leaving the ticket.
Offer Availability: Choose the time range you want to offer the customer:
- Next 3 days
- This week
- Next week
- Next 14 days
- Specific Dates (lets you hand-pick up to 7 dates)
Preview: Fluent Support pulls real available time slots from your FluentBooking calendar and displays them in the preview area. You can edit the slots, select or remove individual times, or remove a full day if needed.
Message (optional): Add a short note that will be included with the booking link, for example:
text
Please pick a time that works best for you and I'll see you on the call.TIP
If your meeting type doesn't show up in the dropdown, open FluentBooking and make sure the event is active and its public booking page is enabled.
Step 4: Insert the Booking Link into Your Reply
When the meeting type and availability are ready, use one of the action buttons at the bottom of the panel:
- Insert with Times — Adds the selected available time slots along with the booking link directly into your reply.
- Copy to Clipboard — Copies the availability so you can paste it anywhere else.
- Cancel — Closes the panel without making changes.
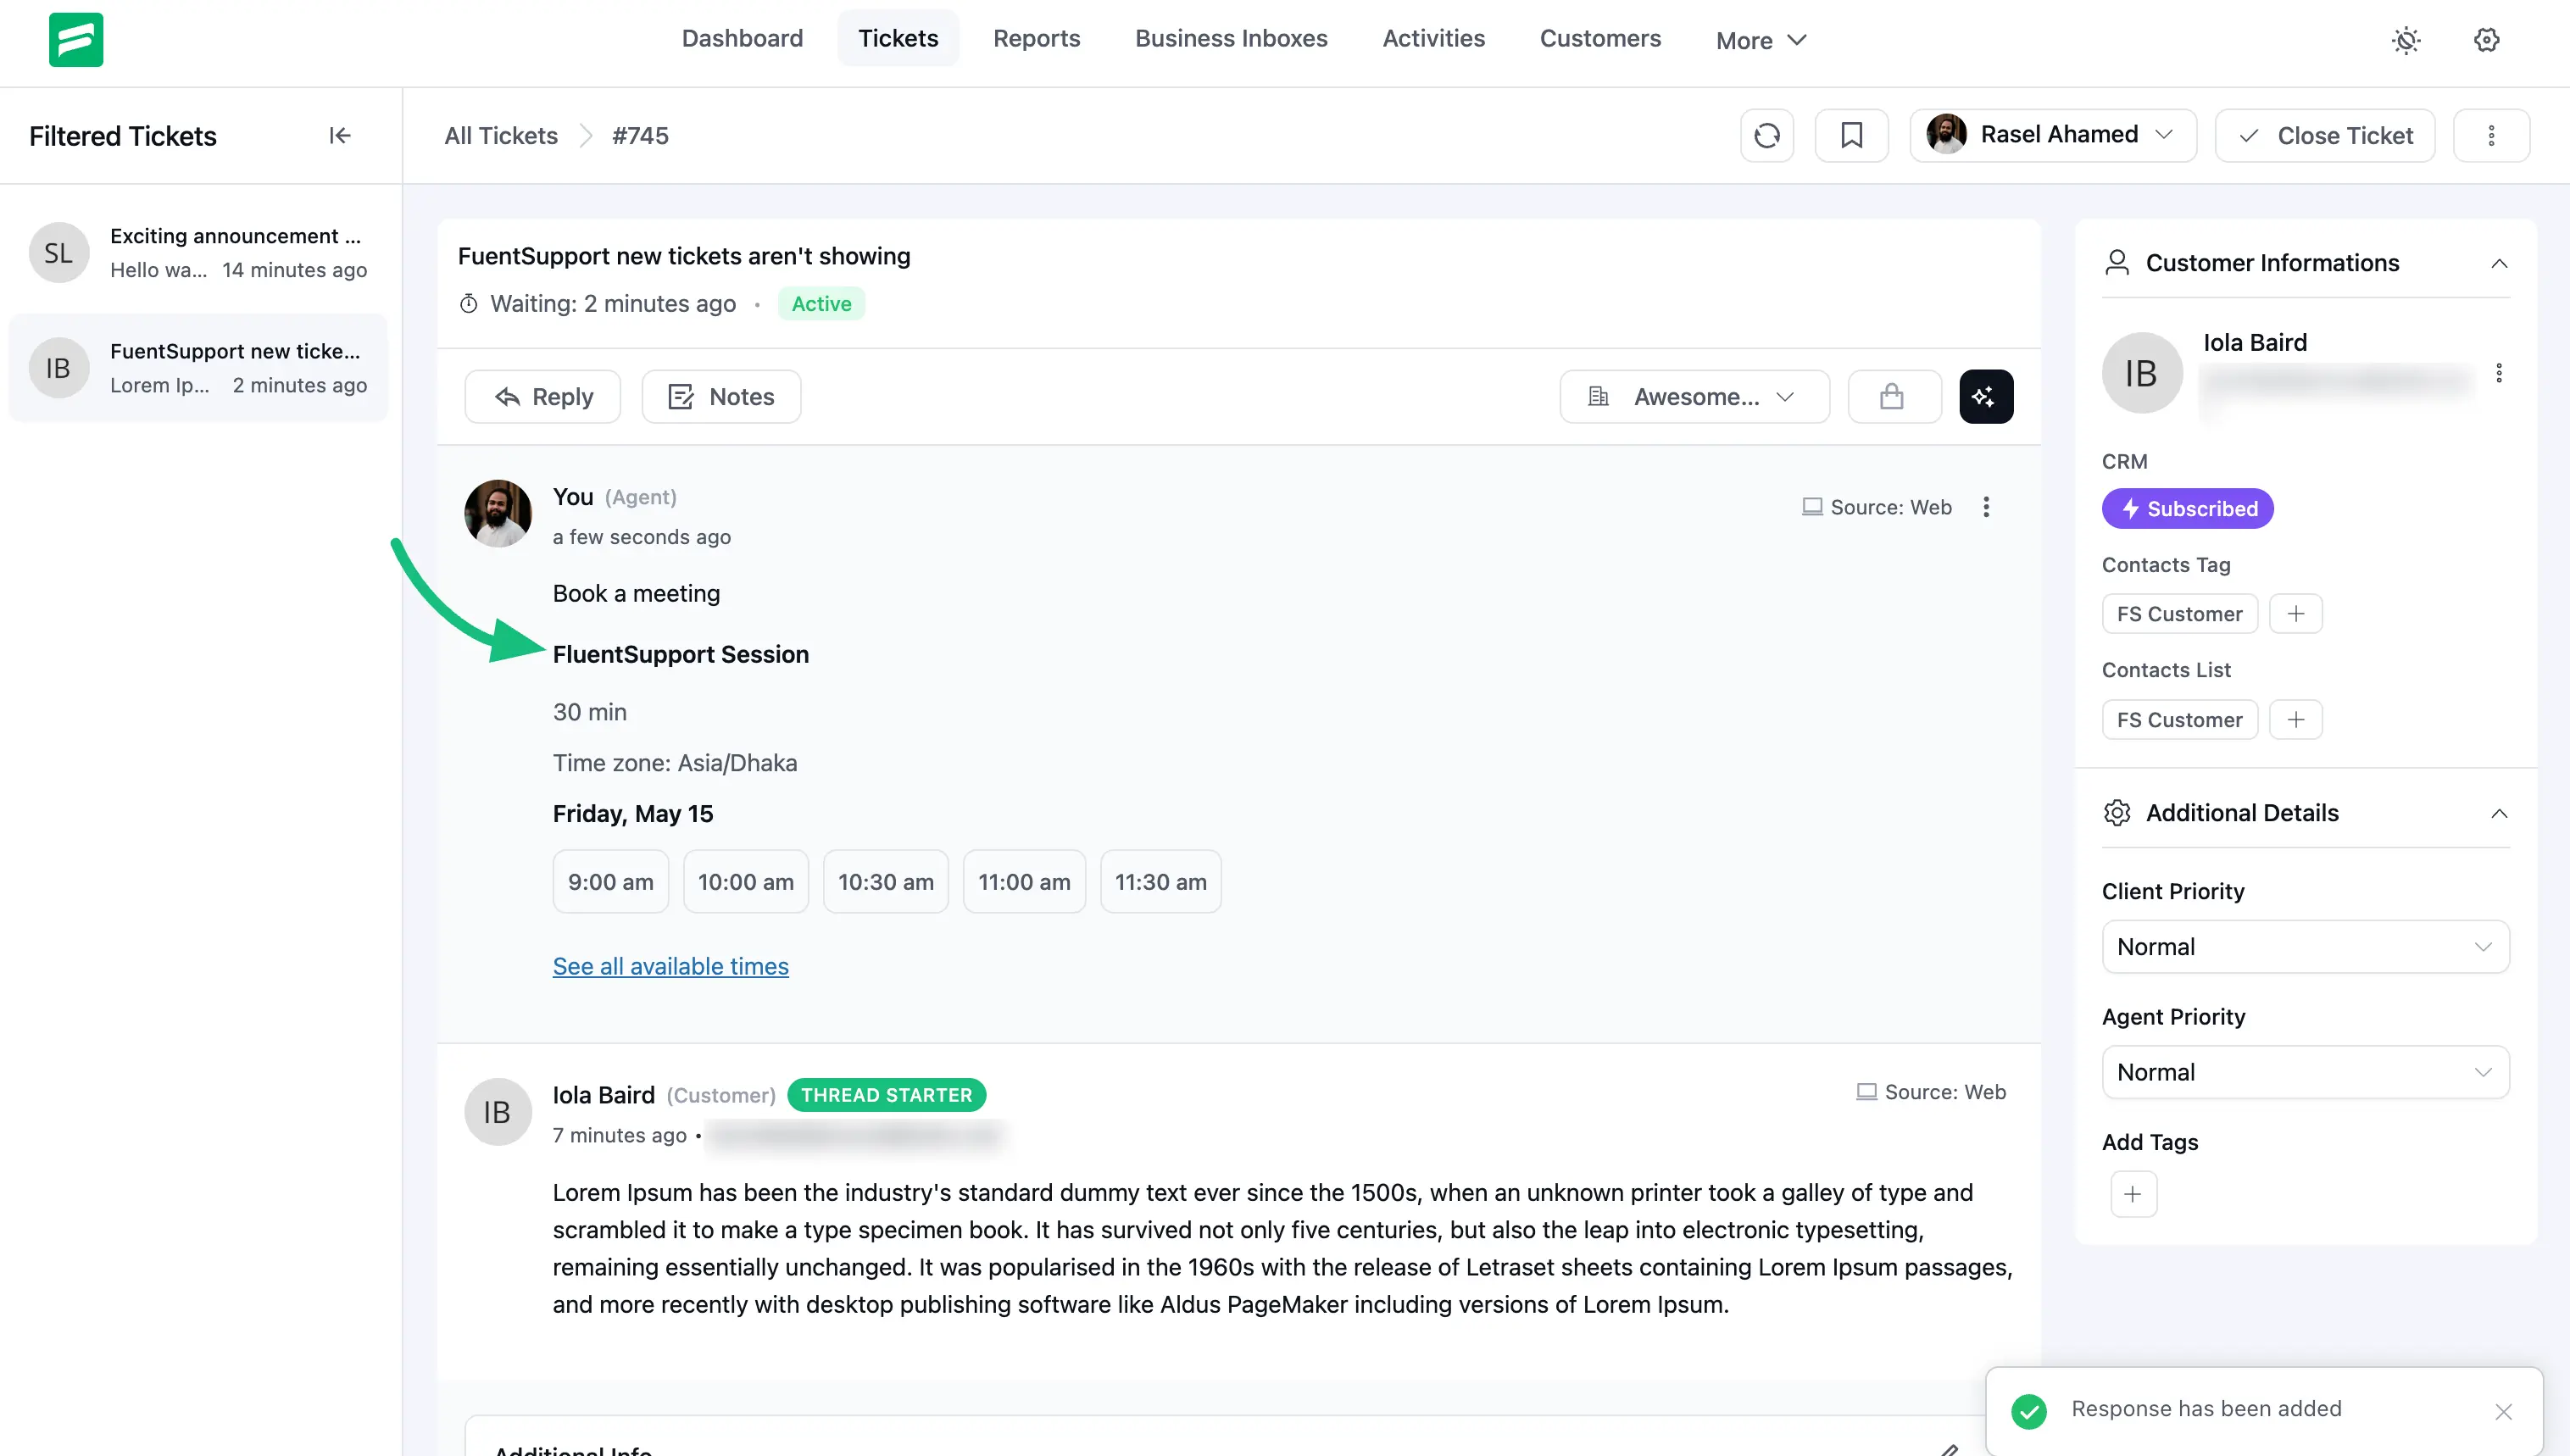
After clicking Insert with Times, the booking block appears right inside your reply editor. Review your reply and click the Reply button to send it to the customer.
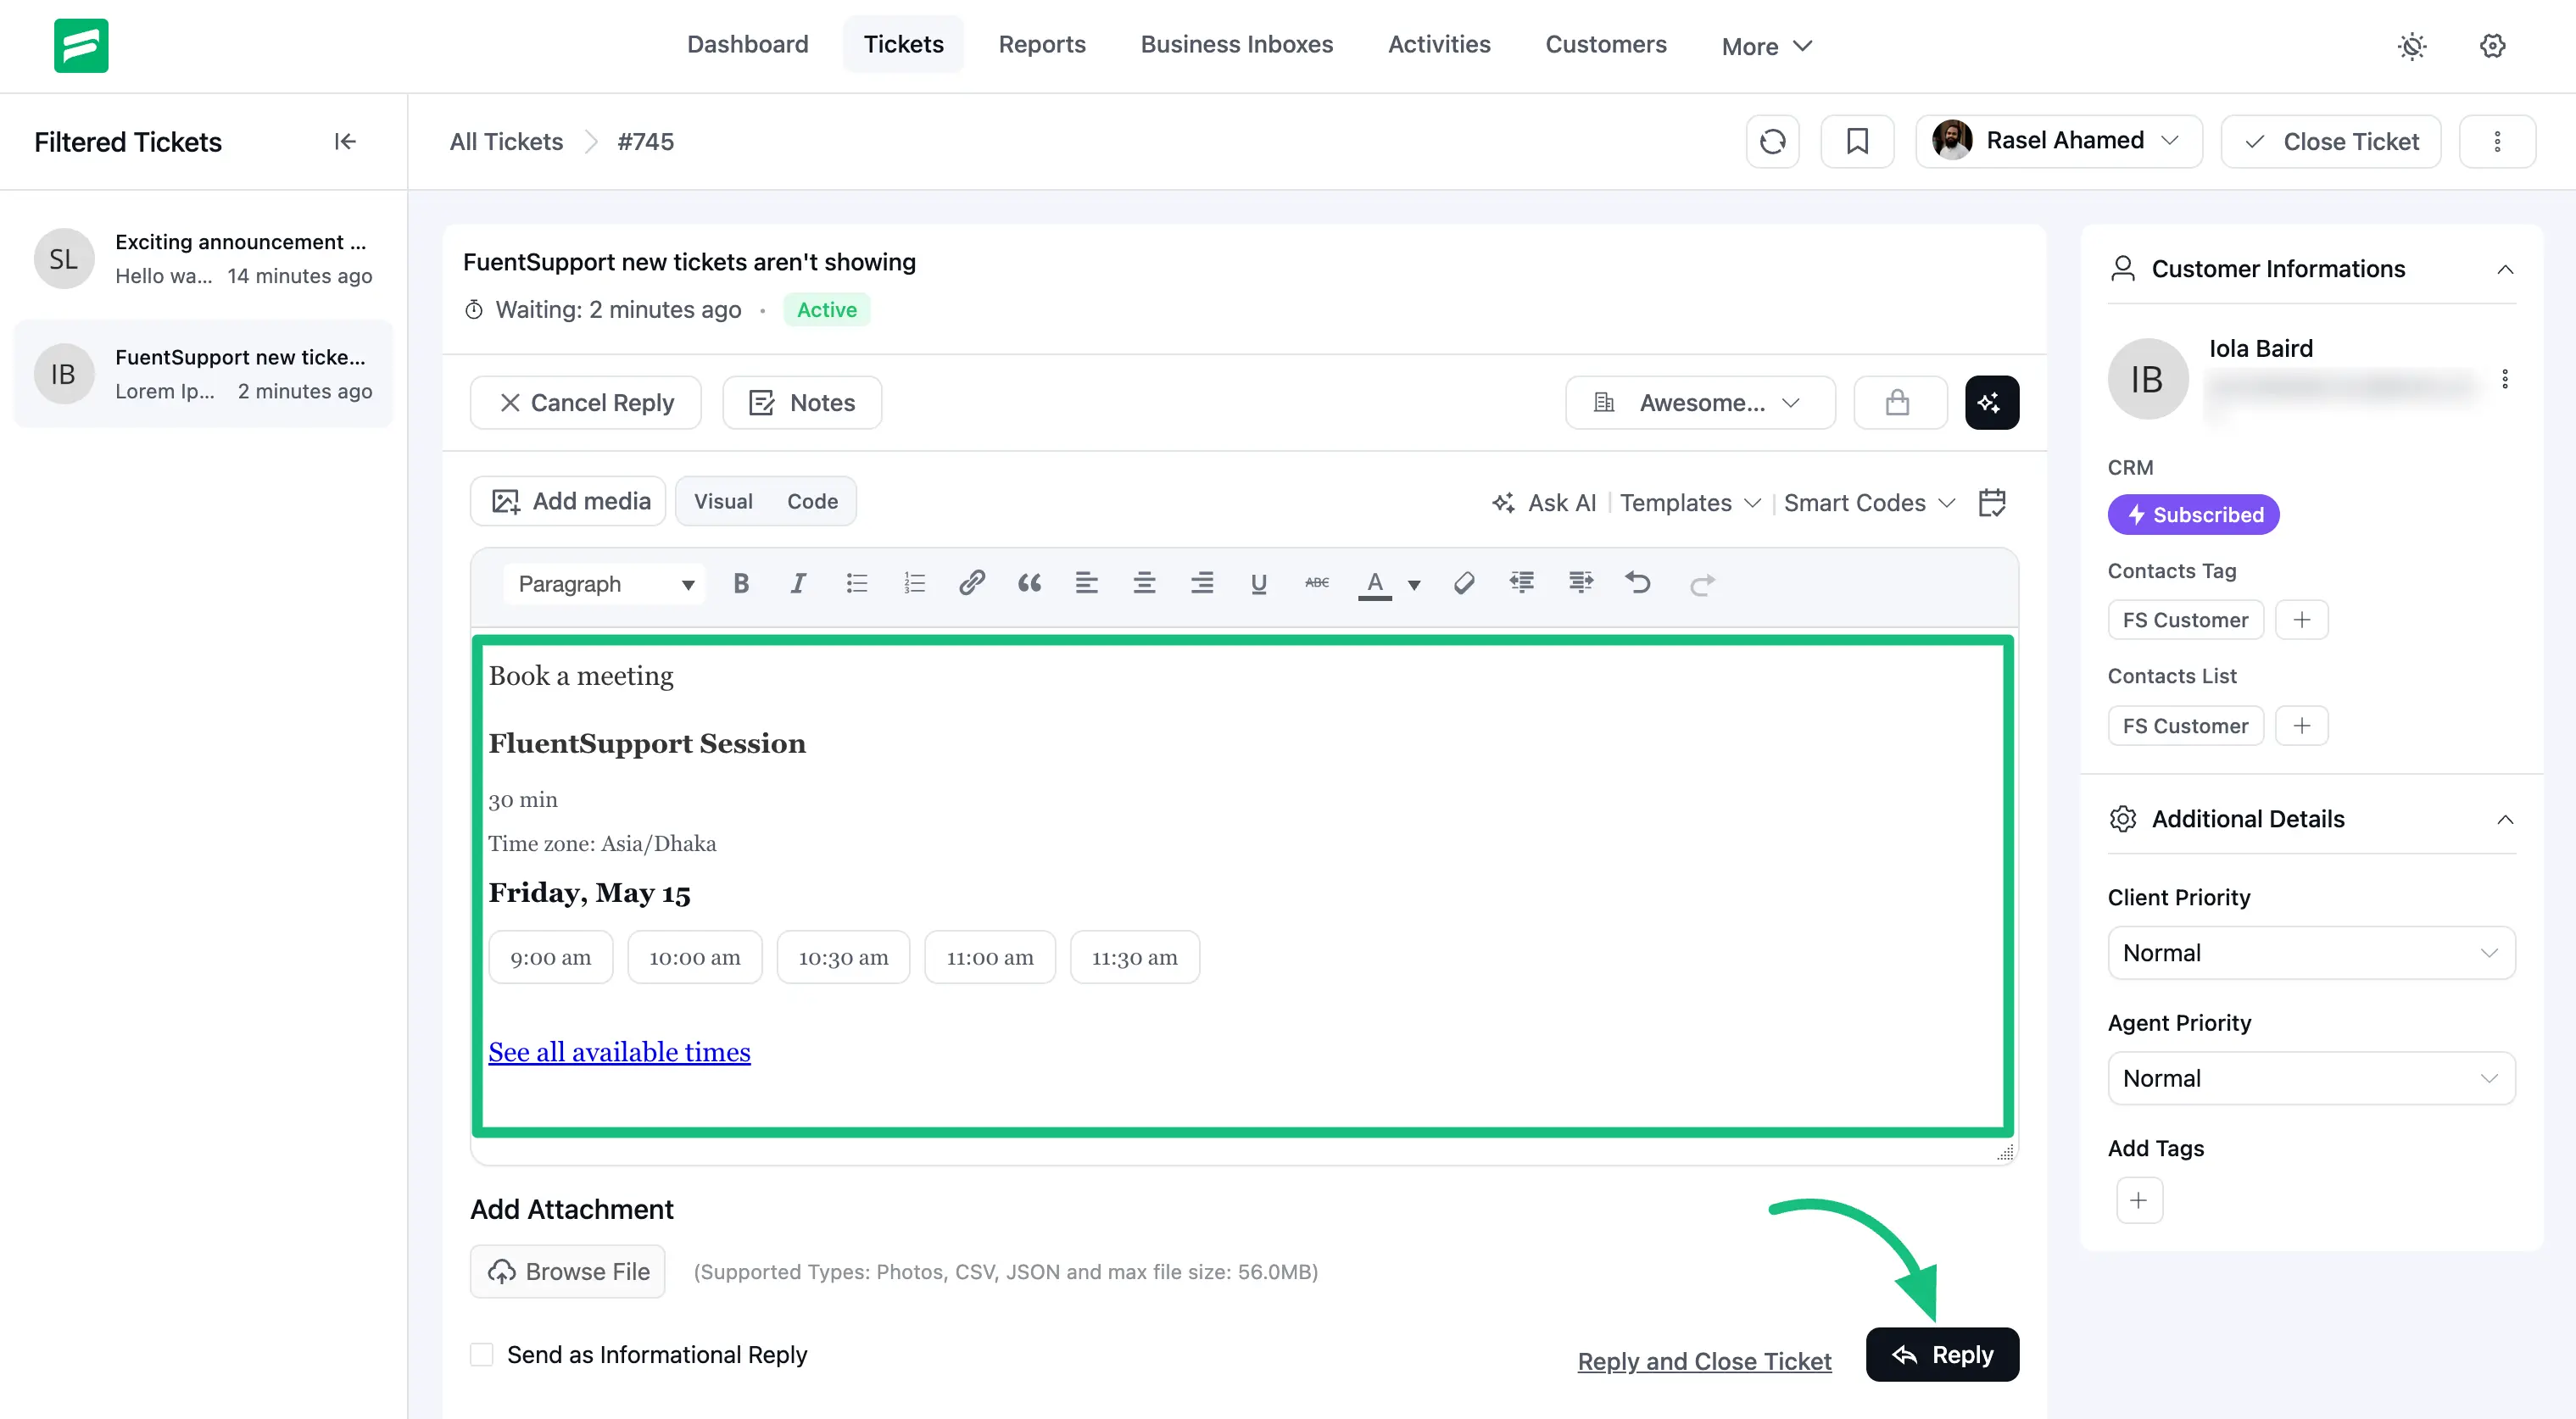
Once sent, the agent's message in the ticket thread will clearly show the meeting title, duration, timezone, and the time slots you offered.
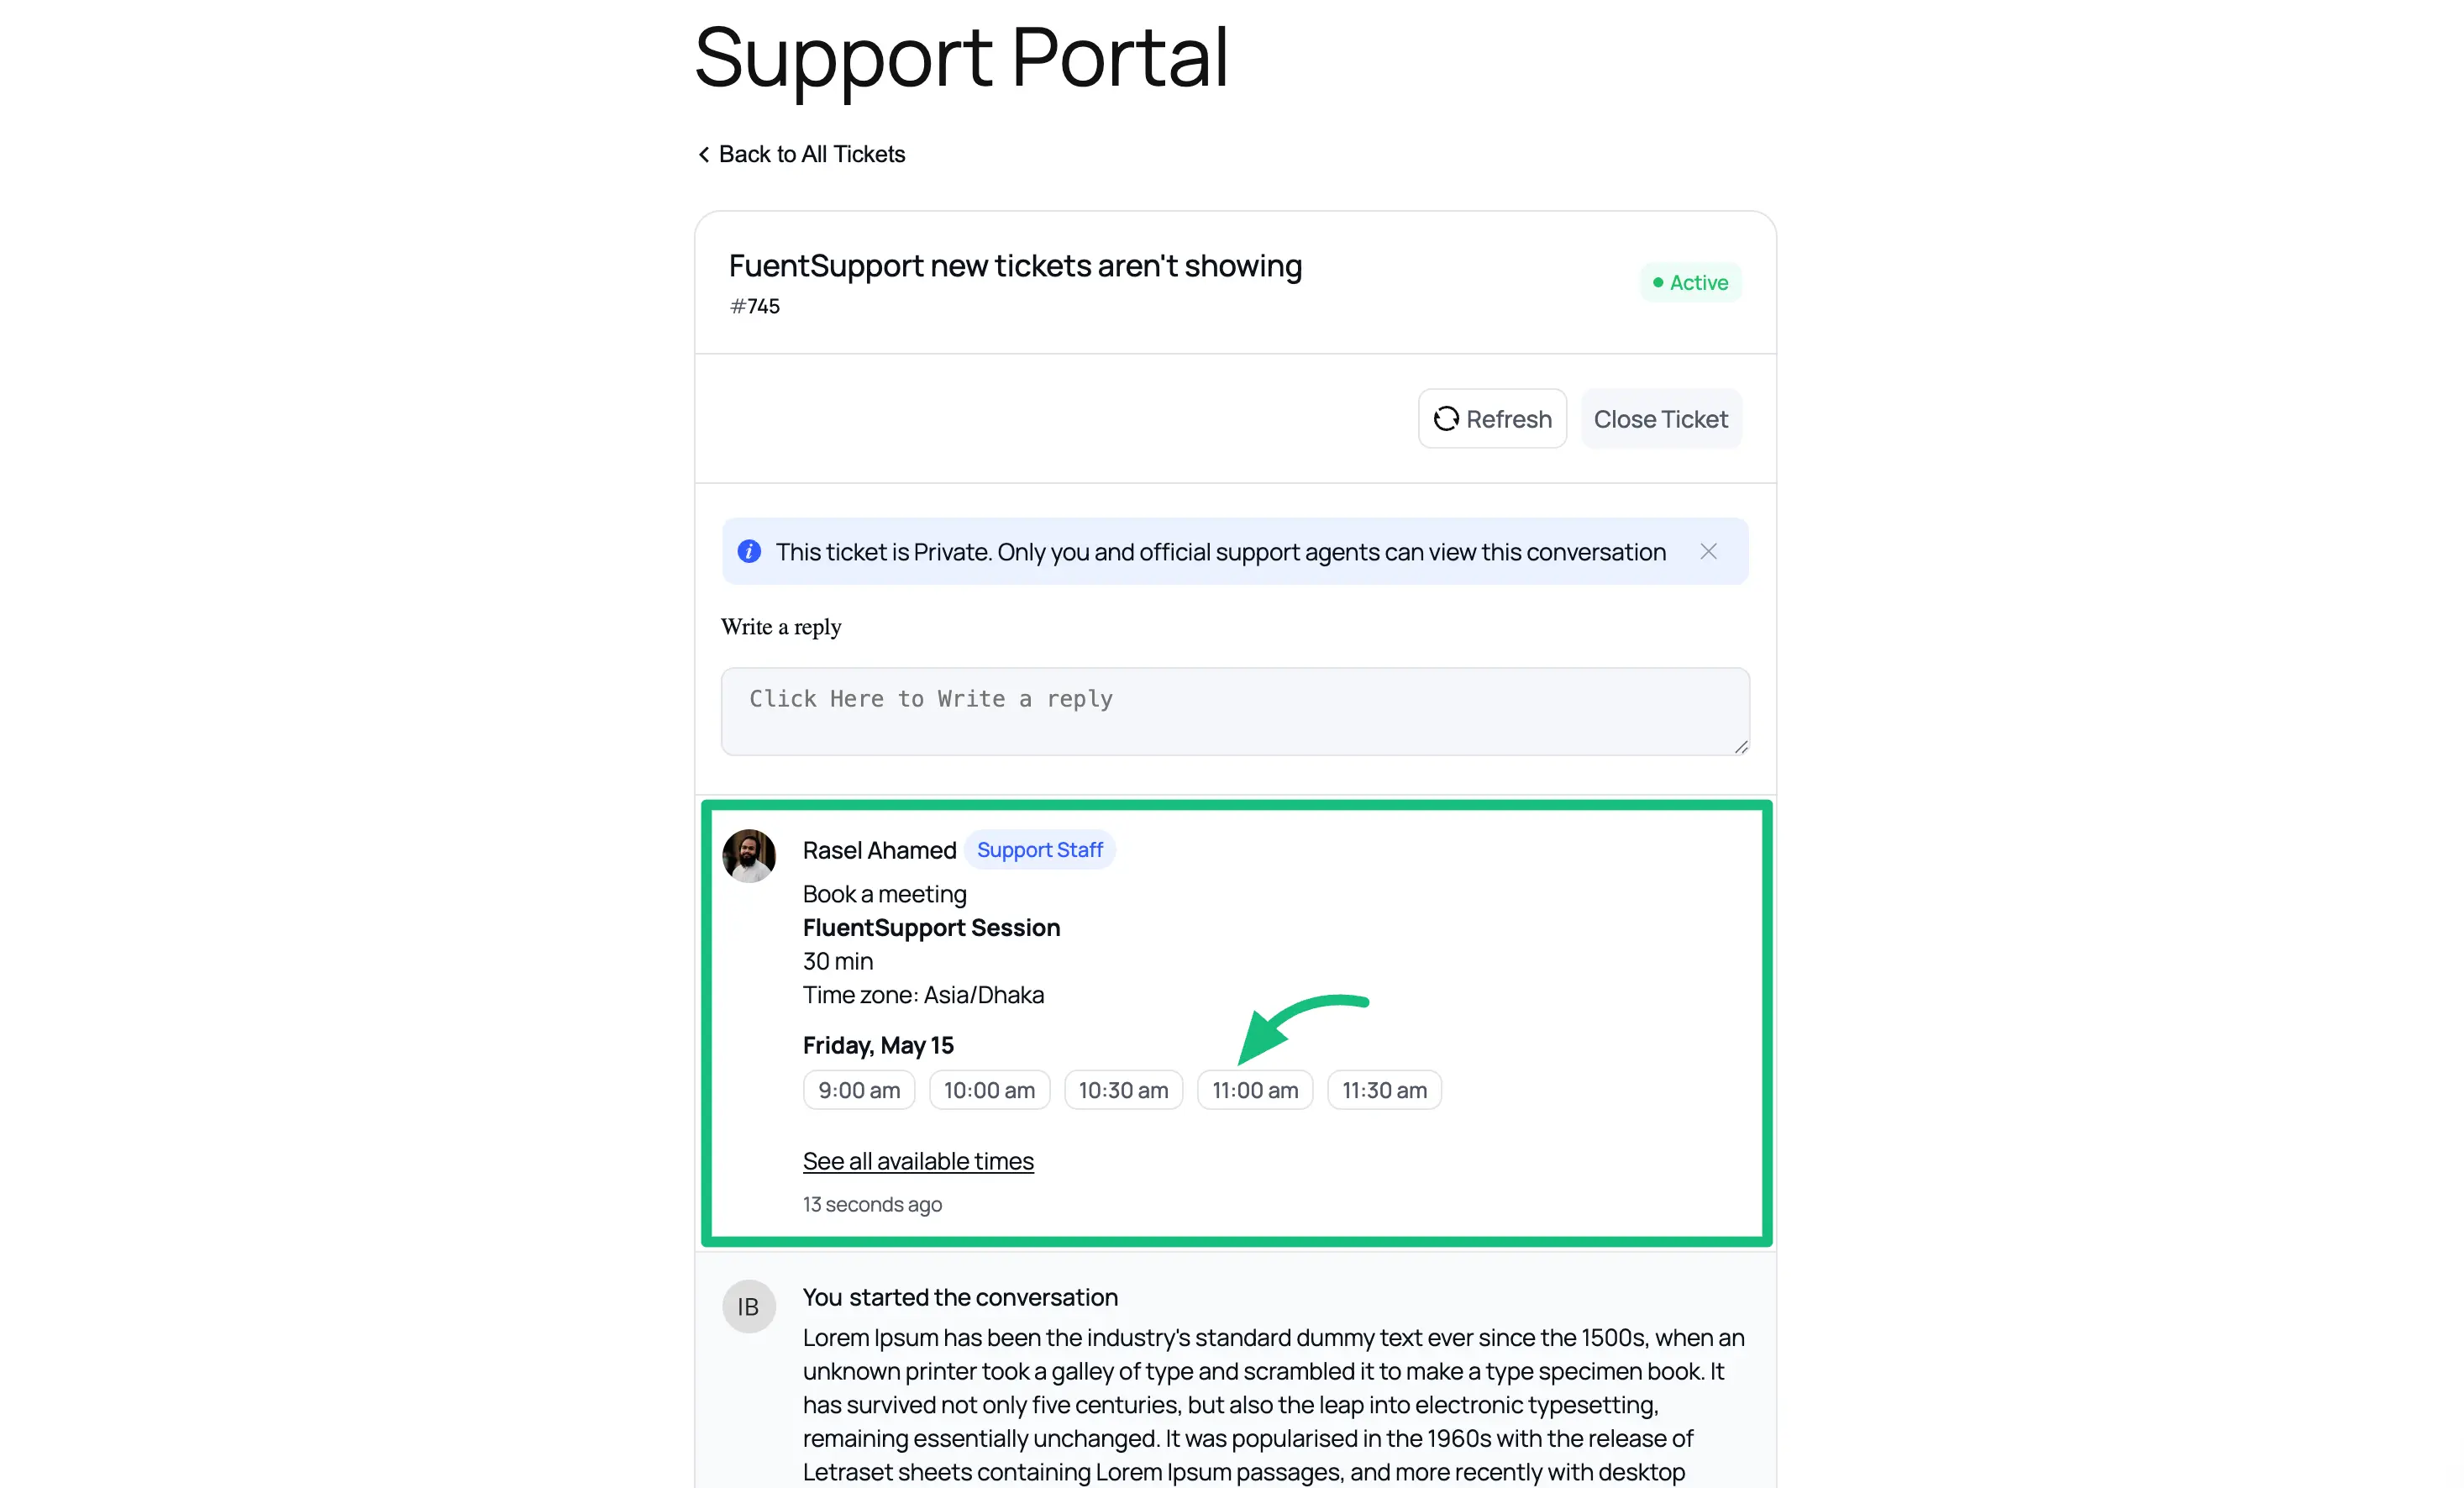
How the Customer Sees the Booking Link
On the customer's end, the booking block looks clean and easy to use. When the customer opens the ticket from the Support Portal, they'll see your reply with the meeting title, duration, timezone, and the available time slots as clickable buttons.
They can simply click one of the time slots to book the meeting, or click See all available times to open the full FluentBooking calendar.
After the Customer Books a Meeting
As soon as the customer picks a time and confirms the booking, Fluent Support automatically updates the ticket so the agent never has to switch tabs to know what's happening.
Two things happen inside the ticket:
- An internal log is added to the ticket timeline with the message "Meeting scheduled via FluentBooking", including the meeting title, time, date, timezone, and a View booking link.
- A "Next Meeting" widget appears in the ticket sidebar under the Meeting section. It shows the meeting status, event title, date, time, and timezone — with a quick View button to open the booking in FluentBooking.
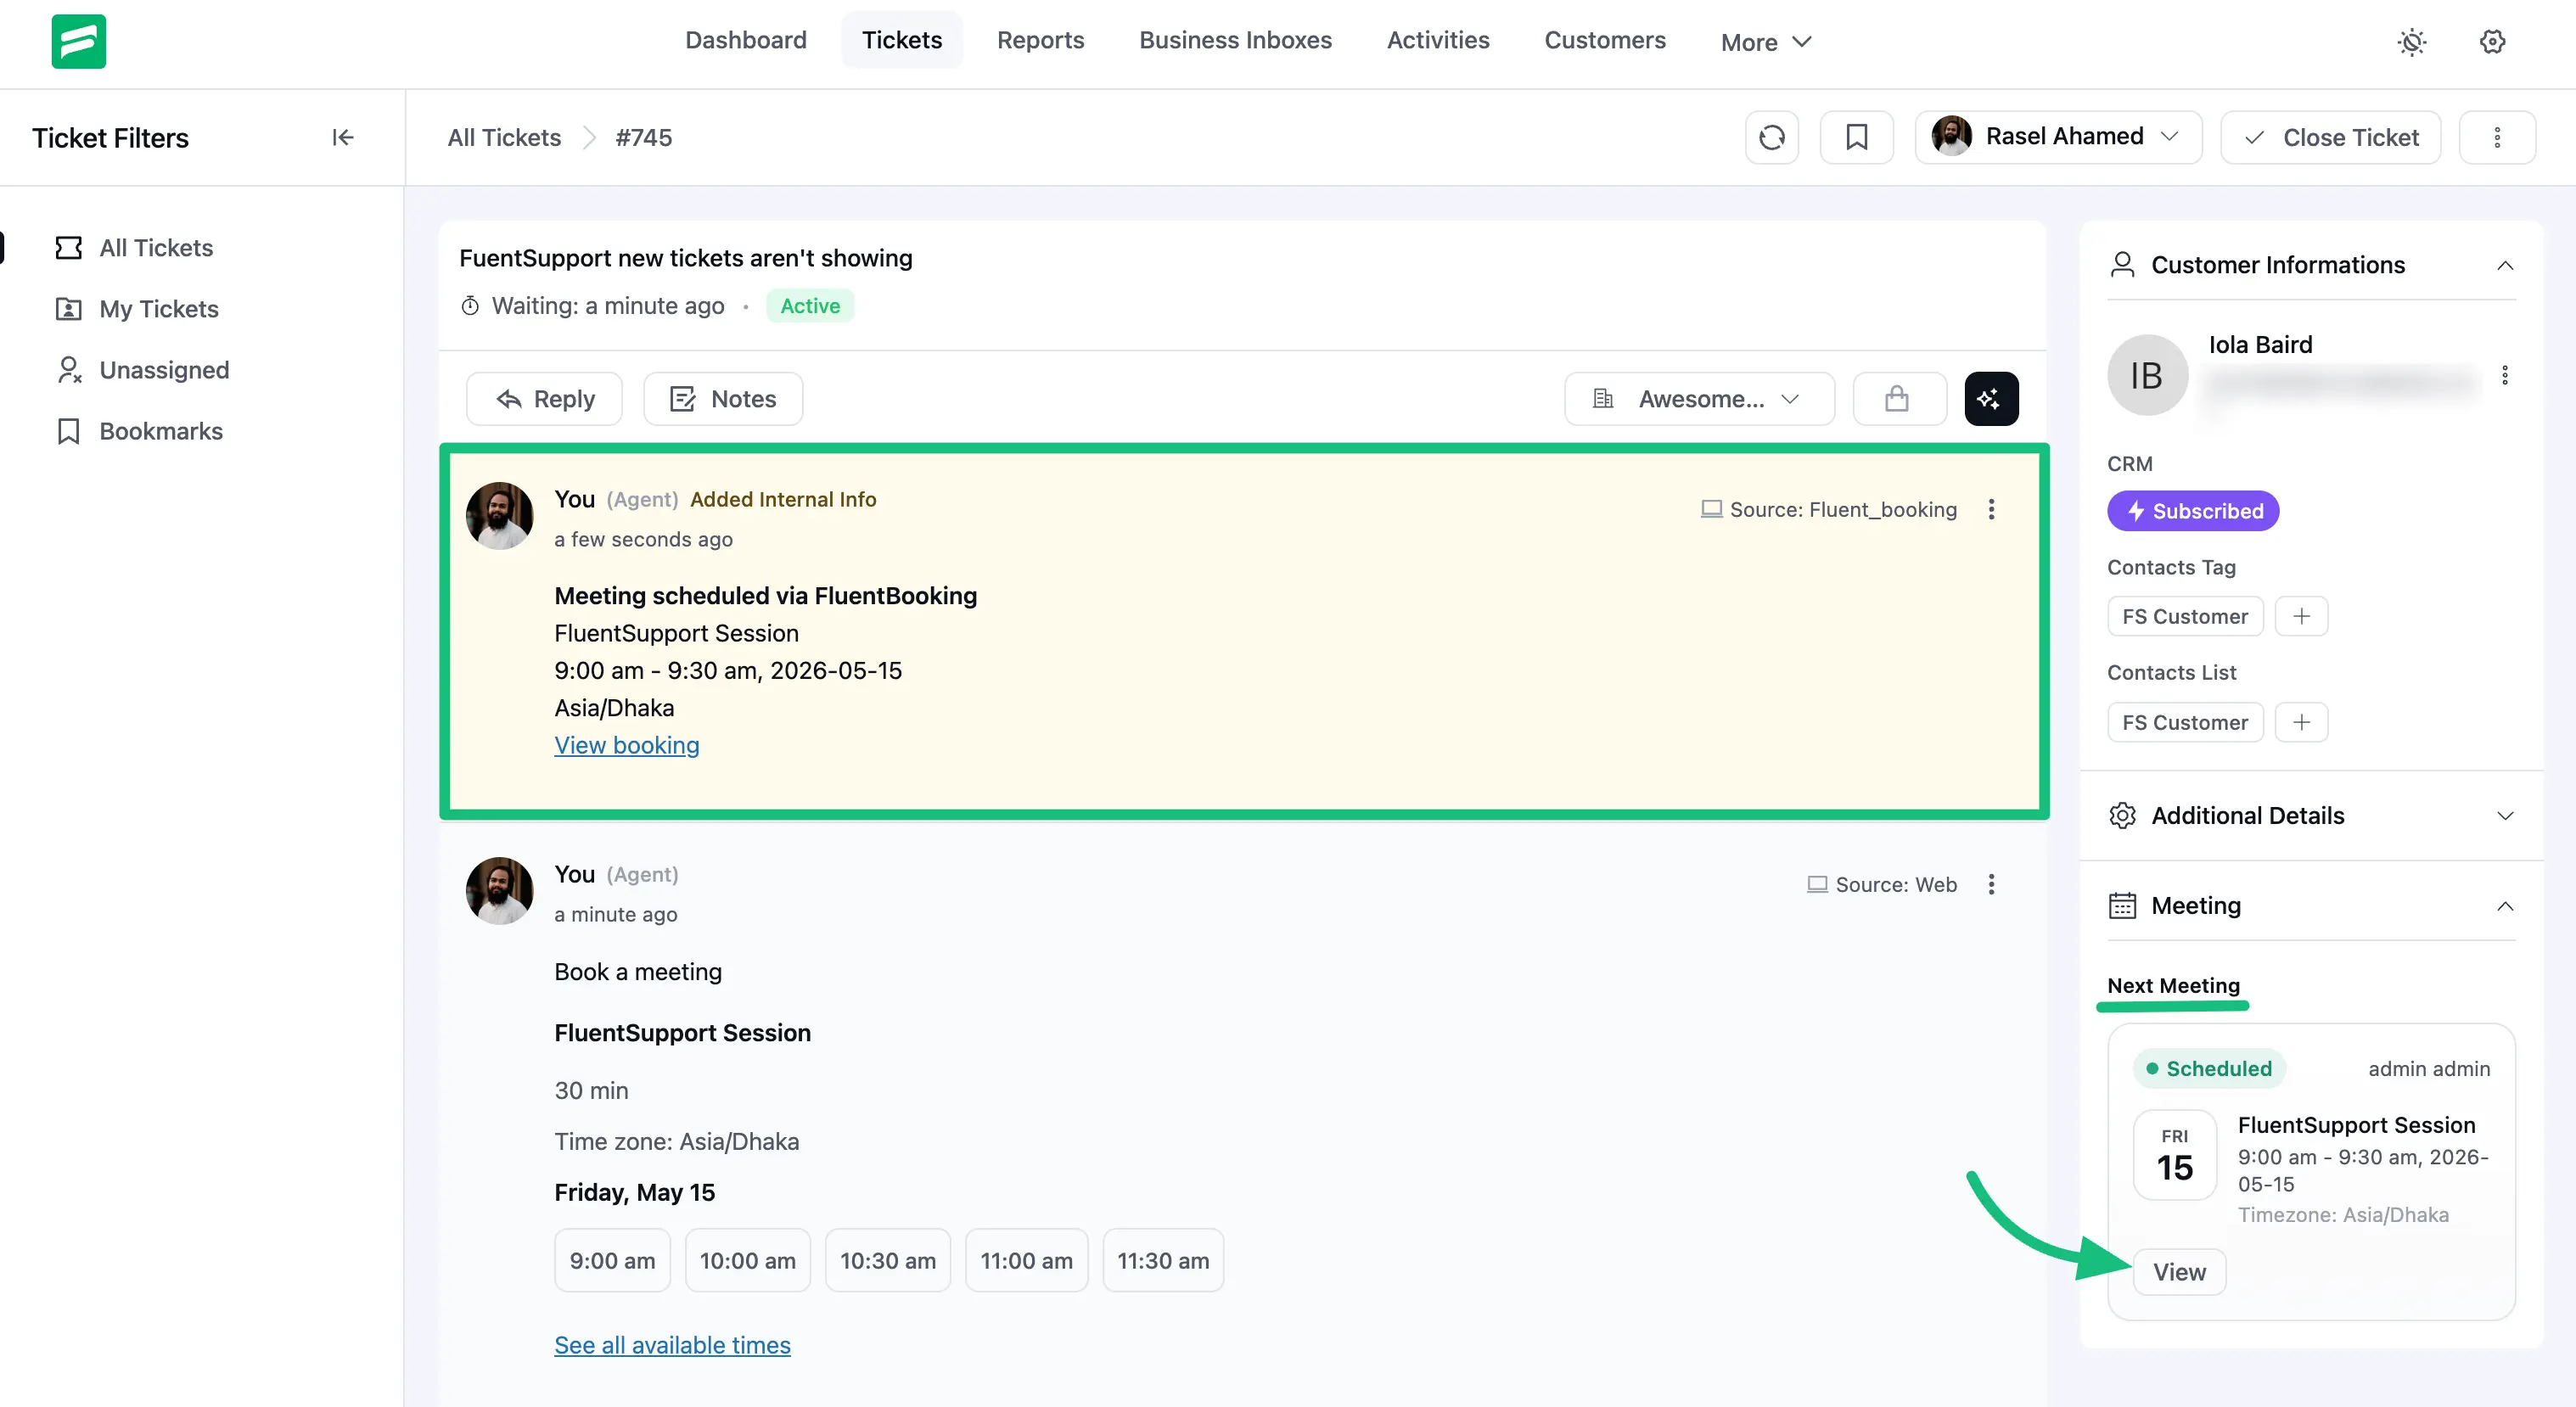
This gives your agents instant meeting context the moment a booking is confirmed, all without ever leaving the ticket.
Troubleshooting
If the FluentBooking meeting option doesn't appear or behave the way you expect, check the following:
- FluentBooking is installed and active on the same WordPress site.
- The Enable Fluent Booking Integration option is turned on in Fluent Support → Settings → Global Settings.
- You have at least one active FluentBooking event type.
- The event type has a public booking page enabled.
- The agent has permission to use the selected FluentBooking calendar.
- The ticket has a valid customer email address (required for the sidebar widget to fetch related meetings).
If everything is configured but the option still doesn't appear, open FluentBooking and confirm that your event type is reachable from its public booking page.
That's it! Your Fluent Support is now connected to FluentBooking, and your agents can schedule live meetings with customers in just a few clicks — without ever leaving the ticket.