Appearance
Connecting Amazon S3 with FluentSupport
If your helpdesk receives a lot of file attachments, storing them directly on your WordPress site can quickly eat up your server space and slow down your website.
By connecting Amazon S3, you can securely store all those customer uploads and ticket attachments in the cloud. This guide will walk you through the entire process, step-by-step, making it easy to set up your cloud storage even if you aren't an AWS expert.
We will tackle this in four simple phases: creating the storage space, creating a system user, getting your security keys, and finally, pasting those keys into FluentSupport.
Phase 1: Creating Your Storage "Bucket"
In Amazon AWS, a "bucket" is simply the digital container where all your files will be stored. Let's create one for your support tickets.
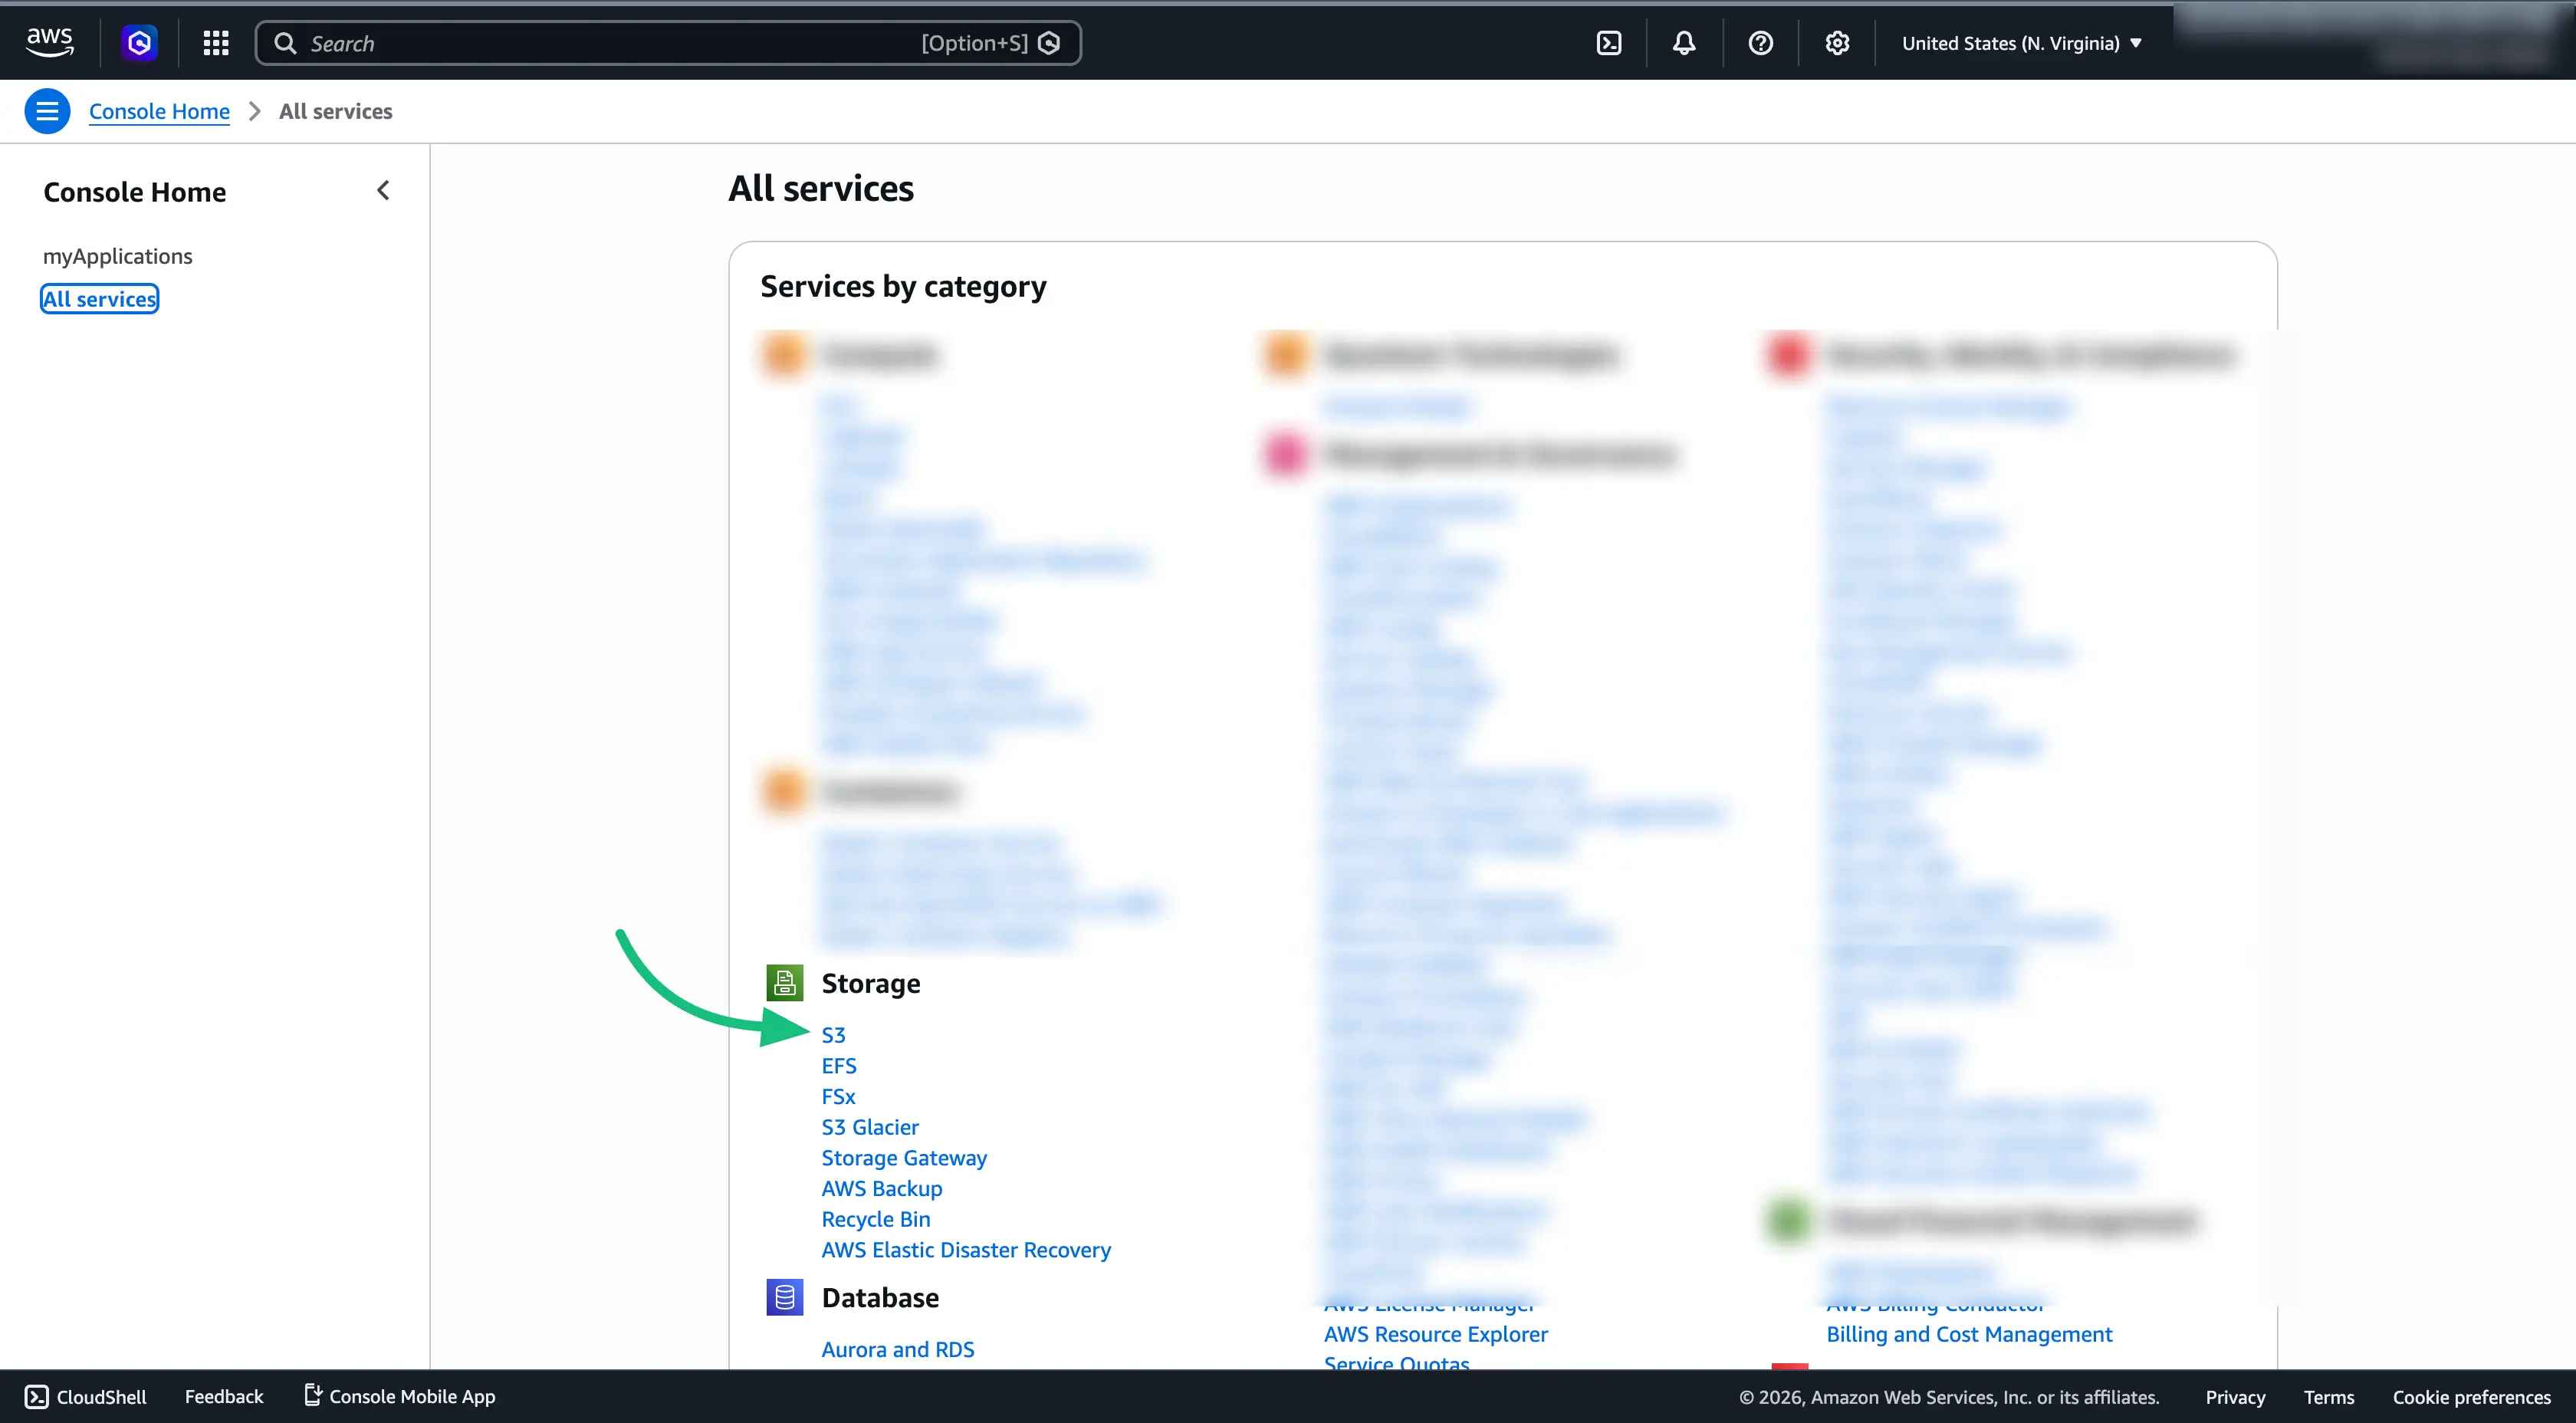
- Log in to your AWS Management Console. At the top left, click on All services, look for the Storage category, and click on S3.
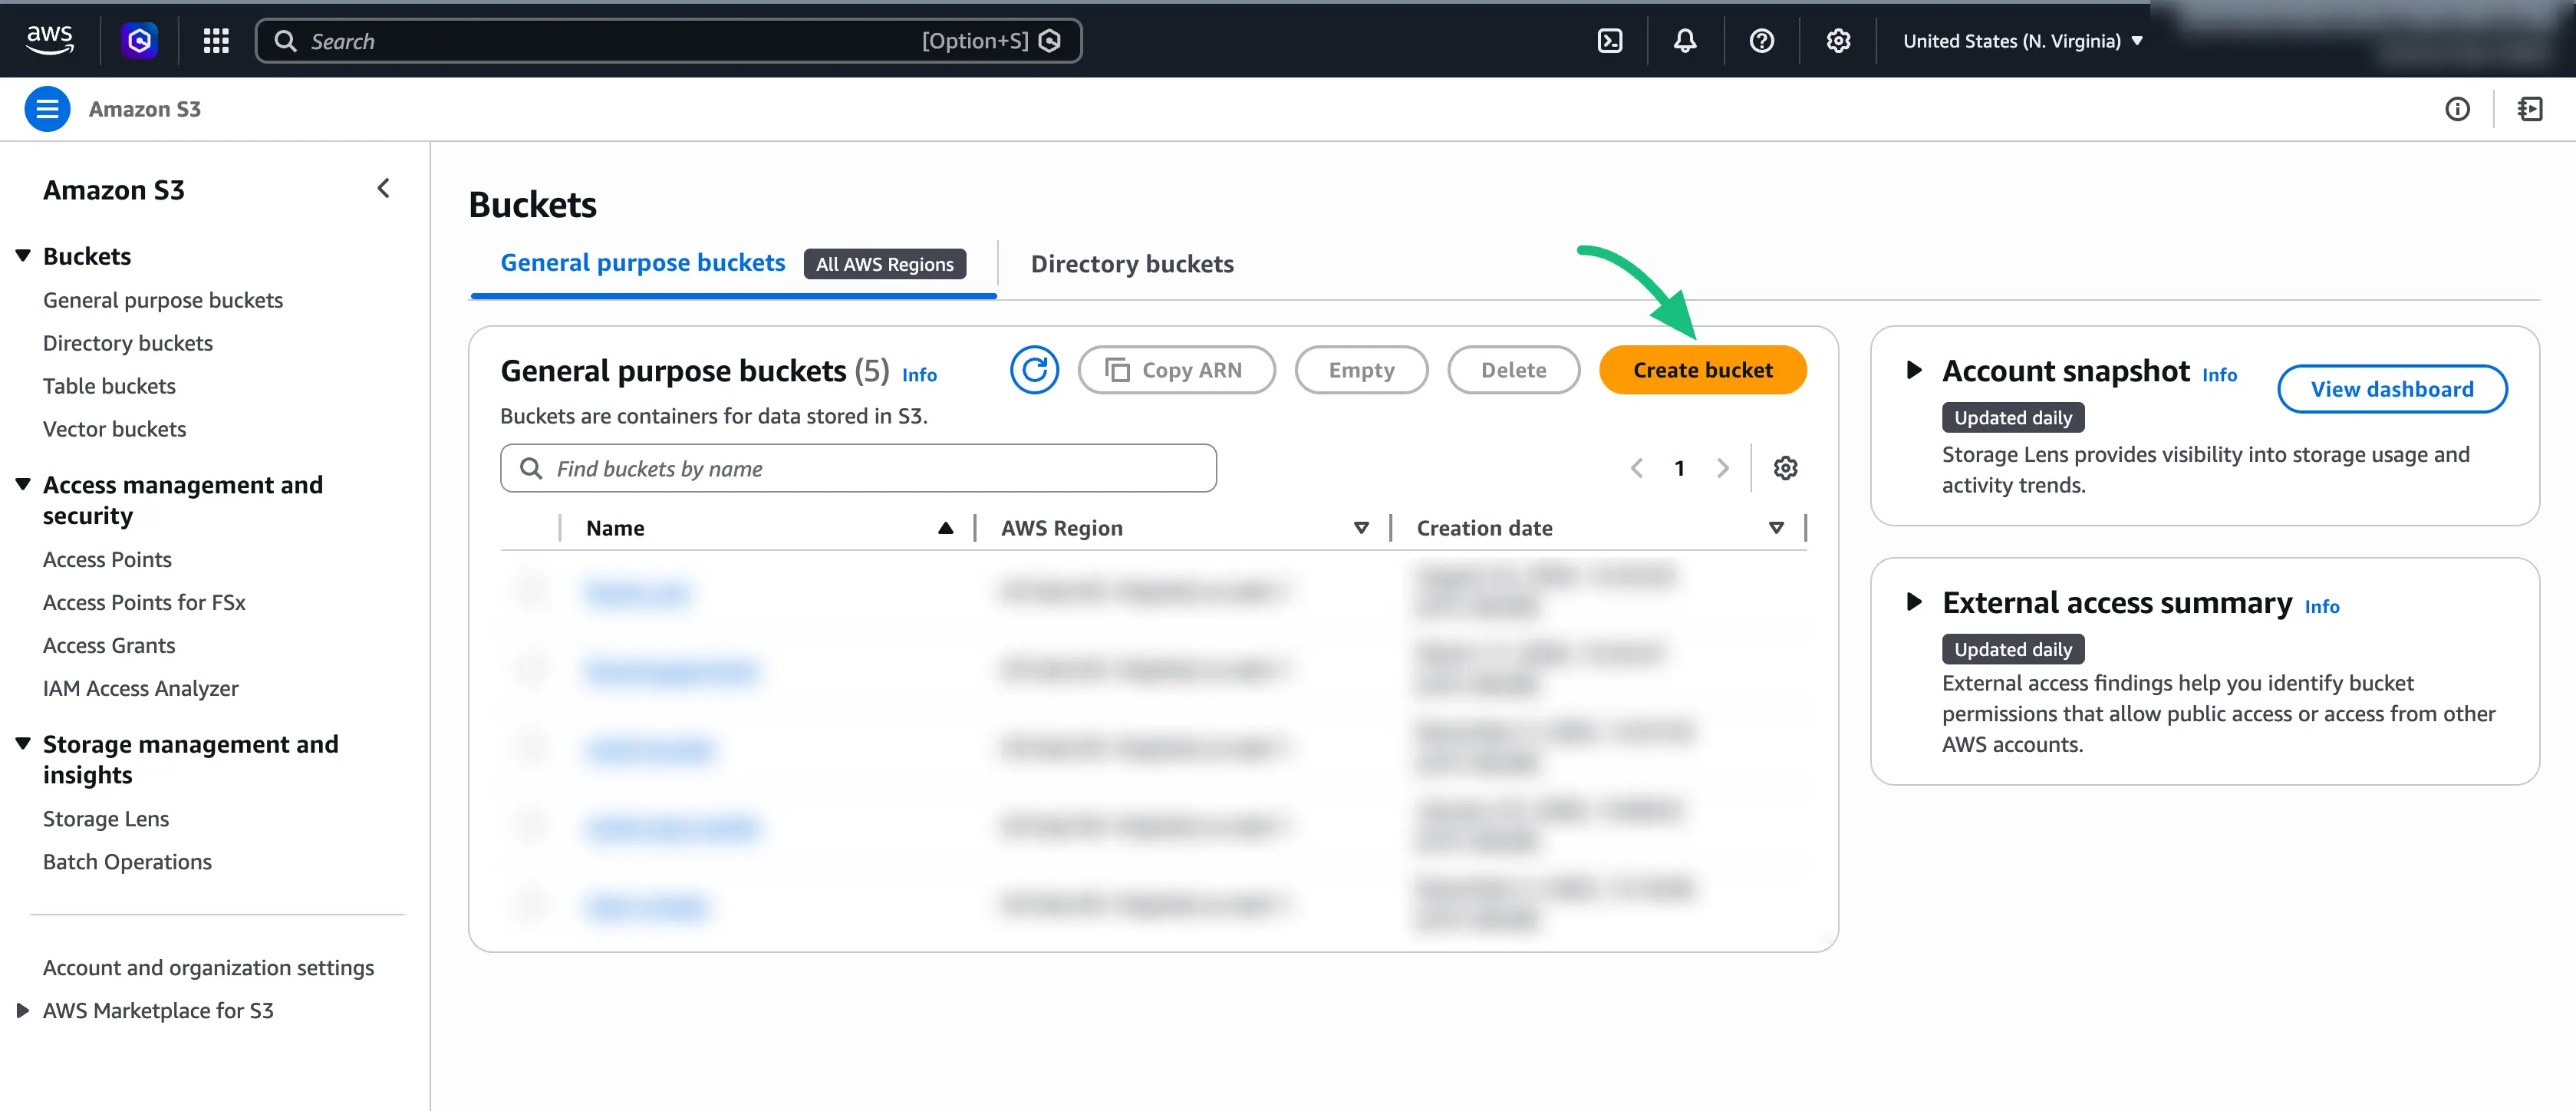
- Once you are in the Amazon S3 dashboard, look for the orange button labeled Create bucket and click it.
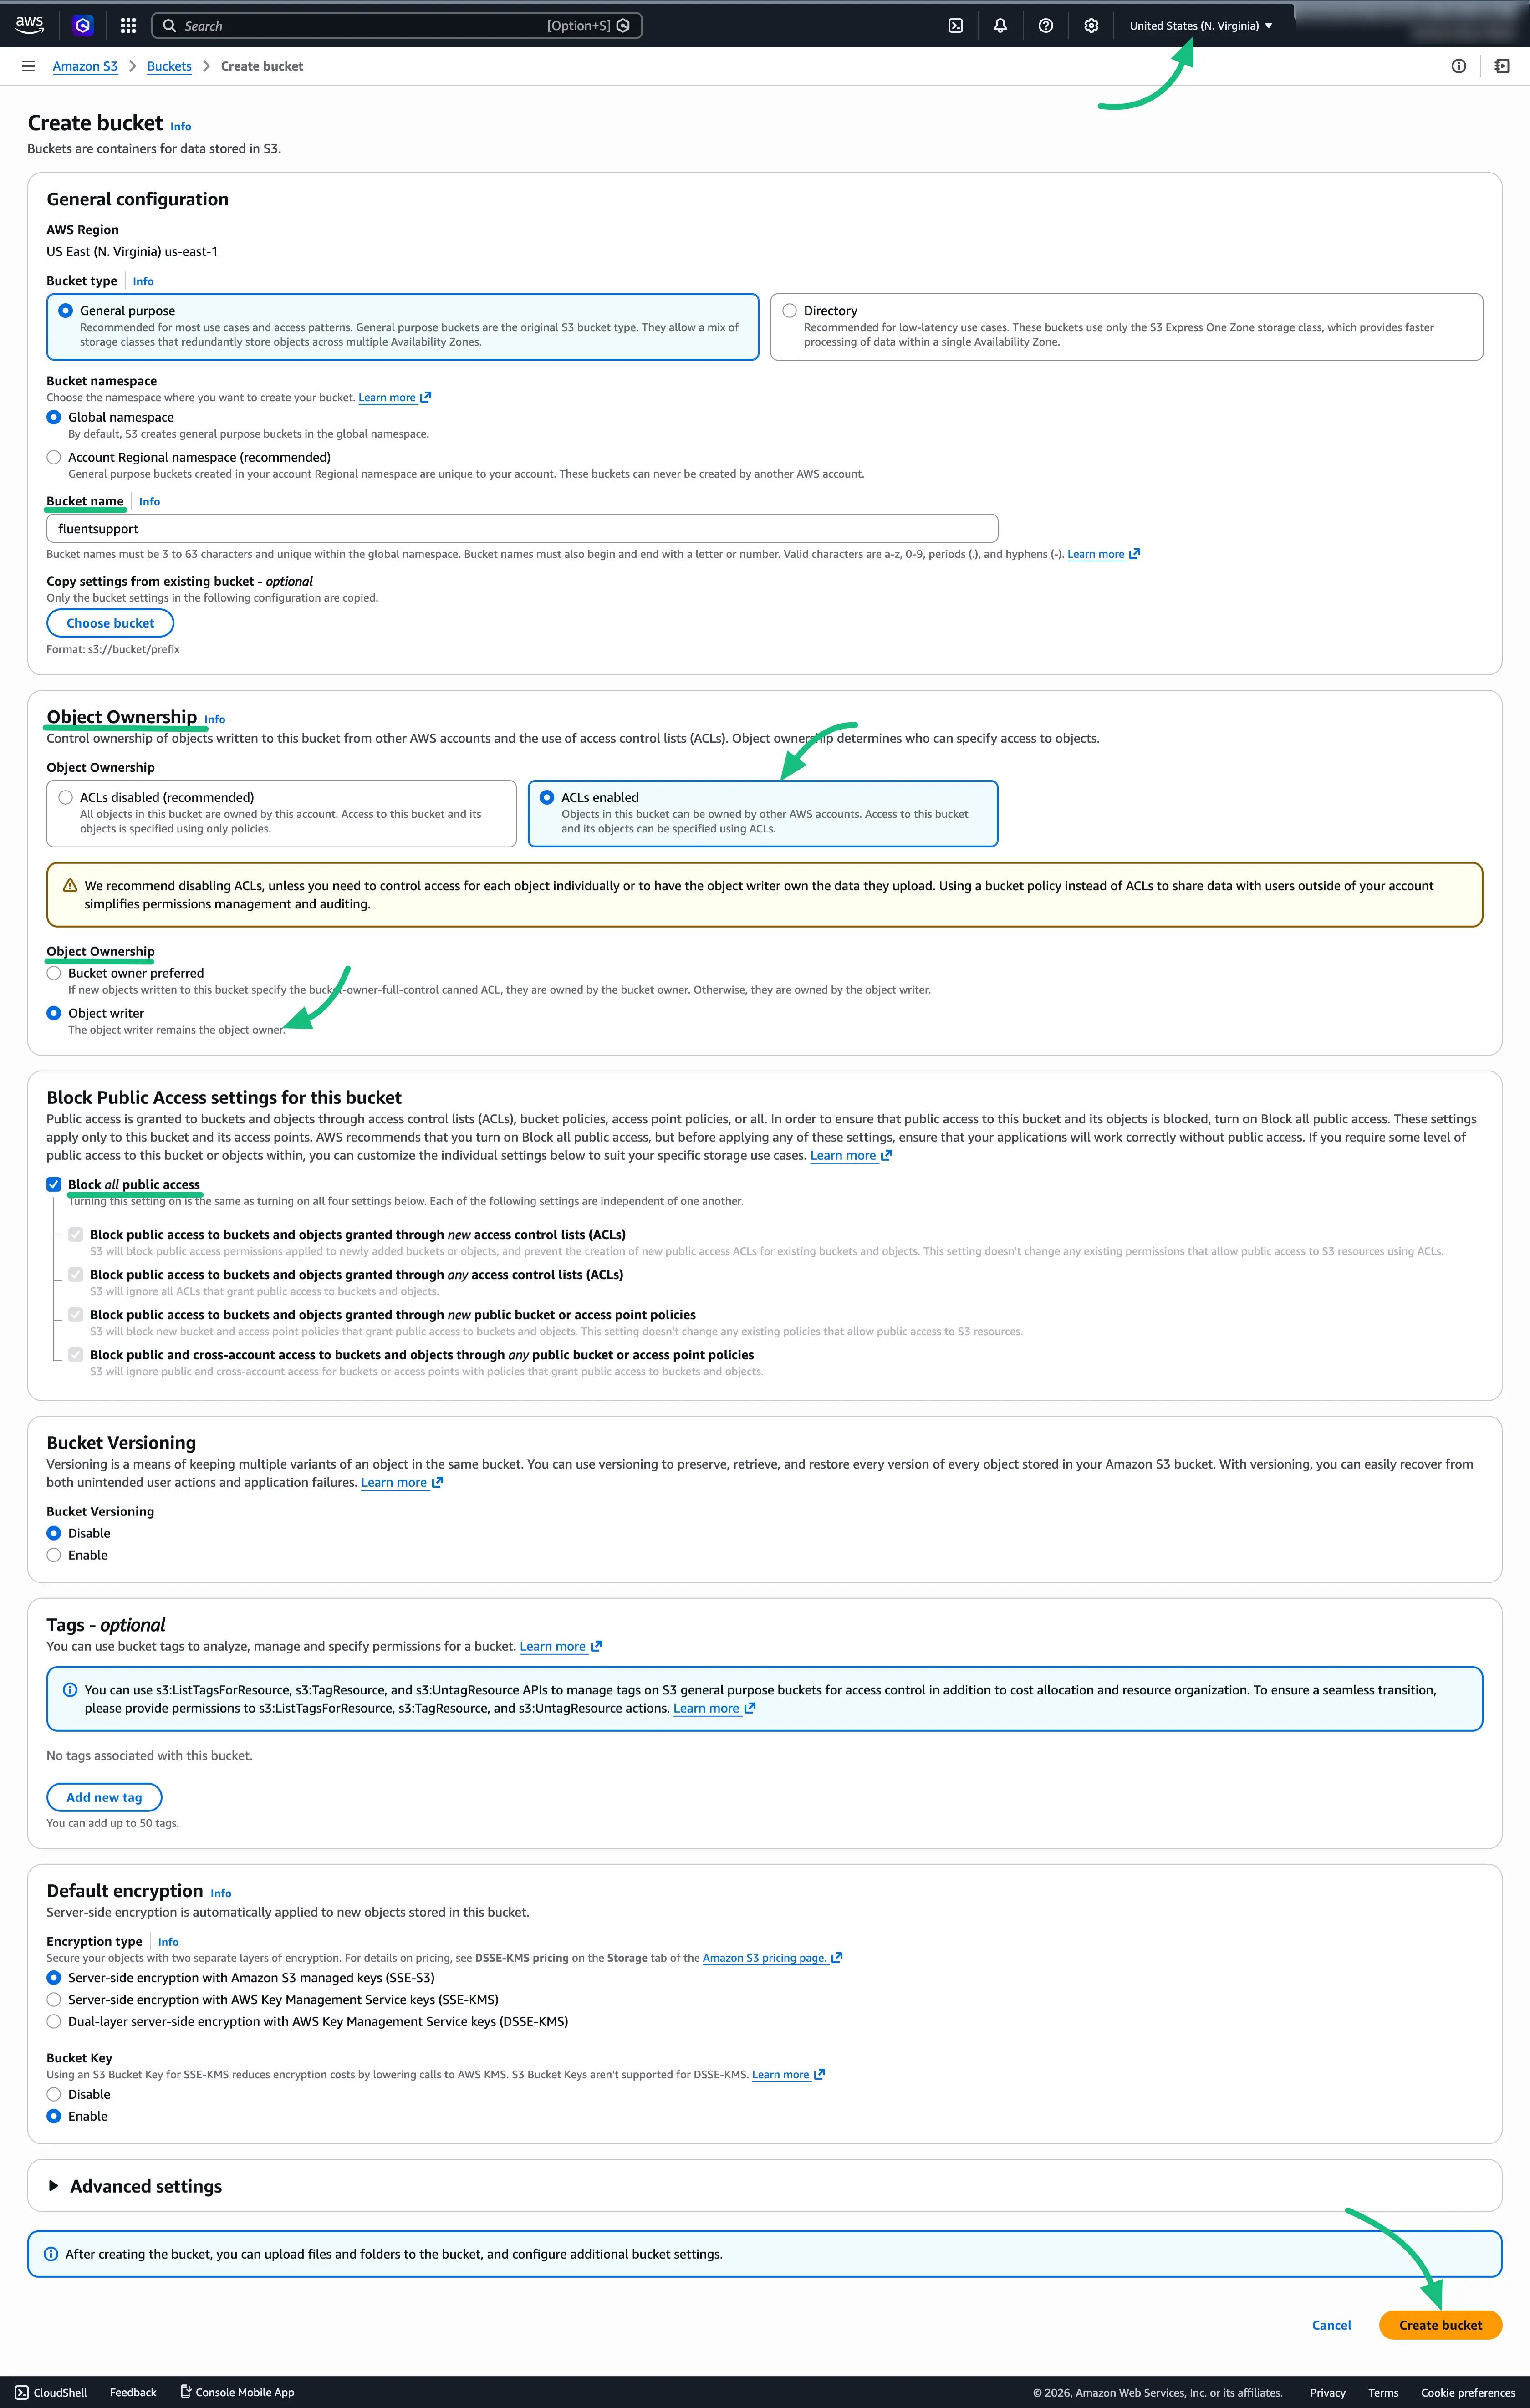
- On the setup page, you need to provide two important details:
- AWS Region: Take note of the region selected at the top right of your screen, as you will need this later.
- Bucket name: Type a unique name for your container, such as
fluentsupport-files.
- Scroll down the page until you see the Object Ownership section.
- Click to select ACLs enabled.
- Right below that, ensure the Object writer option is selected. This ensures FluentSupport has the right to put files into the bucket.
- Scroll all the way down to the bottom of the page and click the orange Create bucket button to finish this phase.
Phase 2: Creating an IAM User
FluentSupport needs permission to talk to Amazon S3. To do this securely, we will create a dedicated "User" inside AWS just for your helpdesk.
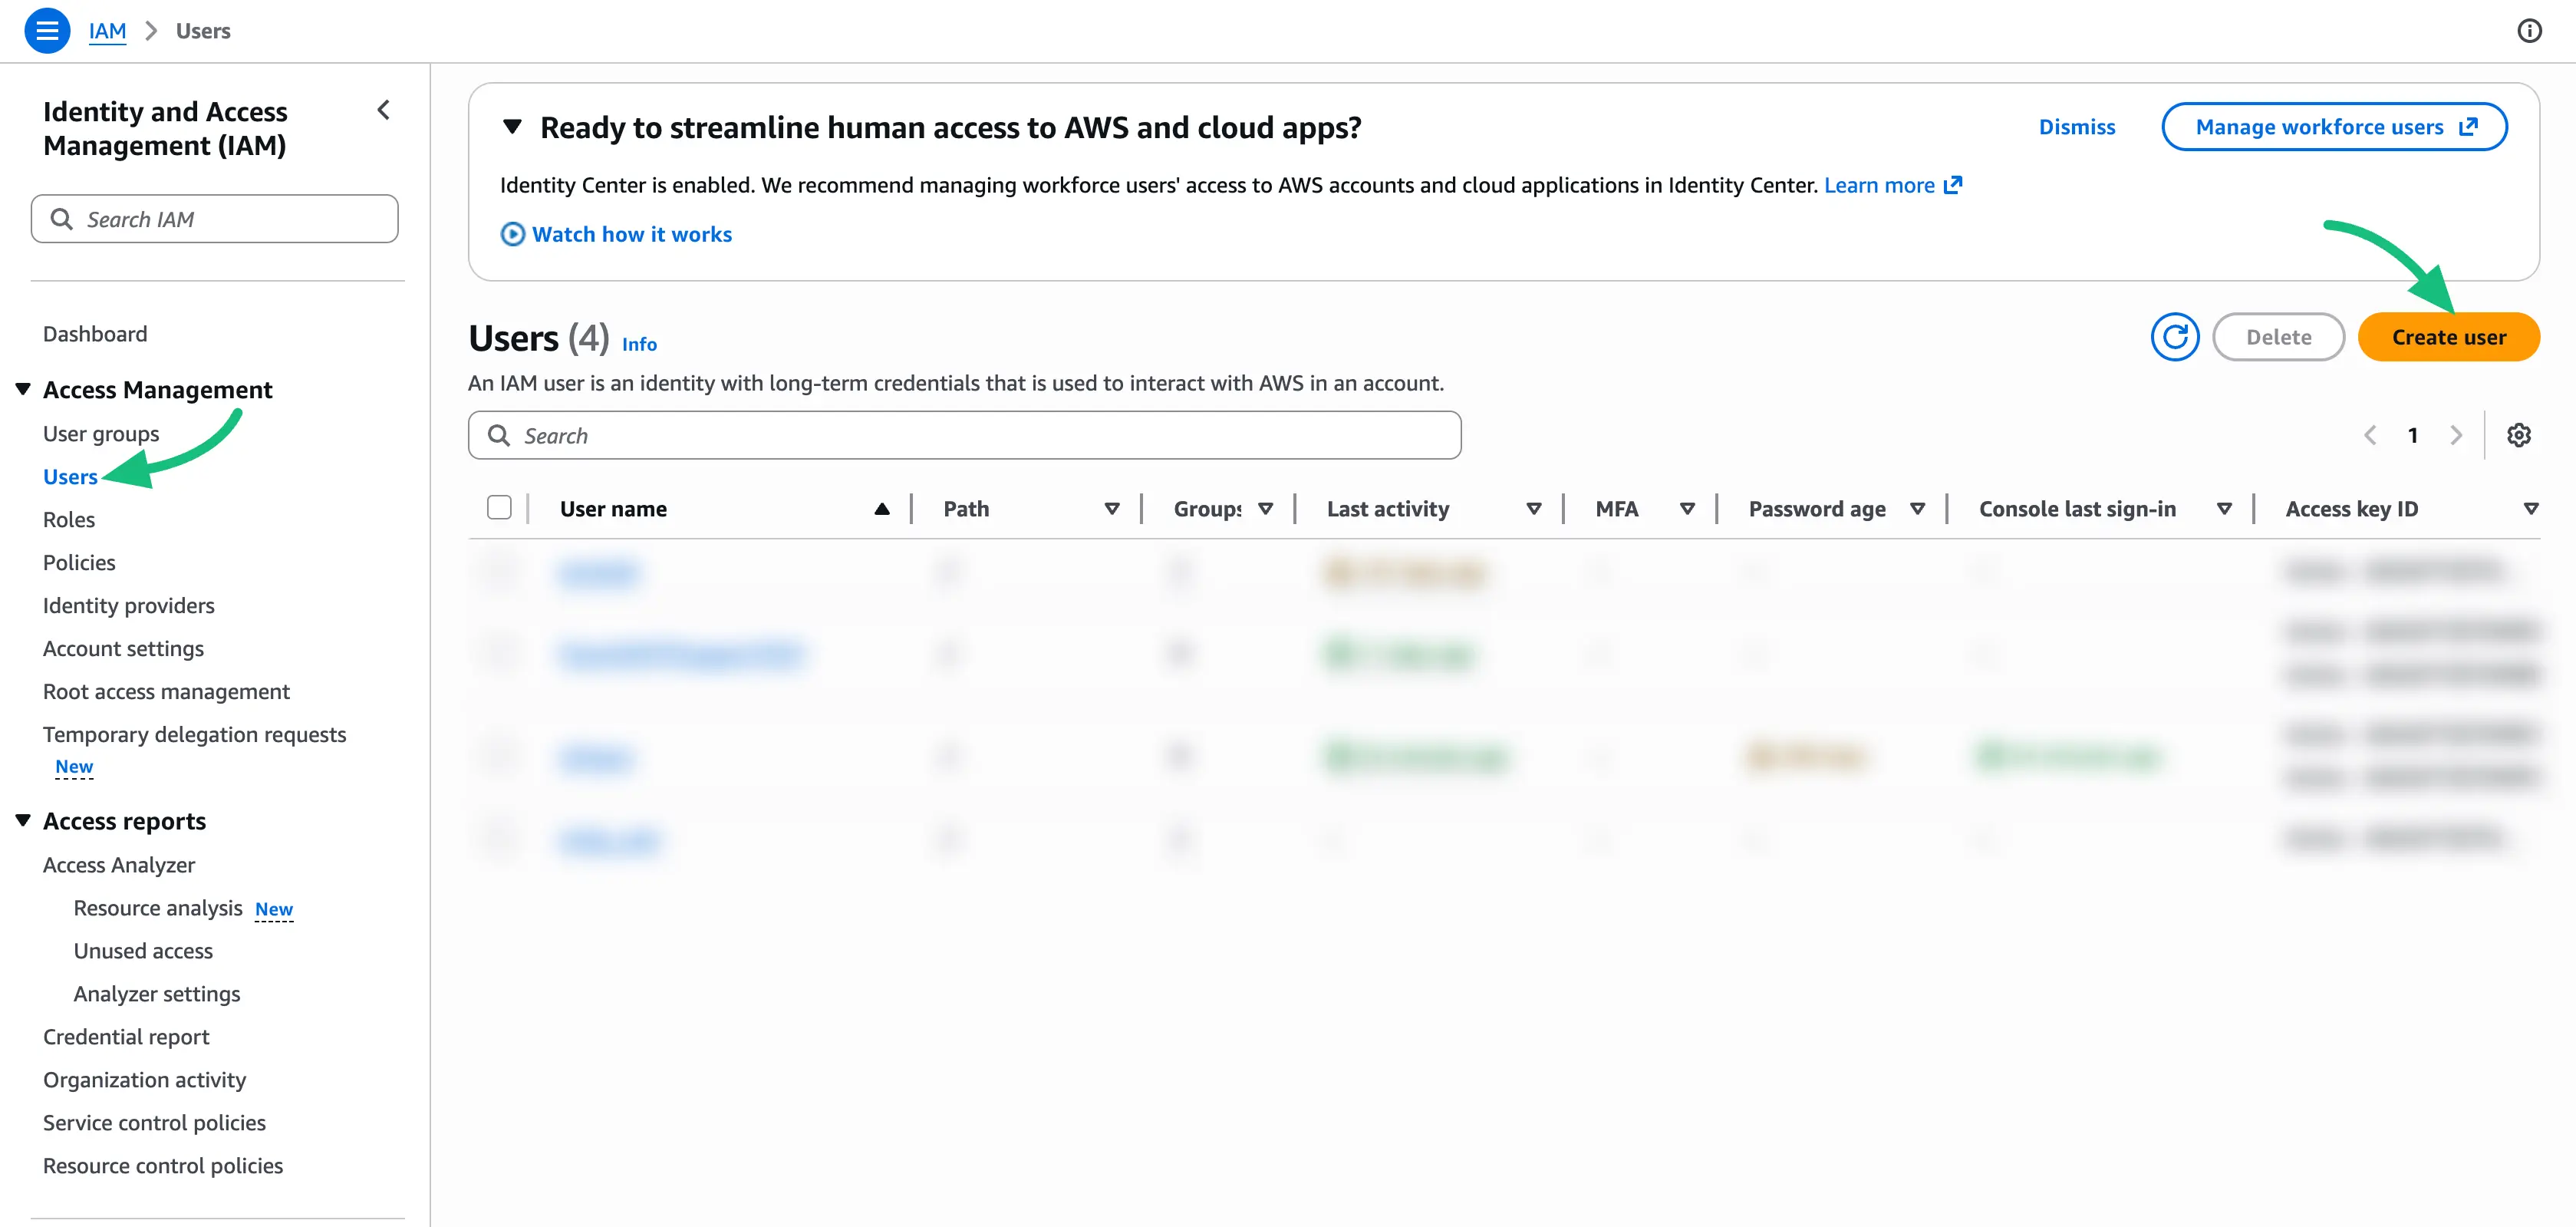
- Use the top search bar in AWS to find and open the IAM (Identity and Access Management) dashboard.
- Look at the left-hand sidebar. Under the Access Management section, click on Users.
- Click the orange Create user button located on the right side of the screen.
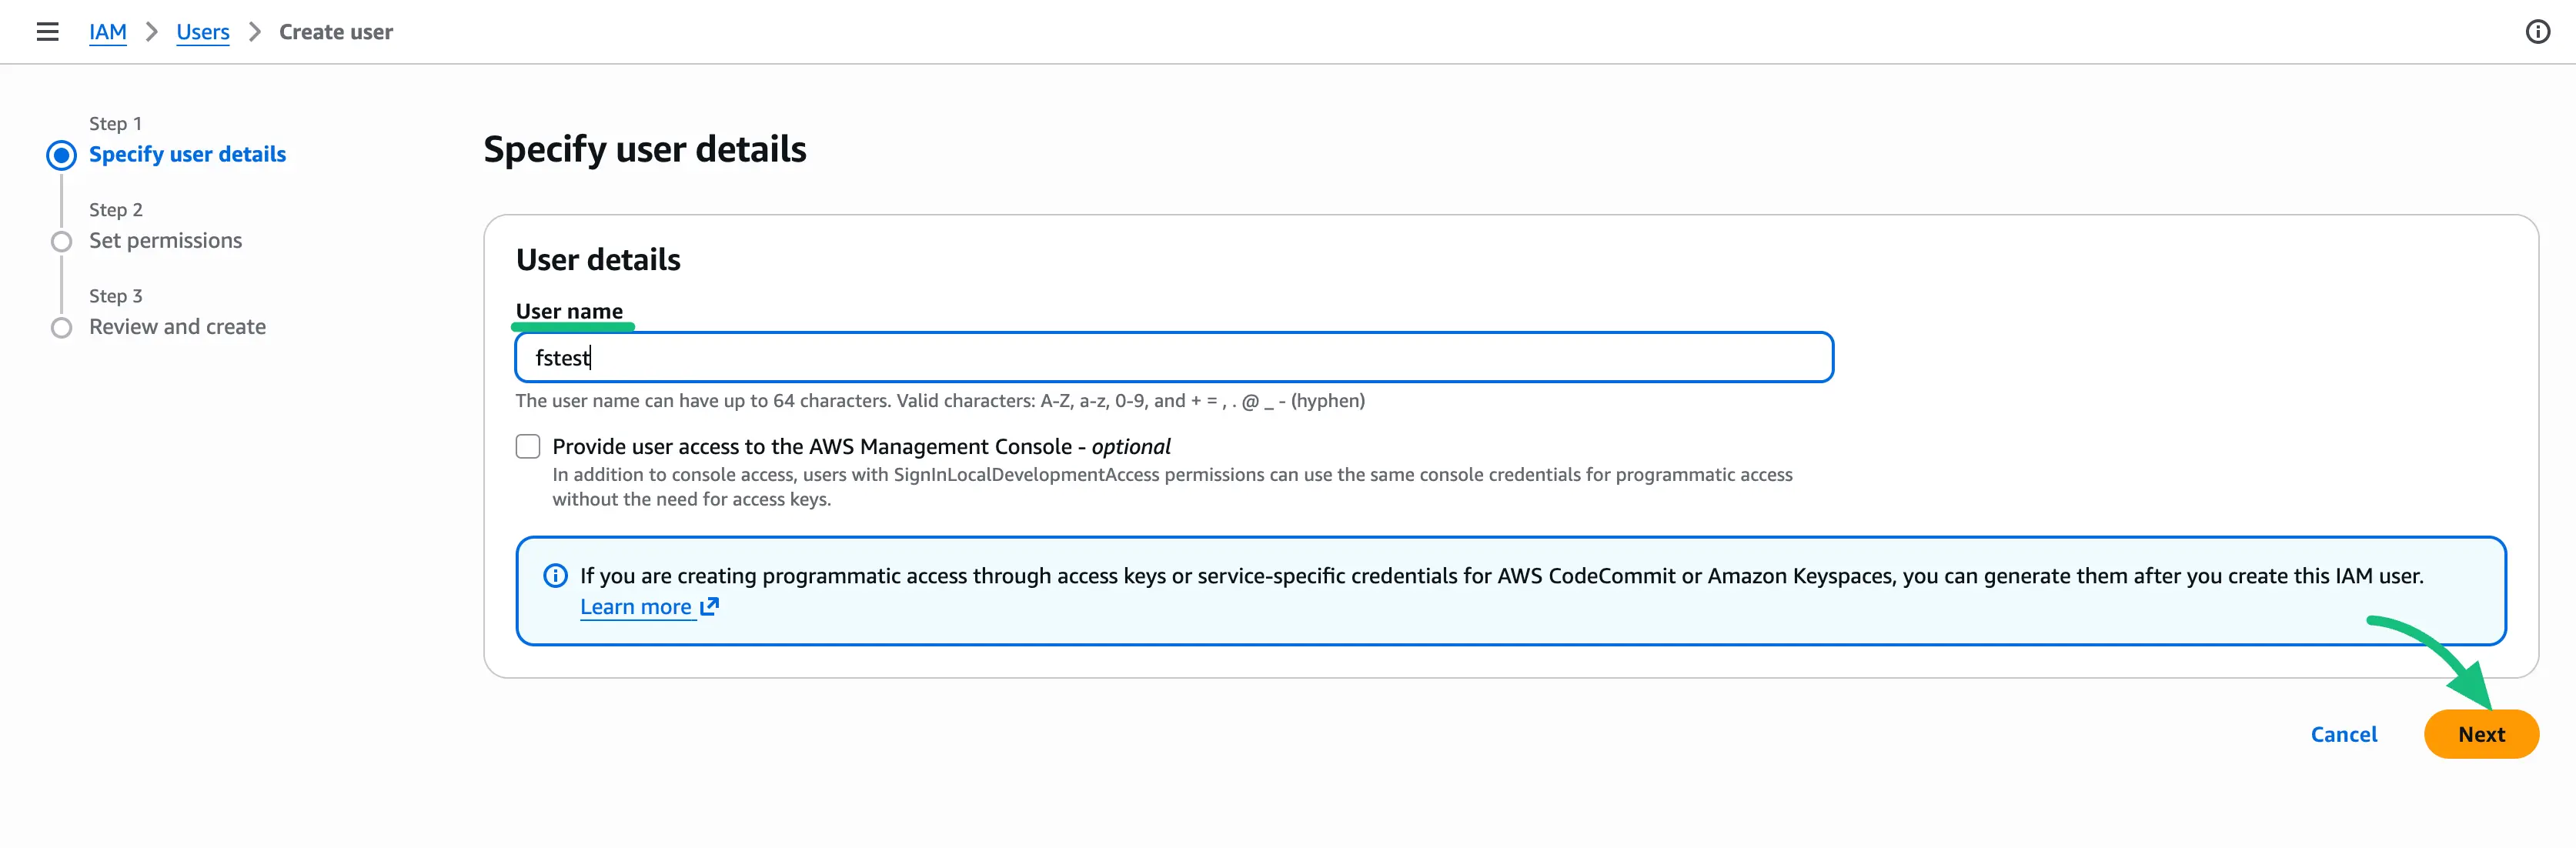
- Specify user details: Type in a clear User name (for example,
fstestorfluentsupport-user) so you know what this user is for, and then click Next.
- Set permissions: Click the box that says Attach policies directly.
- In the search bar right below that, type
amazons3fullaccessto find the right permission level. - Check the blue box next to the AmazonS3FullAccess policy, then click Next.

- Review your setup on the final screen and click the orange Create user button at the bottom.
Phase 3: Generating Your Secret Access Keys
Now that your user is created, we need to generate the digital "Access Keys" that FluentSupport will use to log in and upload files.
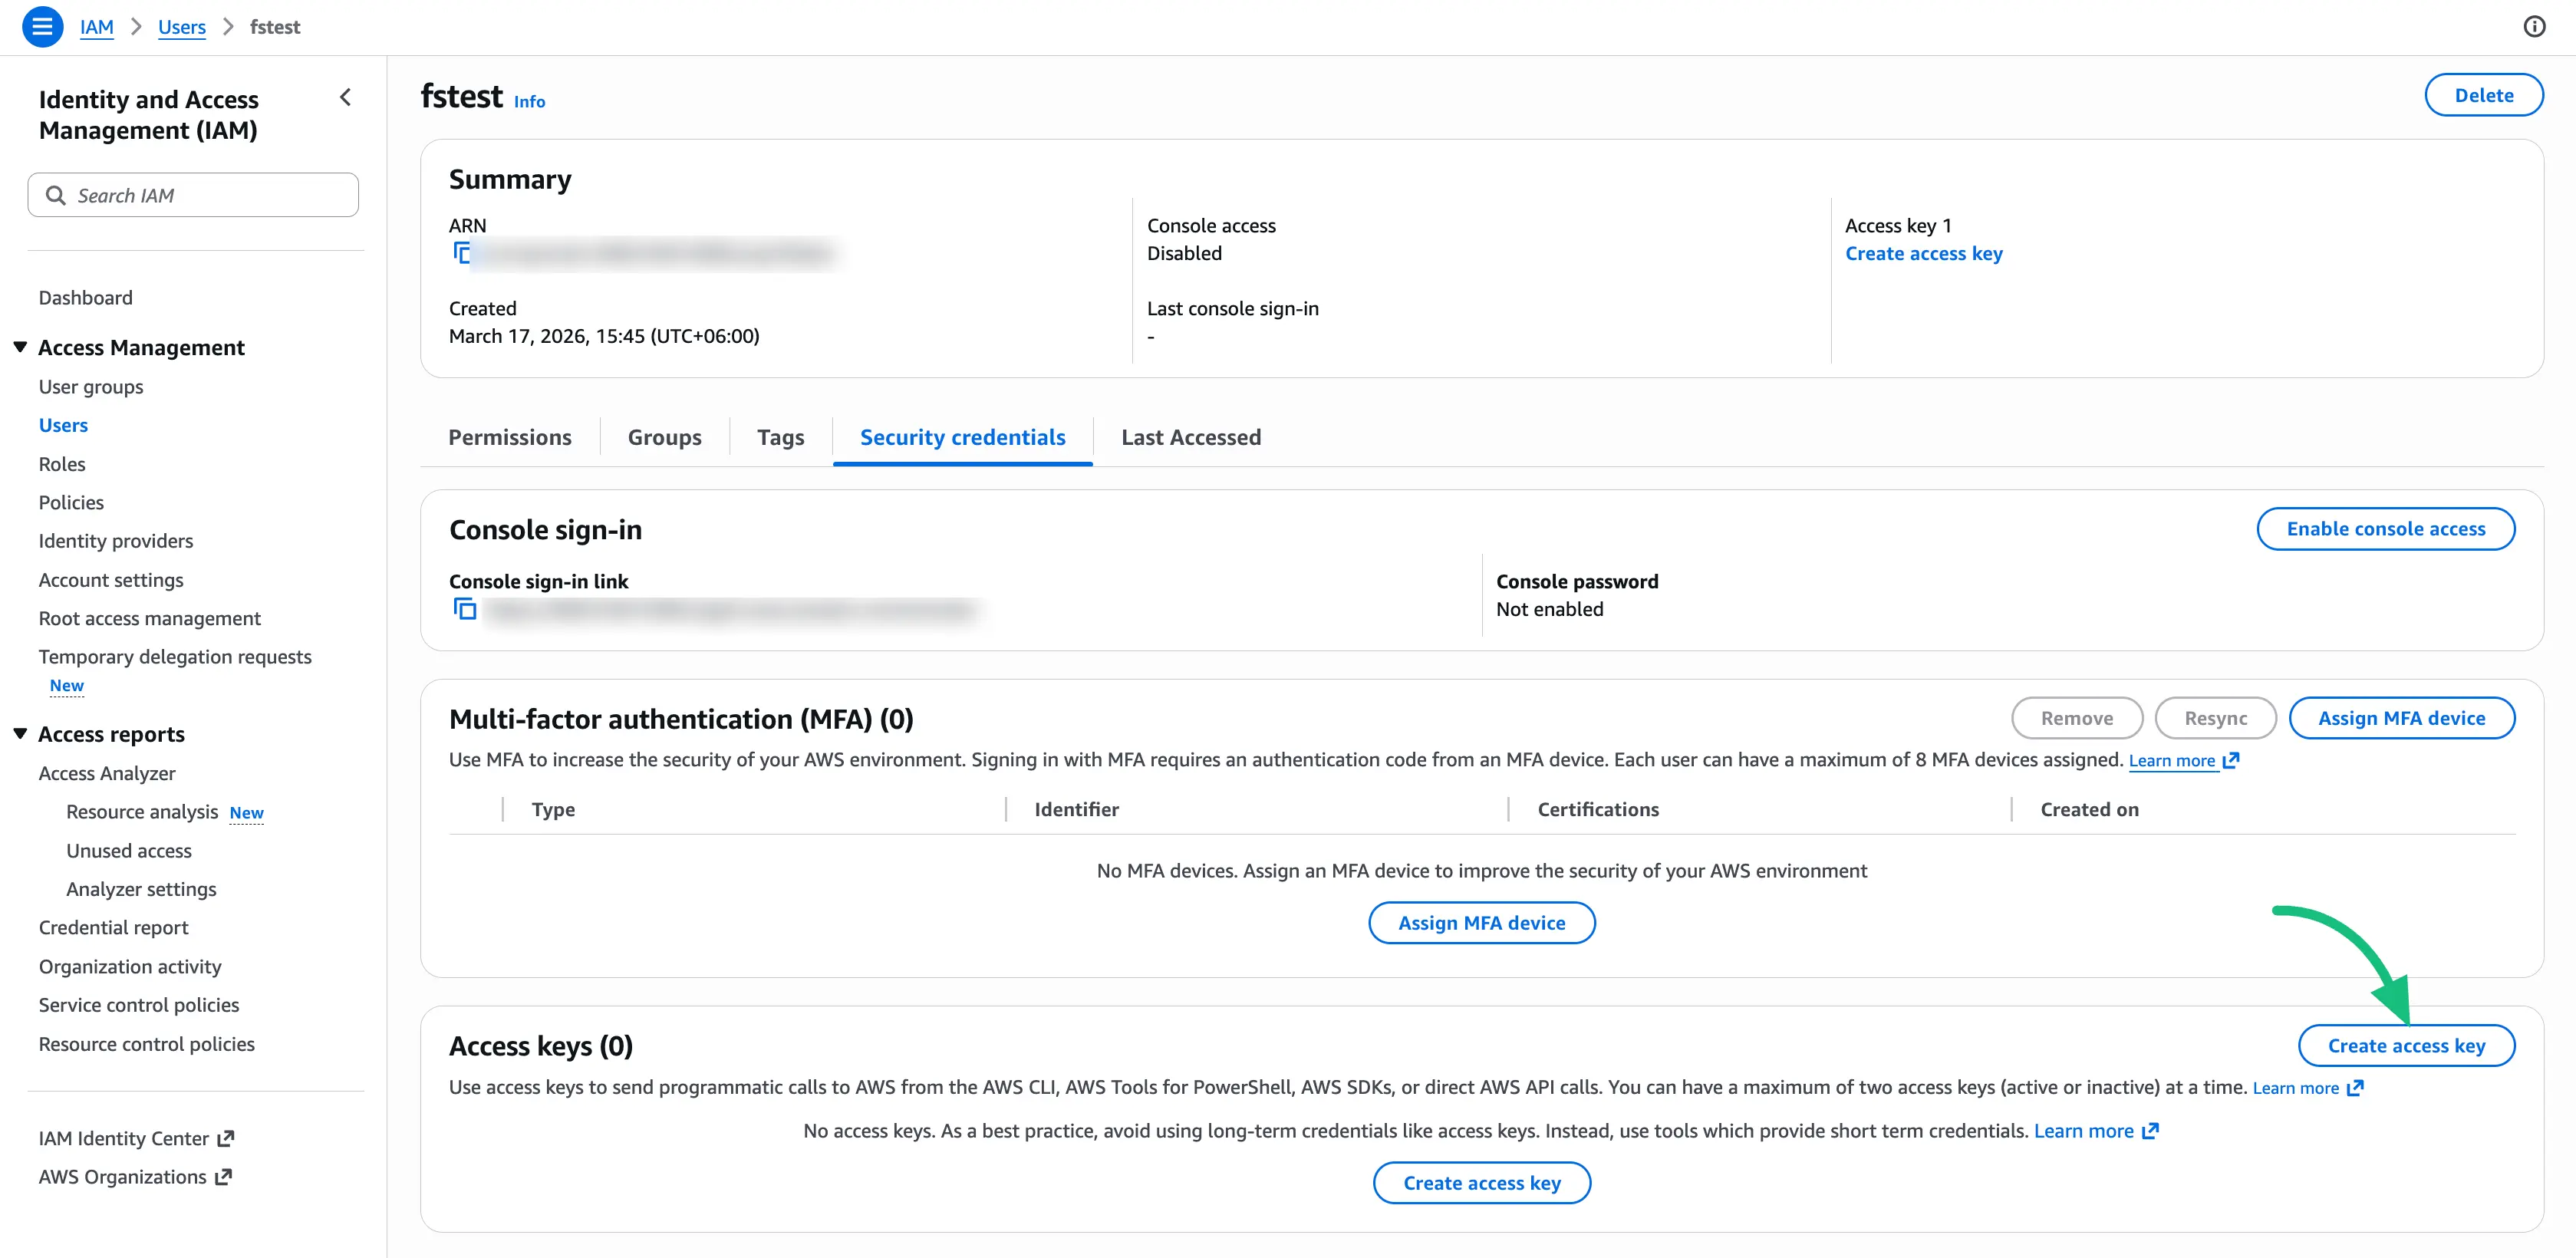
- You should now see a list of your users. Click on the name of the user you just created to open their profile.
- Click on the Security credentials tab near the middle of the screen.
- Scroll down to the section labeled Access keys and click the Create access key button on the right.
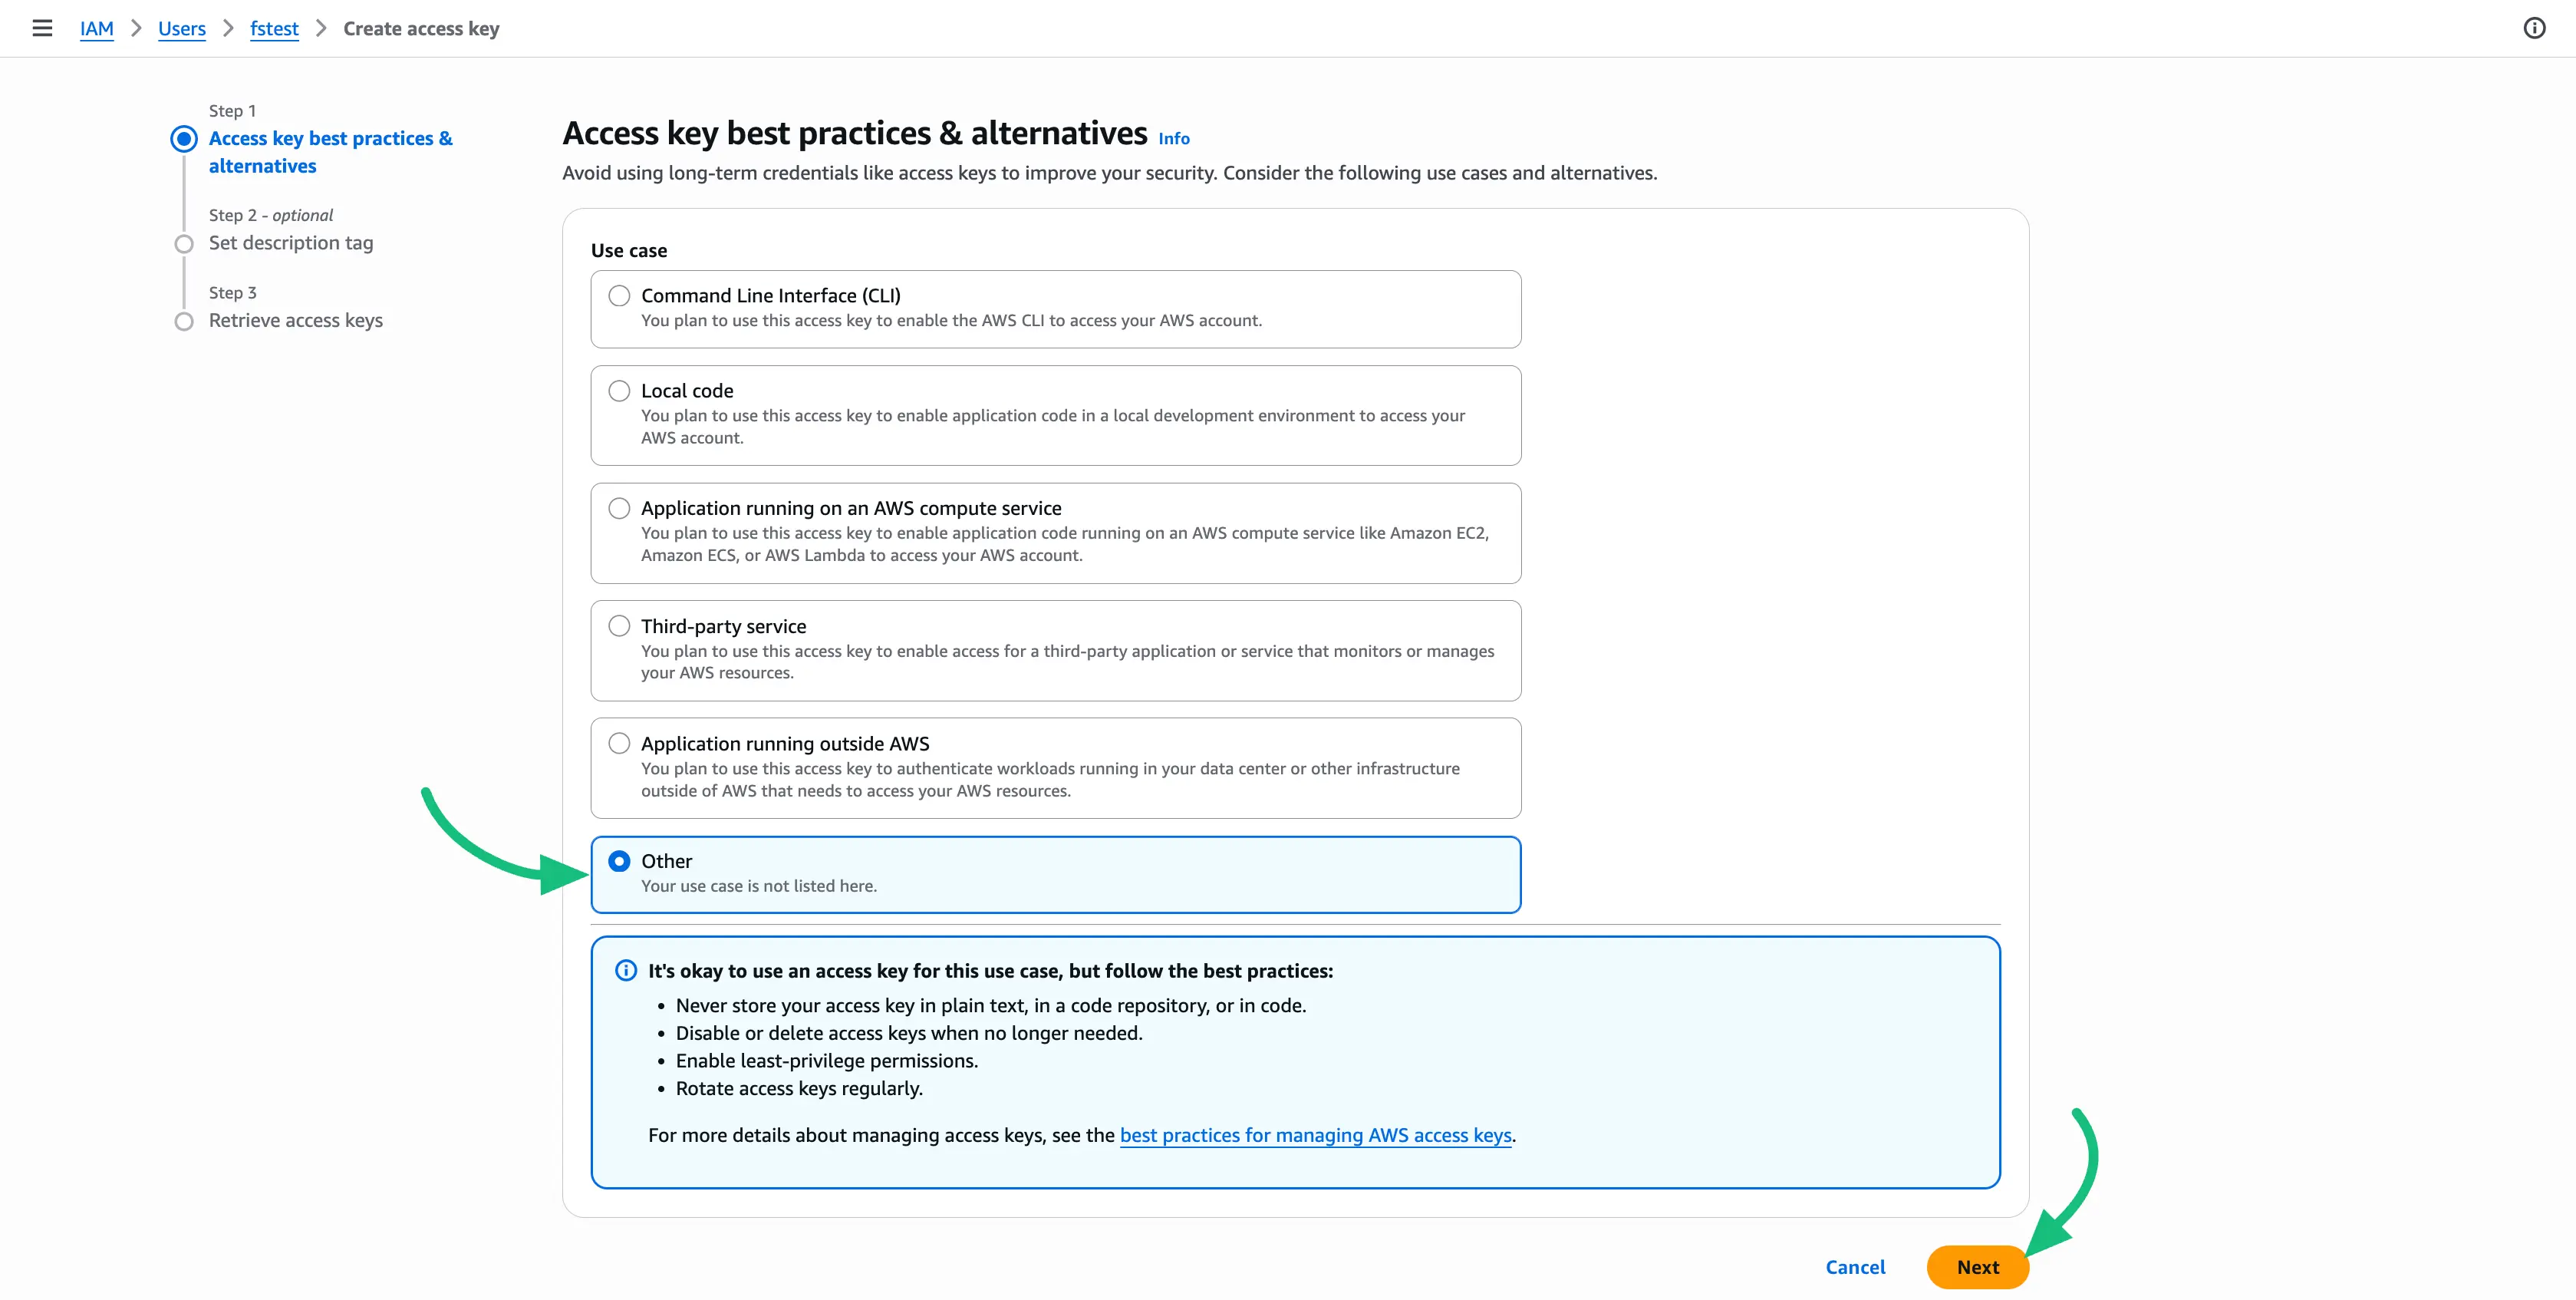
- AWS will ask what you plan to use this key for. Select the Other option from the list and click Next.
- Success! AWS will now generate your keys. You will see an Access key and a Secret access key.
⚠️ CRITICAL STEP: Copy both of these keys and paste them into a secure notepad immediately. AWS strictly warns that this is the only time the secret access key can be viewed or downloaded. If you lose it, you will have to create a new one!
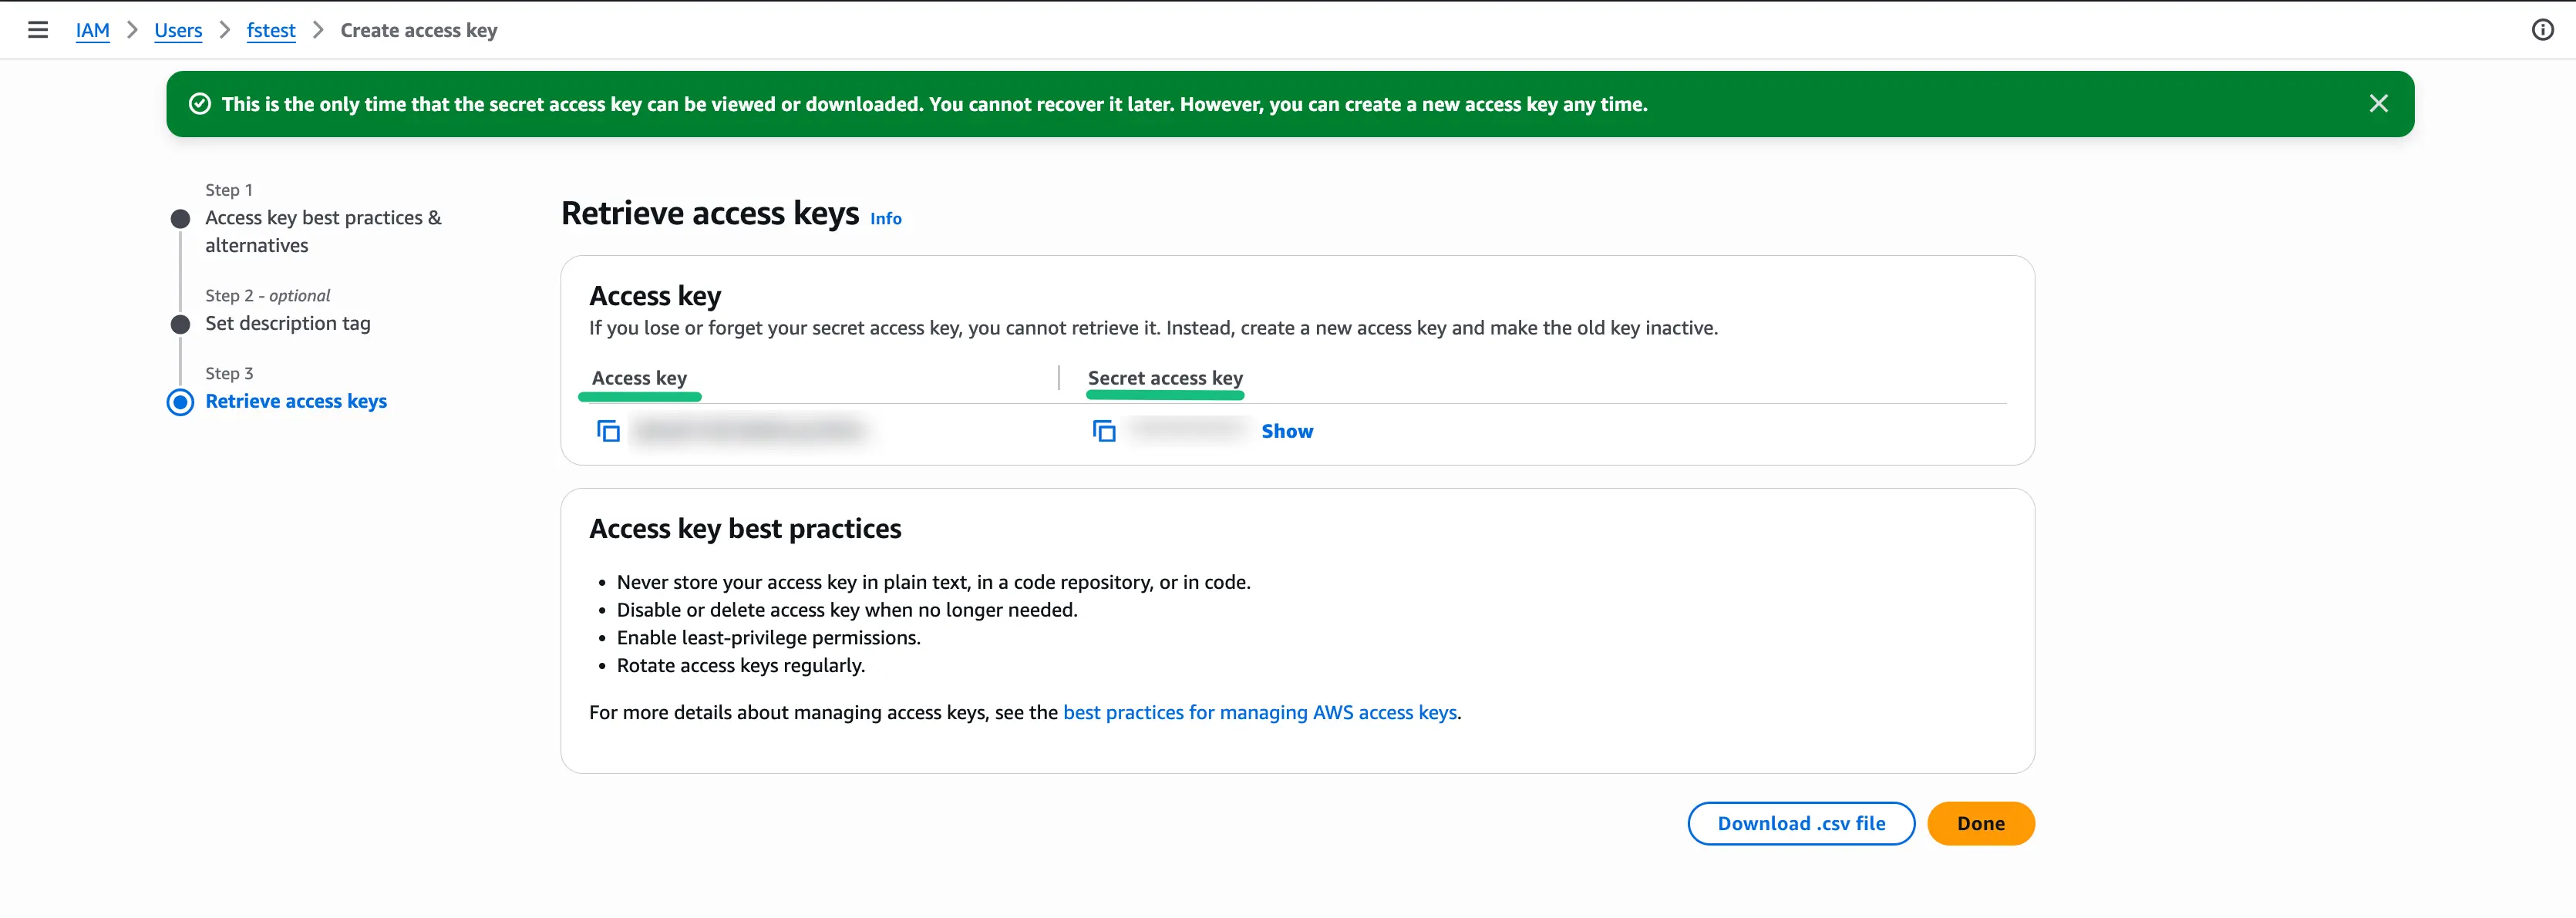
- Once you are absolutely sure you have copied both keys safely, click the orange Done button.
Phase 4: Connecting AWS to FluentSupport
You have done all the hard work! Now, you just need to paste those keys into your WordPress dashboard so FluentSupport can start using the bucket.
- Log in to your WordPress website's admin dashboard.
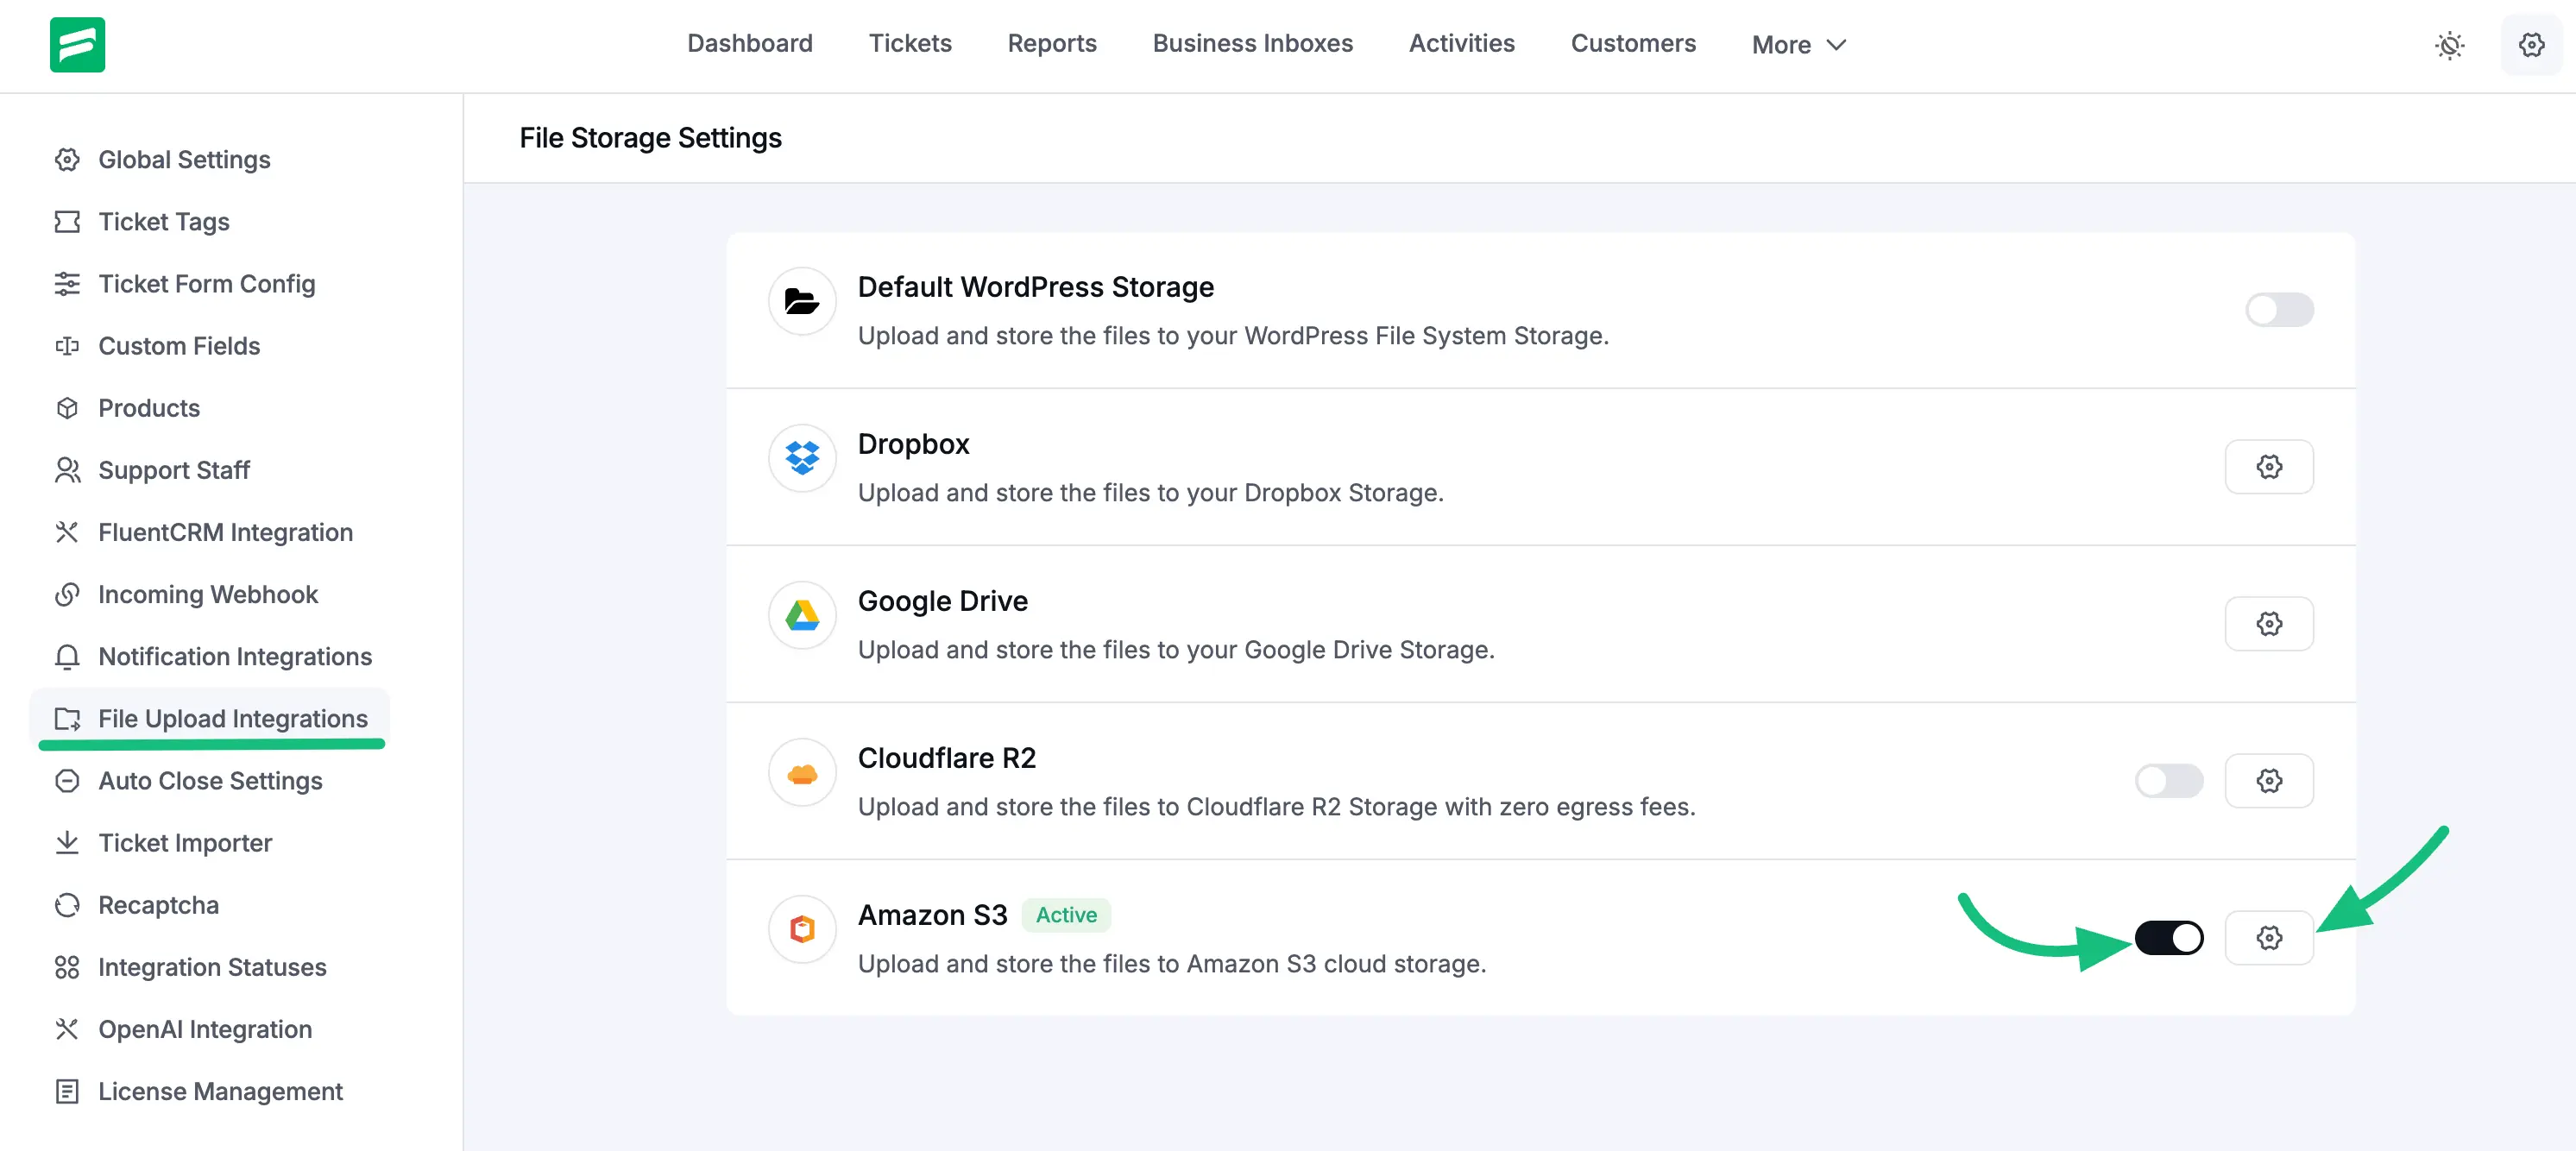
- Go to FluentSupport > Settings.
- In the left sidebar menu, click on File Upload Integrations.
- Find the Amazon S3 option in the list and click the Settings icon (the small gear).
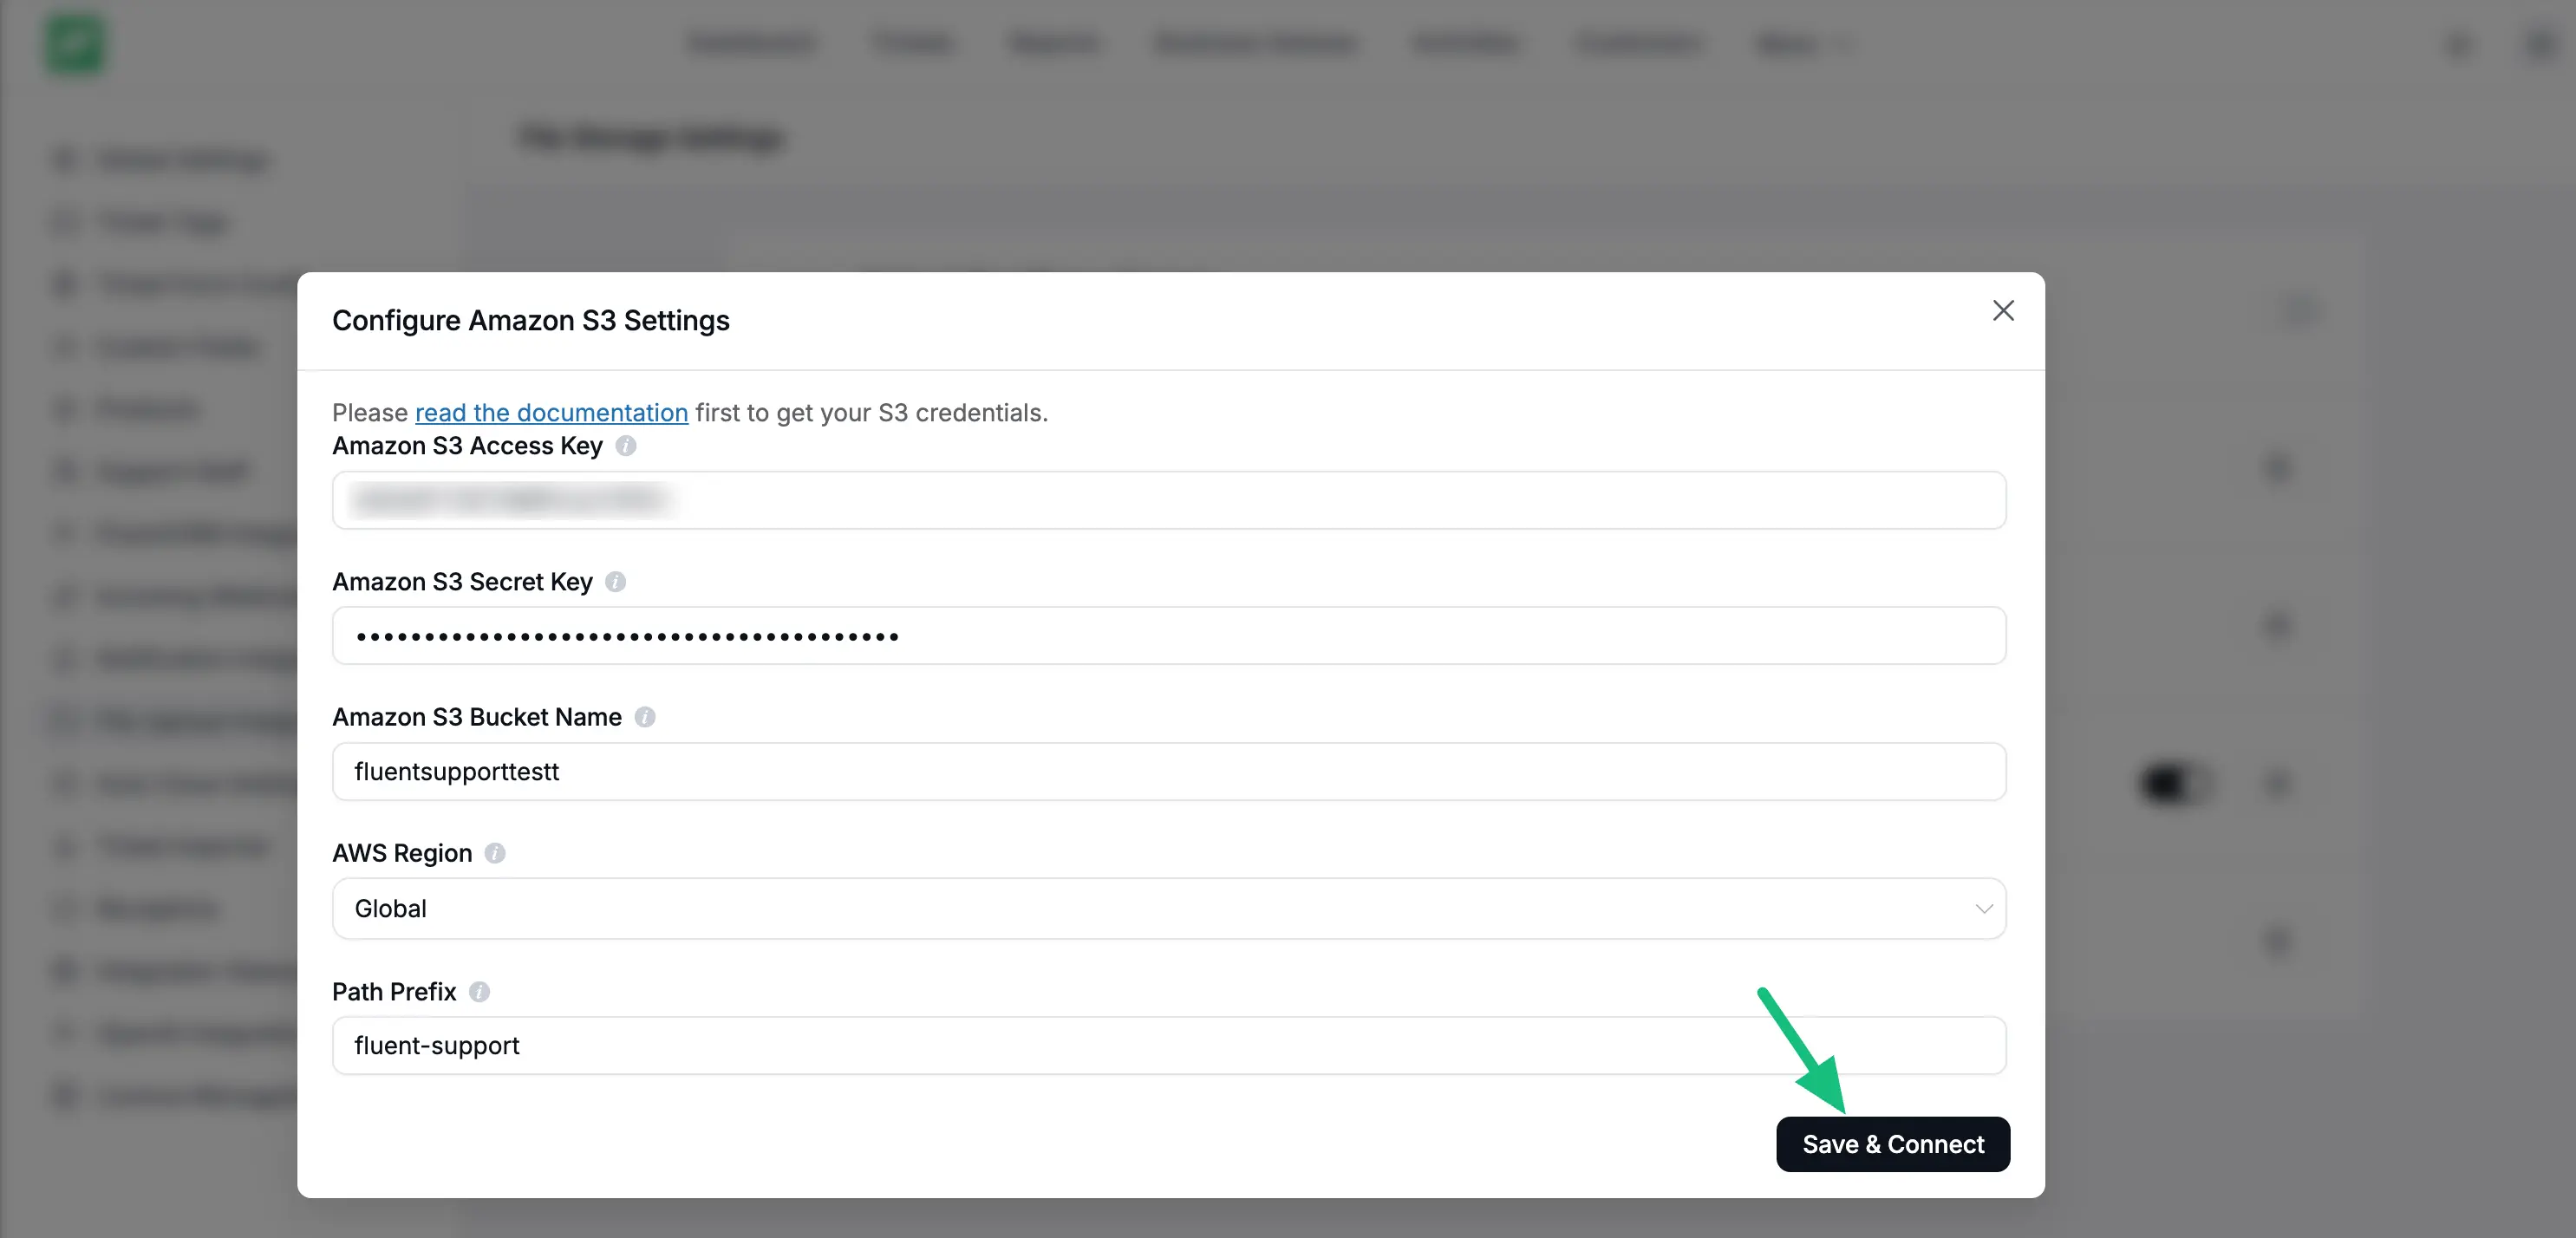
- A pop-up window will appear. Carefully paste in your details:
- Access Key ID: Paste the first key you got from Phase 3.
- Secret Access Key: Paste the secret key from Phase 3.
- Bucket Name: Type the exact name of the bucket you created in Phase 1.
- Region: Select the AWS Region you noted during Phase 1.
- Click Save Settings.
Your FluentSupport is now officially connected to Amazon S3. Any files attached to tickets will now bypass your server and go straight to your secure cloud storage.