Appearance
Internal Notifications
Internal Notifications help your support agents stay updated inside Fluent Support without depending only on email. When this feature is enabled, agents can see a Notification Bell, unread counts, ticket activity updates, mentions, and automation-related alerts — right from the Fluent Support dashboard.
This is especially useful when your team works from the ticket dashboard all day and needs quick updates about assigned tickets, customer replies, ticket status changes, and workflow activity. This article will guide you through how to enable and use Internal Notifications in Fluent Support.
When Should You Use Internal Notifications?
You can use Internal Notifications when you want your support team to:
- See important ticket updates directly inside Fluent Support.
- Quickly open tickets from the notification panel.
- Track unread updates with a notification badge on the bell icon.
- Separate notifications by mentions, ticket activity, and automation events.
- Reduce dependency on email inboxes for internal team updates.
Enable Internal Notifications
To turn on Internal Notifications, go to Settings from your Fluent Support Dashboard and click on Global Settings from the left sidebar.
Scroll down and check the Enable Internal Notifications option, then click Save Settings at the top right corner.
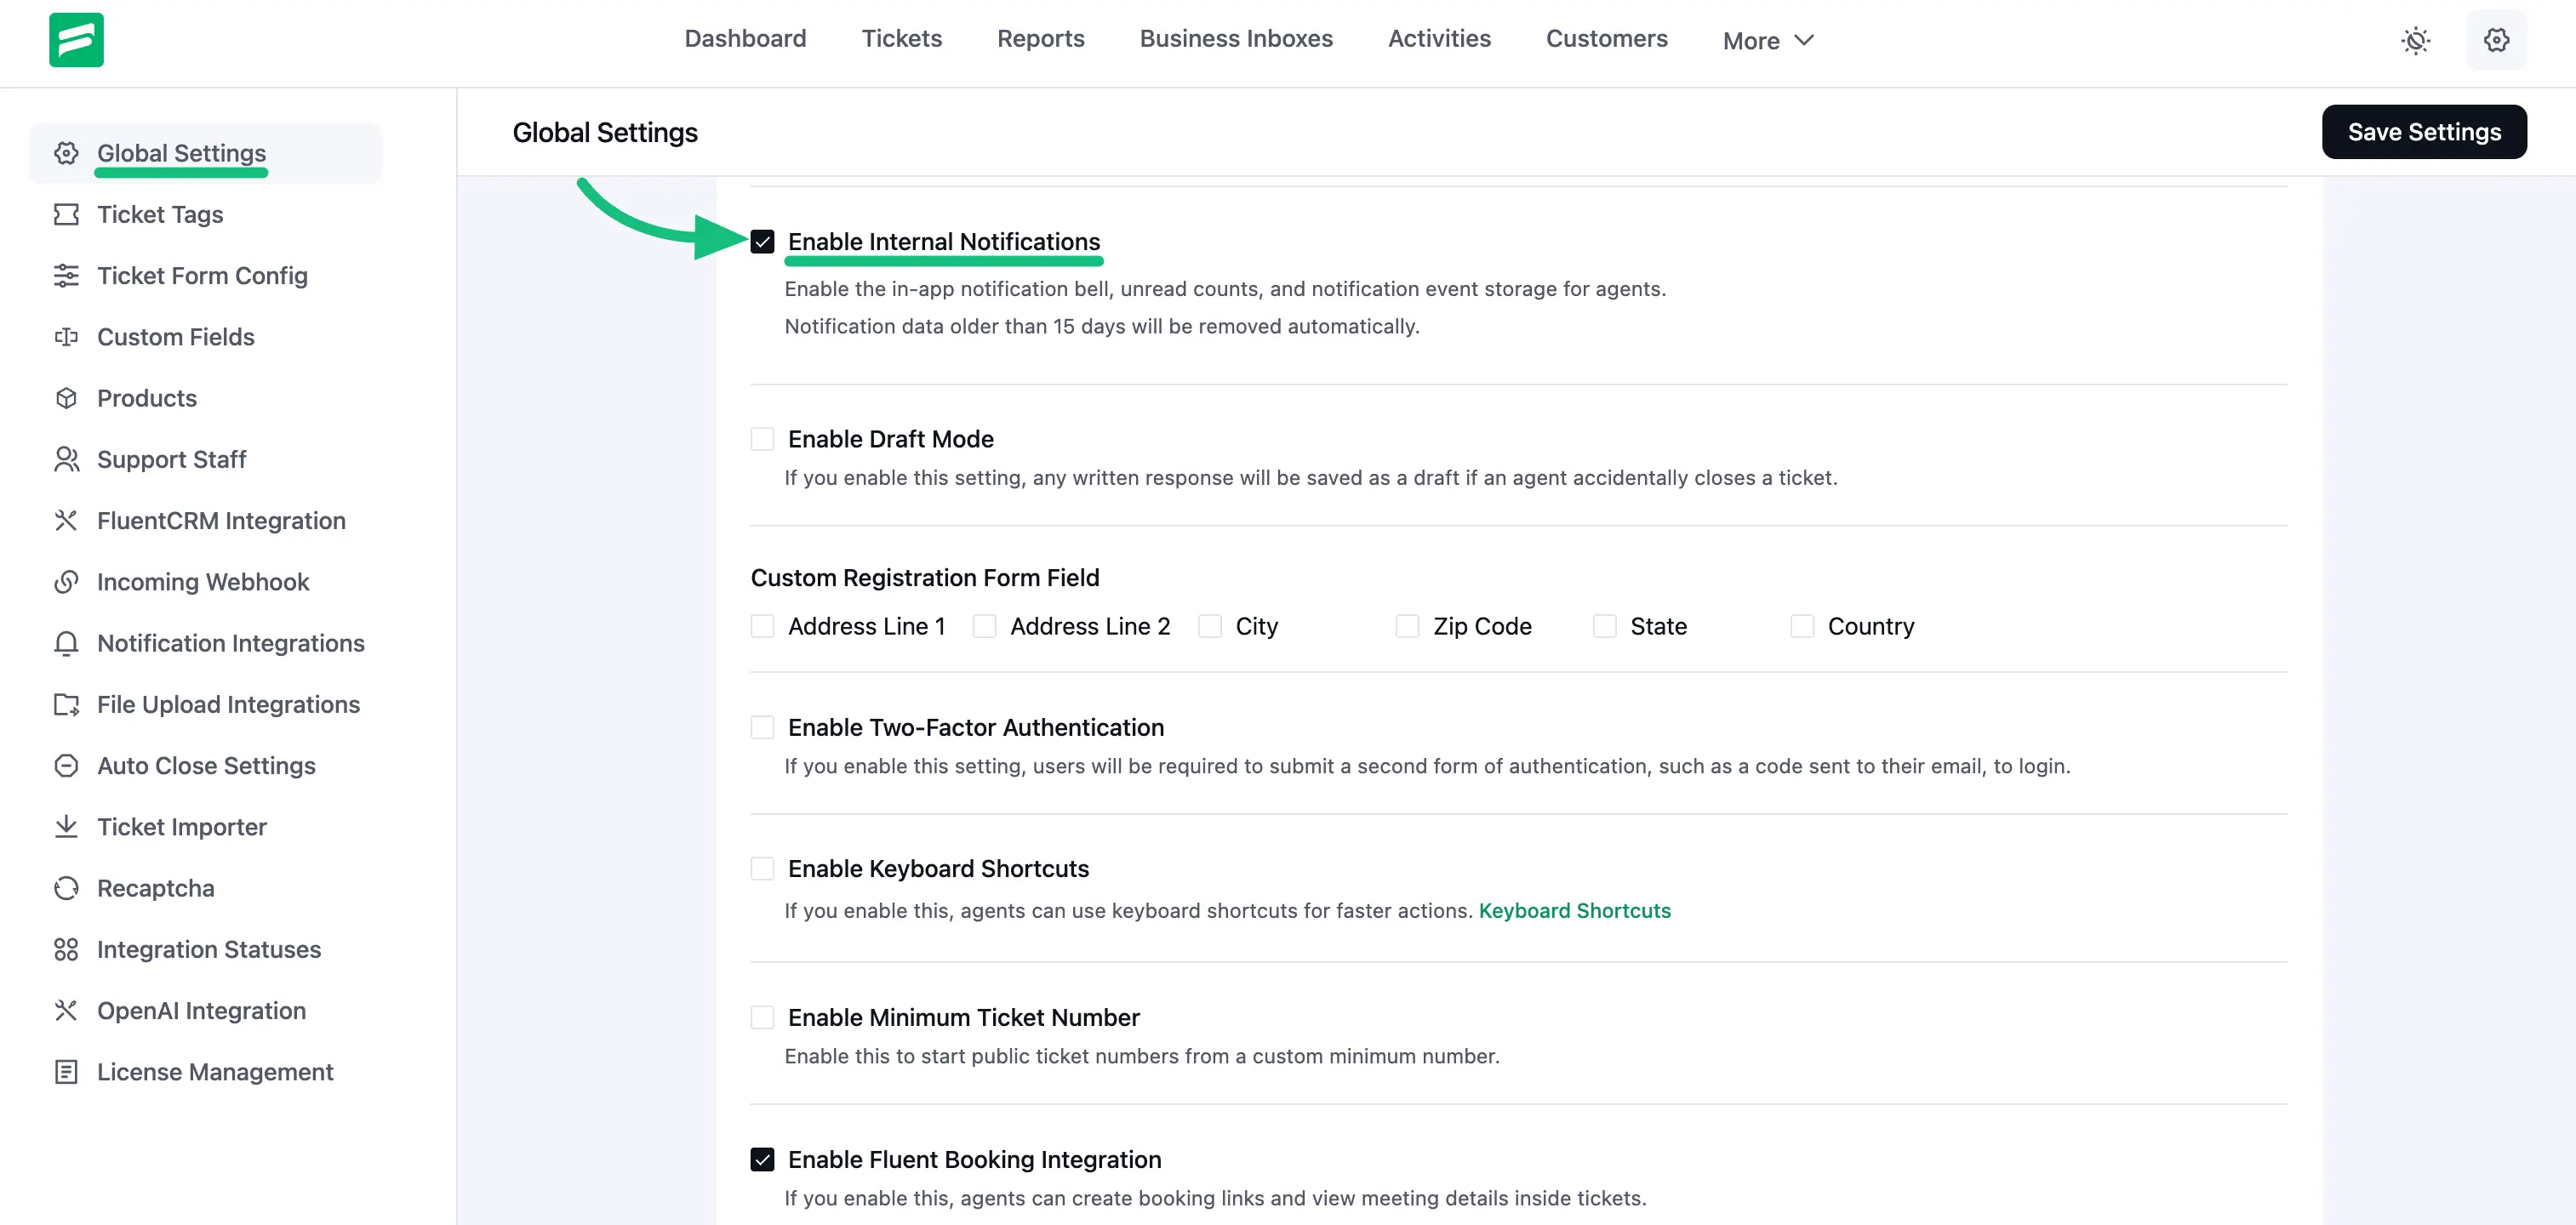
Once enabled, the Notification Bell will appear in the Fluent Support dashboard for every agent.
INFO
Notification data older than 15 days will be removed automatically to keep the notification list clean and fast.
Use the Notification Bell
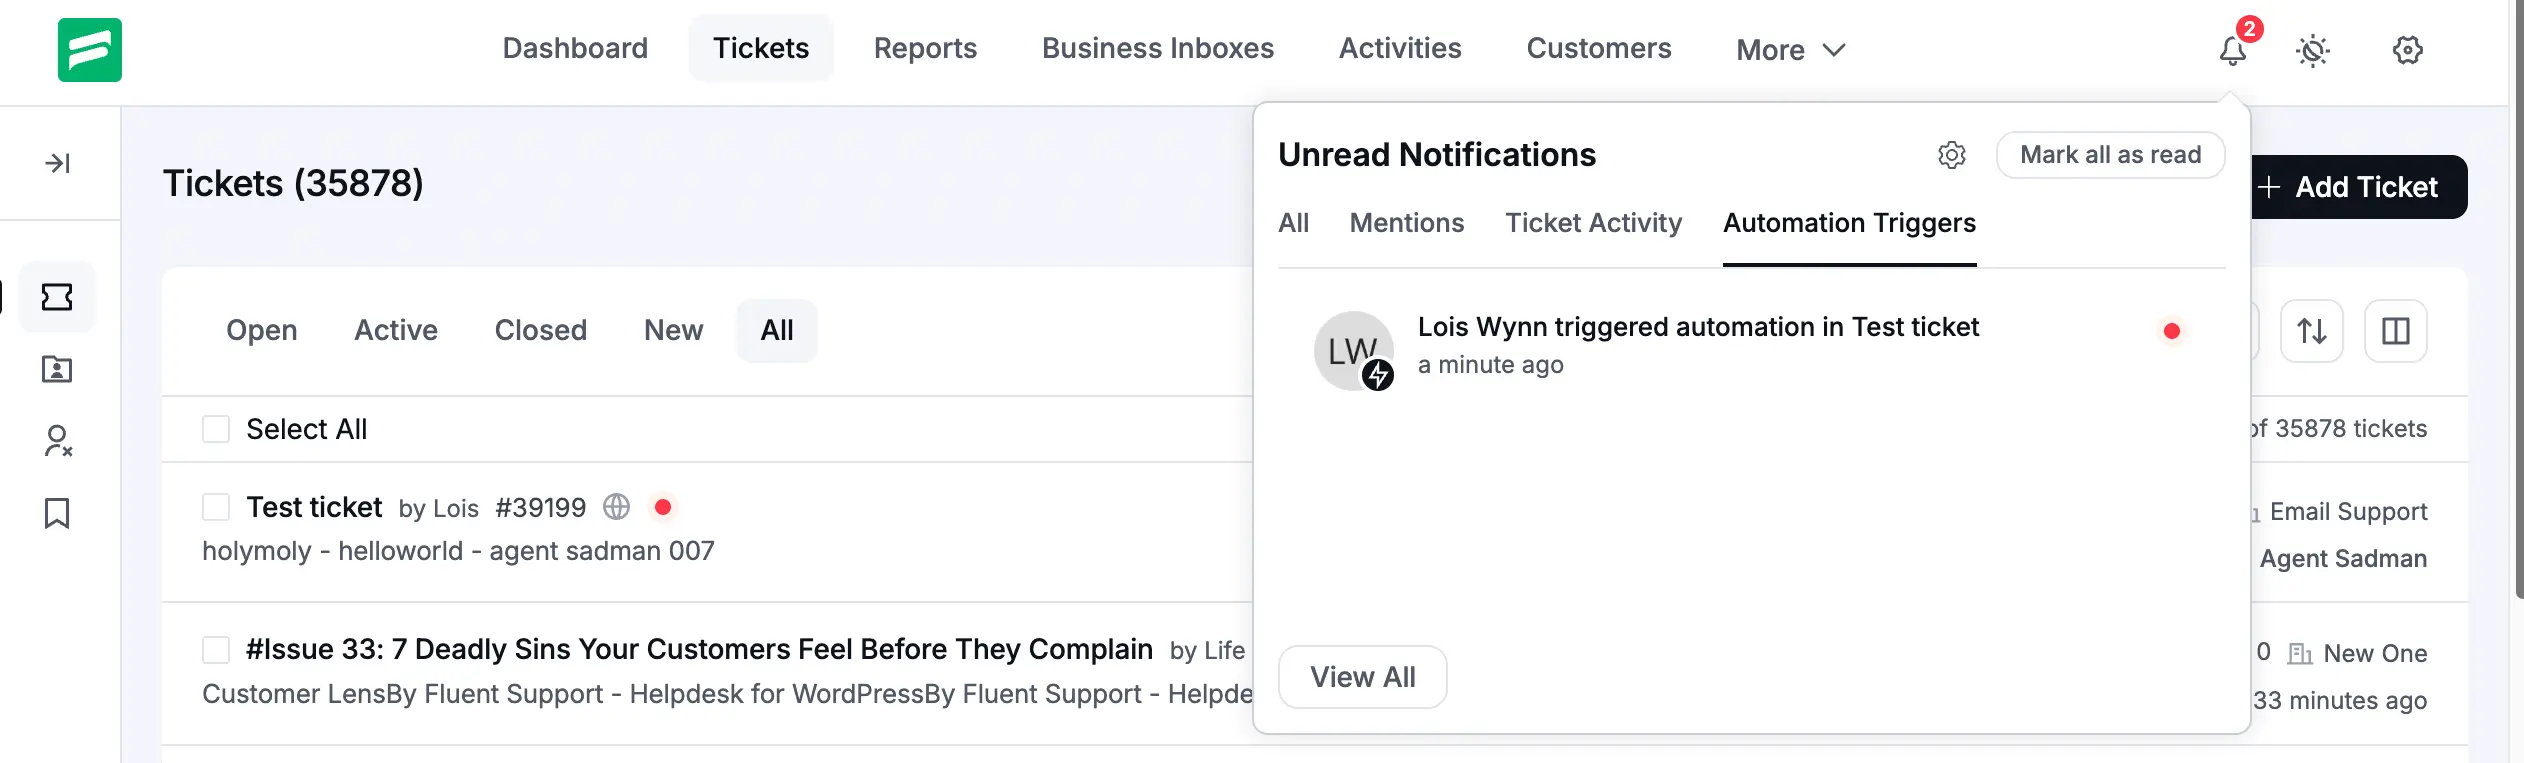
After Internal Notifications are enabled, agents will see a Notification Bell at the top right corner of the Fluent Support dashboard. If there are unread notifications, the bell will display an unread count badge.
Click the bell icon to open the Unread Notifications panel. From here, you can:
- View recent unread notifications.
- Filter notifications by category — All, Mentions, Ticket Activity, and Automation Triggers.
- Click any notification to open the related ticket.
- Click Mark all as read to clear all unread notifications at once.
- Click the Settings (gear) icon to open Notification Settings, if you have permission to manage them.
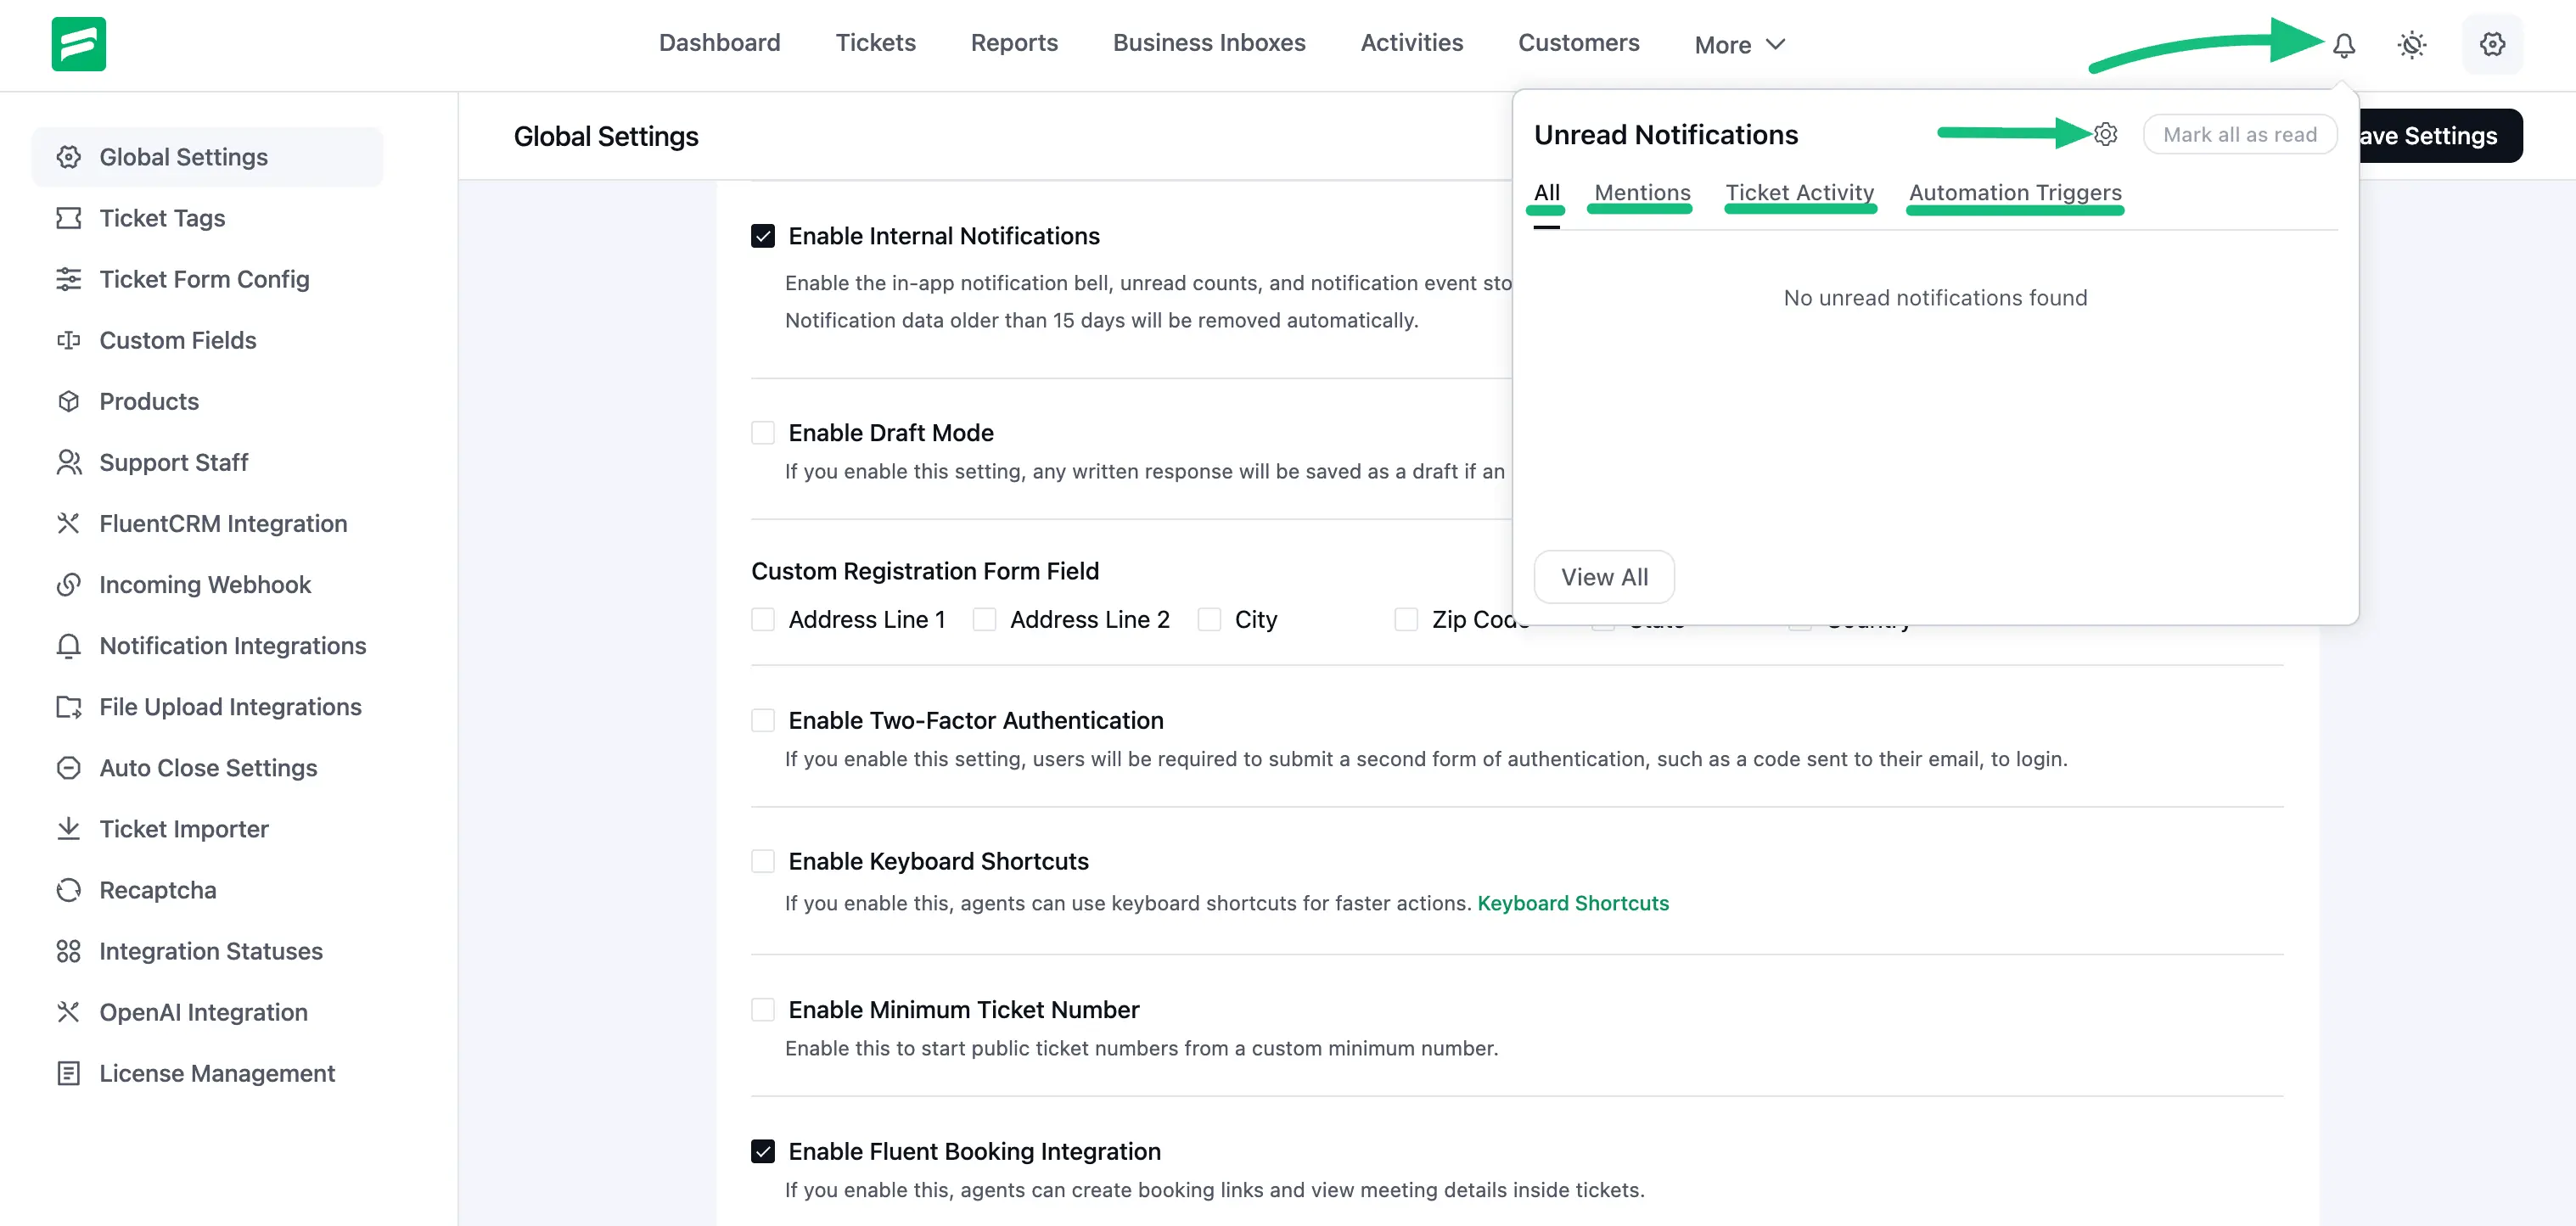
Notification Categories
Internal Notifications are grouped into categories so agents can focus on the updates that matter most to them. You can switch between these tabs at the top of the Unread Notifications panel.
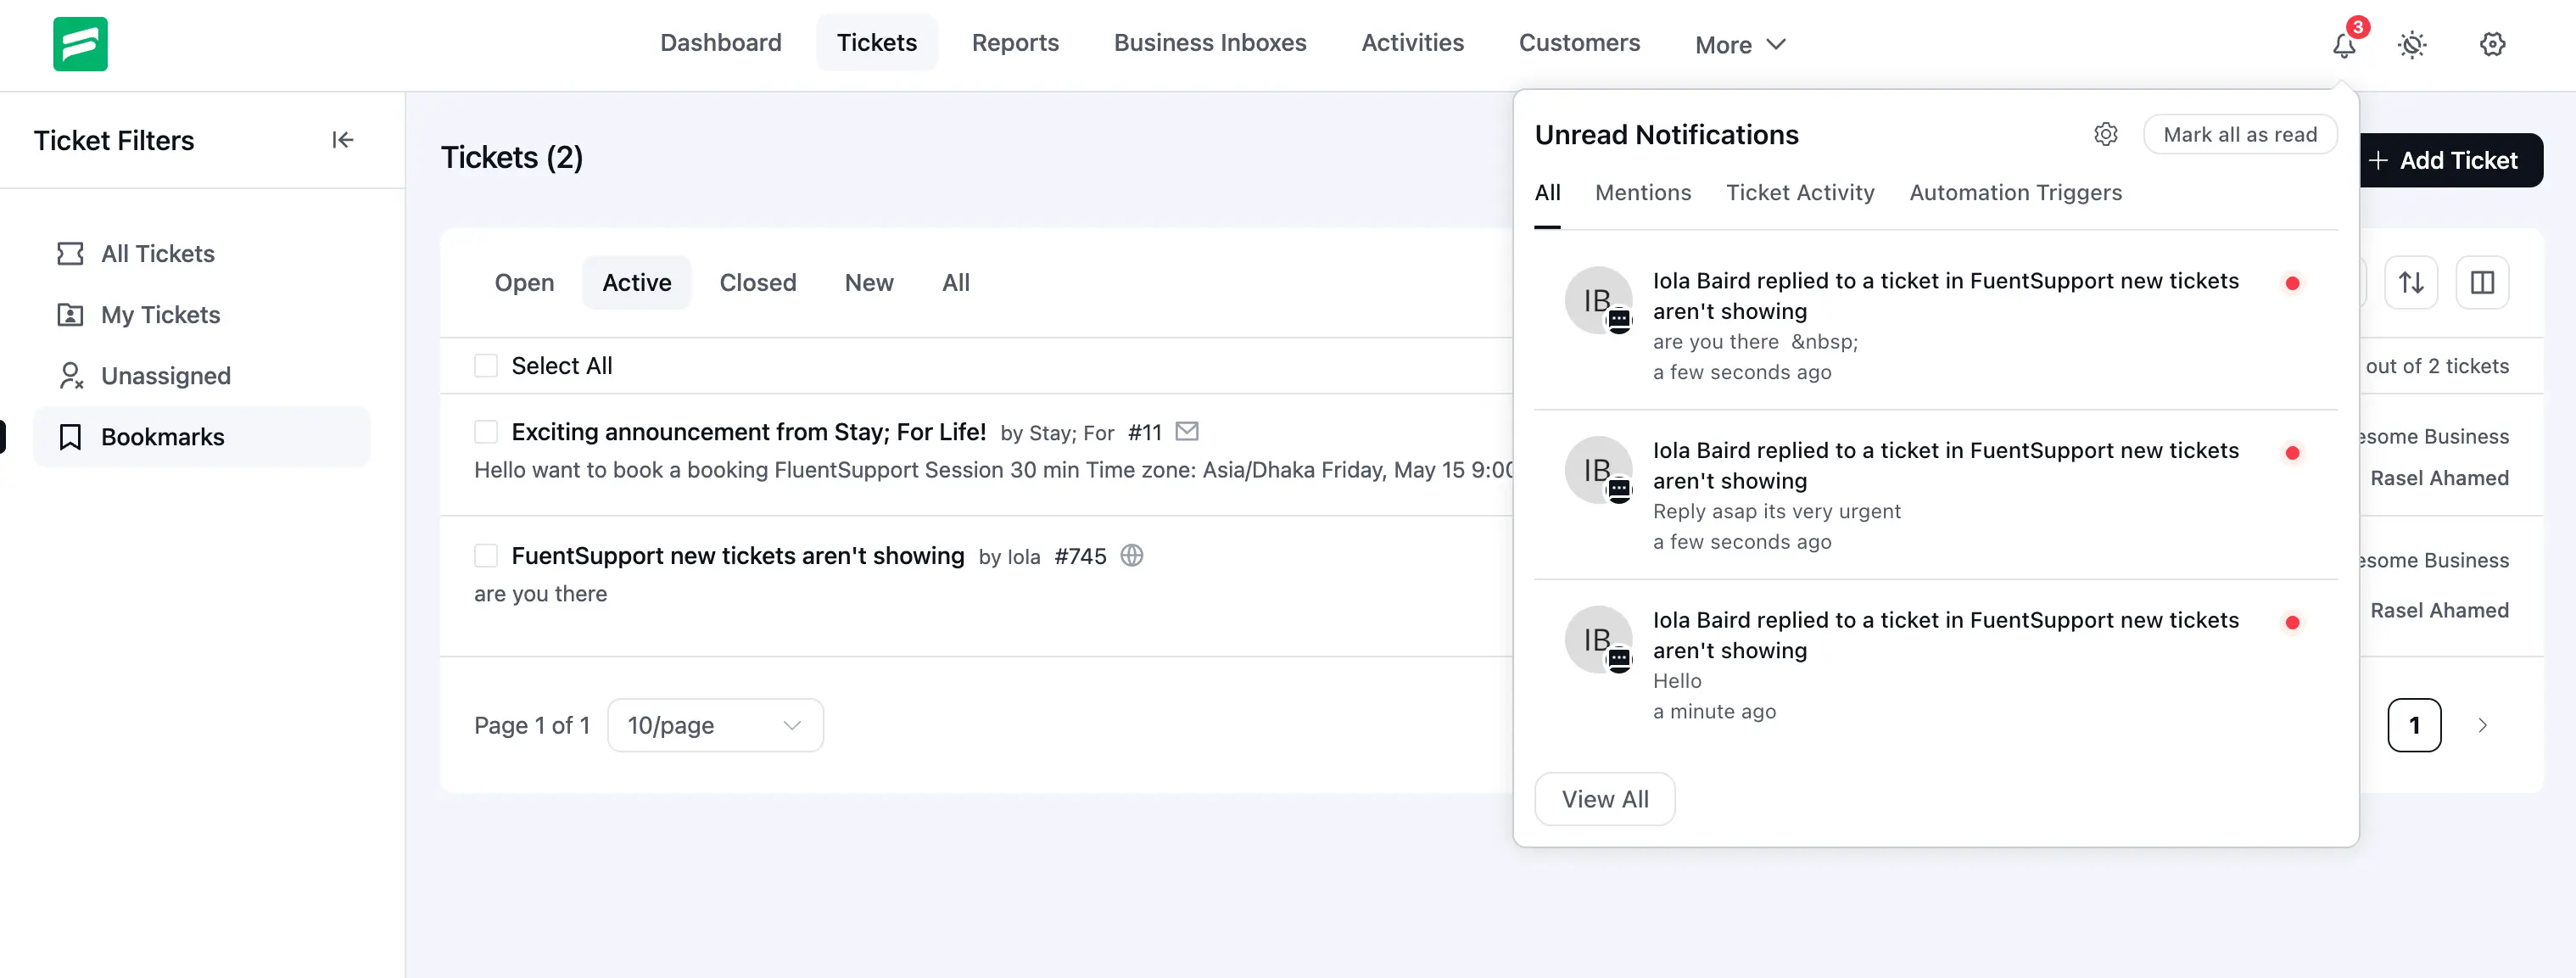
All
The All tab shows every available notification — including customer replies, mentions, ticket activity, and automation triggers — in one place.
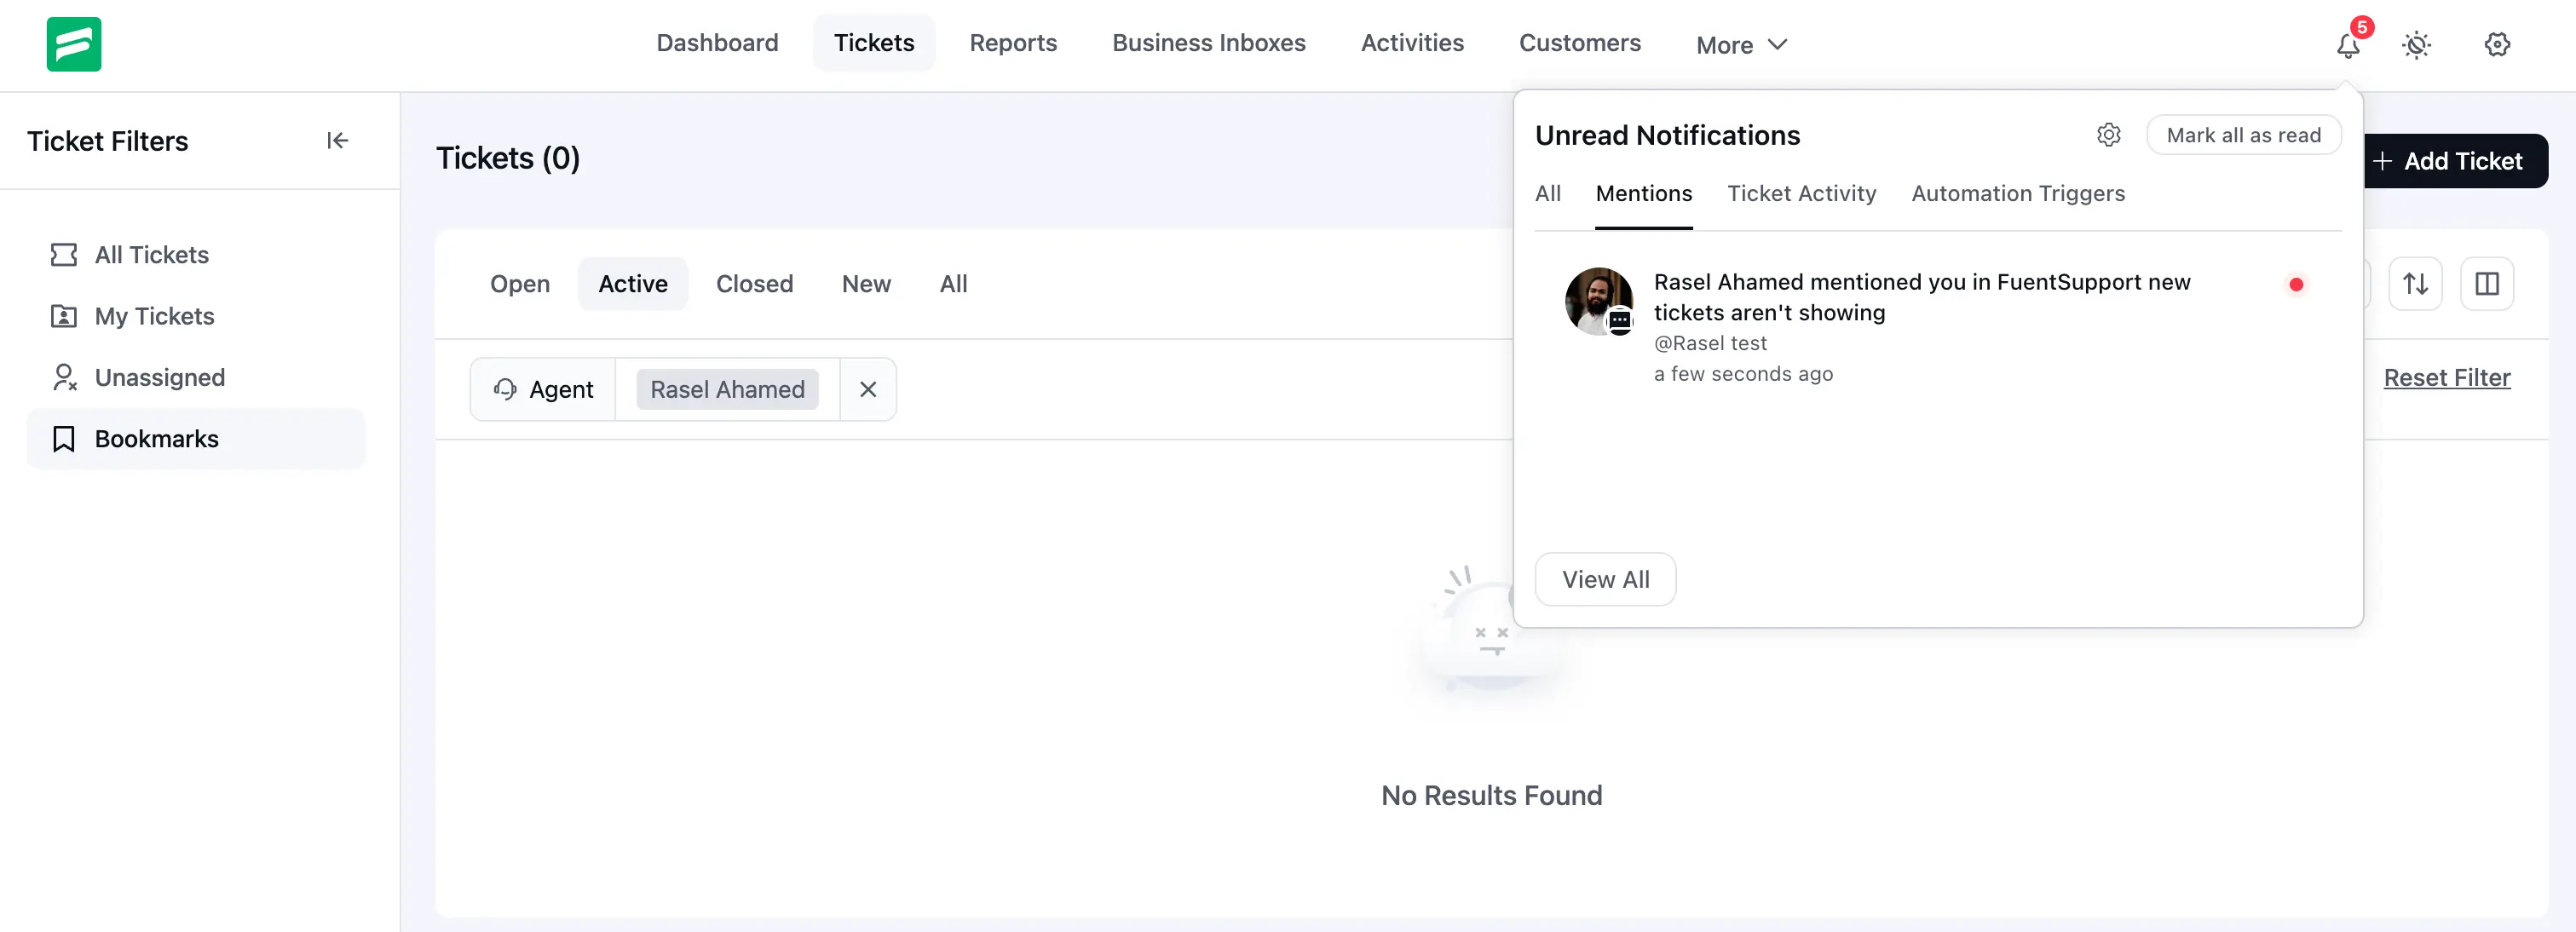
Mentions
The Mentions tab shows notifications whenever an agent is mentioned in a ticket reply or internal note. Mention notifications are always enabled, so agents will never miss when a teammate tags them in a conversation.
Ticket Activity
The Ticket Activity tab shows updates such as ticket assignments, customer replies, ticket closing, and reopening events.
Automation Triggers
The Automation Triggers tab shows notifications related to workflow activity — for example, when an automation runs on a ticket assigned to the agent.
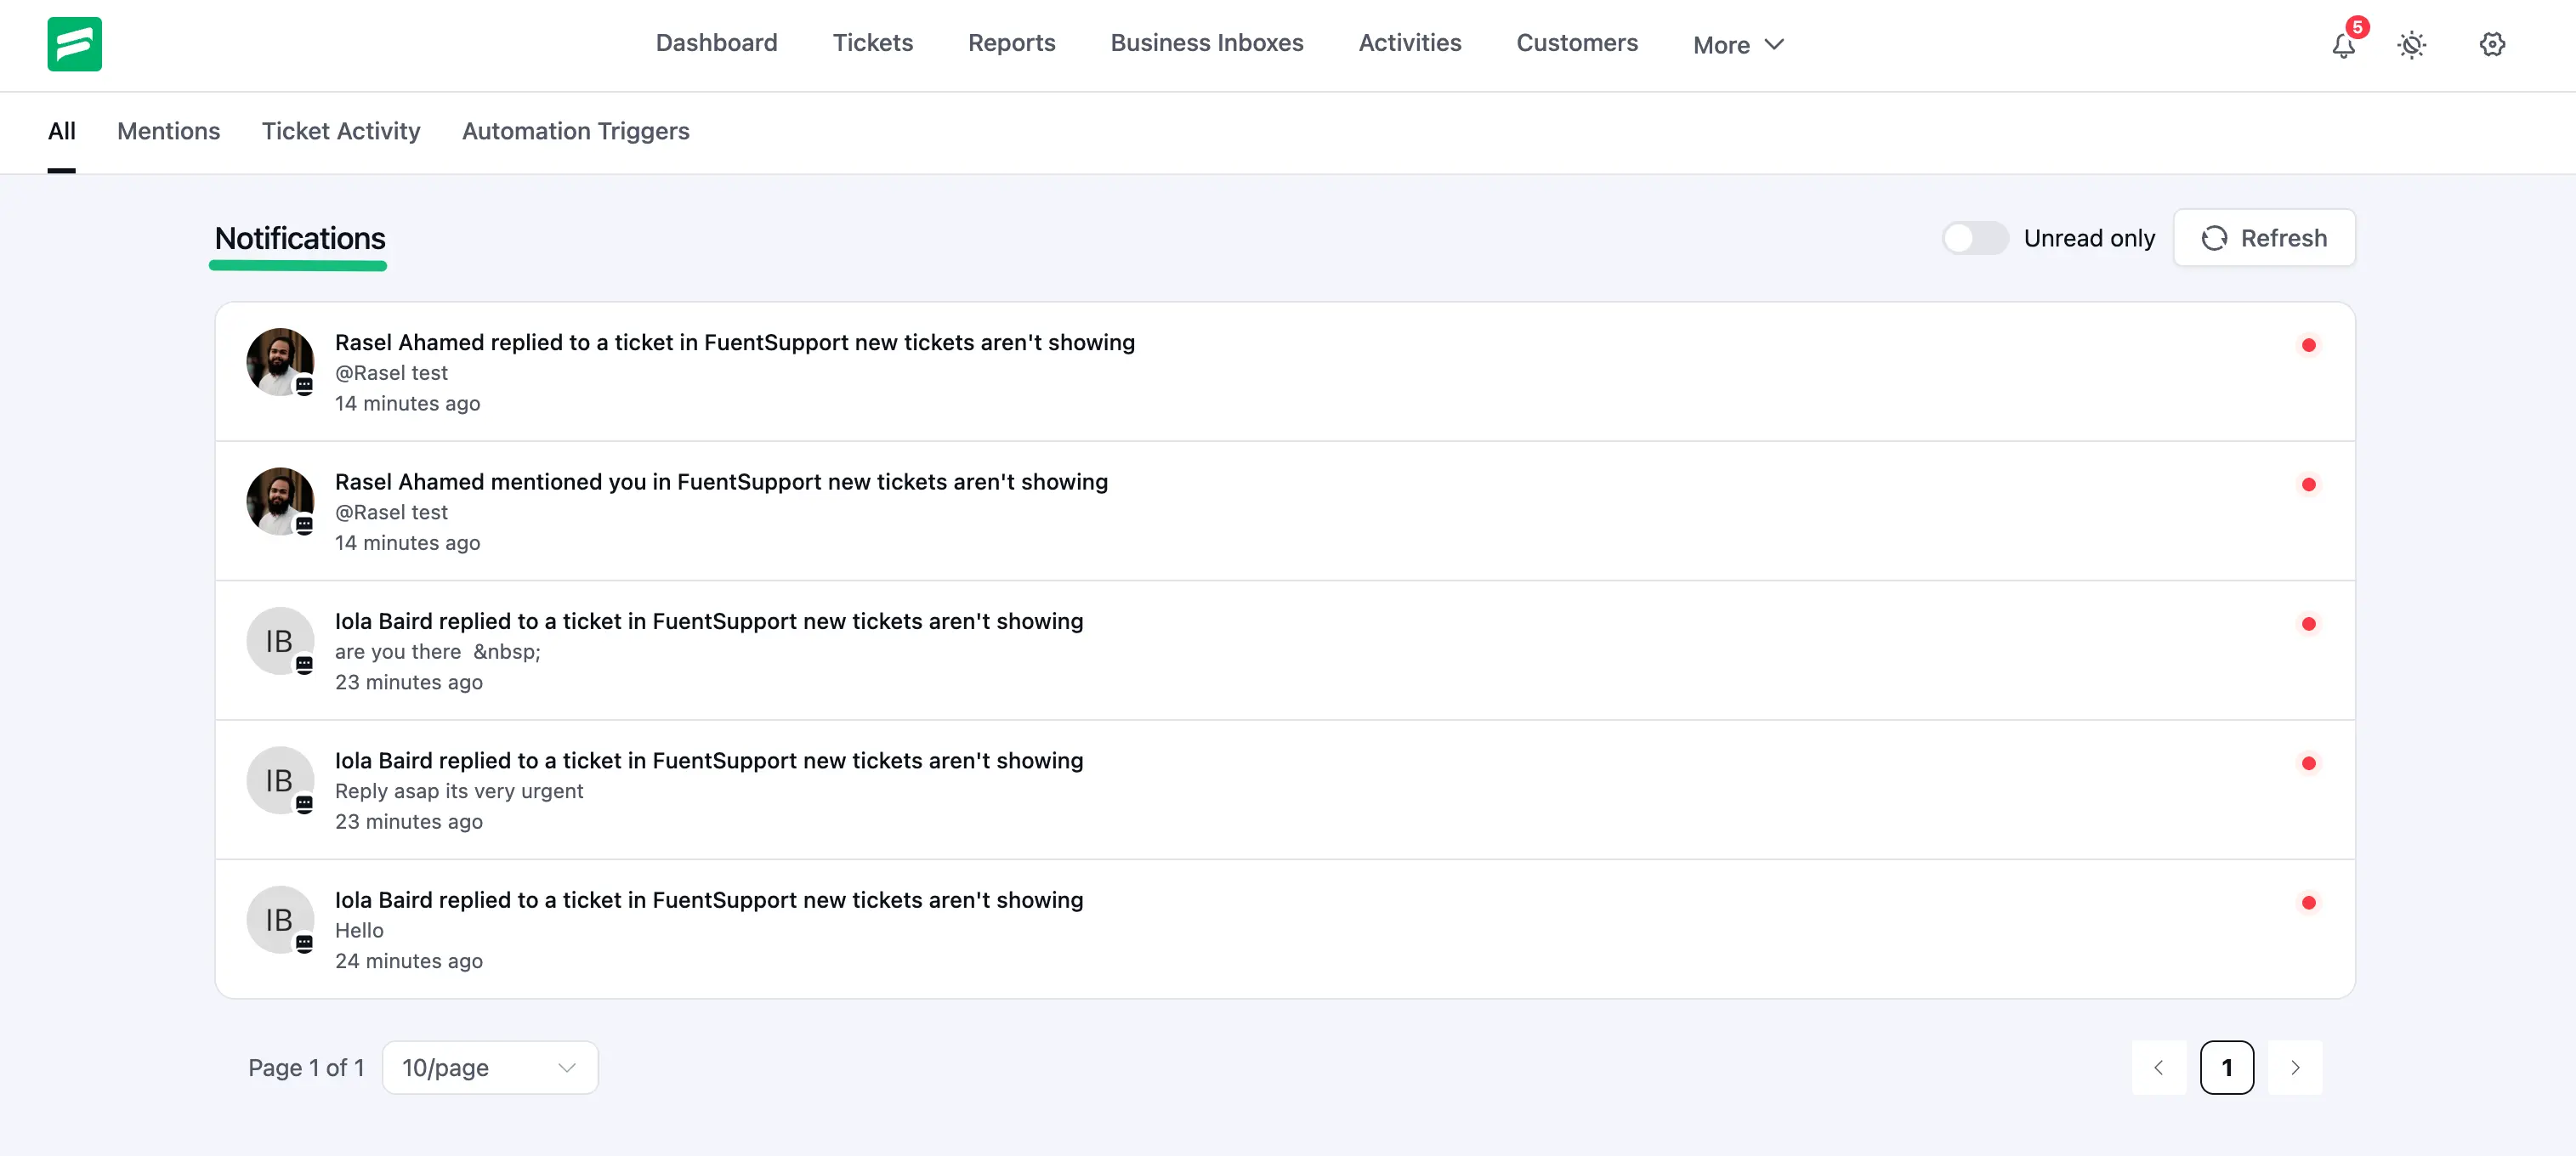
View All Notifications
From the notification panel, click View All to open the full Notifications page. This page gives agents a complete overview of every notification they've received — without the limited space of the dropdown panel.
On this page, agents can:
- Switch between categories using the All, Mentions, Ticket Activity, and Automation Triggers tabs at the top.
- Toggle Unread only to filter the list down to unread notifications.
- Click the Refresh button to instantly pull in the latest activity.
- Click any notification to jump directly to the related ticket.
- Navigate through older notifications using the pagination controls at the bottom.
Manage Notification Preferences
Admins and users with settings permission can open Notification Settings by clicking the Settings (gear) icon at the top of the Unread Notifications panel.
This will open the Notification Settings modal, where you can enable or disable specific notification types for your team.
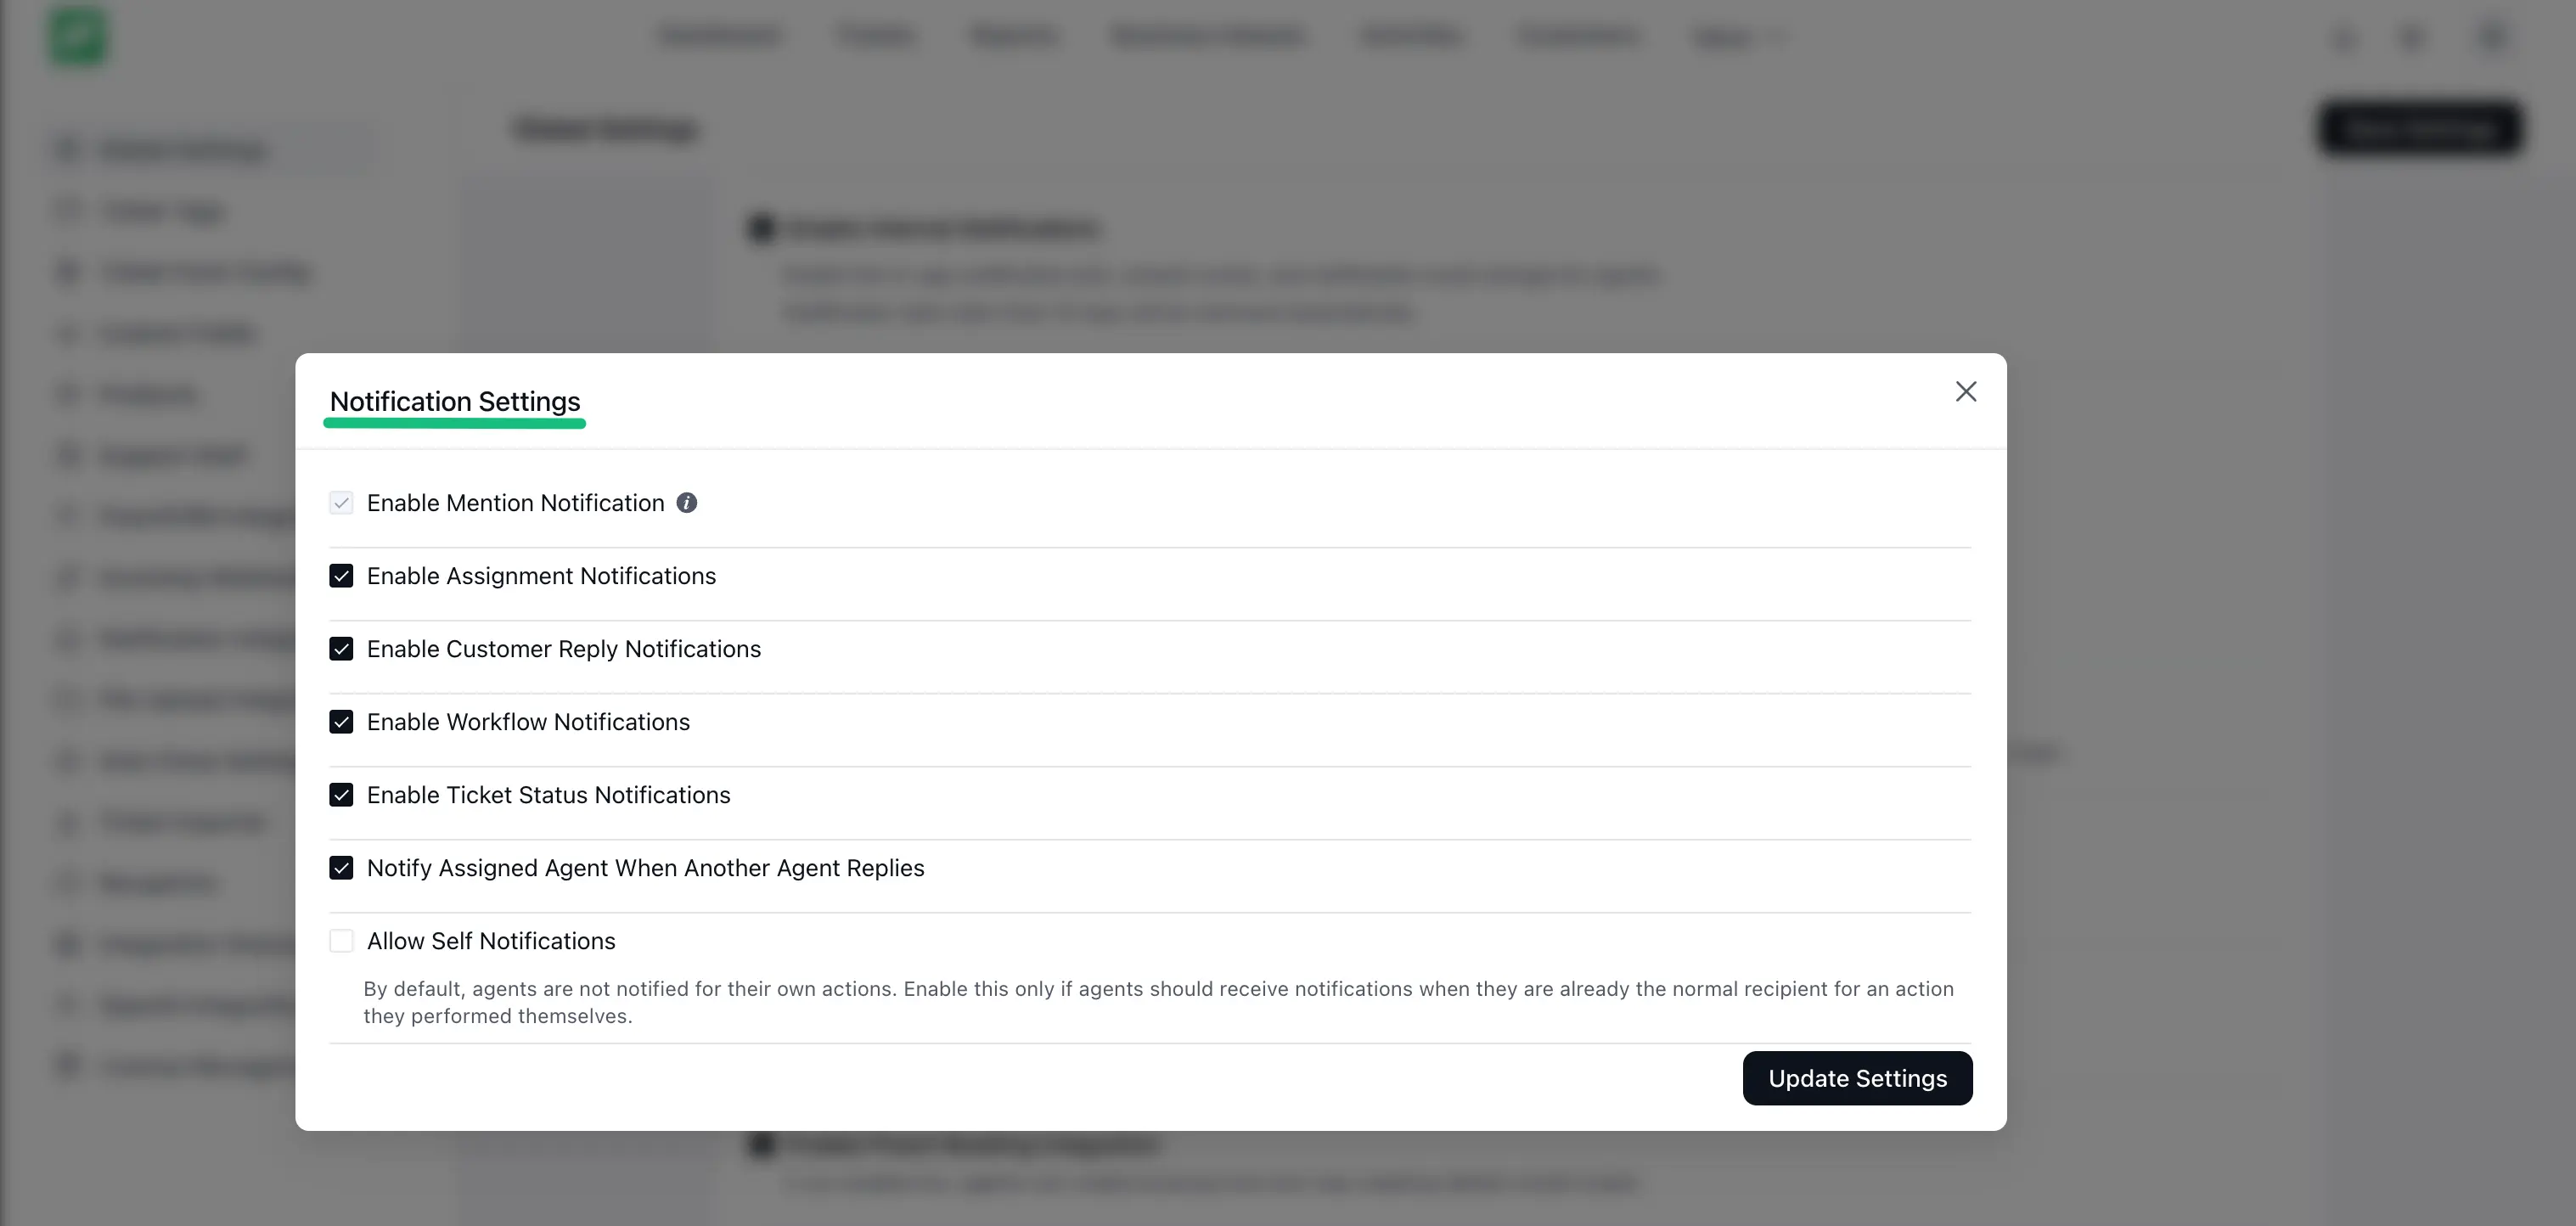
Available preferences include:
- Enable Mention Notification: Always enabled. Notifies agents when they are mentioned in a reply or internal note.
- Enable Assignment Notifications: Notify agents when tickets are assigned or reassigned to them.
- Enable Customer Reply Notifications: Notify the assigned agent when a customer replies to a ticket.
- Enable Workflow Notifications: Notify agents when an automation workflow runs on their tickets.
- Enable Ticket Status Notifications: Notify agents when tickets are closed or reopened.
- Notify Assigned Agent When Another Agent Replies: Keep the assigned agent in the loop when a teammate responds to their ticket.
- Allow Self Notifications: By default, agents are not notified for their own actions. Enable this only if you want agents to receive notifications for actions they performed themselves.
After updating your preferences, click Update Settings to save the changes.
TIP
Mention notifications are always on by design so agents can never miss when a teammate tags them. All other notification types can be toggled on or off based on your team's workflow.
Difference Between Internal and Email Notifications
Internal Notifications appear inside the Fluent Support dashboard for agents perfect for team activity and real-time updates while working on tickets.
Email Notifications, on the other hand, are sent through email based on your inbox notification settings perfect for customer-facing communication and out-of-dashboard updates.
If you want to customize customer or agent email templates, check the Managing Email Notifications documentation.
In short use Internal Notifications for team activity inside the dashboard, and Email Notifications for sending updates to inboxes.