Appearance
Google Drive Integration
Integrating Google Drive with the Fluent Support plugin allows the synchronization of files between the two platforms. This article will guide you through integrating Google Drive with Fluent Support.
Google Drive Integration With Fluent Support
To integrate Fluent Support with Google Drive, follow the steps with screenshots below —
Access the Google Drive
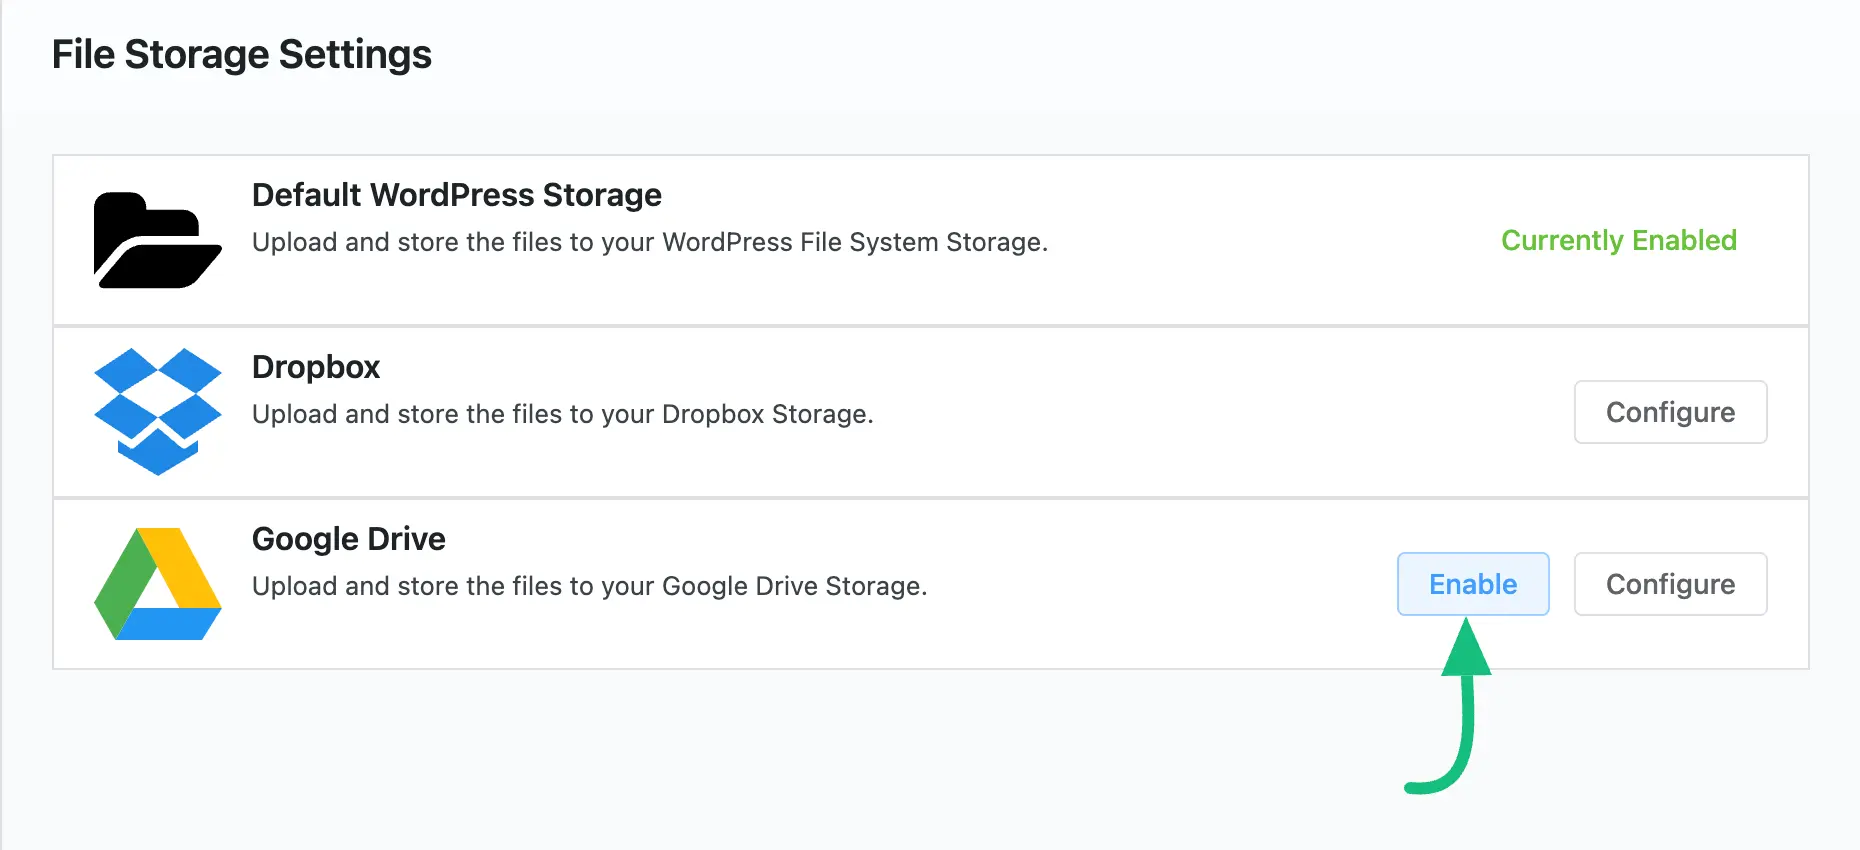
Go to your Fluent Support Dashboard, open Settings, then select the File Upload Integration section from the left sidebar. There, find Google Drive and click the Settings (gear) icon.
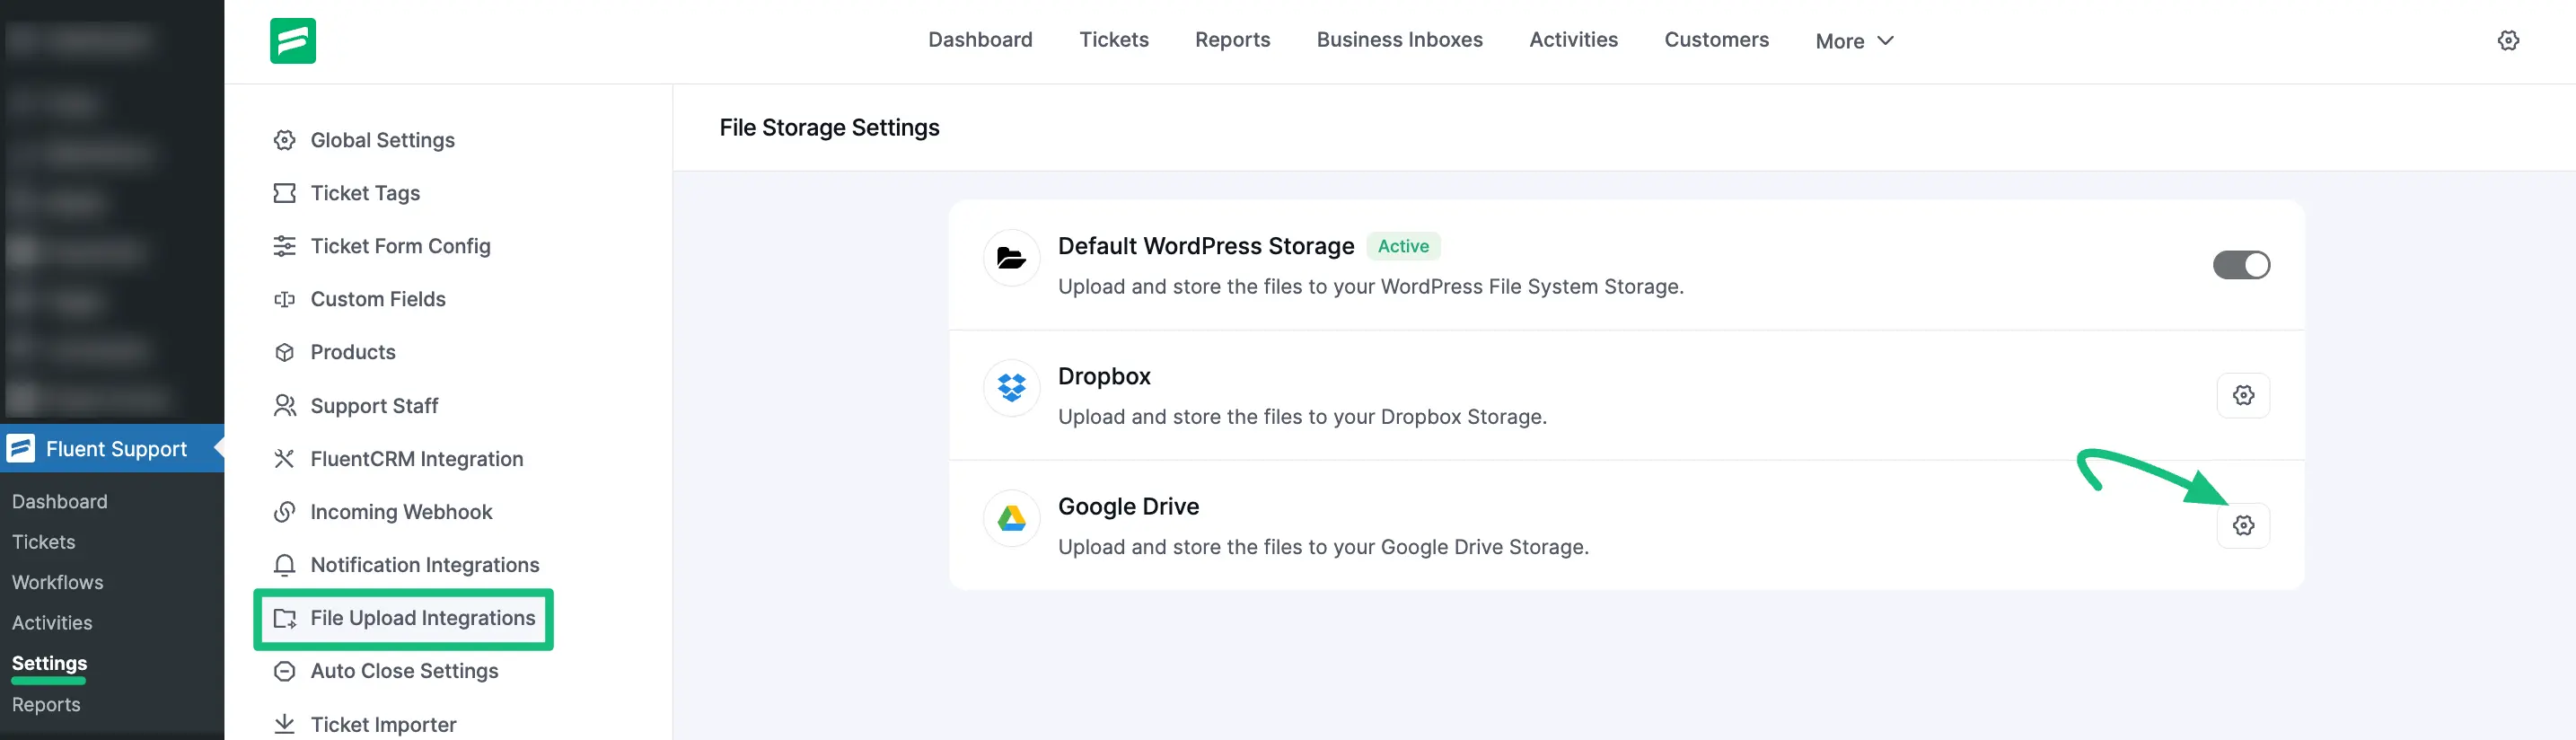
A pop-up will appear. Now, copy the OAuth2 Redirect URL displayed there for future use.

Accessing Google Cloud Console
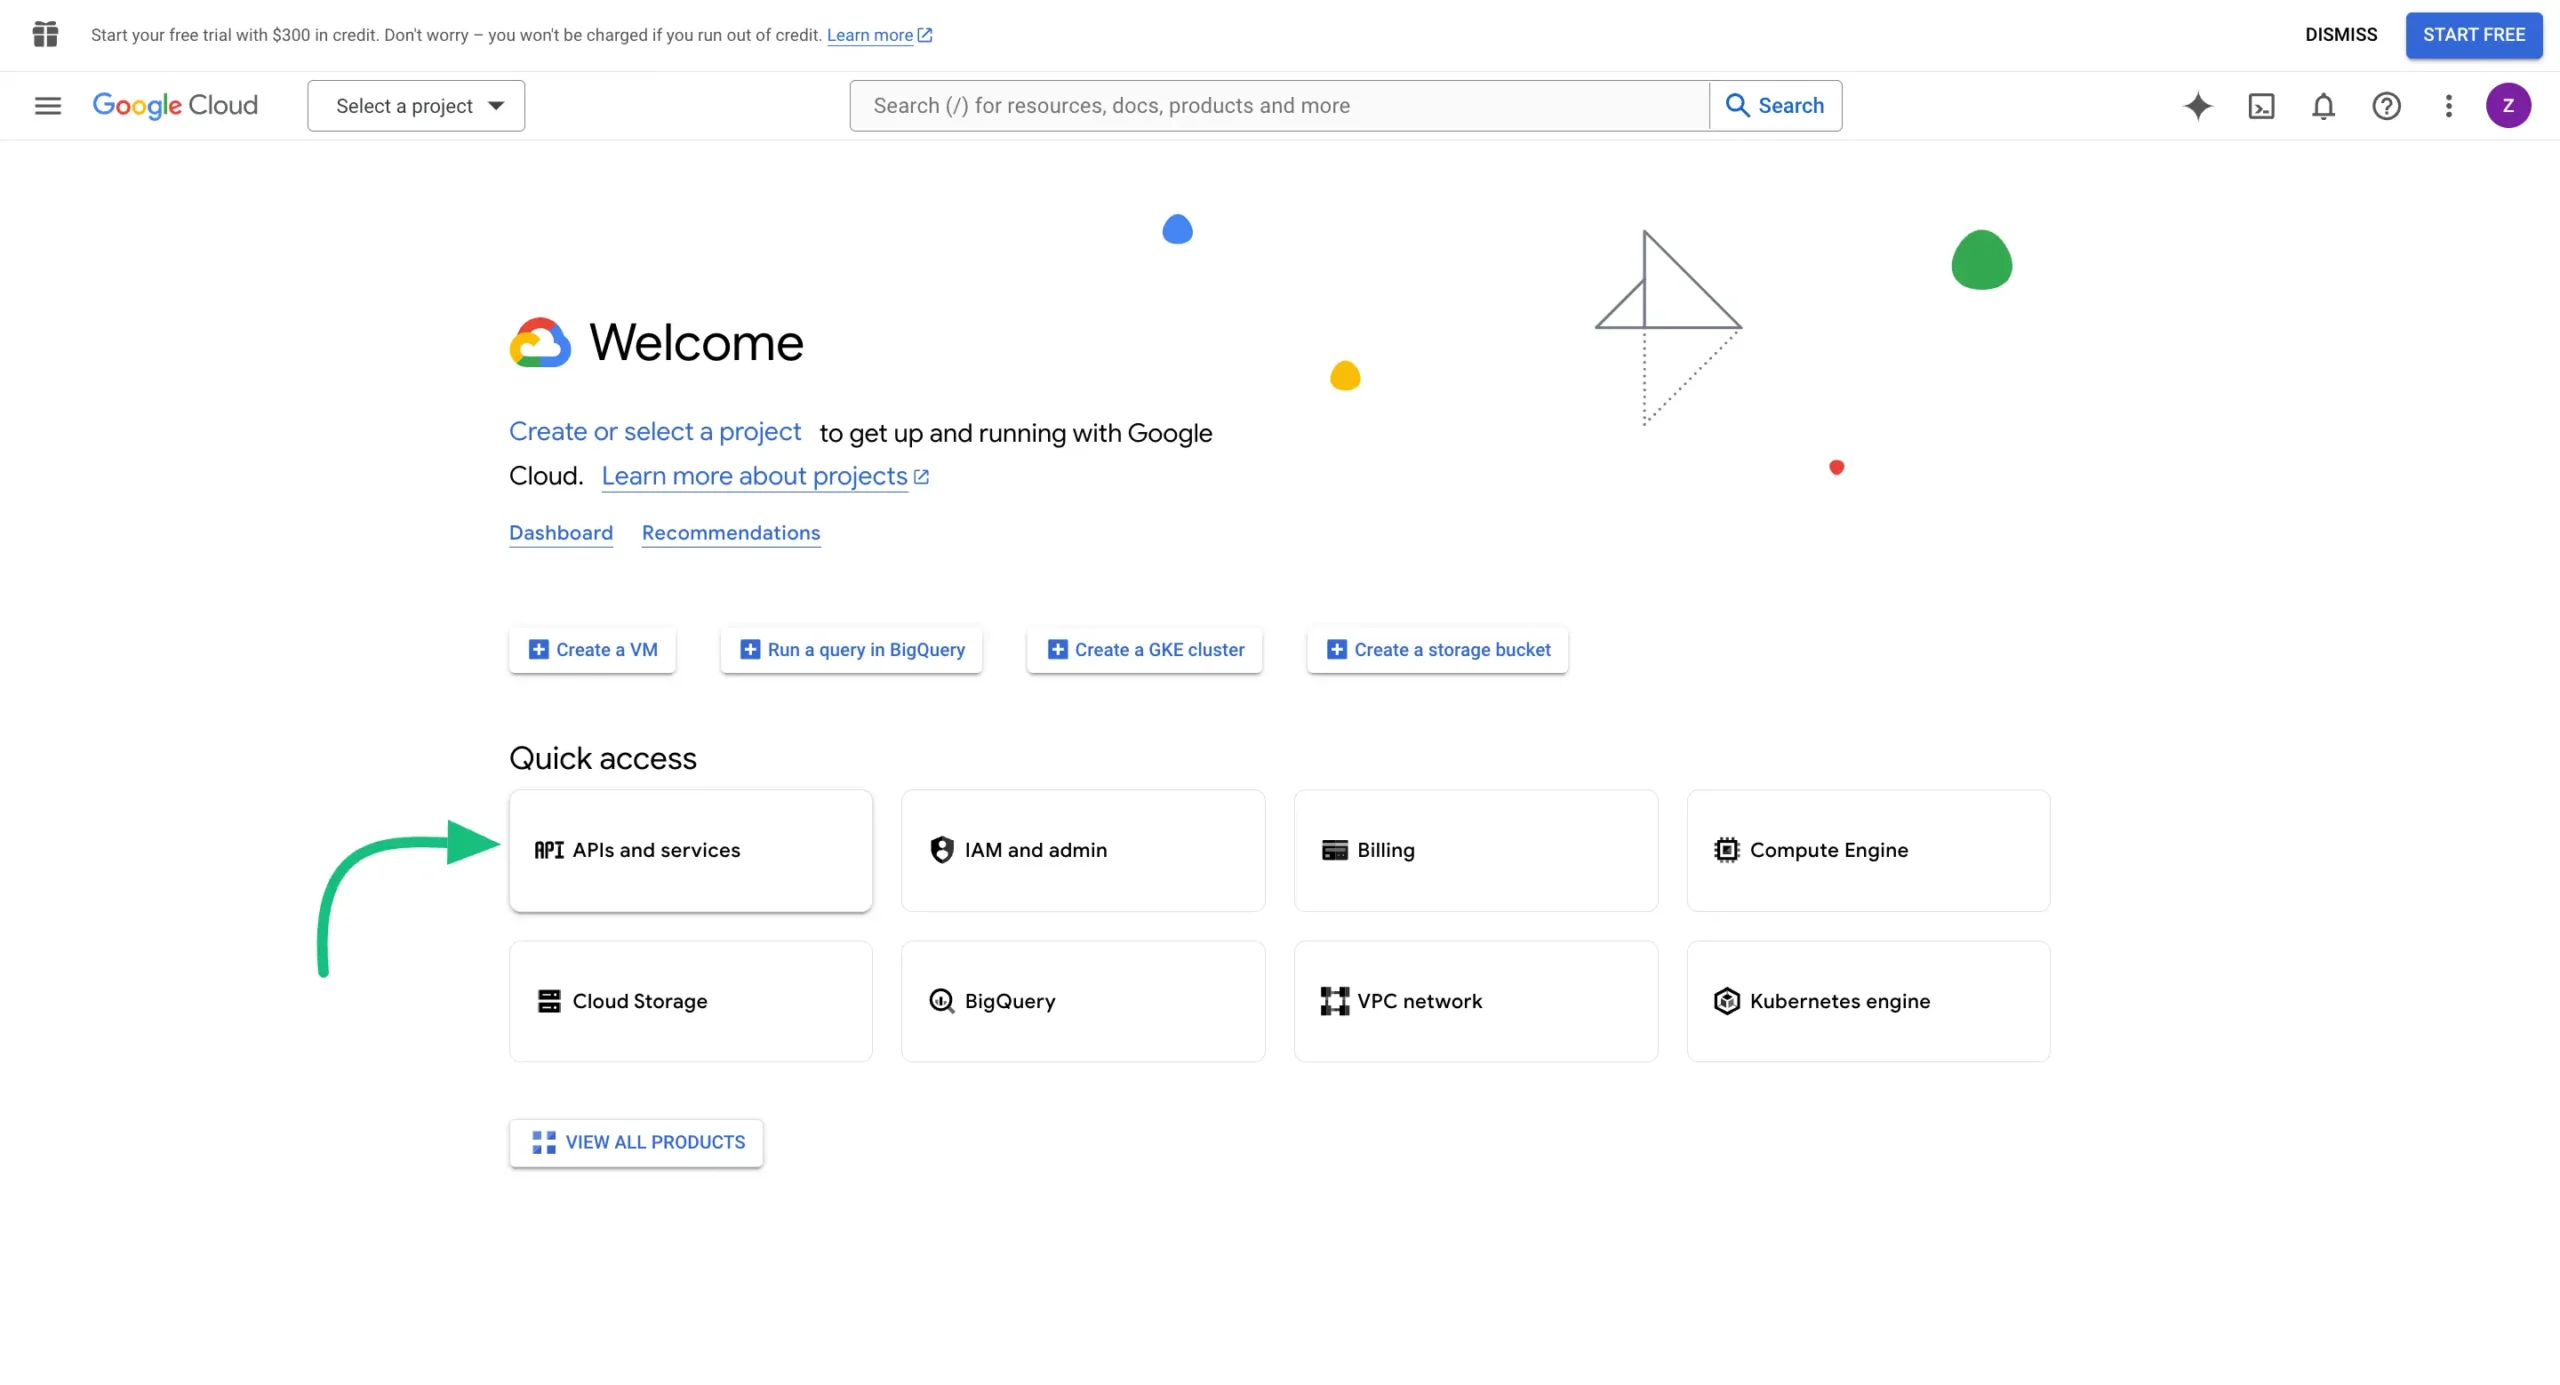
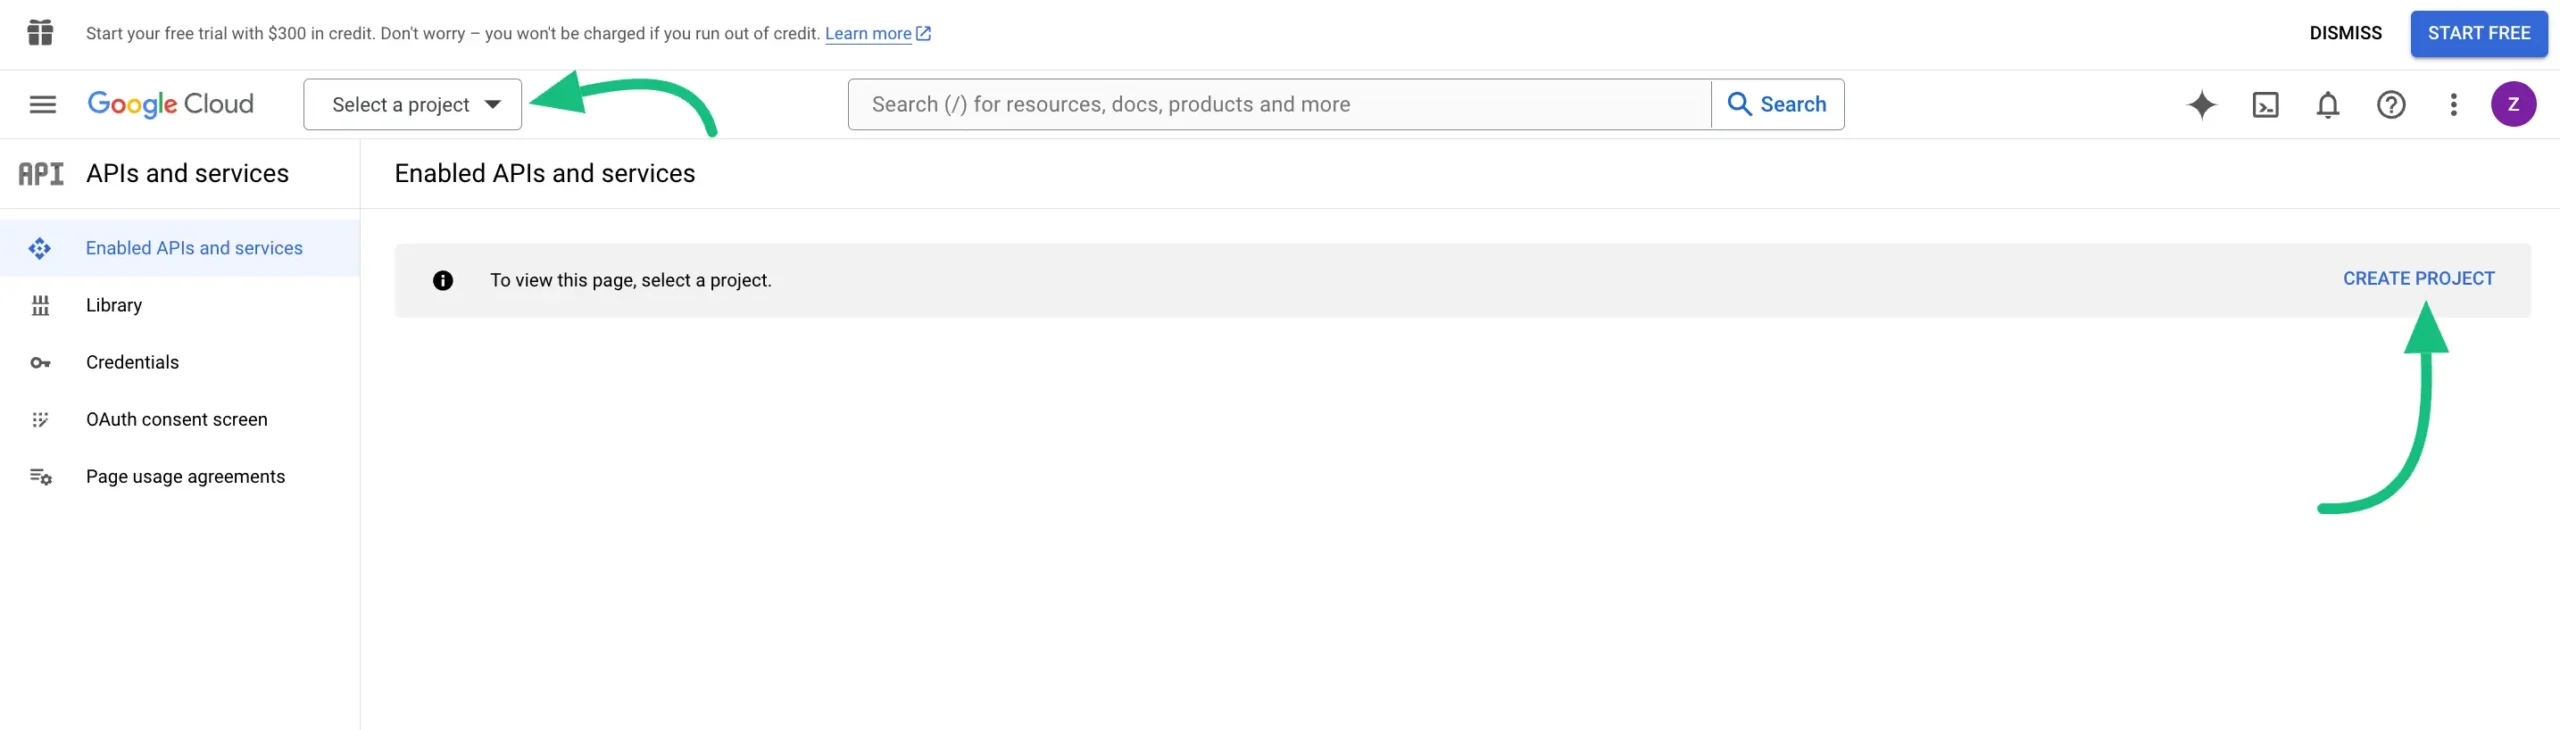
First, go to the Google Cloud Console and select APIs & Services.
Creating New Project
To get the API, create a new project by clicking the Create Project.
Or, you can easily select any of your existing projects from the “Select a Project” dropdown list by clicking on the Arrow Icon.
Give a name to your project (location is optional) and press the CREATE button.

Enabling Google Drive API
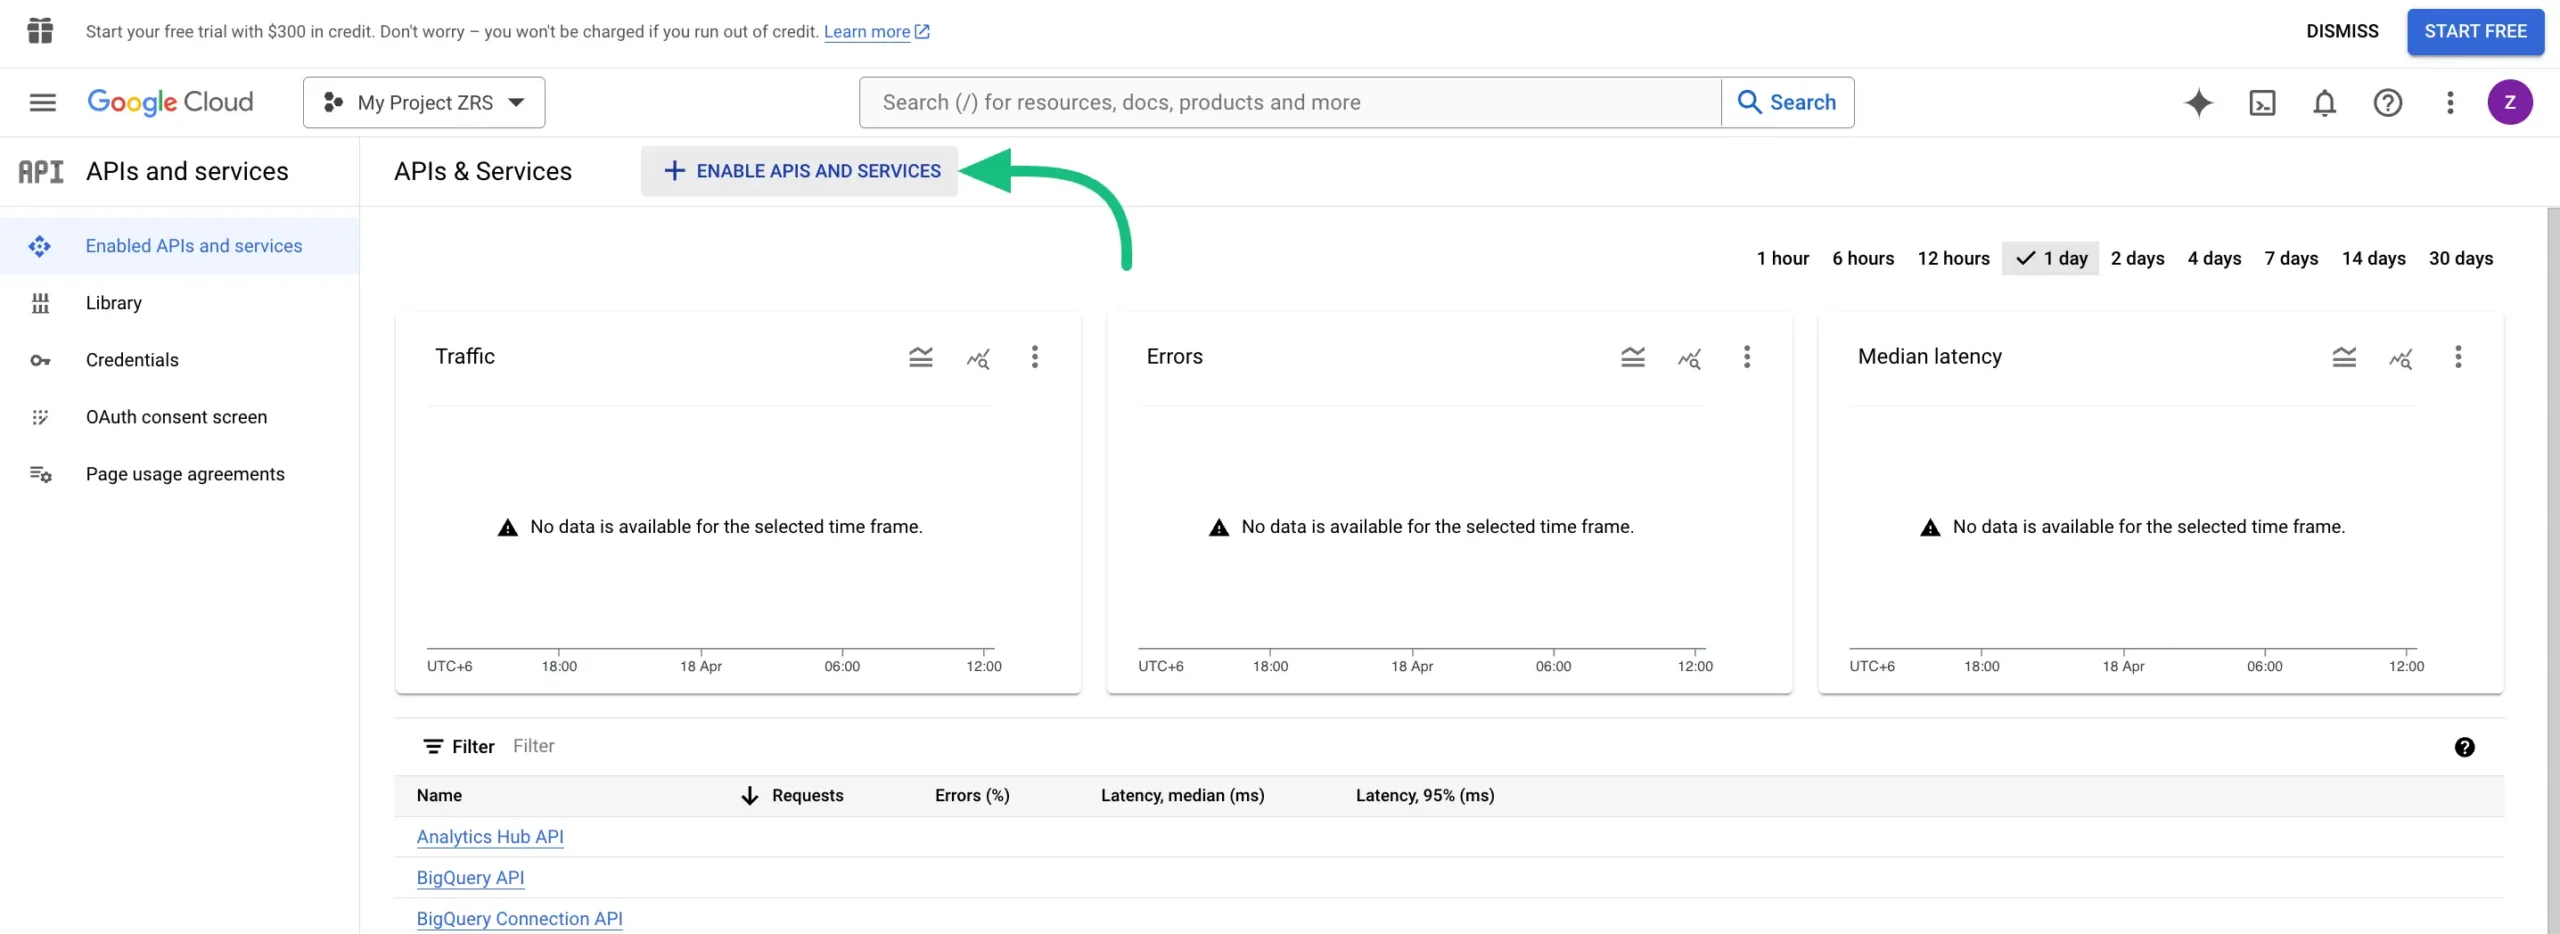
Click on + ENABLE APIS AND SERVICES.
Select Google Drive API.

Now, click on the ENABLE button to activate the Google Drive API.
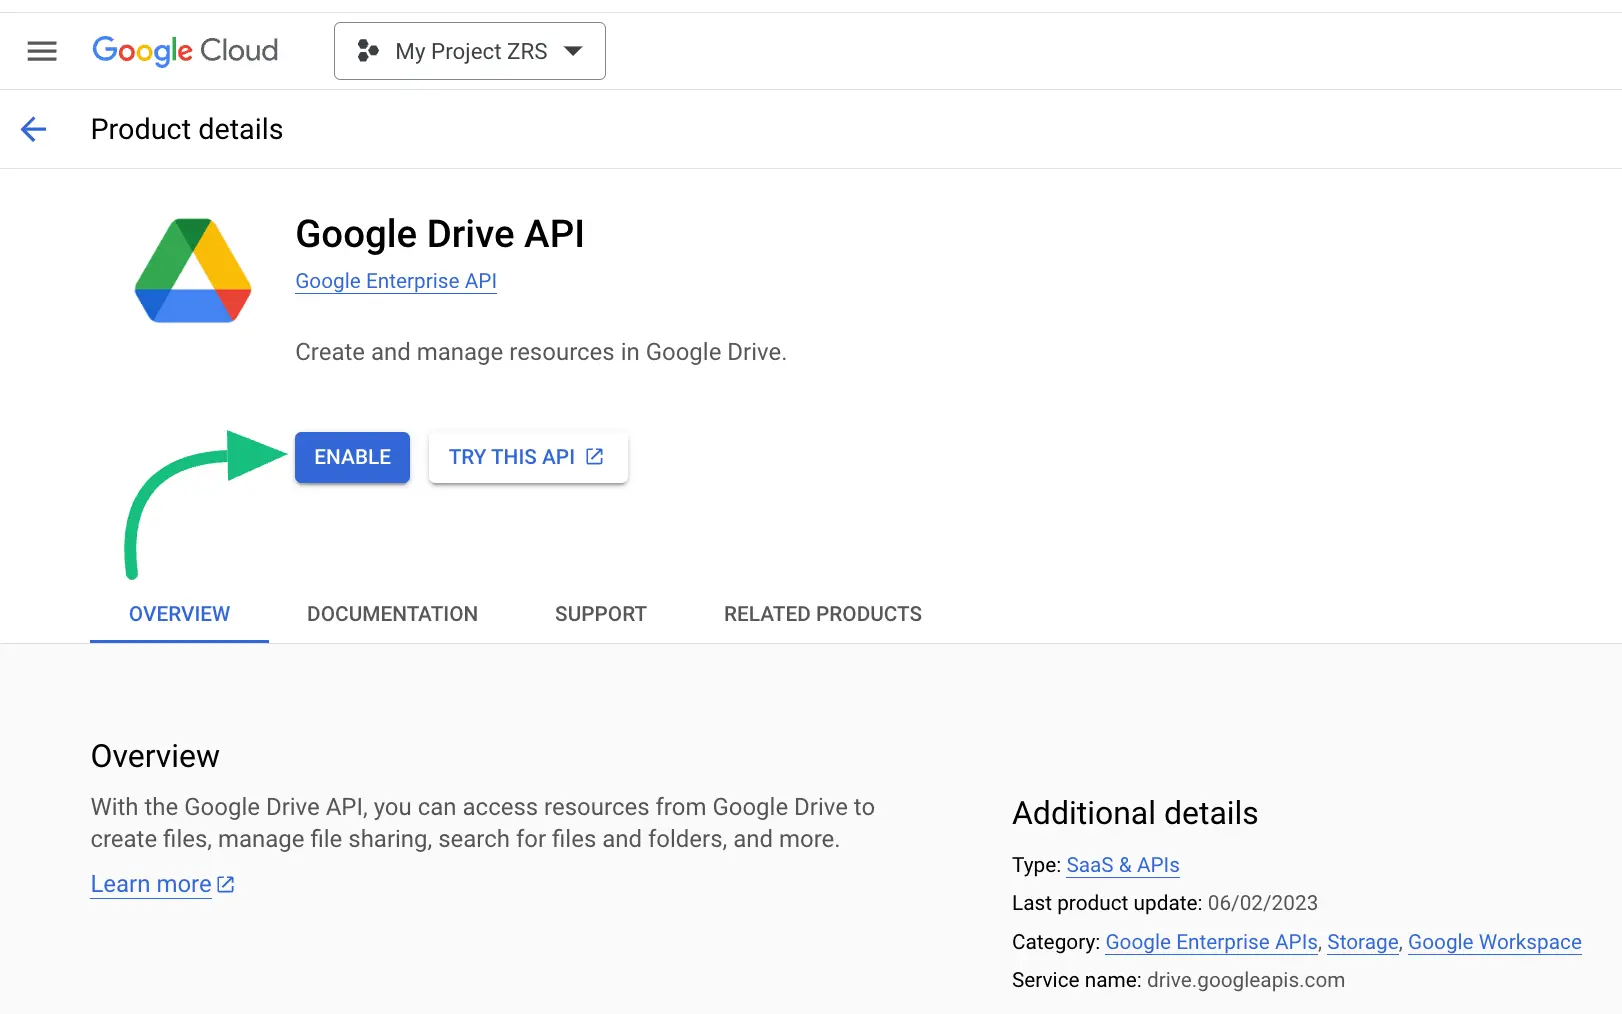
You will see the CREATE CREDENTIALS button, click on it.

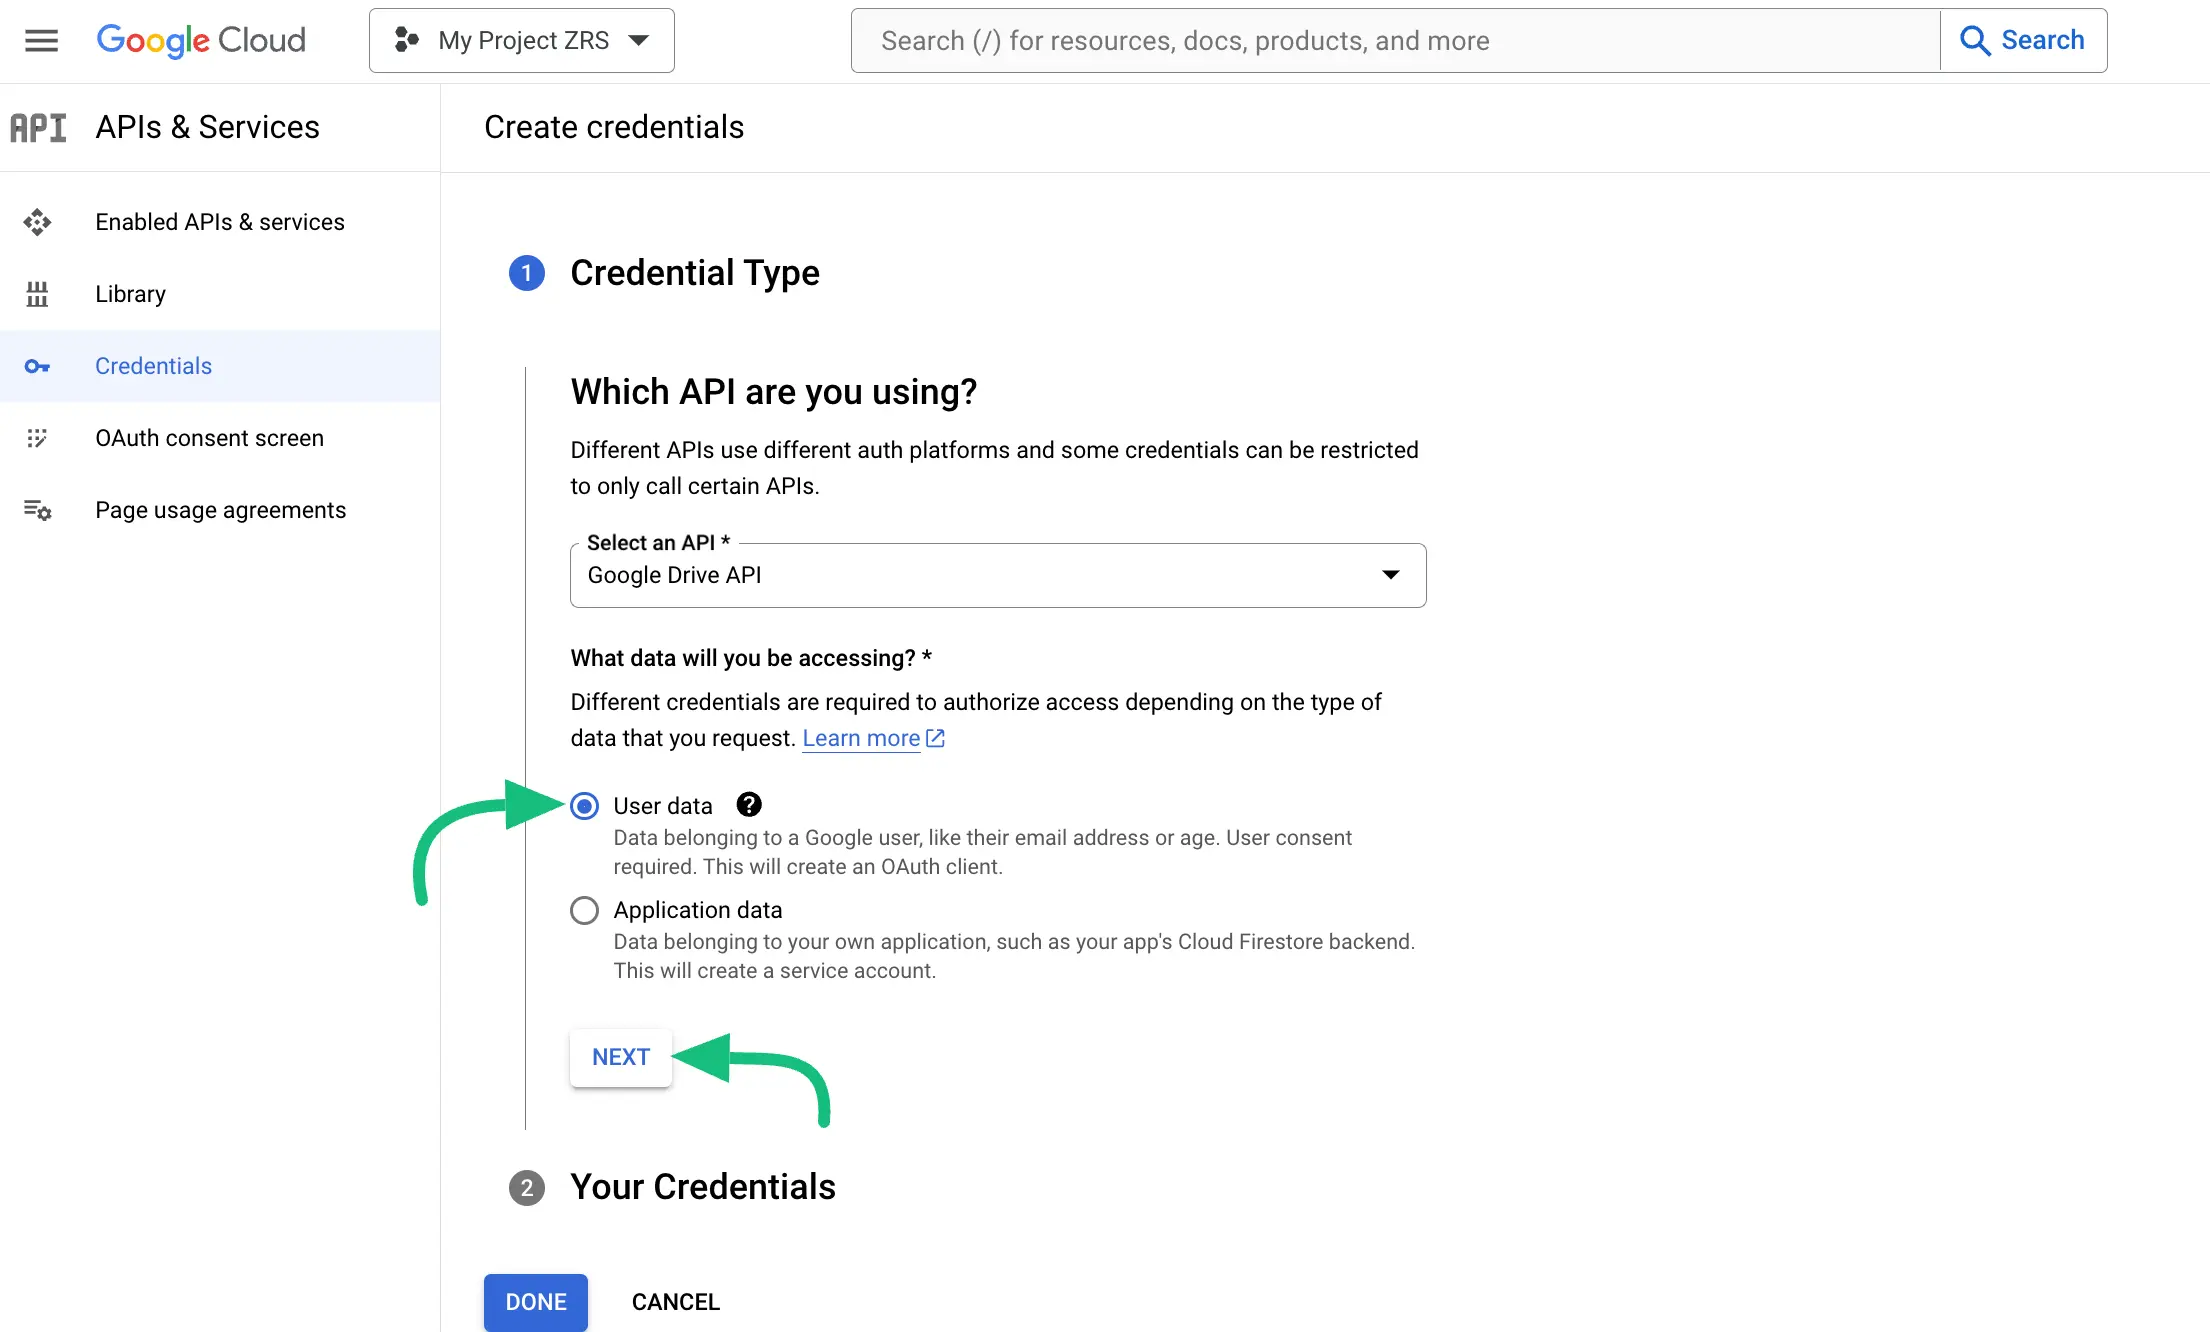
Here, you will find five steps that you need to complete. These are :
Credential Type
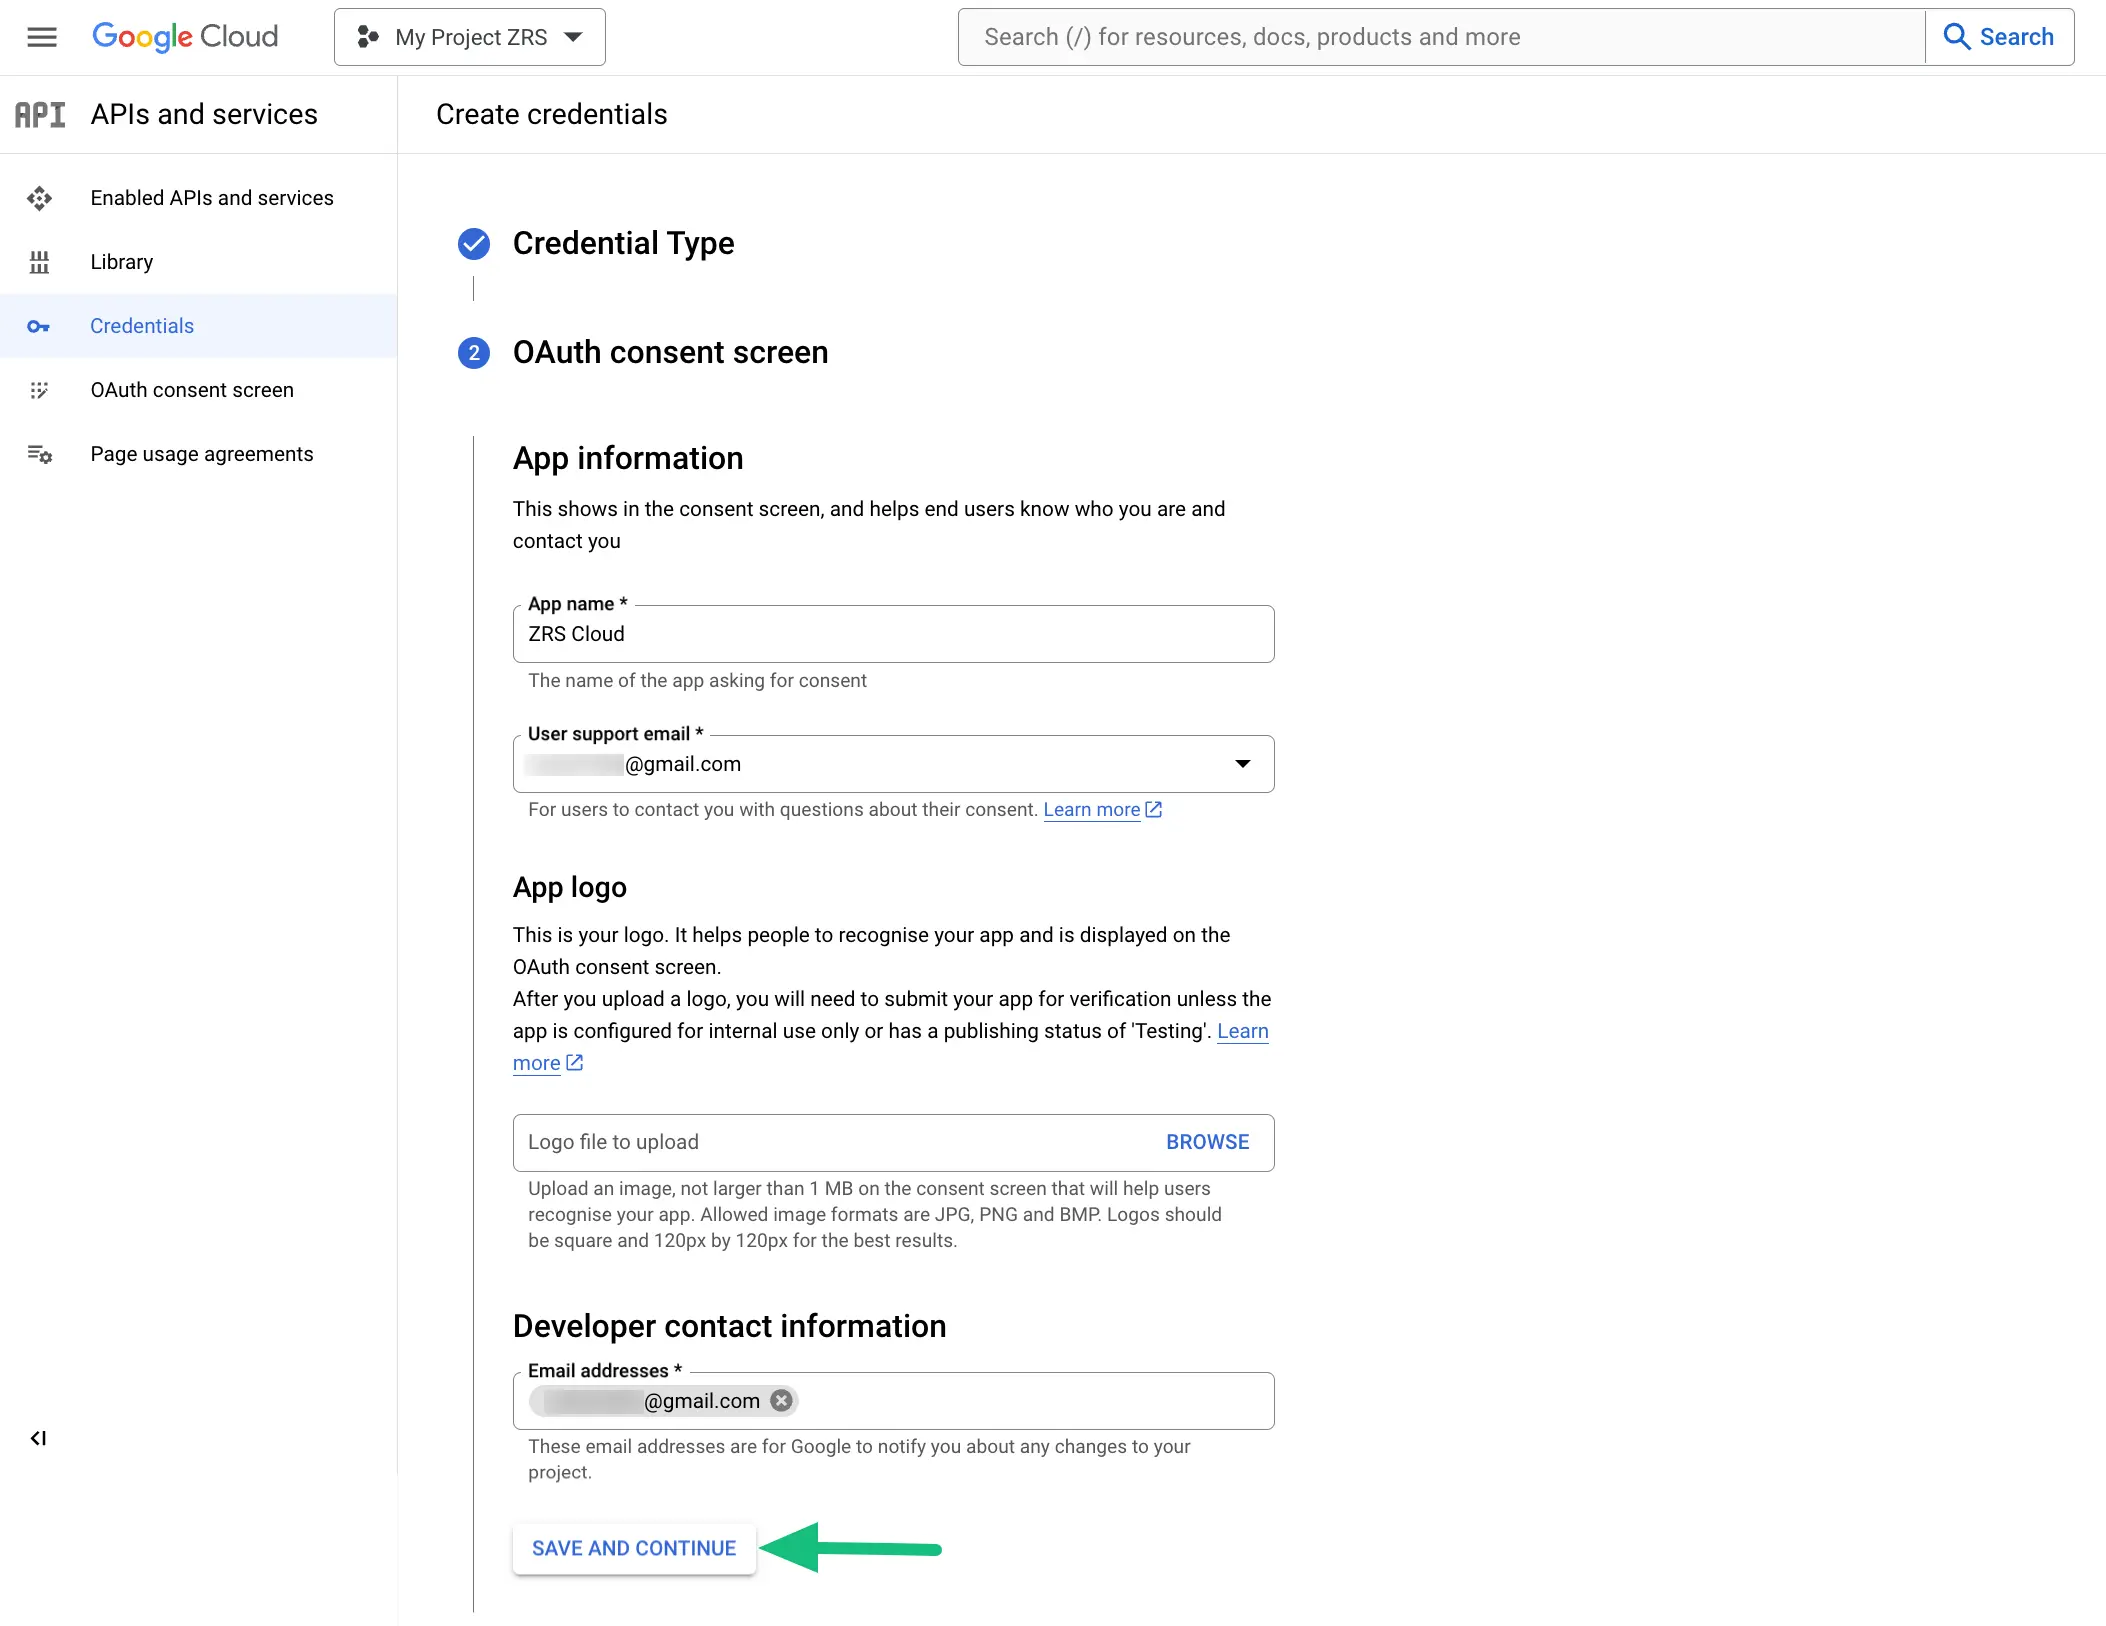
OAuth consent screen
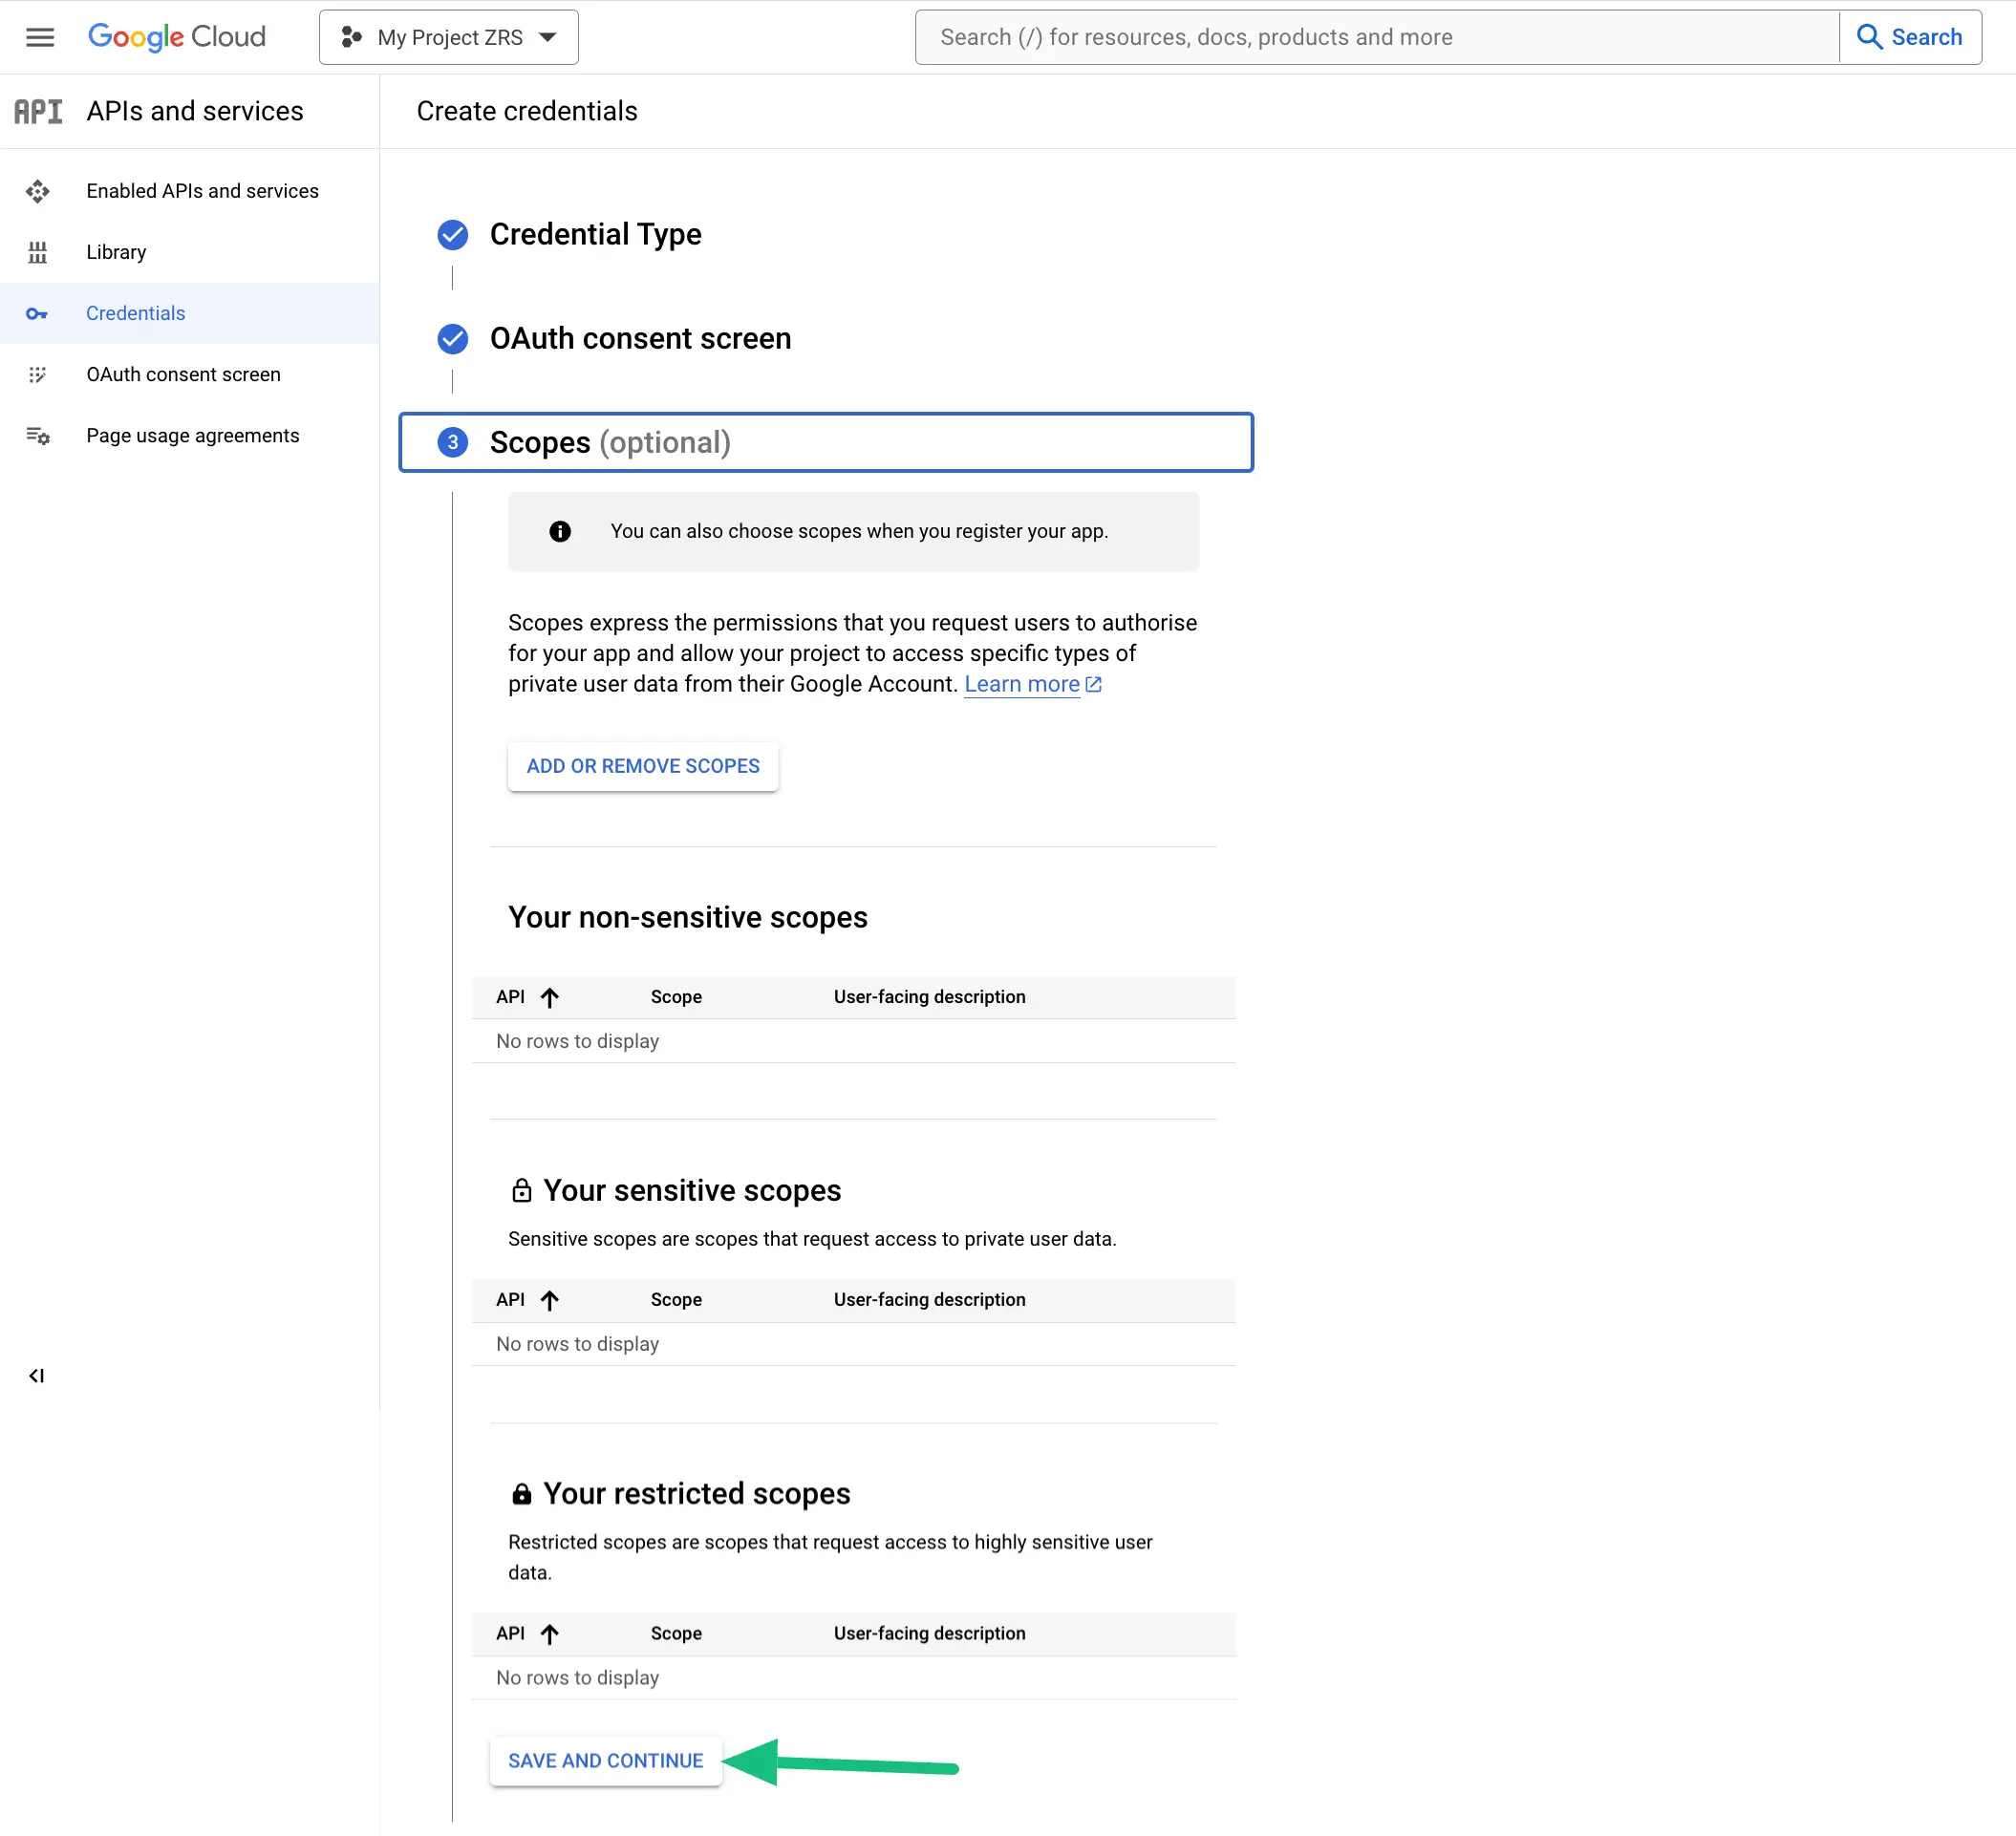
Scopes
OAuth Client ID
Your Credentials.
In Credential Type select the User Data field and press the Next button.
- In the OAuth Consent Screen , give an App name, User support email, and Developer email. Once you are done, click the SAVE AND CONTINUE button.
- As Scopes is optional, you can skip it and go to the next step by clicking the SAVE AND CONTINUE button.
Client ID and Client Secret
- In OAuth Client ID ,
– In the Application type select Web Application you can give any name here.
– In Authorized Javascript Origins give your domain name without the ‘/’ slash in the last.
– In the Authorized redirect URL paste the OAuth2 redirect URL
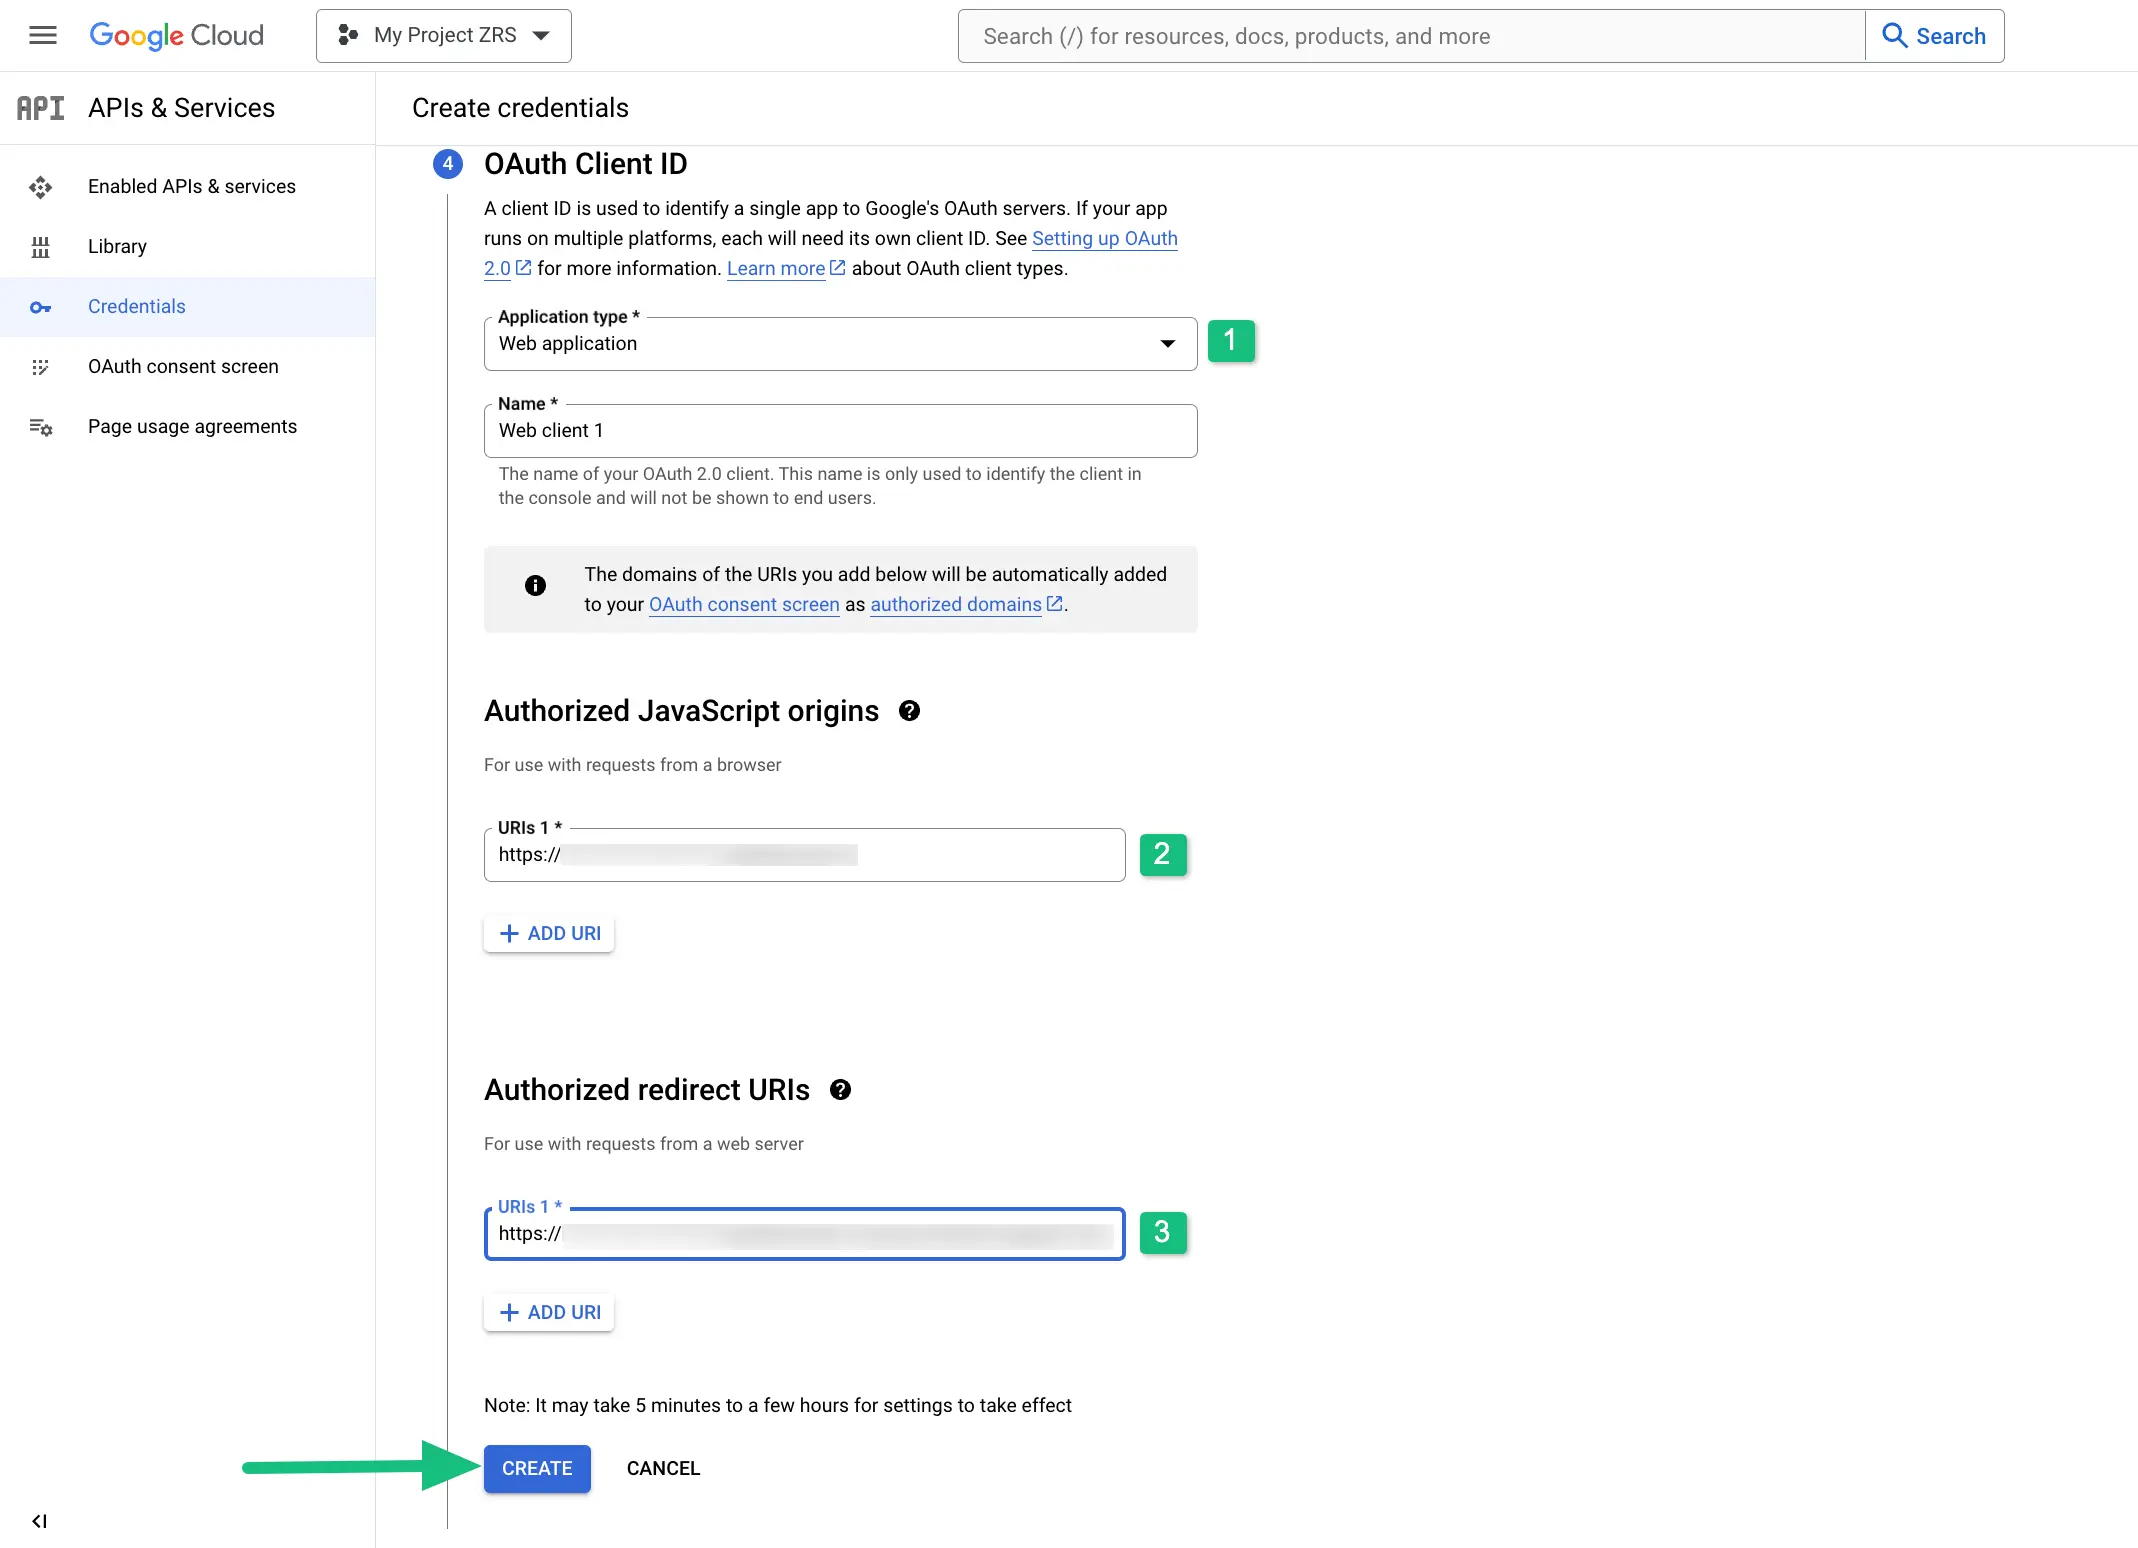
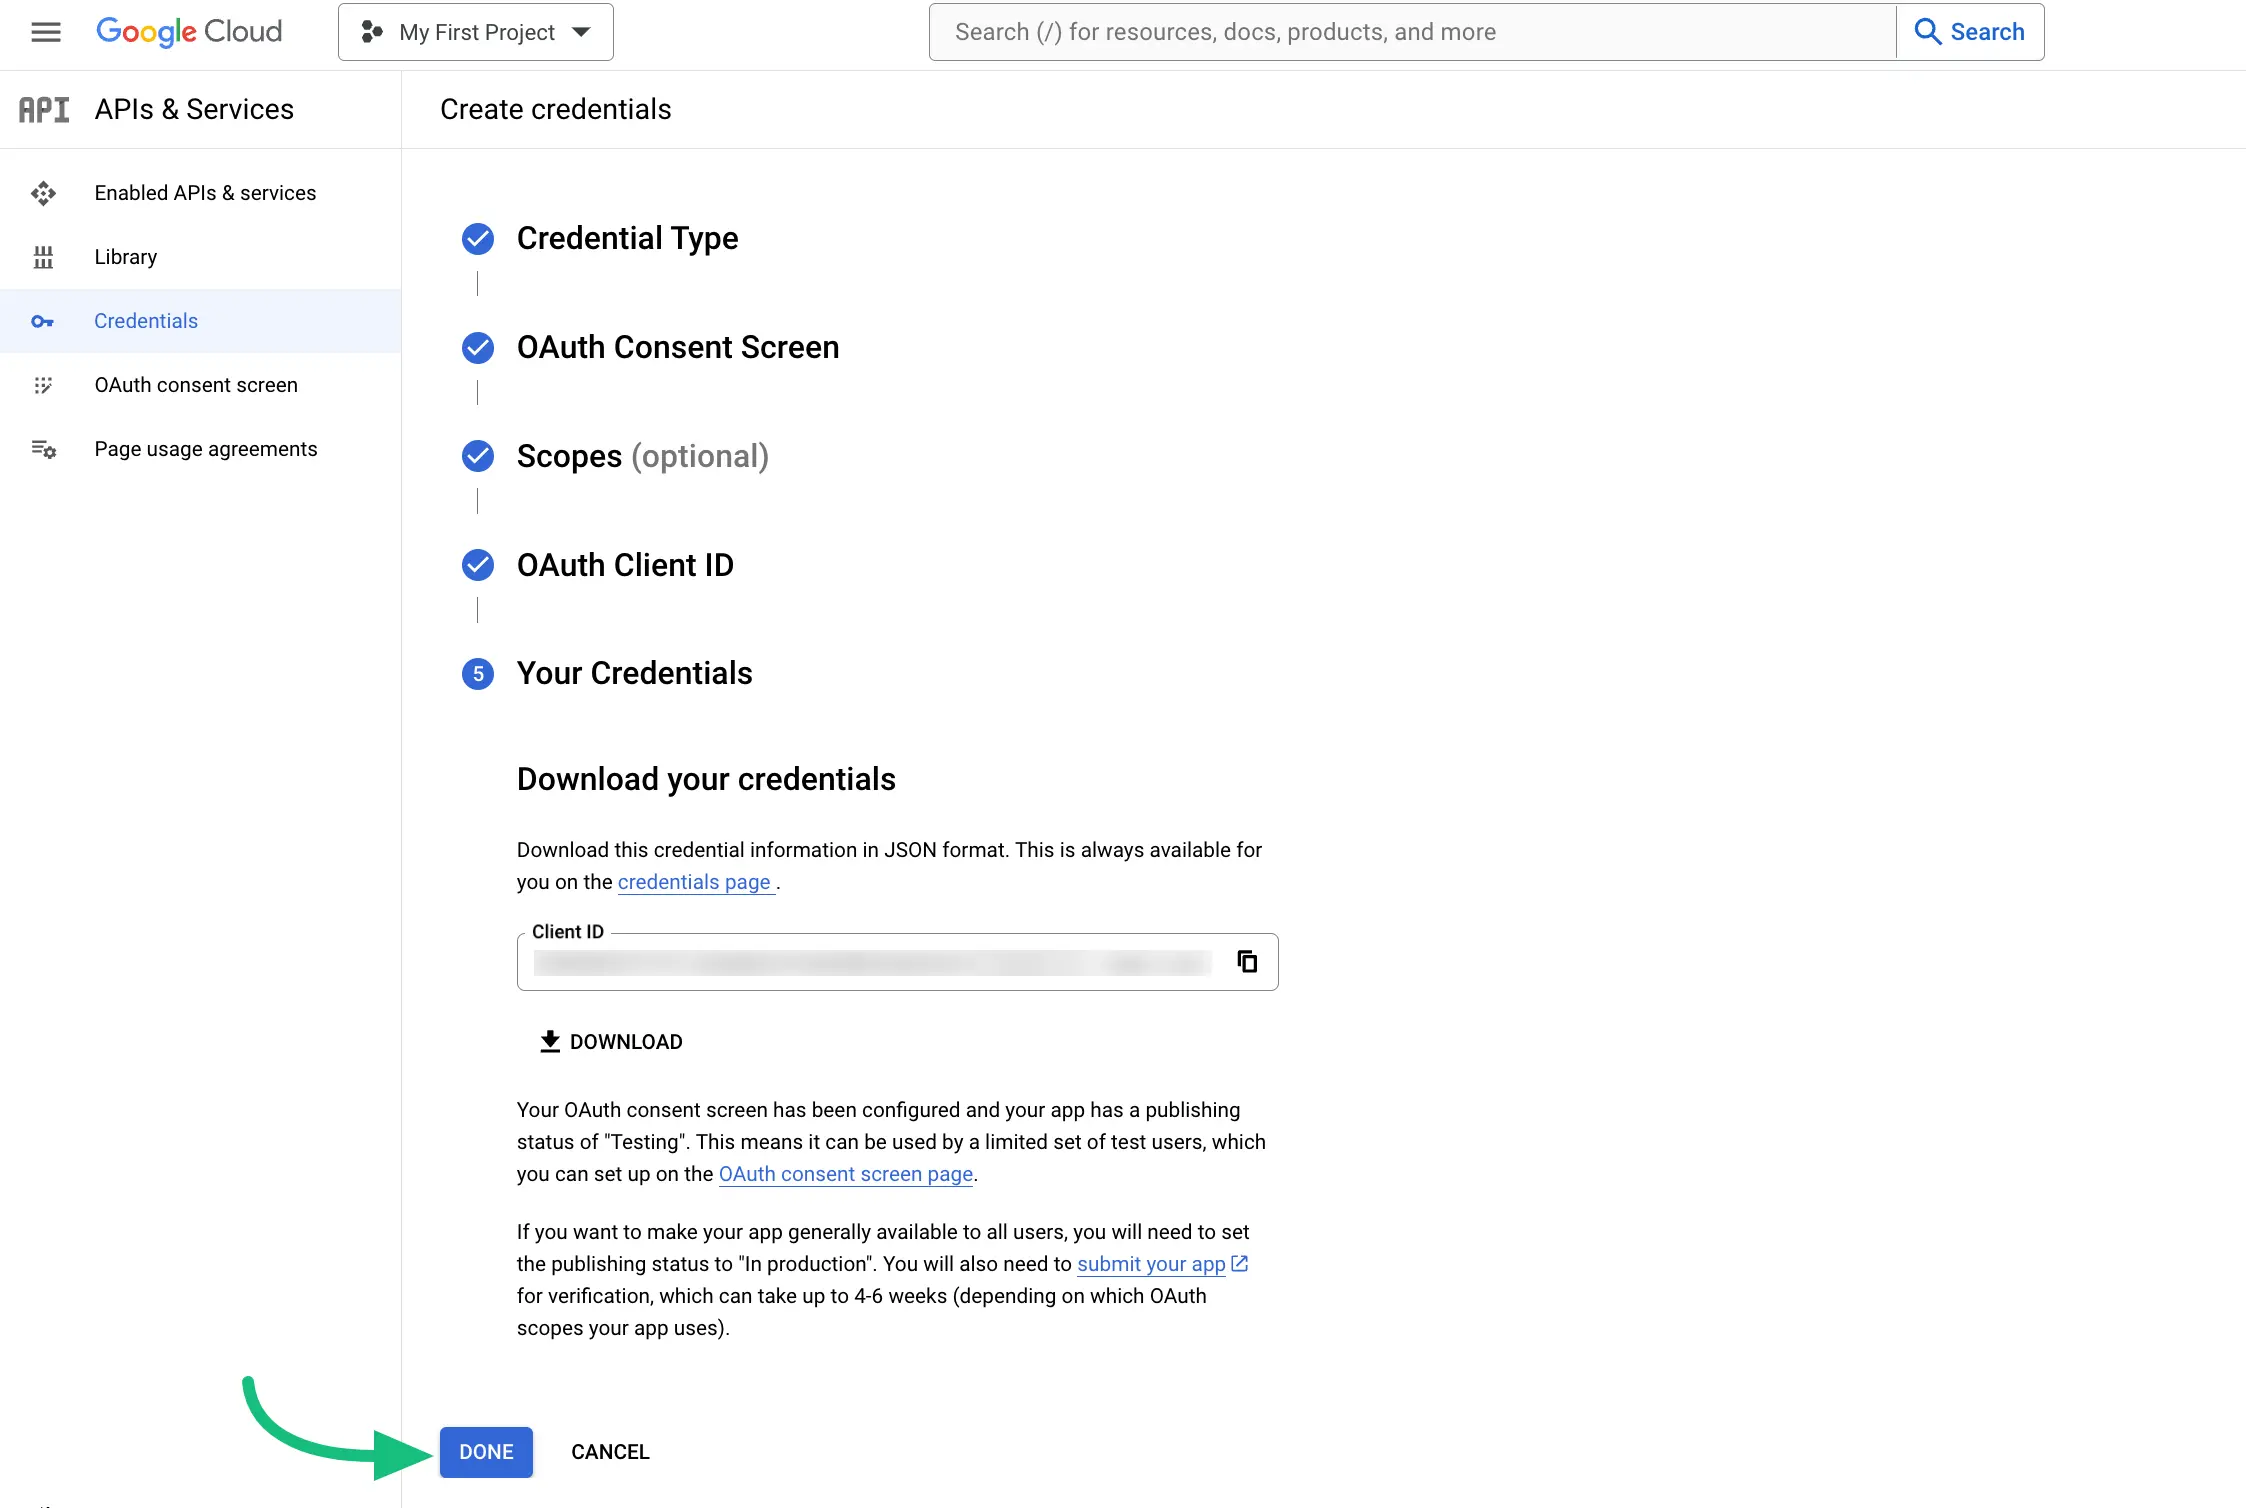
Here, you will find the Client ID and you can copy. Now click on the Done button and the credential will be ready.
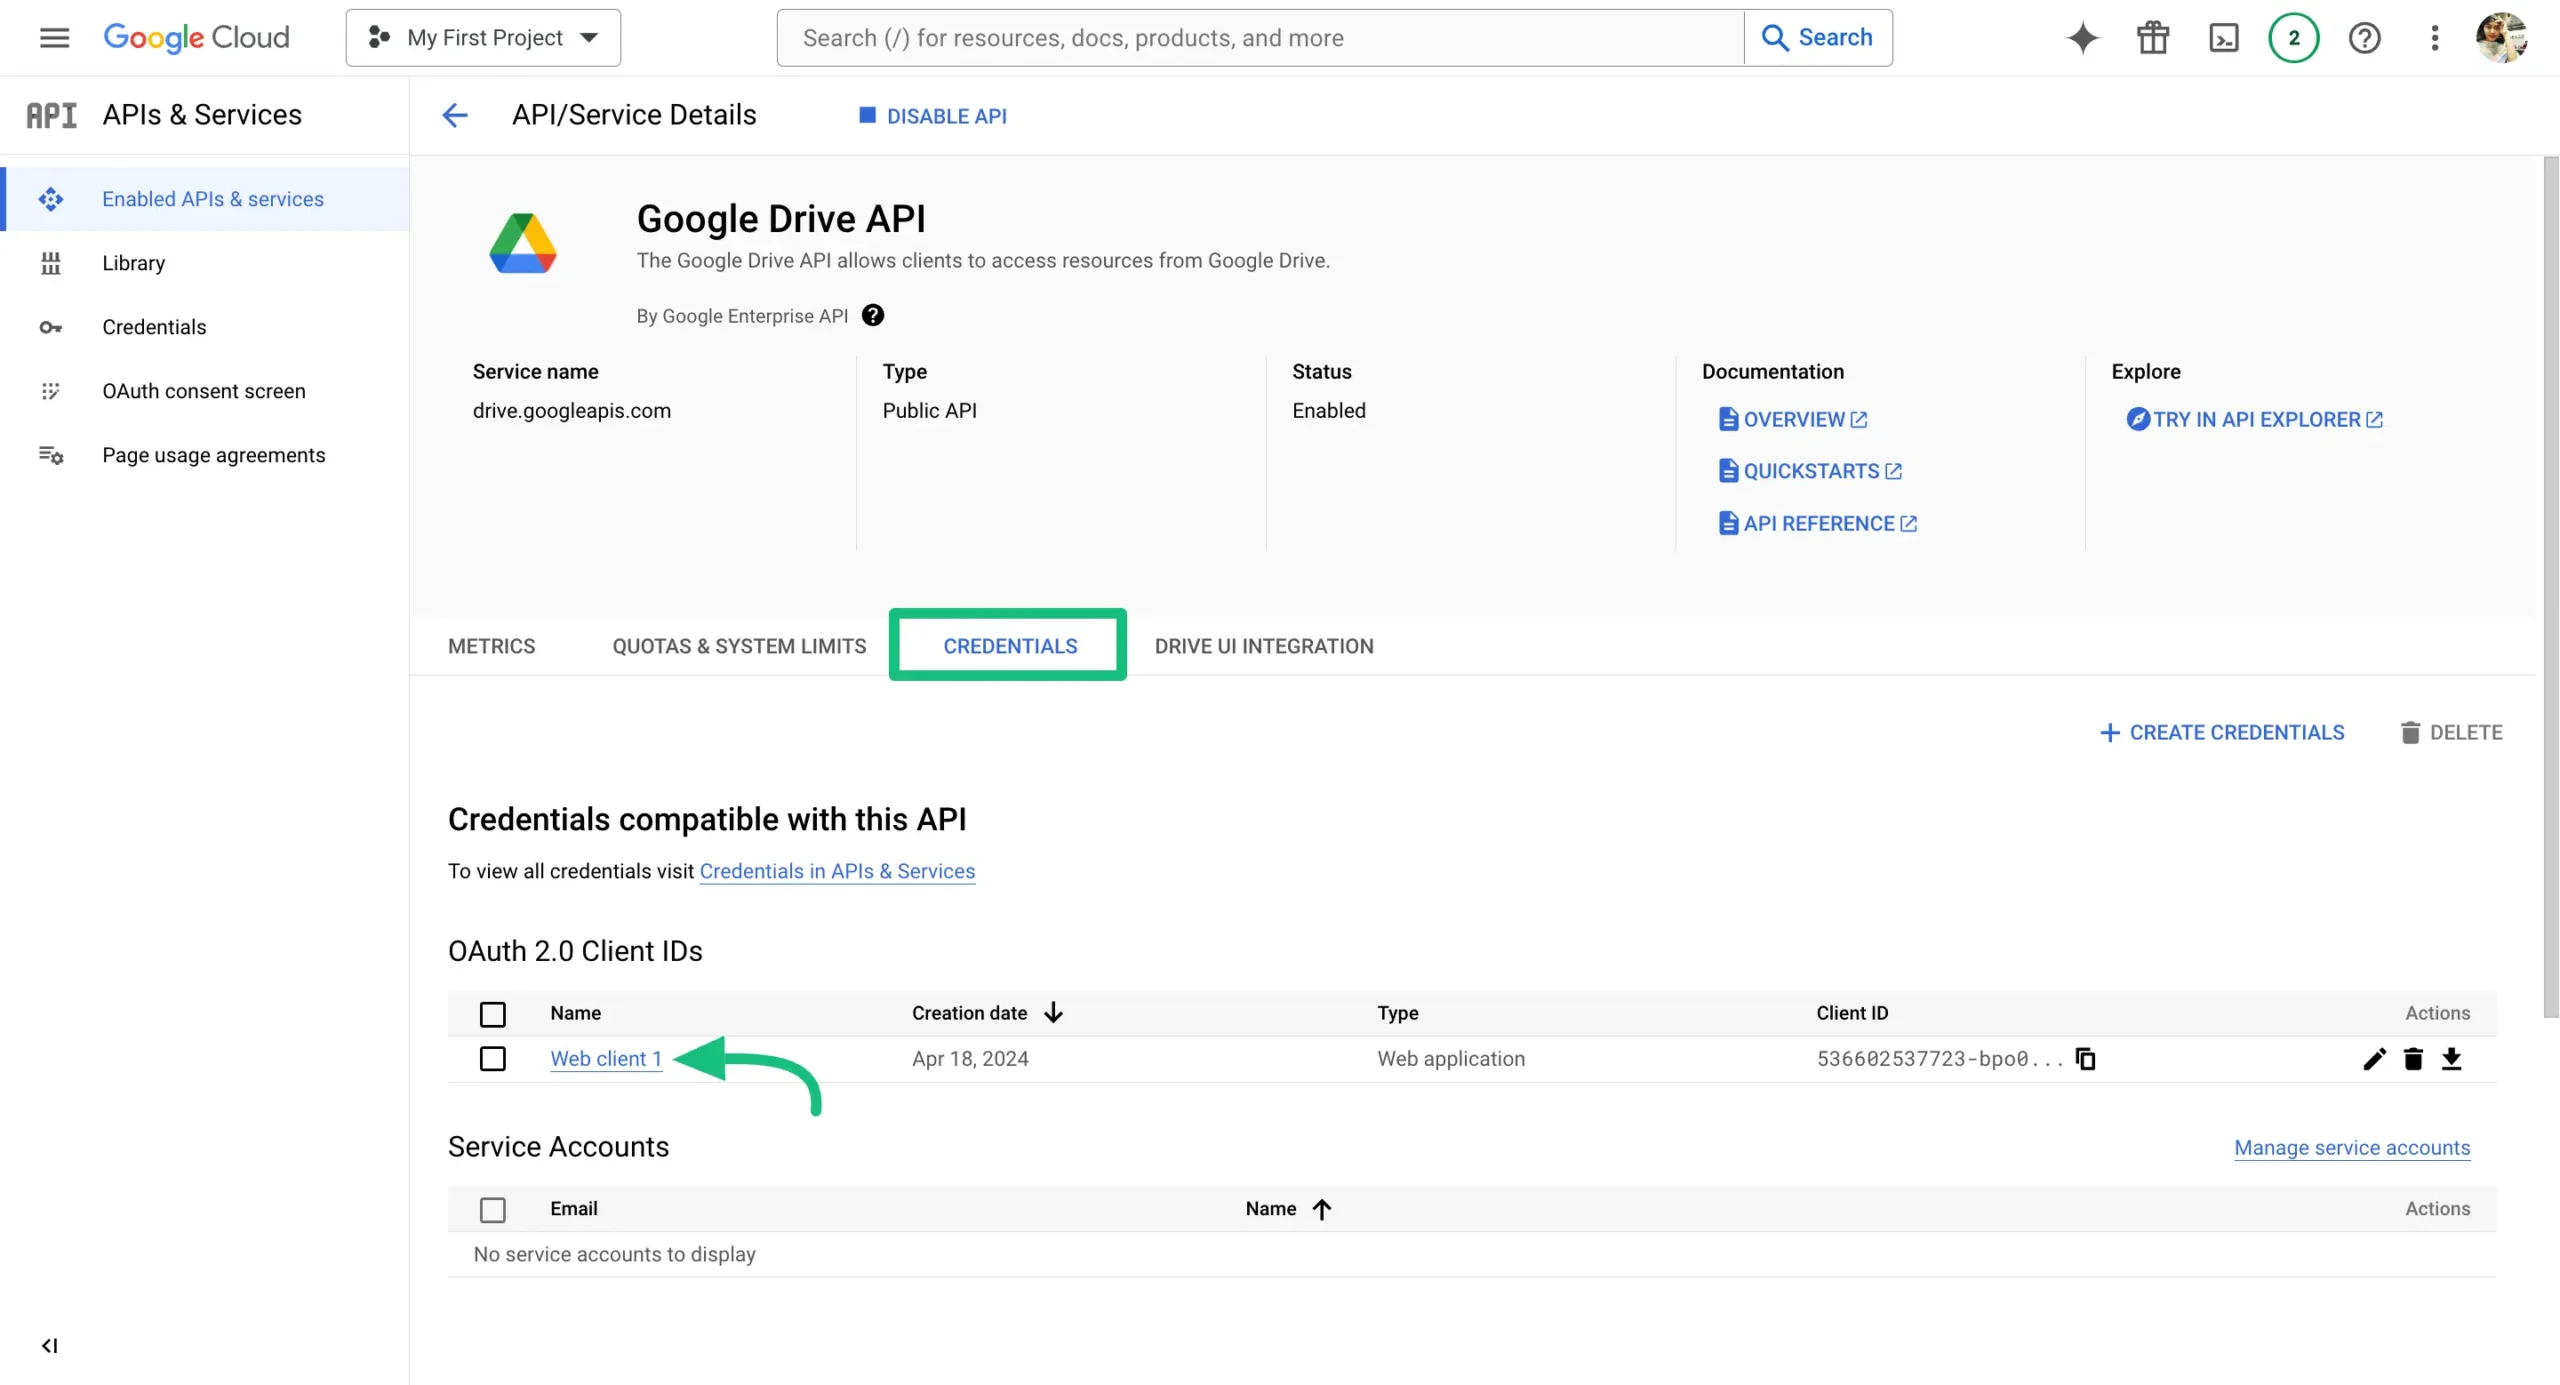
Now this page will come, go to the CREDENTIALS section and click on Web Client 1 under OAuth 2.0 Client IDs.
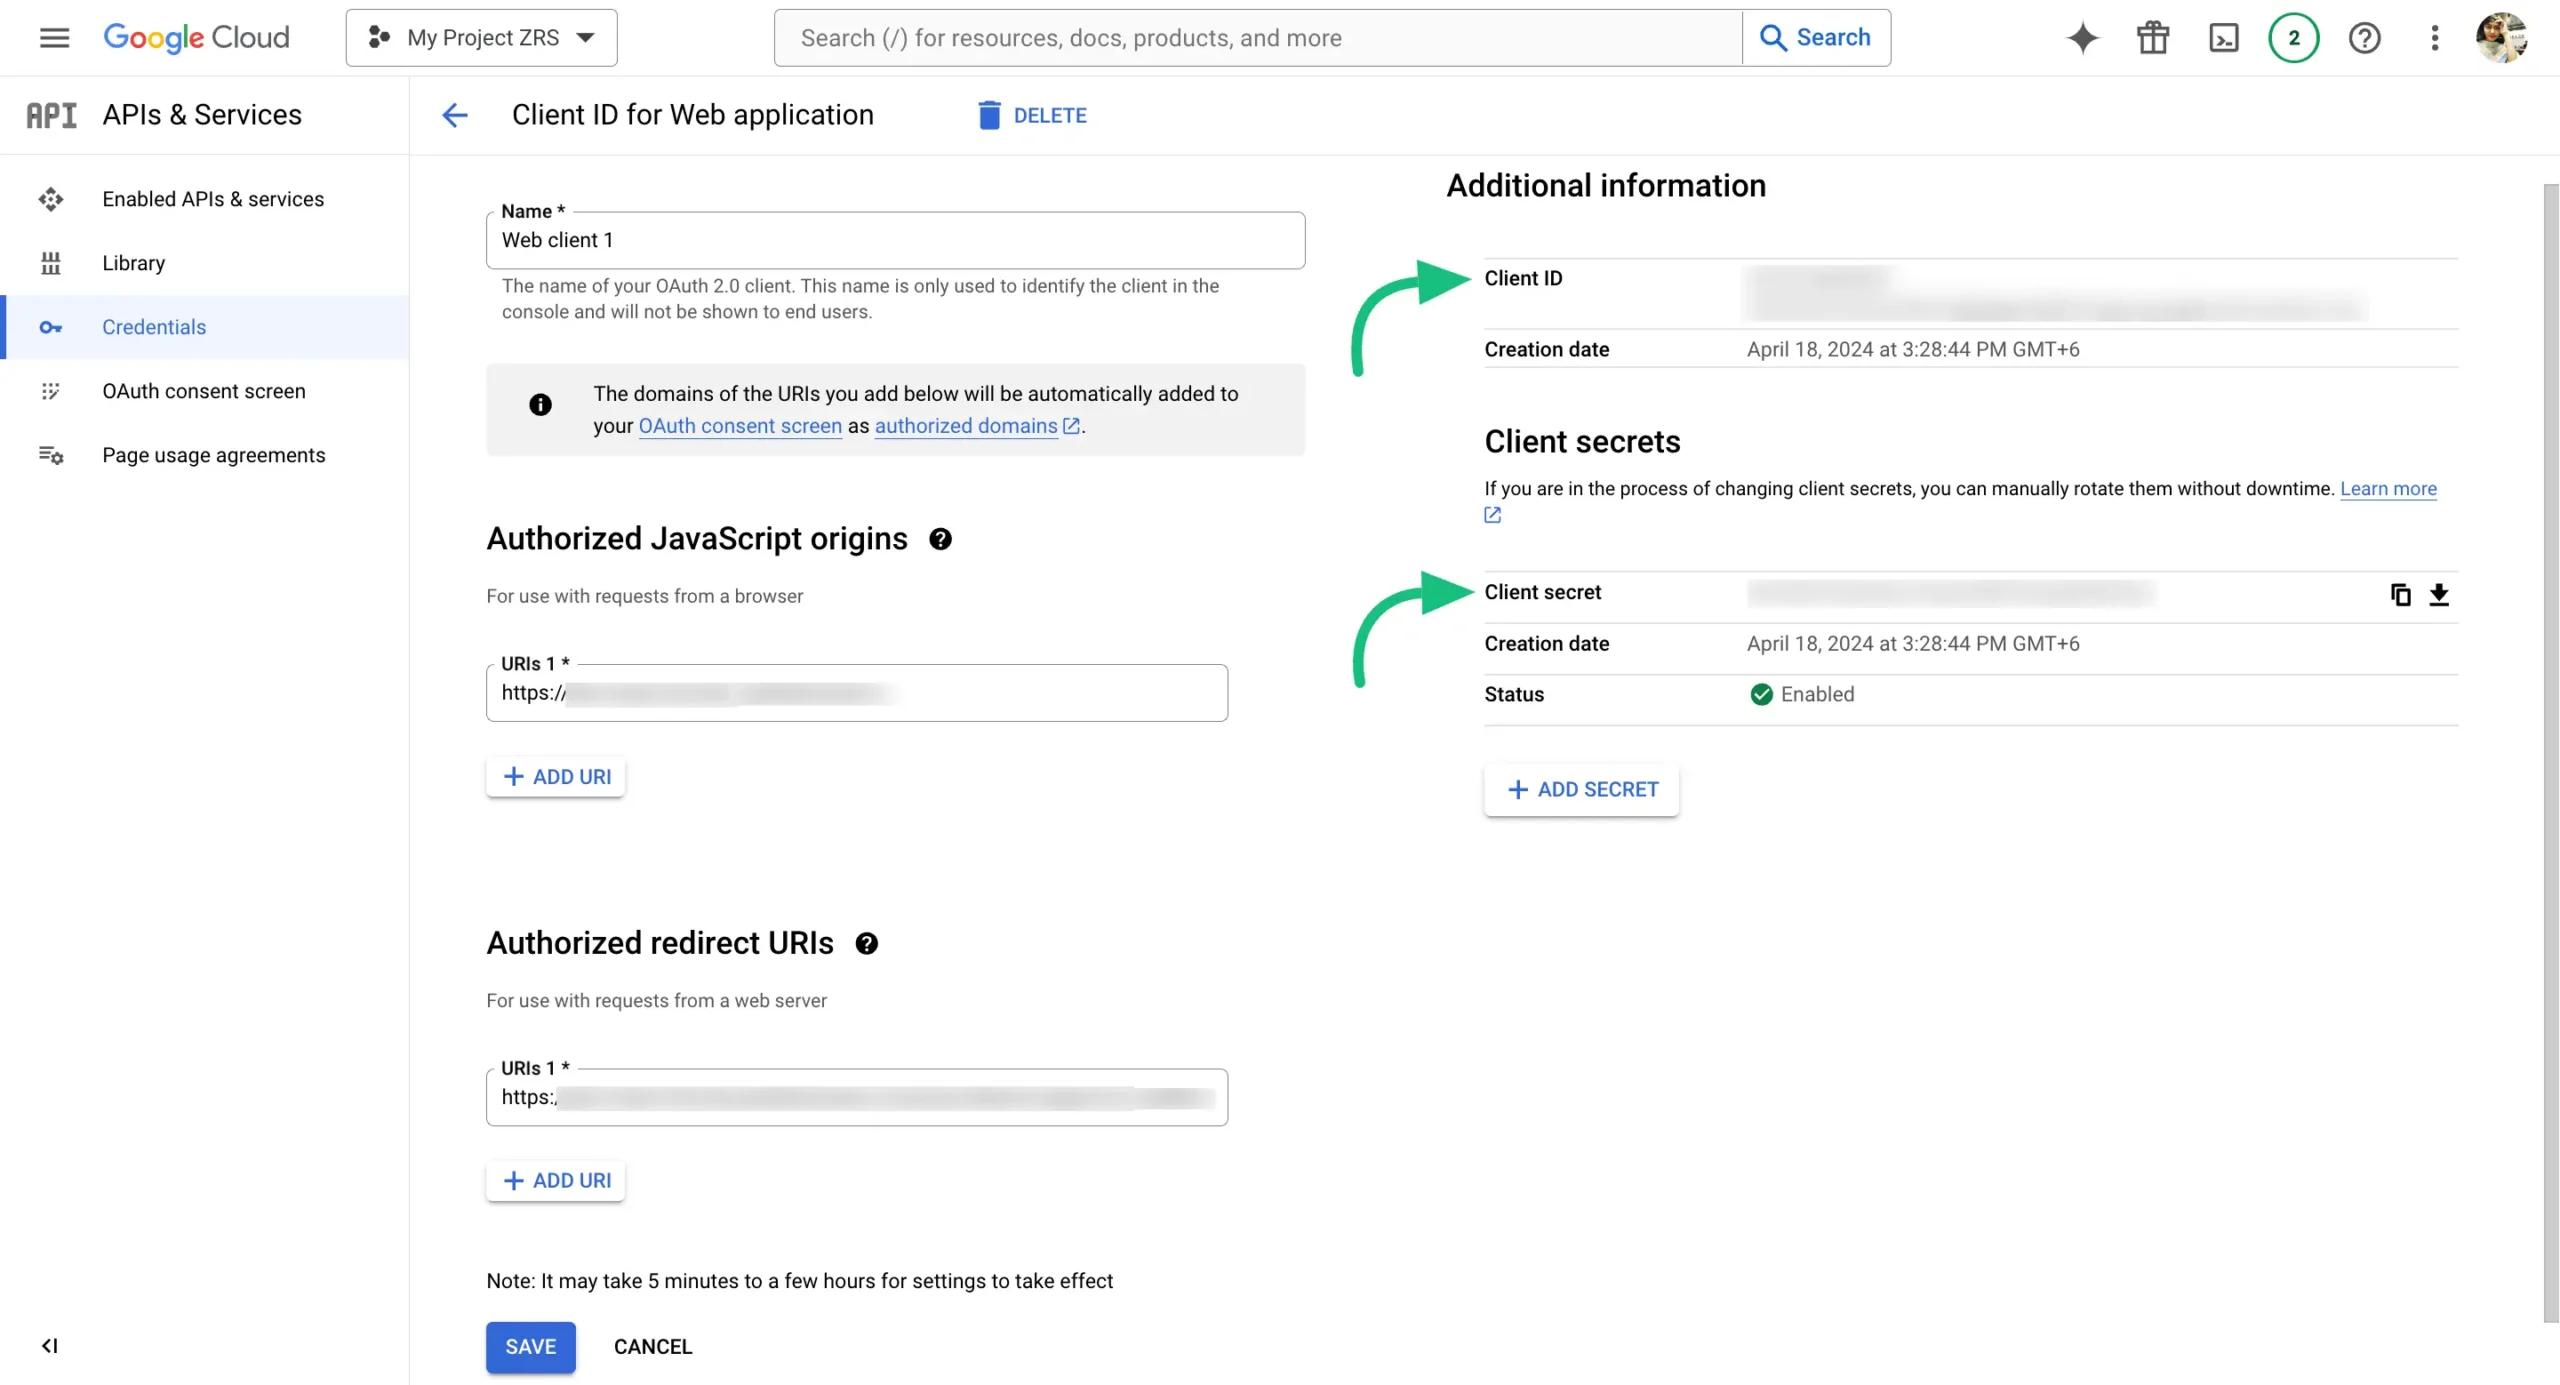
After that, the below page will come and you will find the Client ID and Client Secret here copy these things.
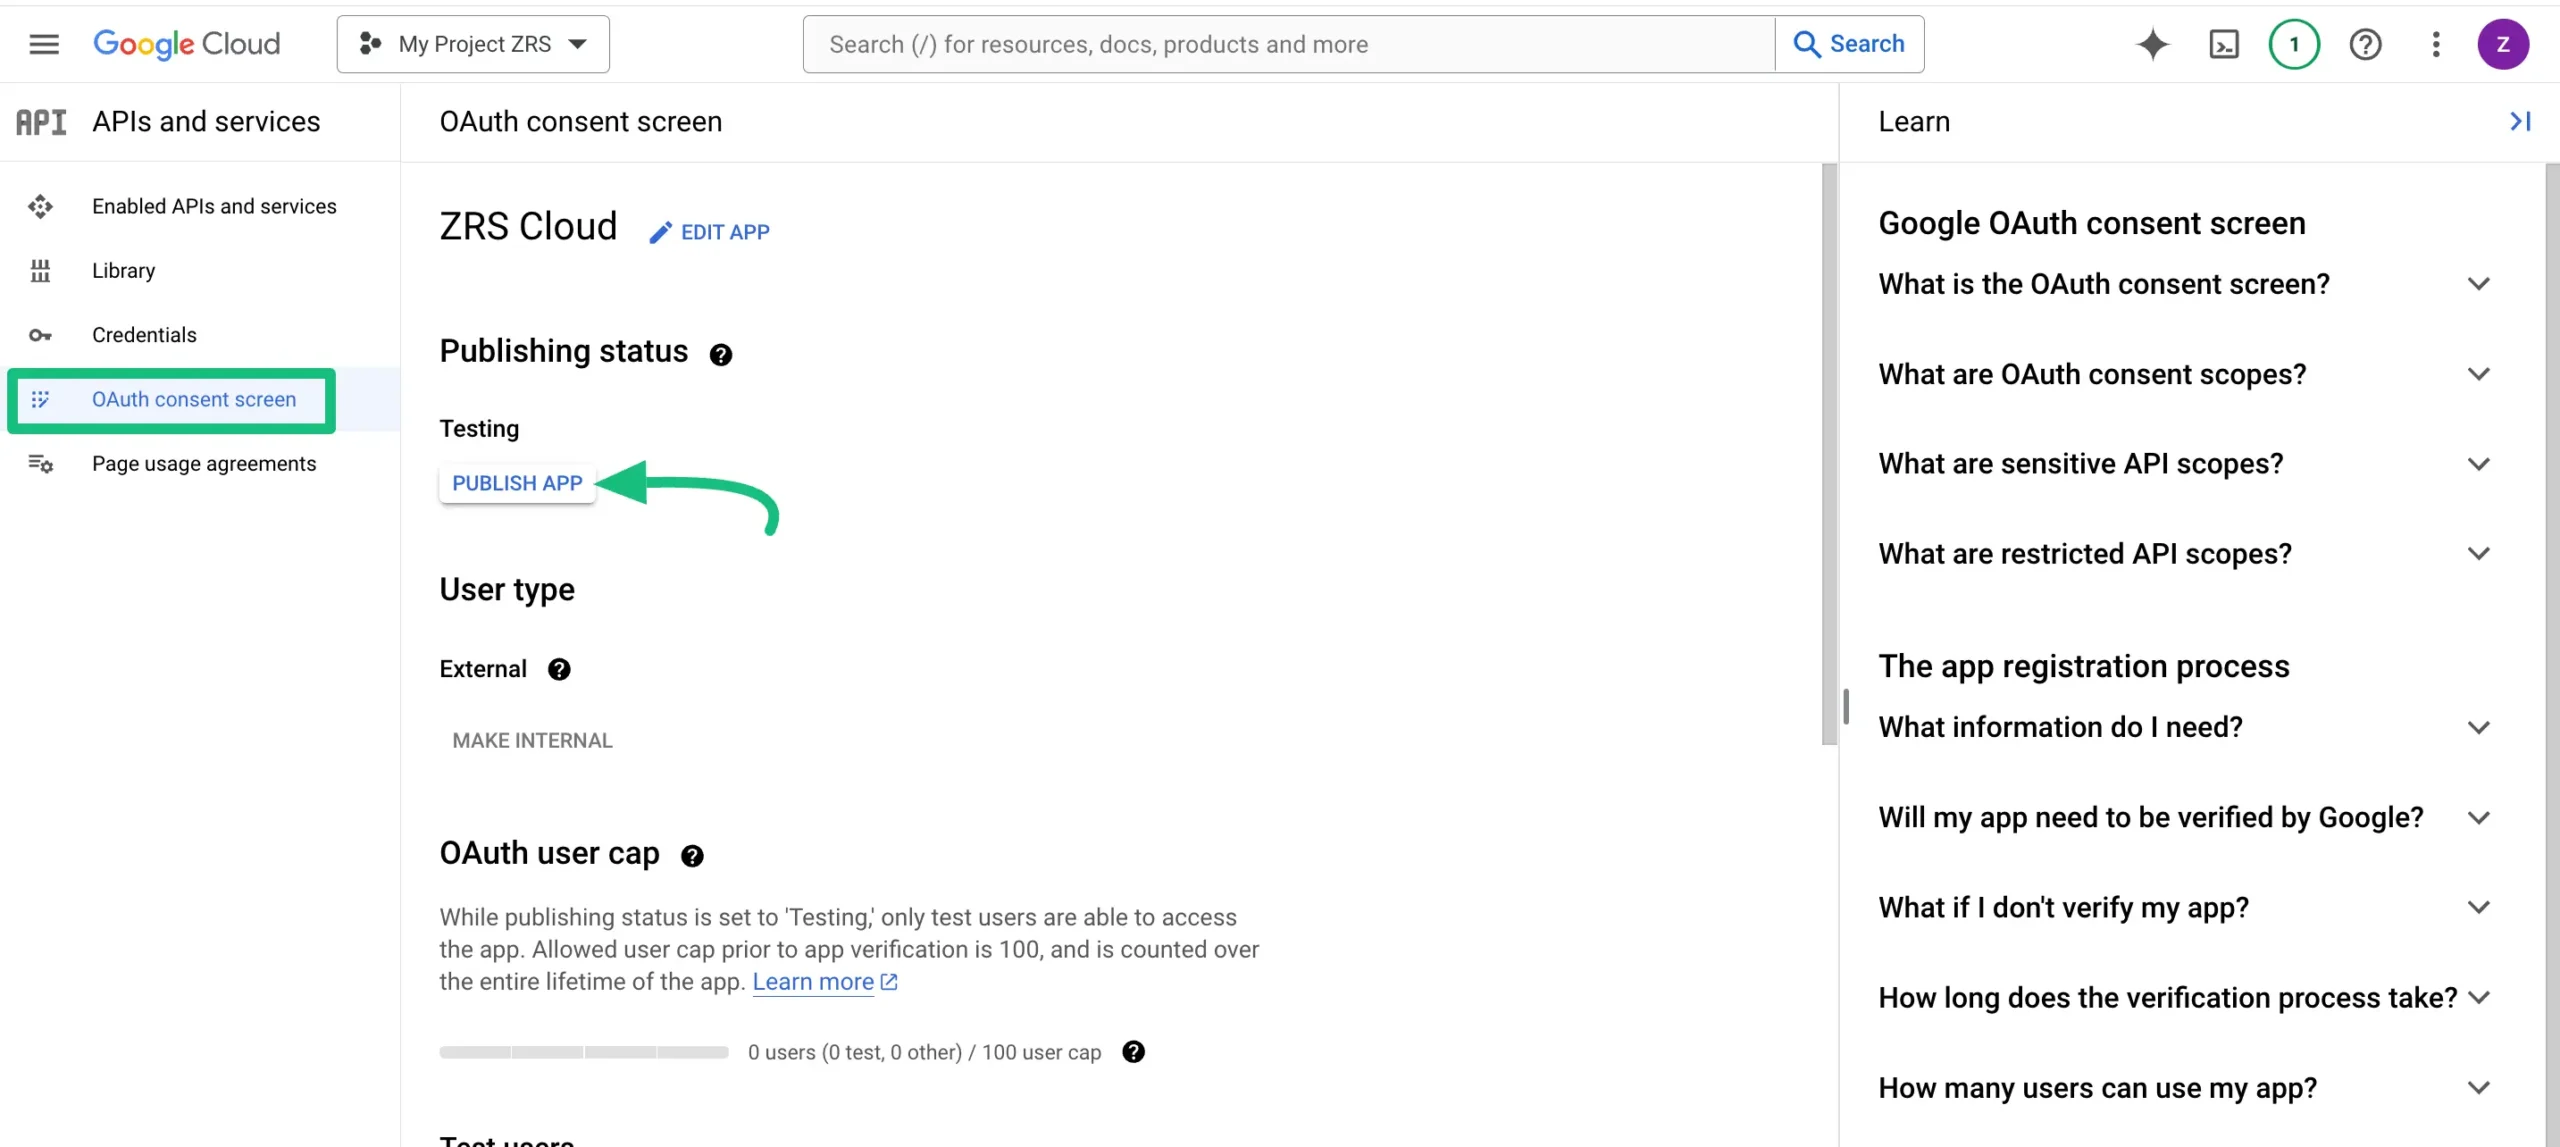
Now, go to the OAuth Consent Screen section and click the PUBLISH APP button.
Configure Fluent Support
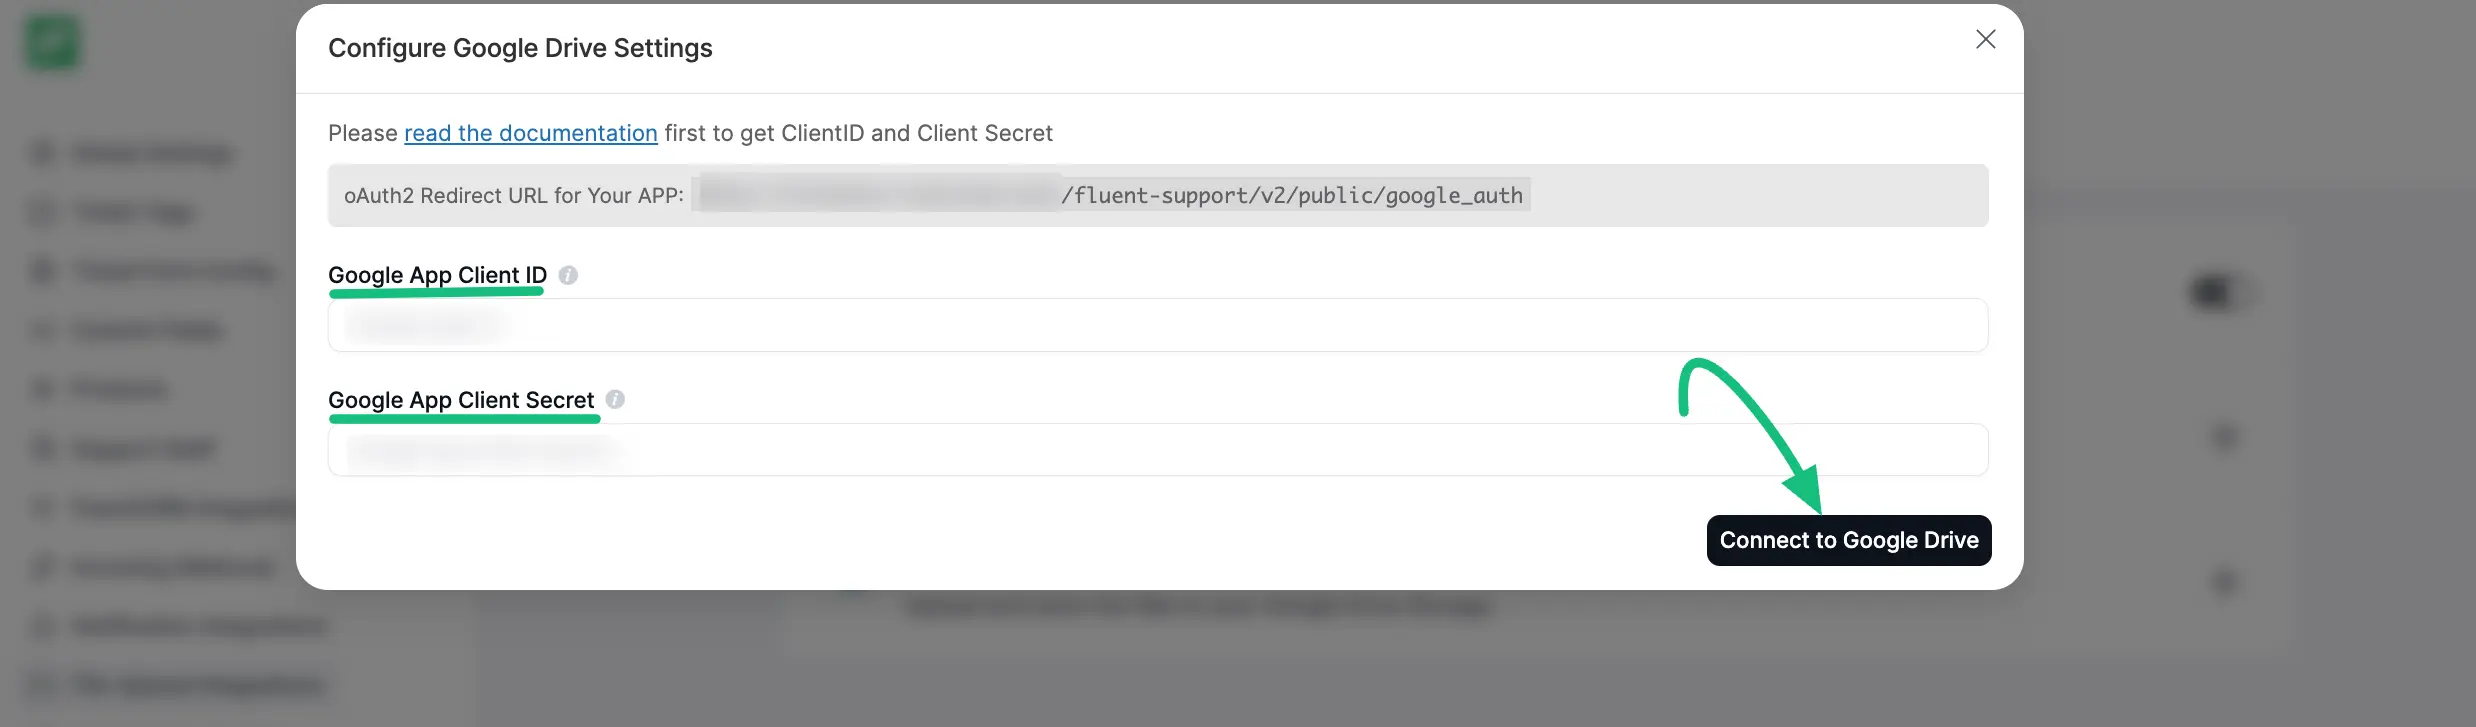
Now, return to your Fluent Support Dashboard > Settings > File Upload Integration section from the left sidebar. Then, find Google Drive and click the Settings (gear) icon.
Now, Paste the Client ID & Client Secret here. Click on the Connect to Google Drive button.
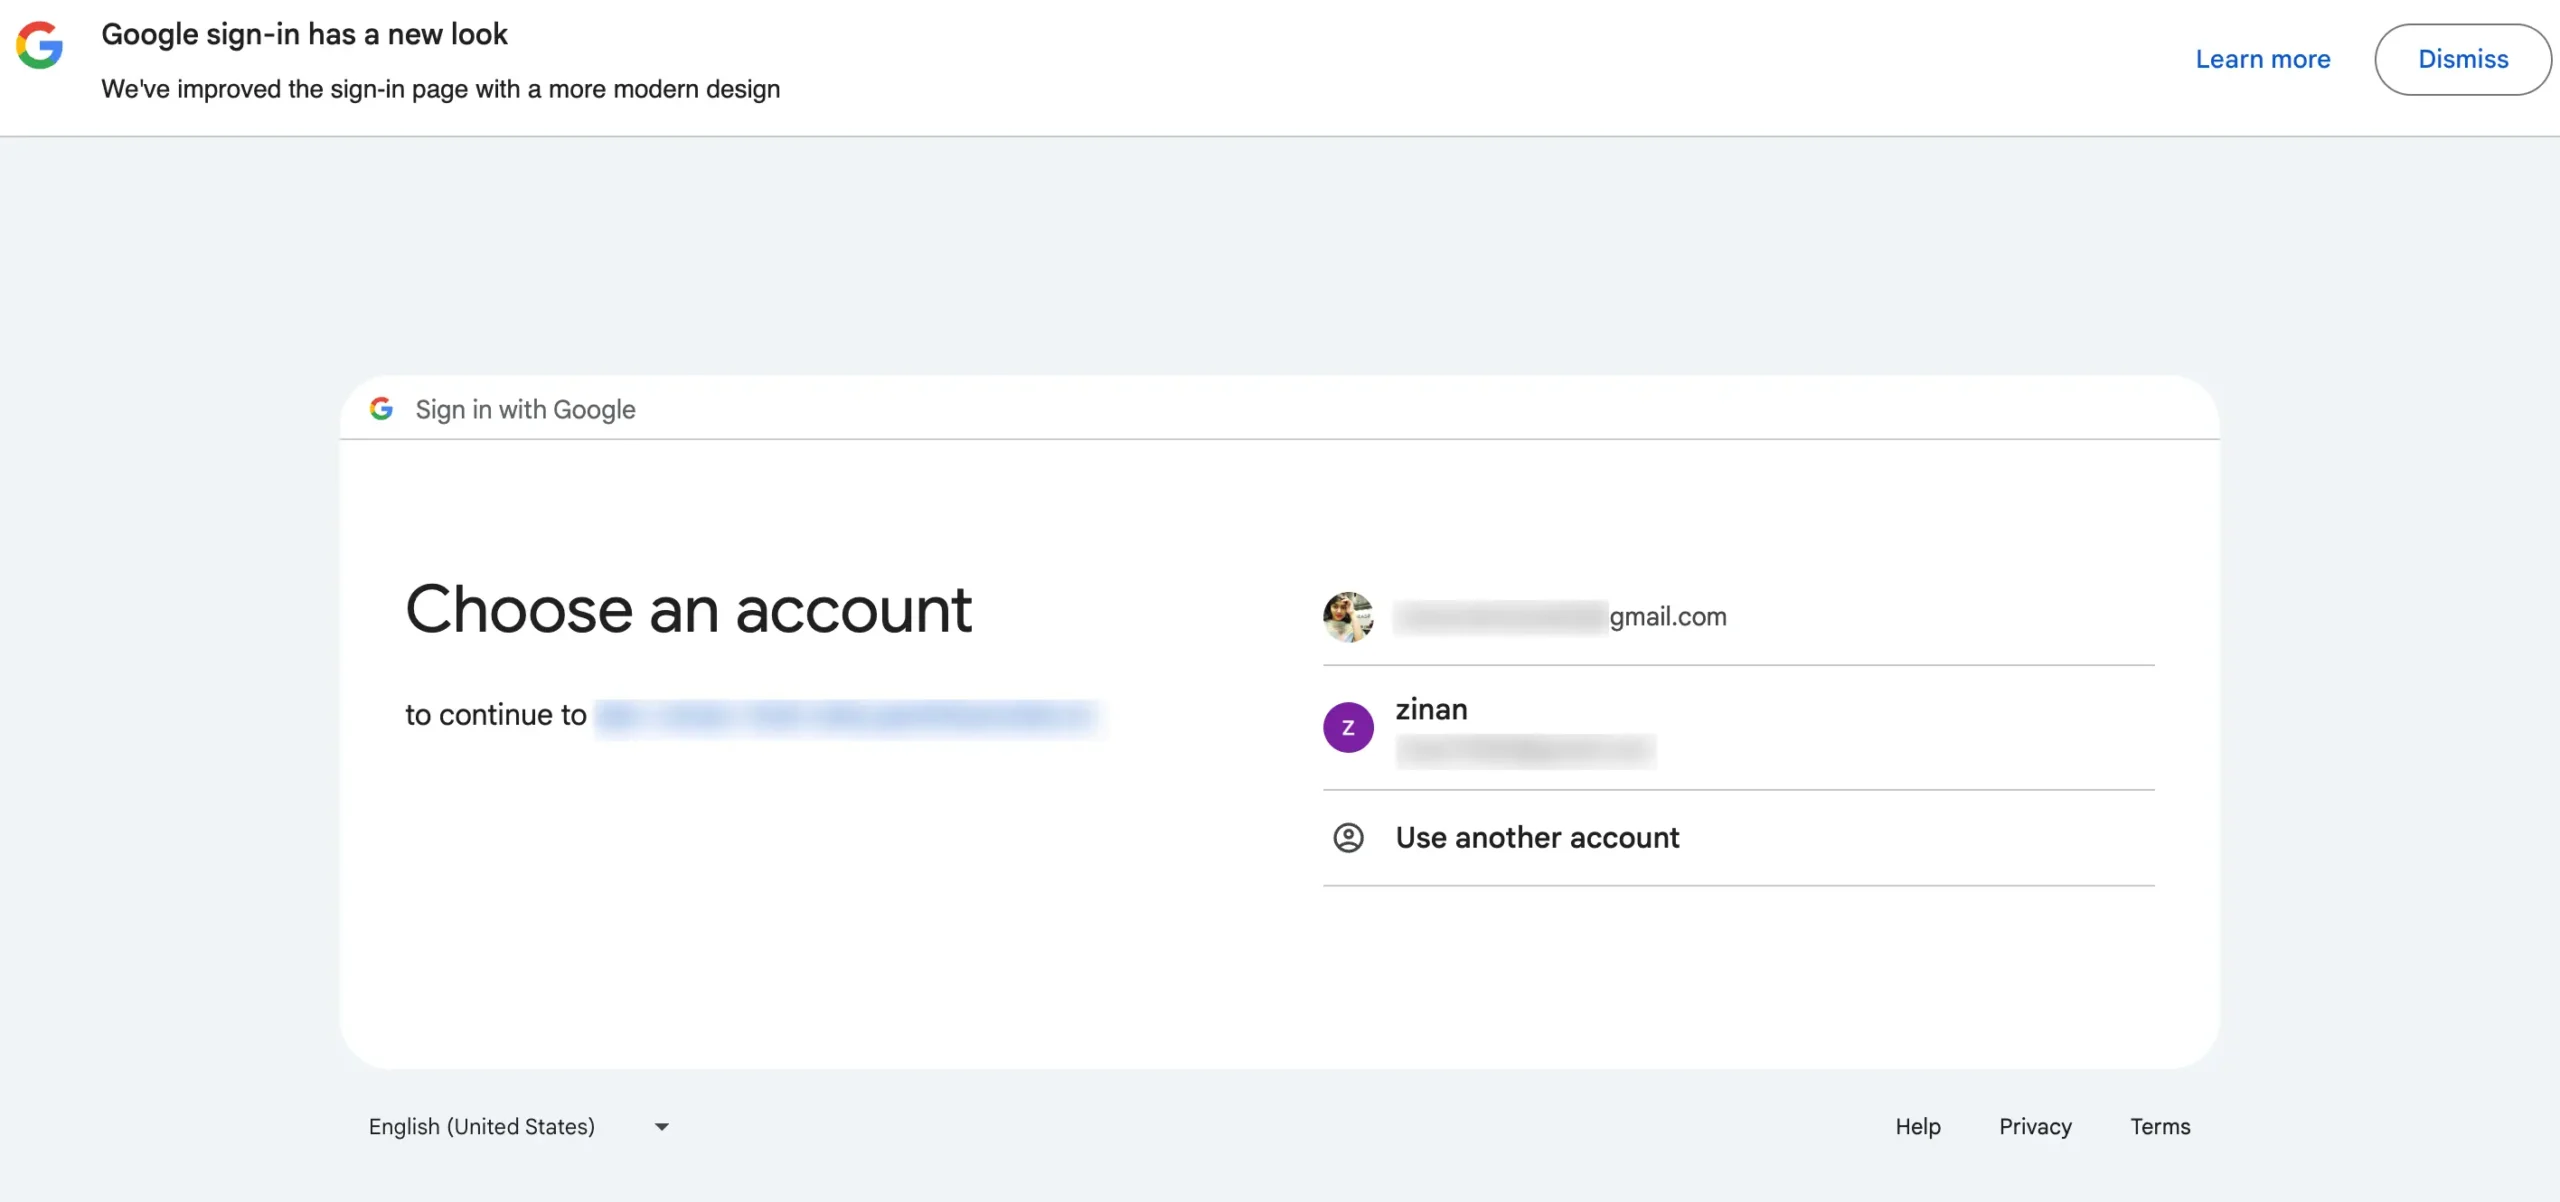
Now you have to choose an account for drive upload.
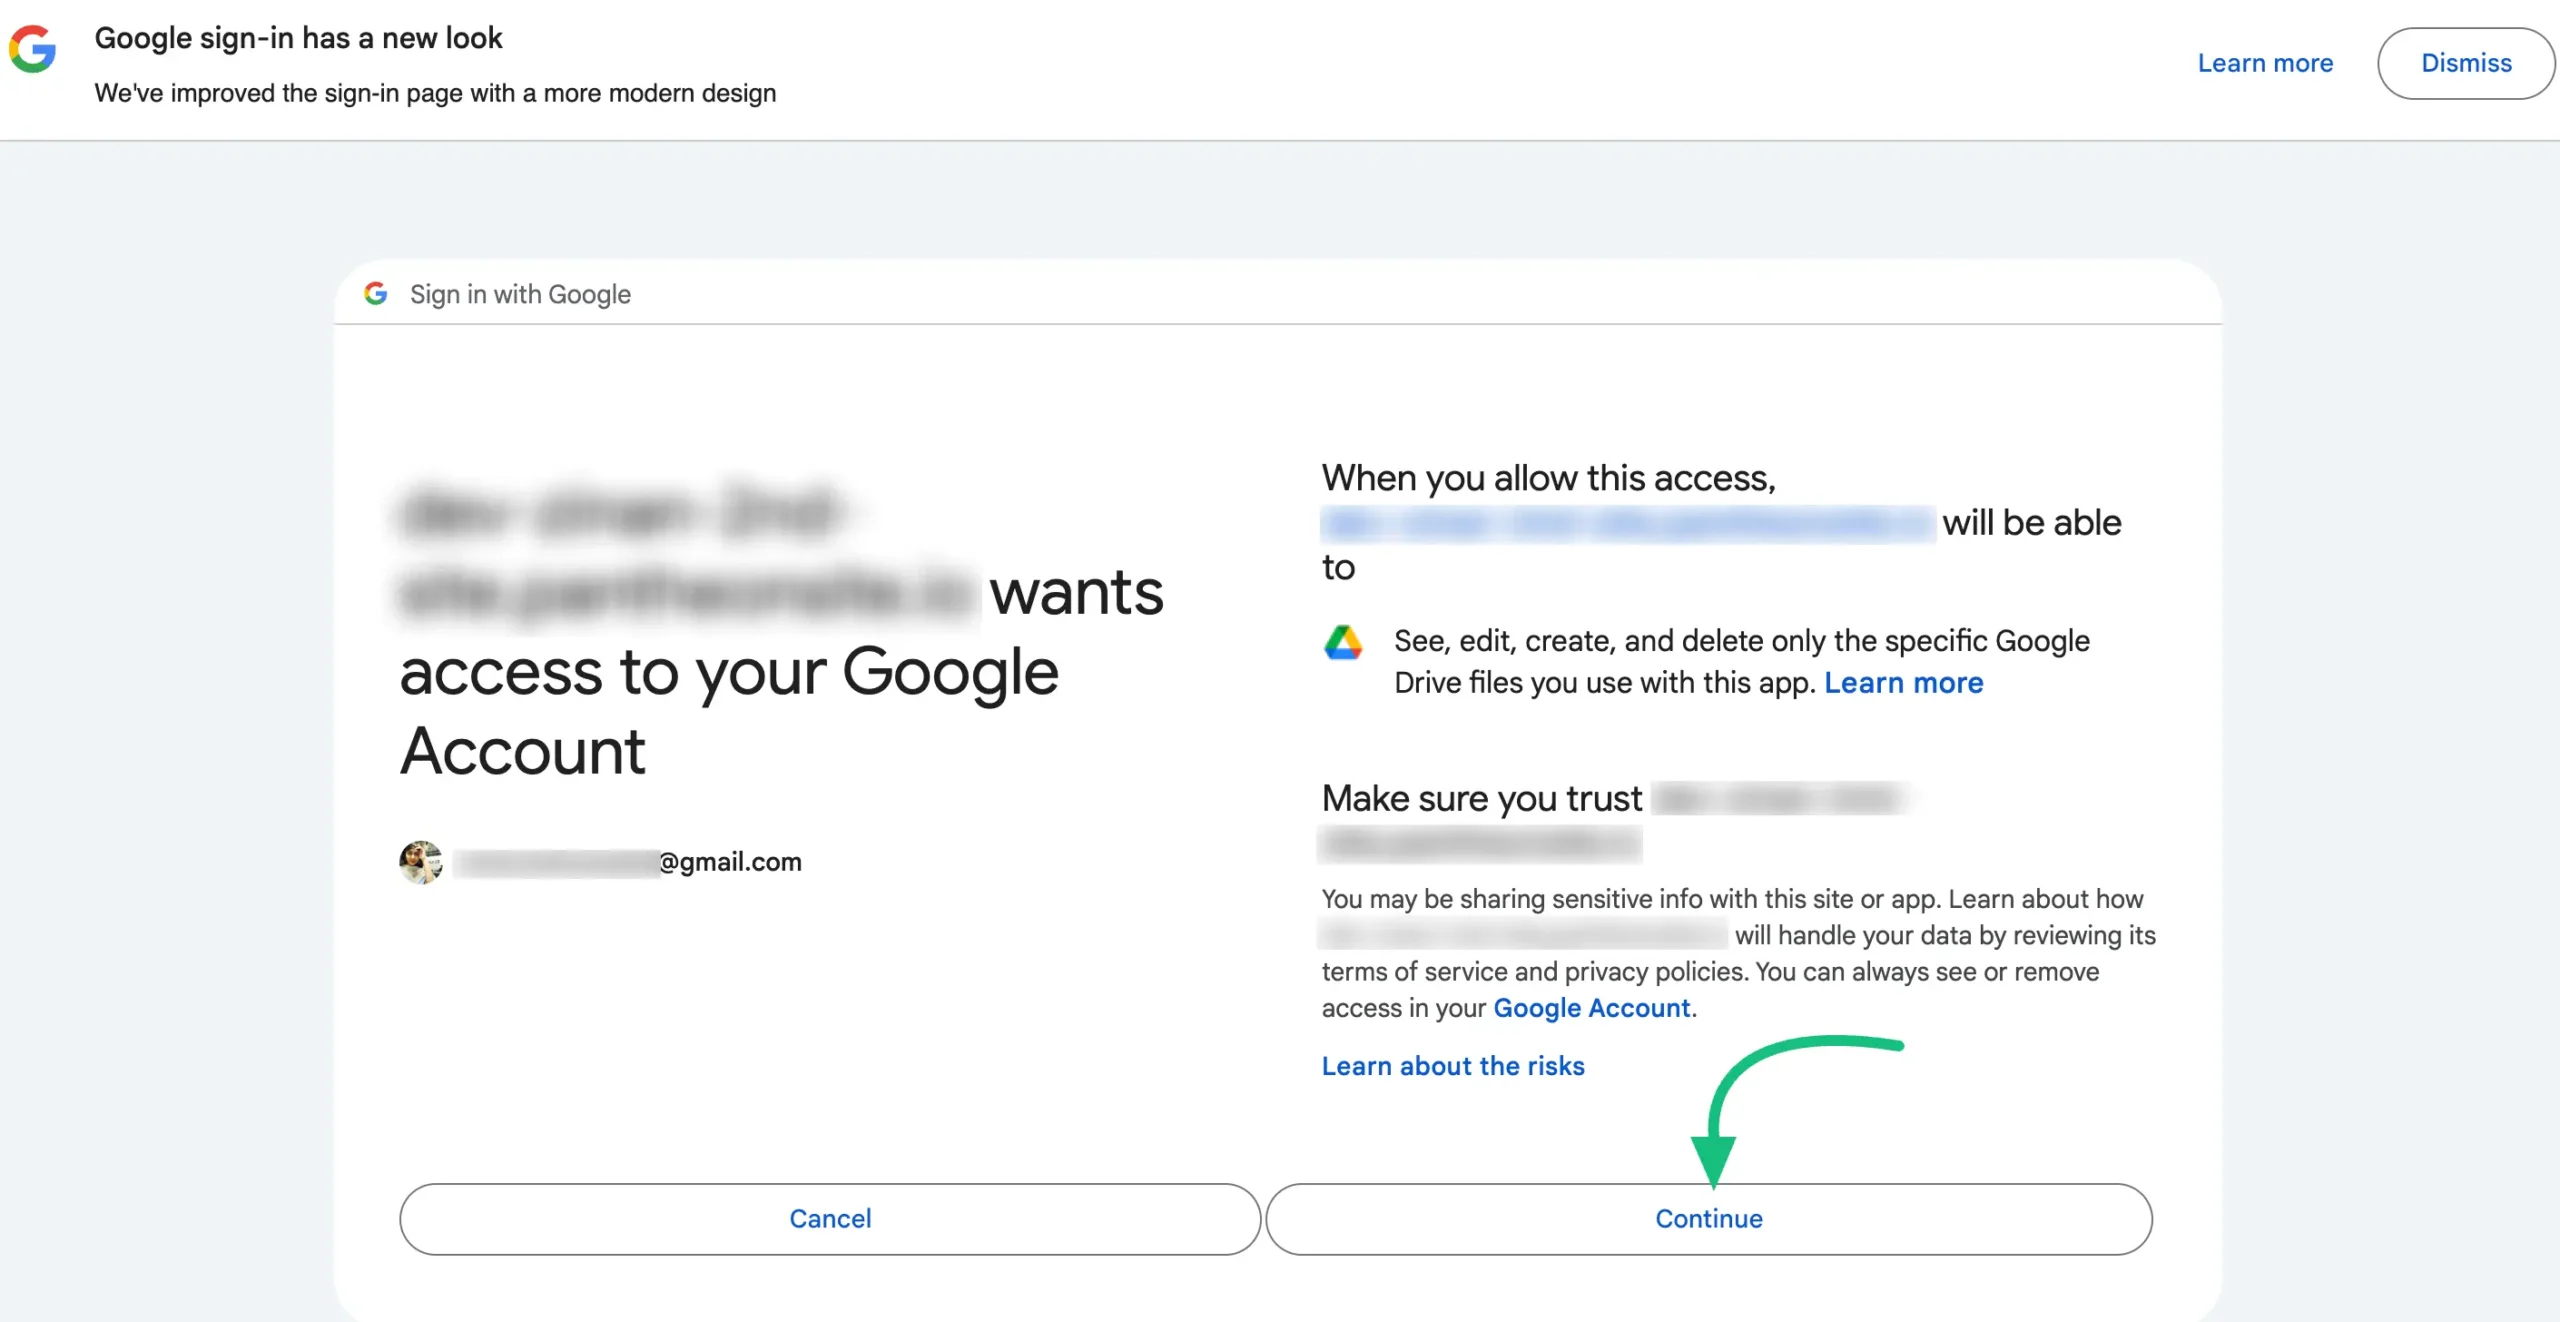
Click on Continue to complete the drive confirmation process.
Click on the Enable button to end the integration process for Google Drive upload.
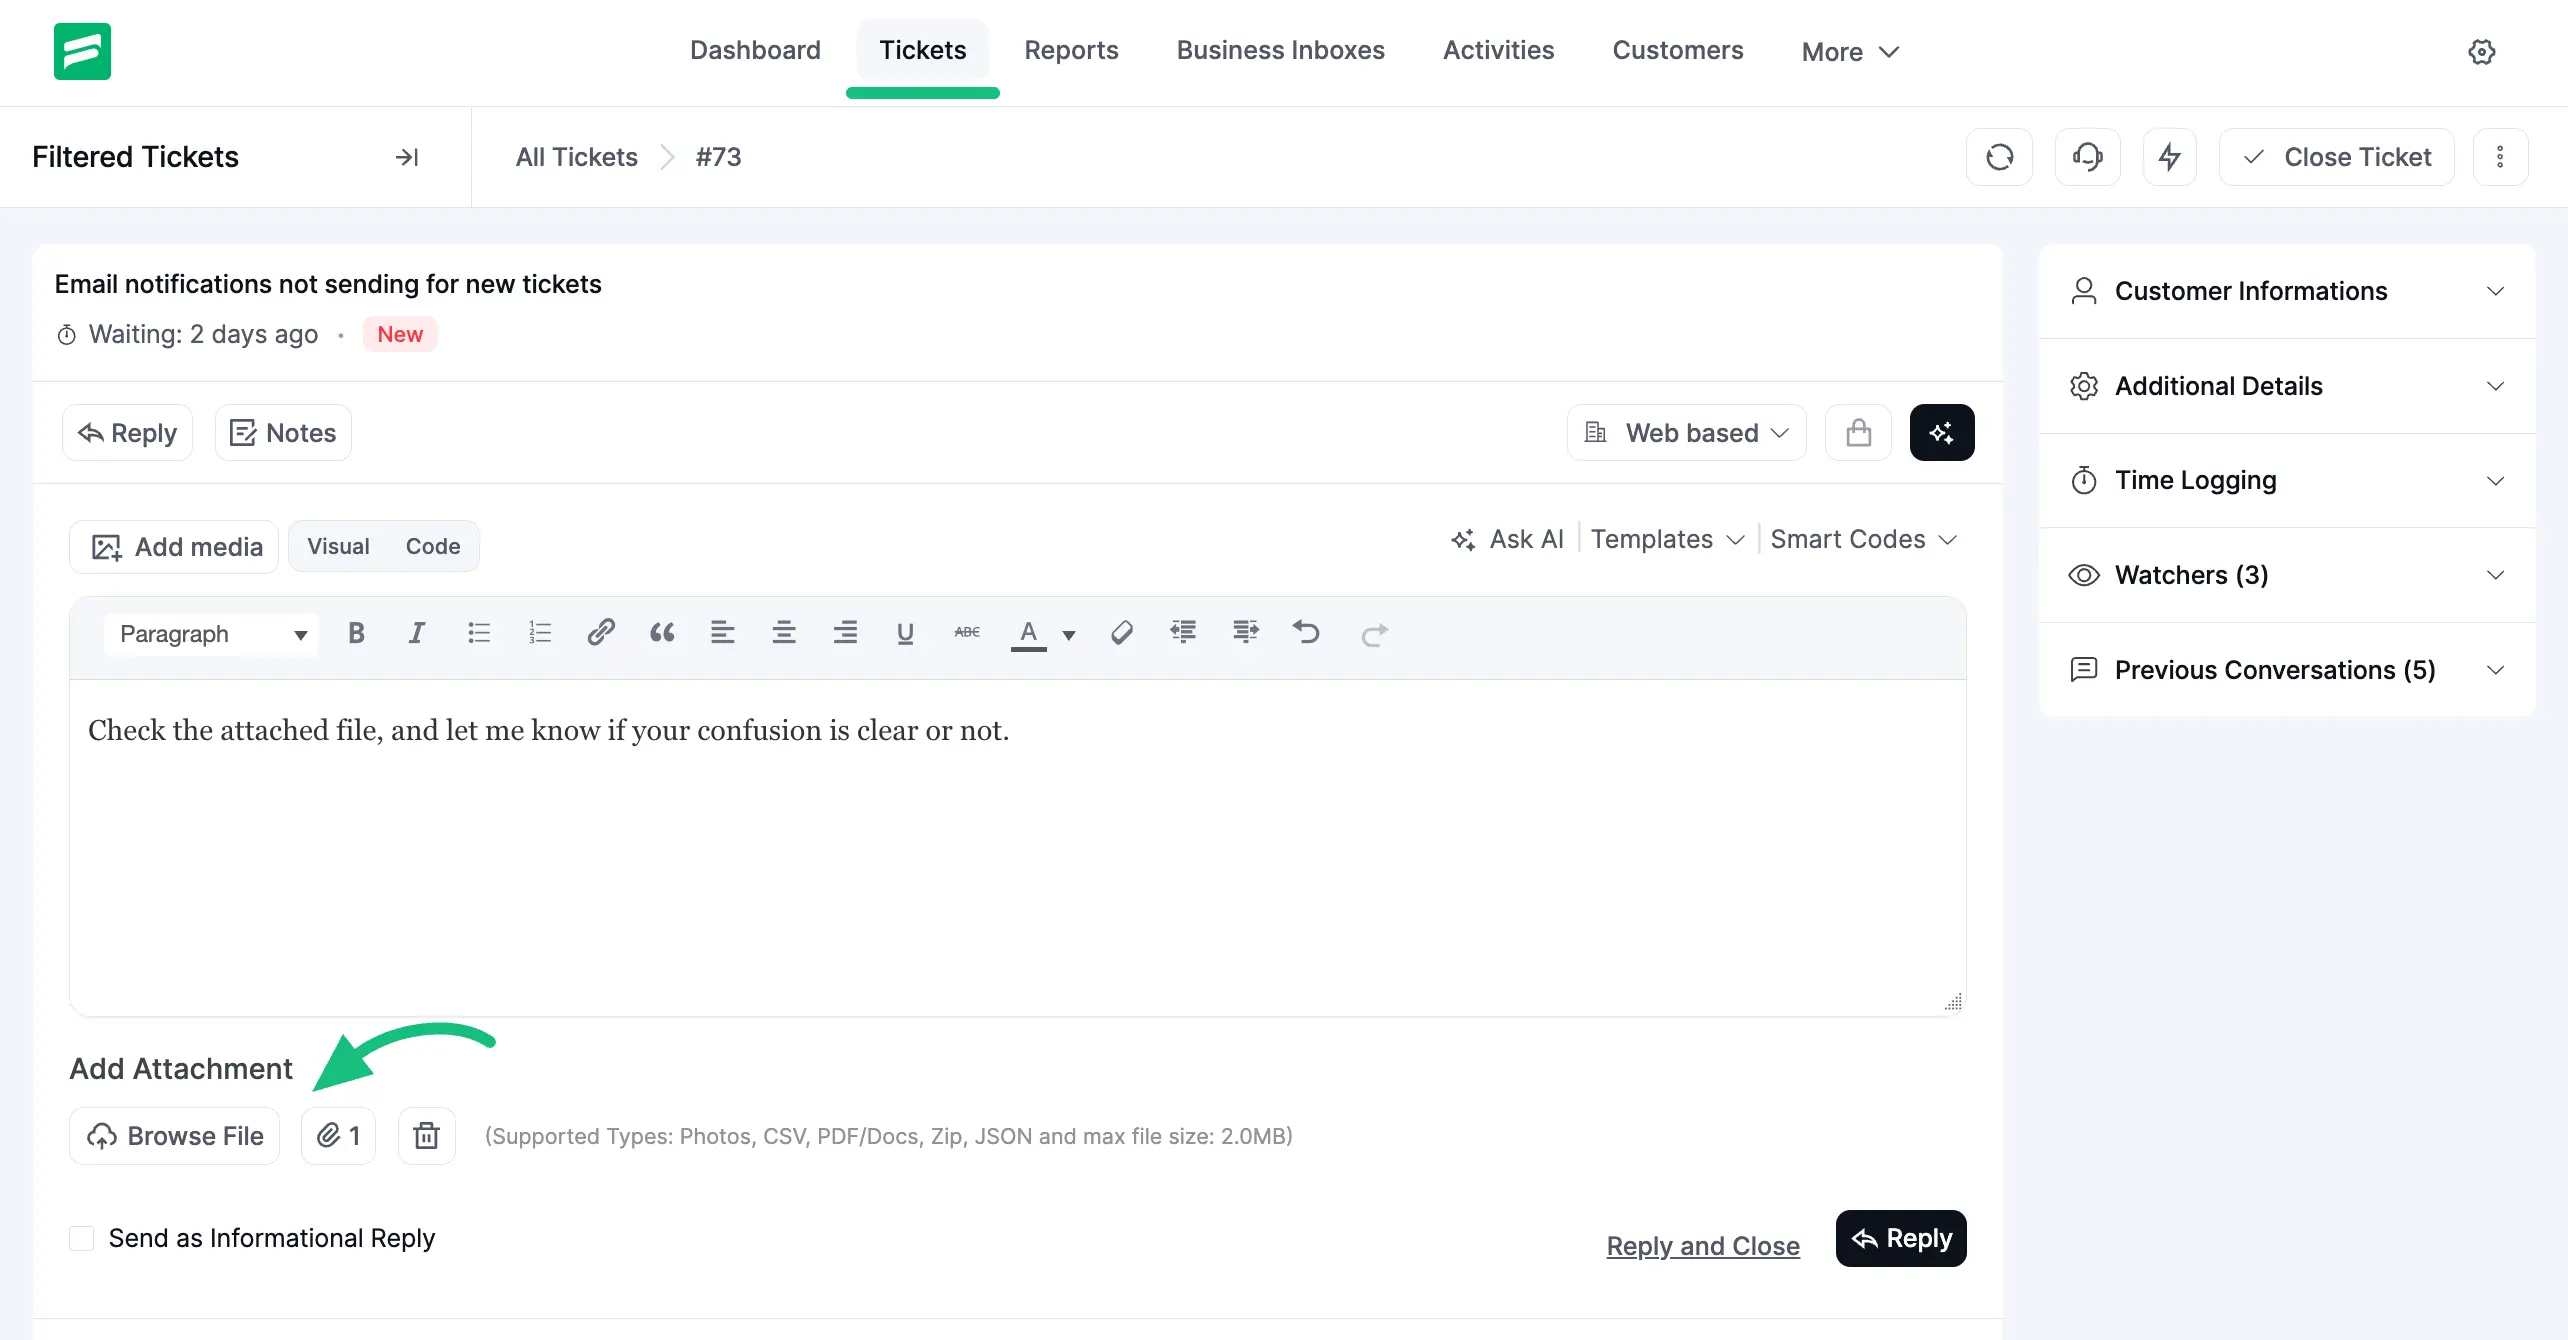
For Example
Here, you can see that a file is uploaded with a ticket reply.
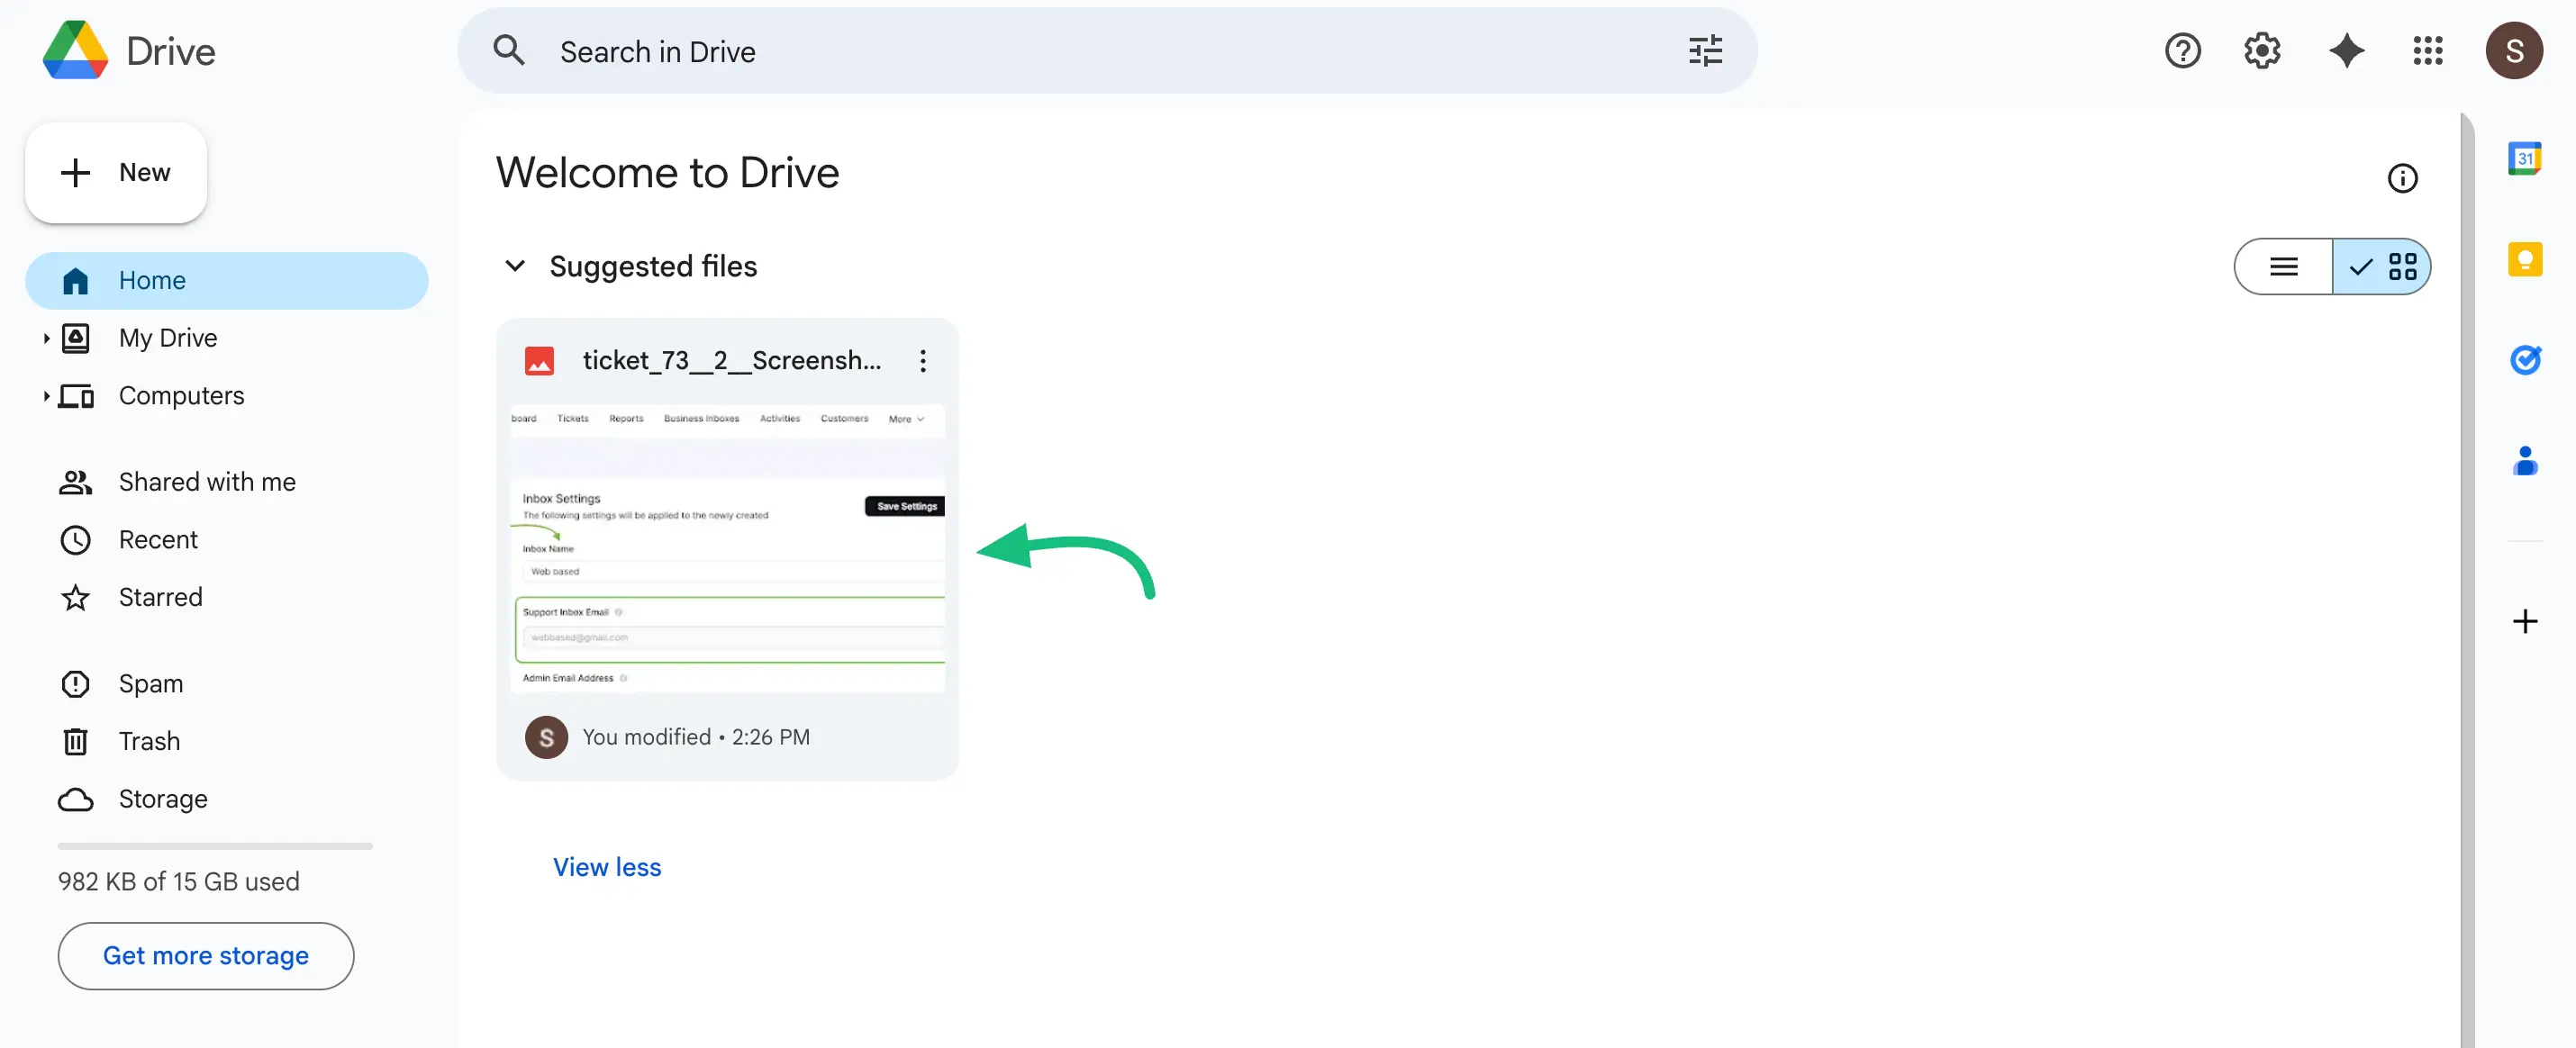
Now, you will find the uploaded file stored in your Google Drive.
This is how you can integrate Google Drive with Fluent Support!