Appearance
Web-Based Settings in Business Inbox
Web-based Business Inbox allows customers to create support tickets directly from the website only. This article will explain the functionalities of web-based business inbox settings in Fluent Support.
Web-Based Settings of Business Inbox
Go to Business Inboxes from the Fluent Support Dashboard , select the business inbox you kept Web-based , and click on View Setting.
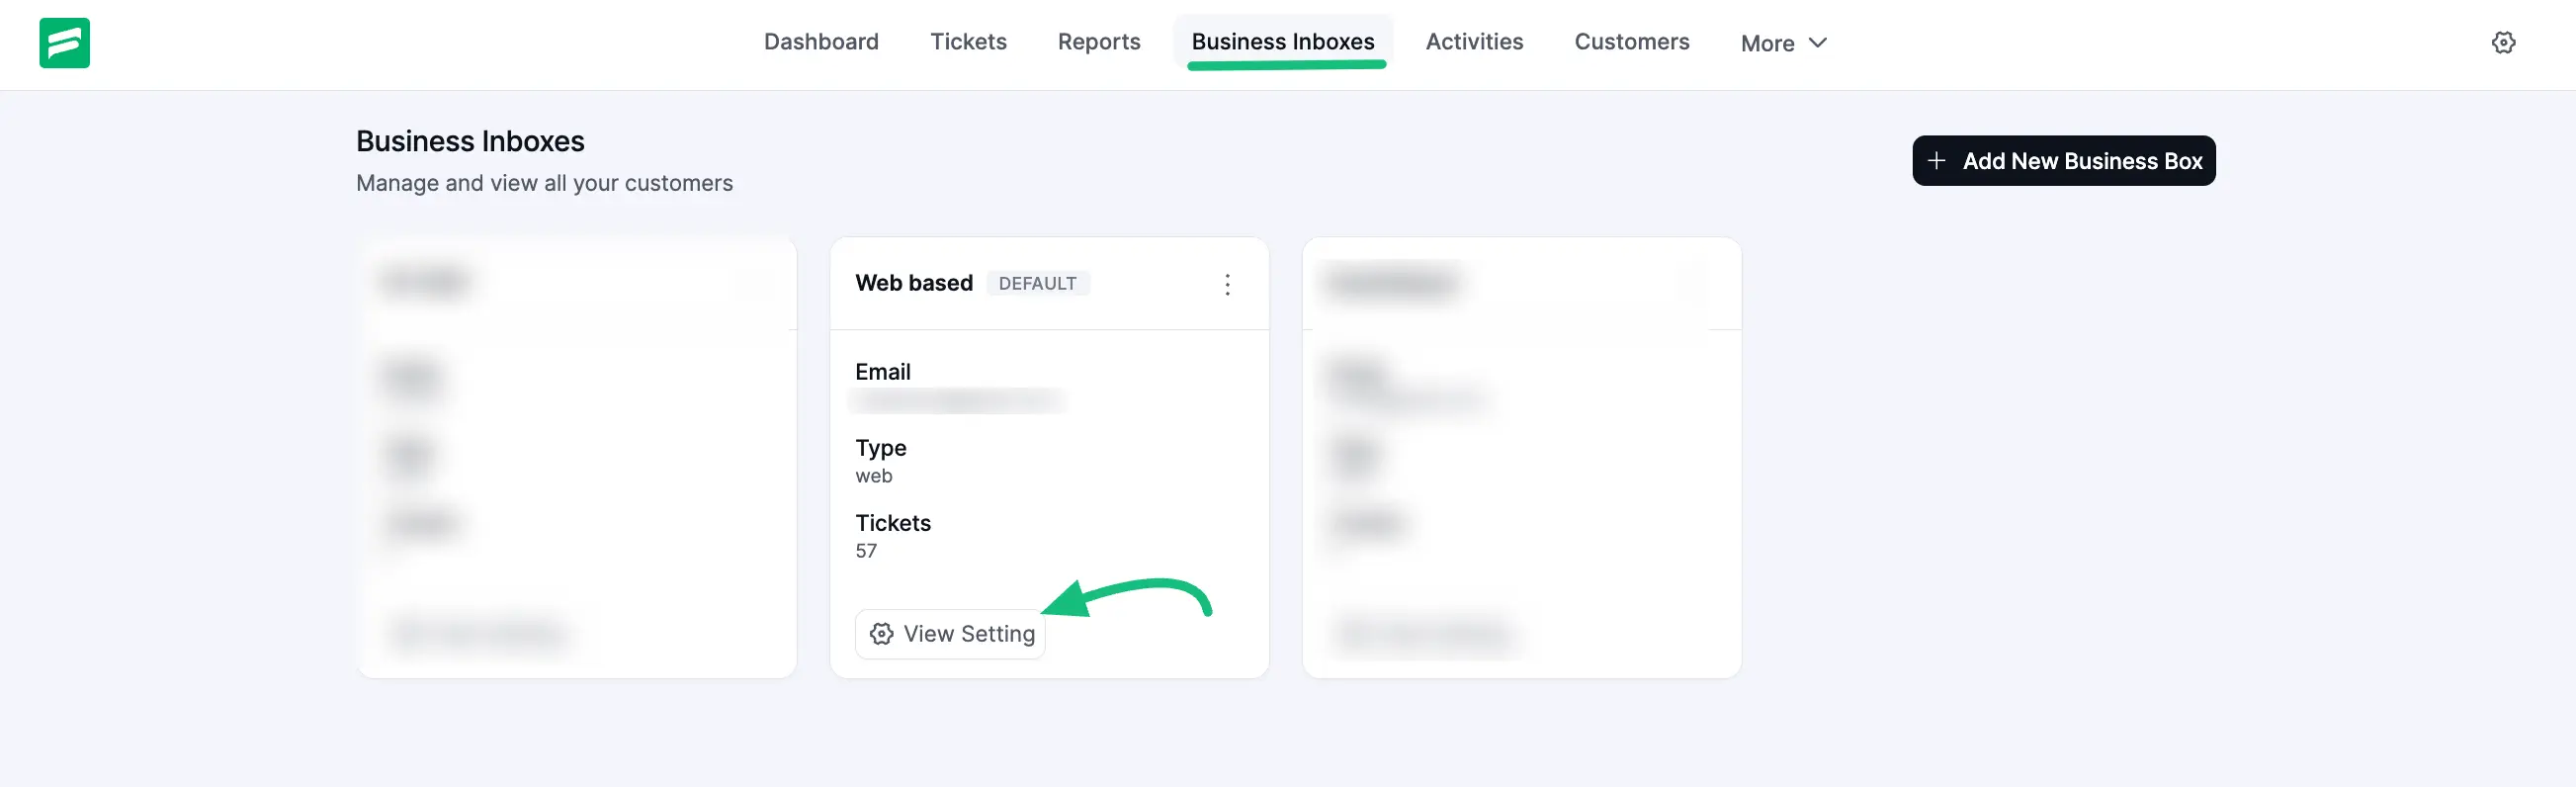
You will find two types of Settings options (Inbox Settings & Email Settings) to set your Web-Based Inbox.
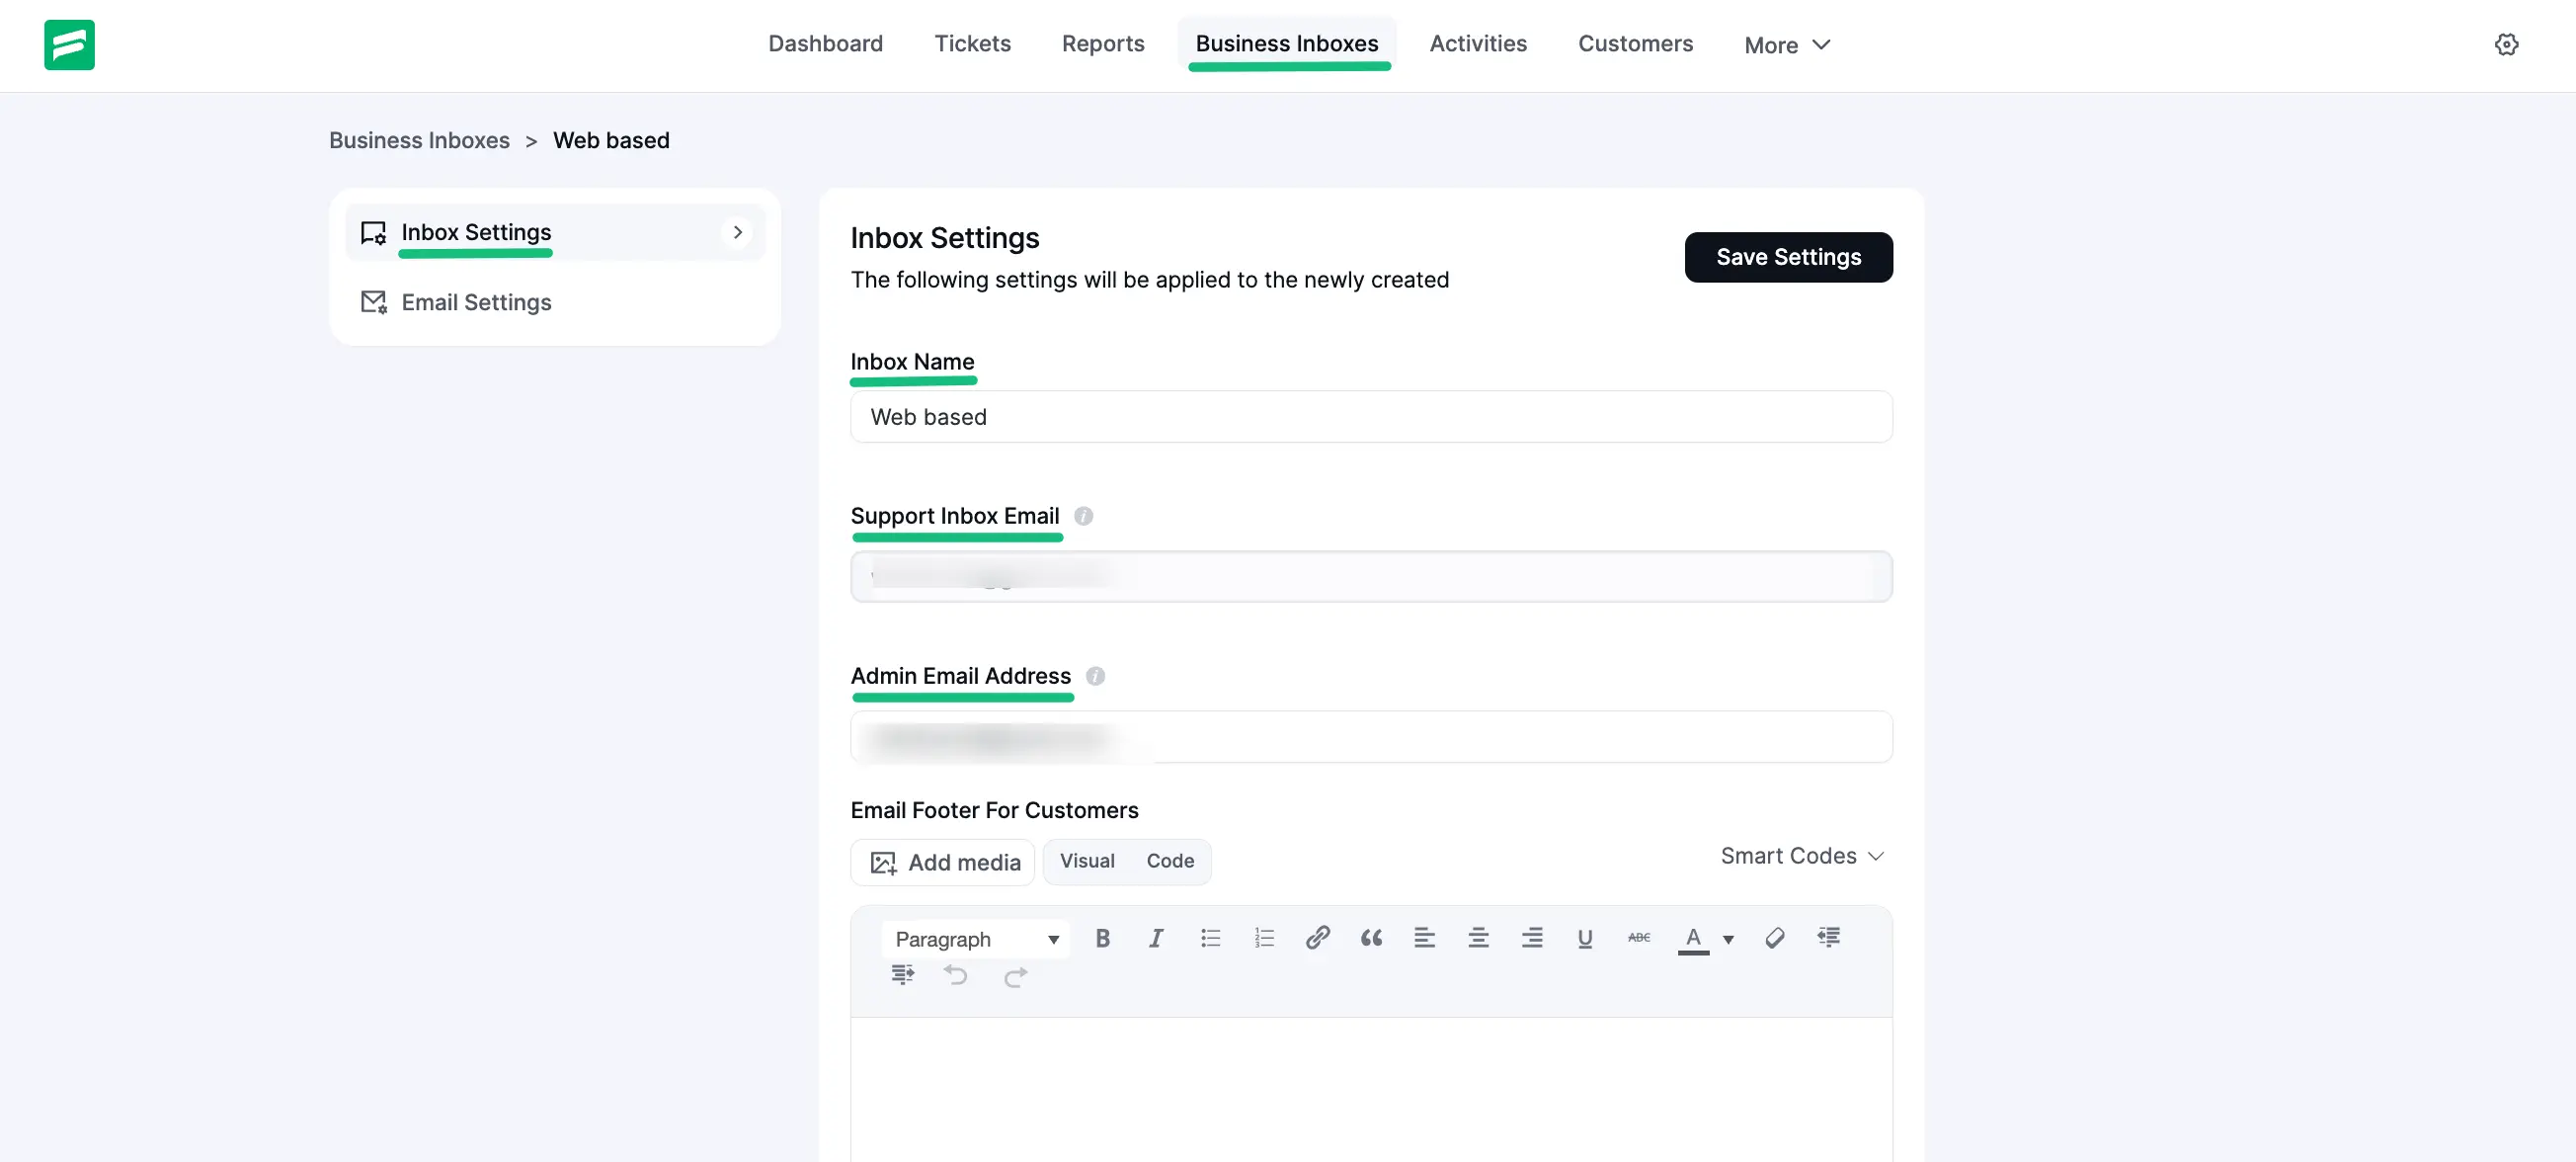
Inbox Settings
In the Inbox Settings, you can do lots of customization, e.g., changing inbox name, adding admin email address & footer, selecting inbox color, etc.
Inbox Name: You can change the name of your Business inbox from here.
Support From Email: From here, you will find the email you used to create this business inbox.
Admin Email Address: Here, you can add another email address for admin where admin will get email if enabled in email settings, and you can change it anytime.
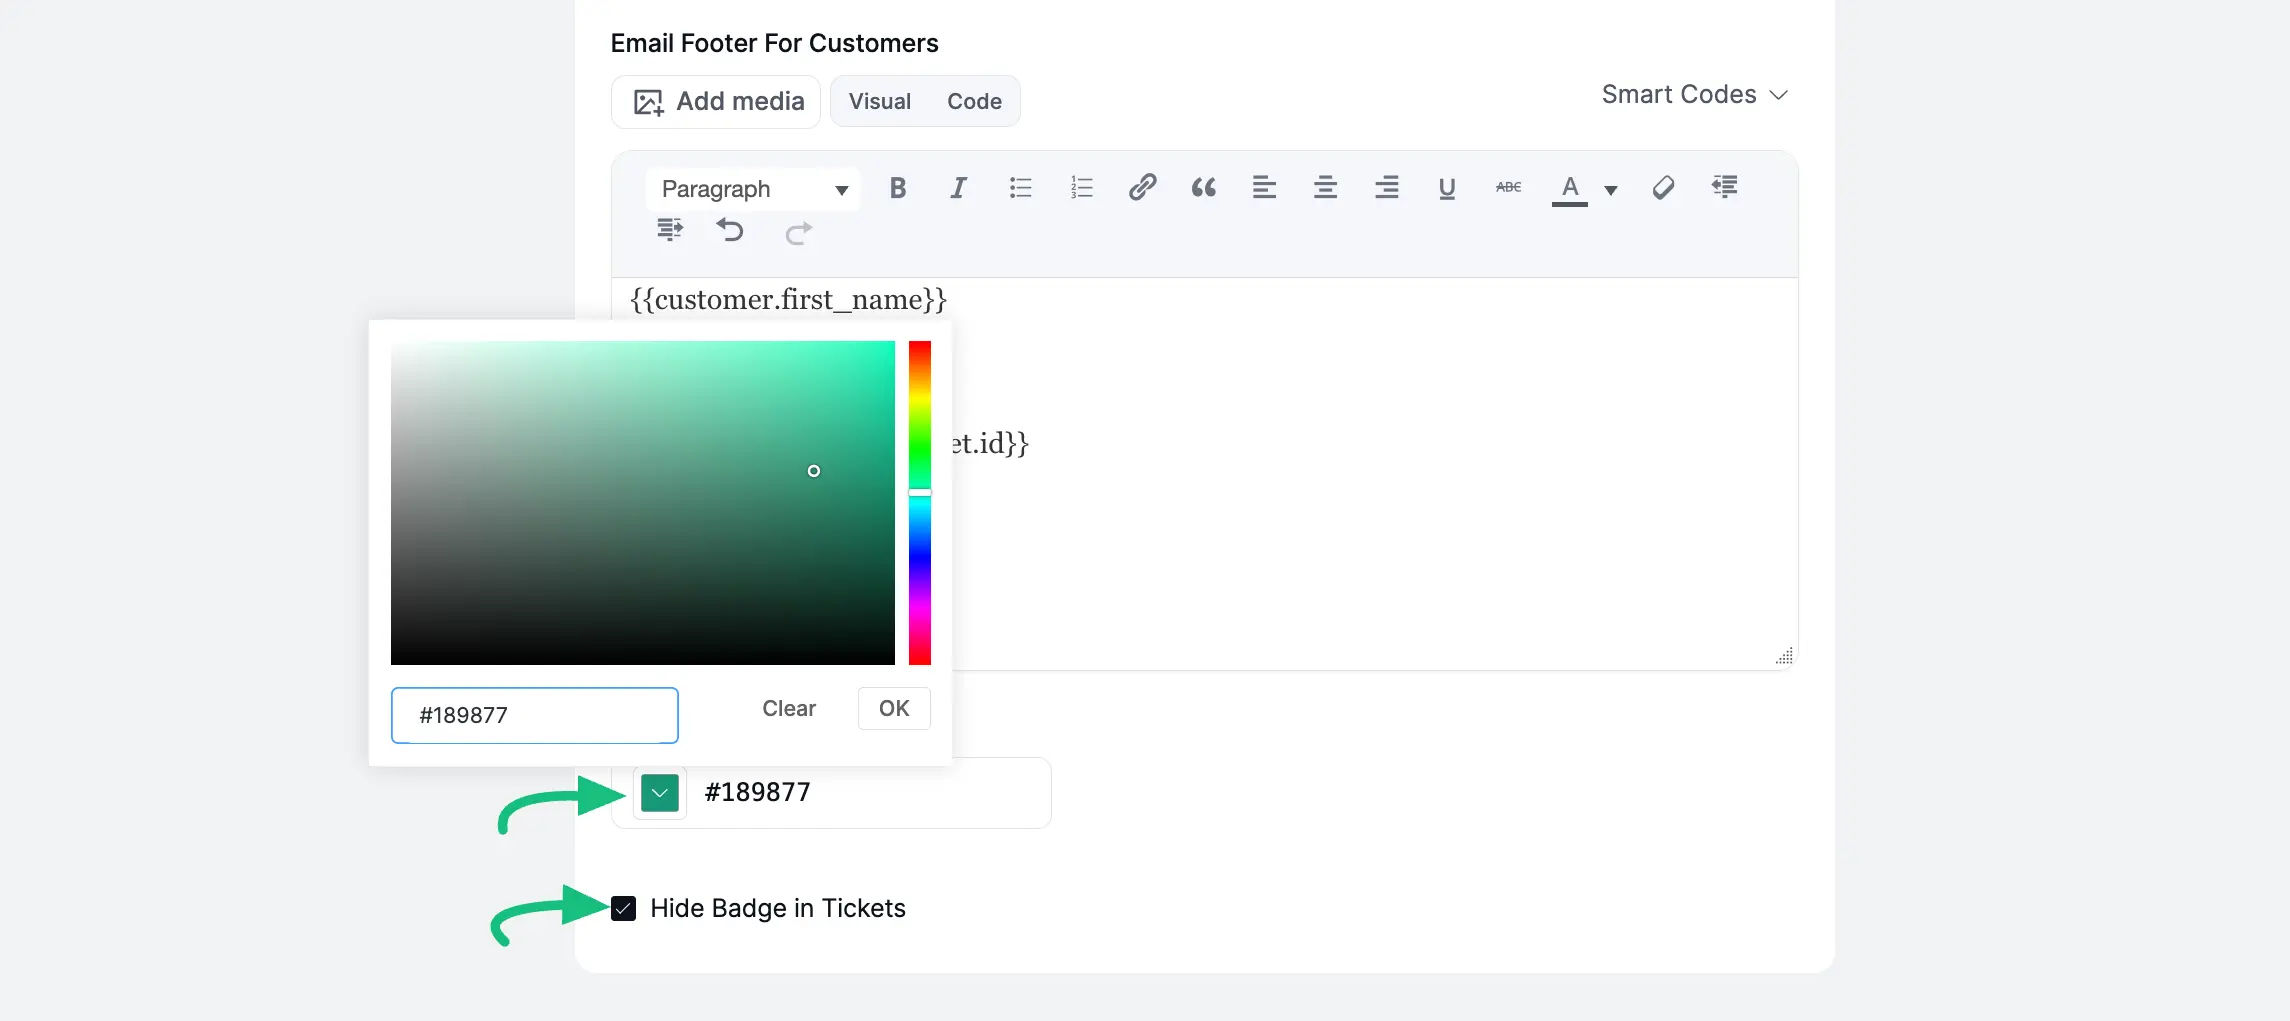
Email Footer For Customers: You can also set Email footer for your customers where —
- You can add Media , Text and customize their footer in Visual/Code mode from here
- Smart Codes: You will find the Smartcodes here and you can use on your footer.
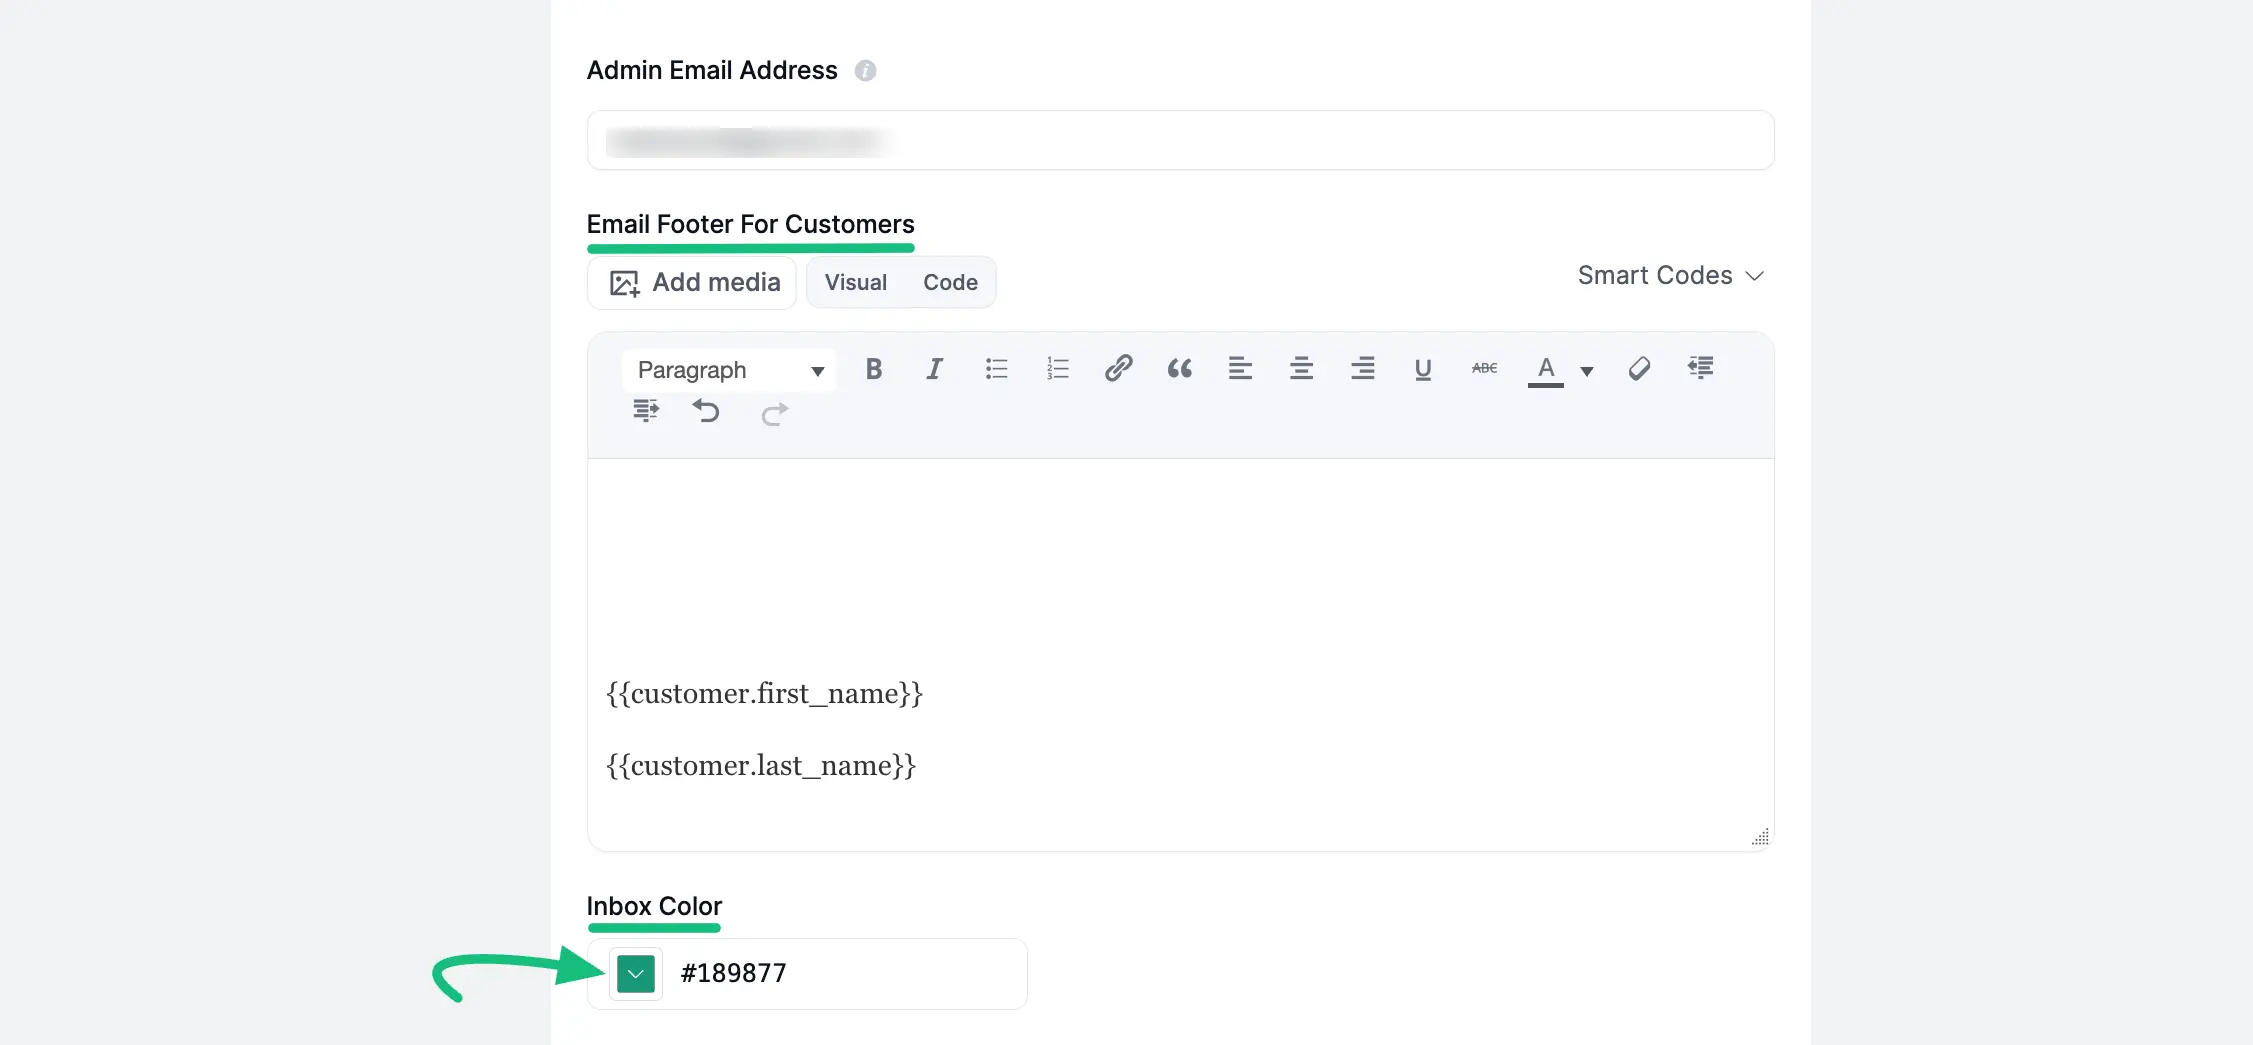
Inbox Color: From the Inbox Color drop-down, you can select any color for your business inboxes
Hide Badge in Tickets: The Business Inbox Badge is an automatically generated label that appears next to a ticket’s title in the main ticket list. Its purpose is to provide a quick visual indicator of which Business Inbox (i.e., which support channel or product) the ticket belongs to.
Fluent Support creates this badge by using a short abbreviation from the name of the specific Business Inbox that received the ticket. For example, a ticket submitted to your “Automation Support” inbox might display an Aut.. badge.
To hide the badge from the ticket, just need to enable the Hide Badge in Tickets button.
Always press Save Settings after finishing all the customization in your Inbox Settings to save it, otherwise, changes will not appear in your inbox.
Email Settings
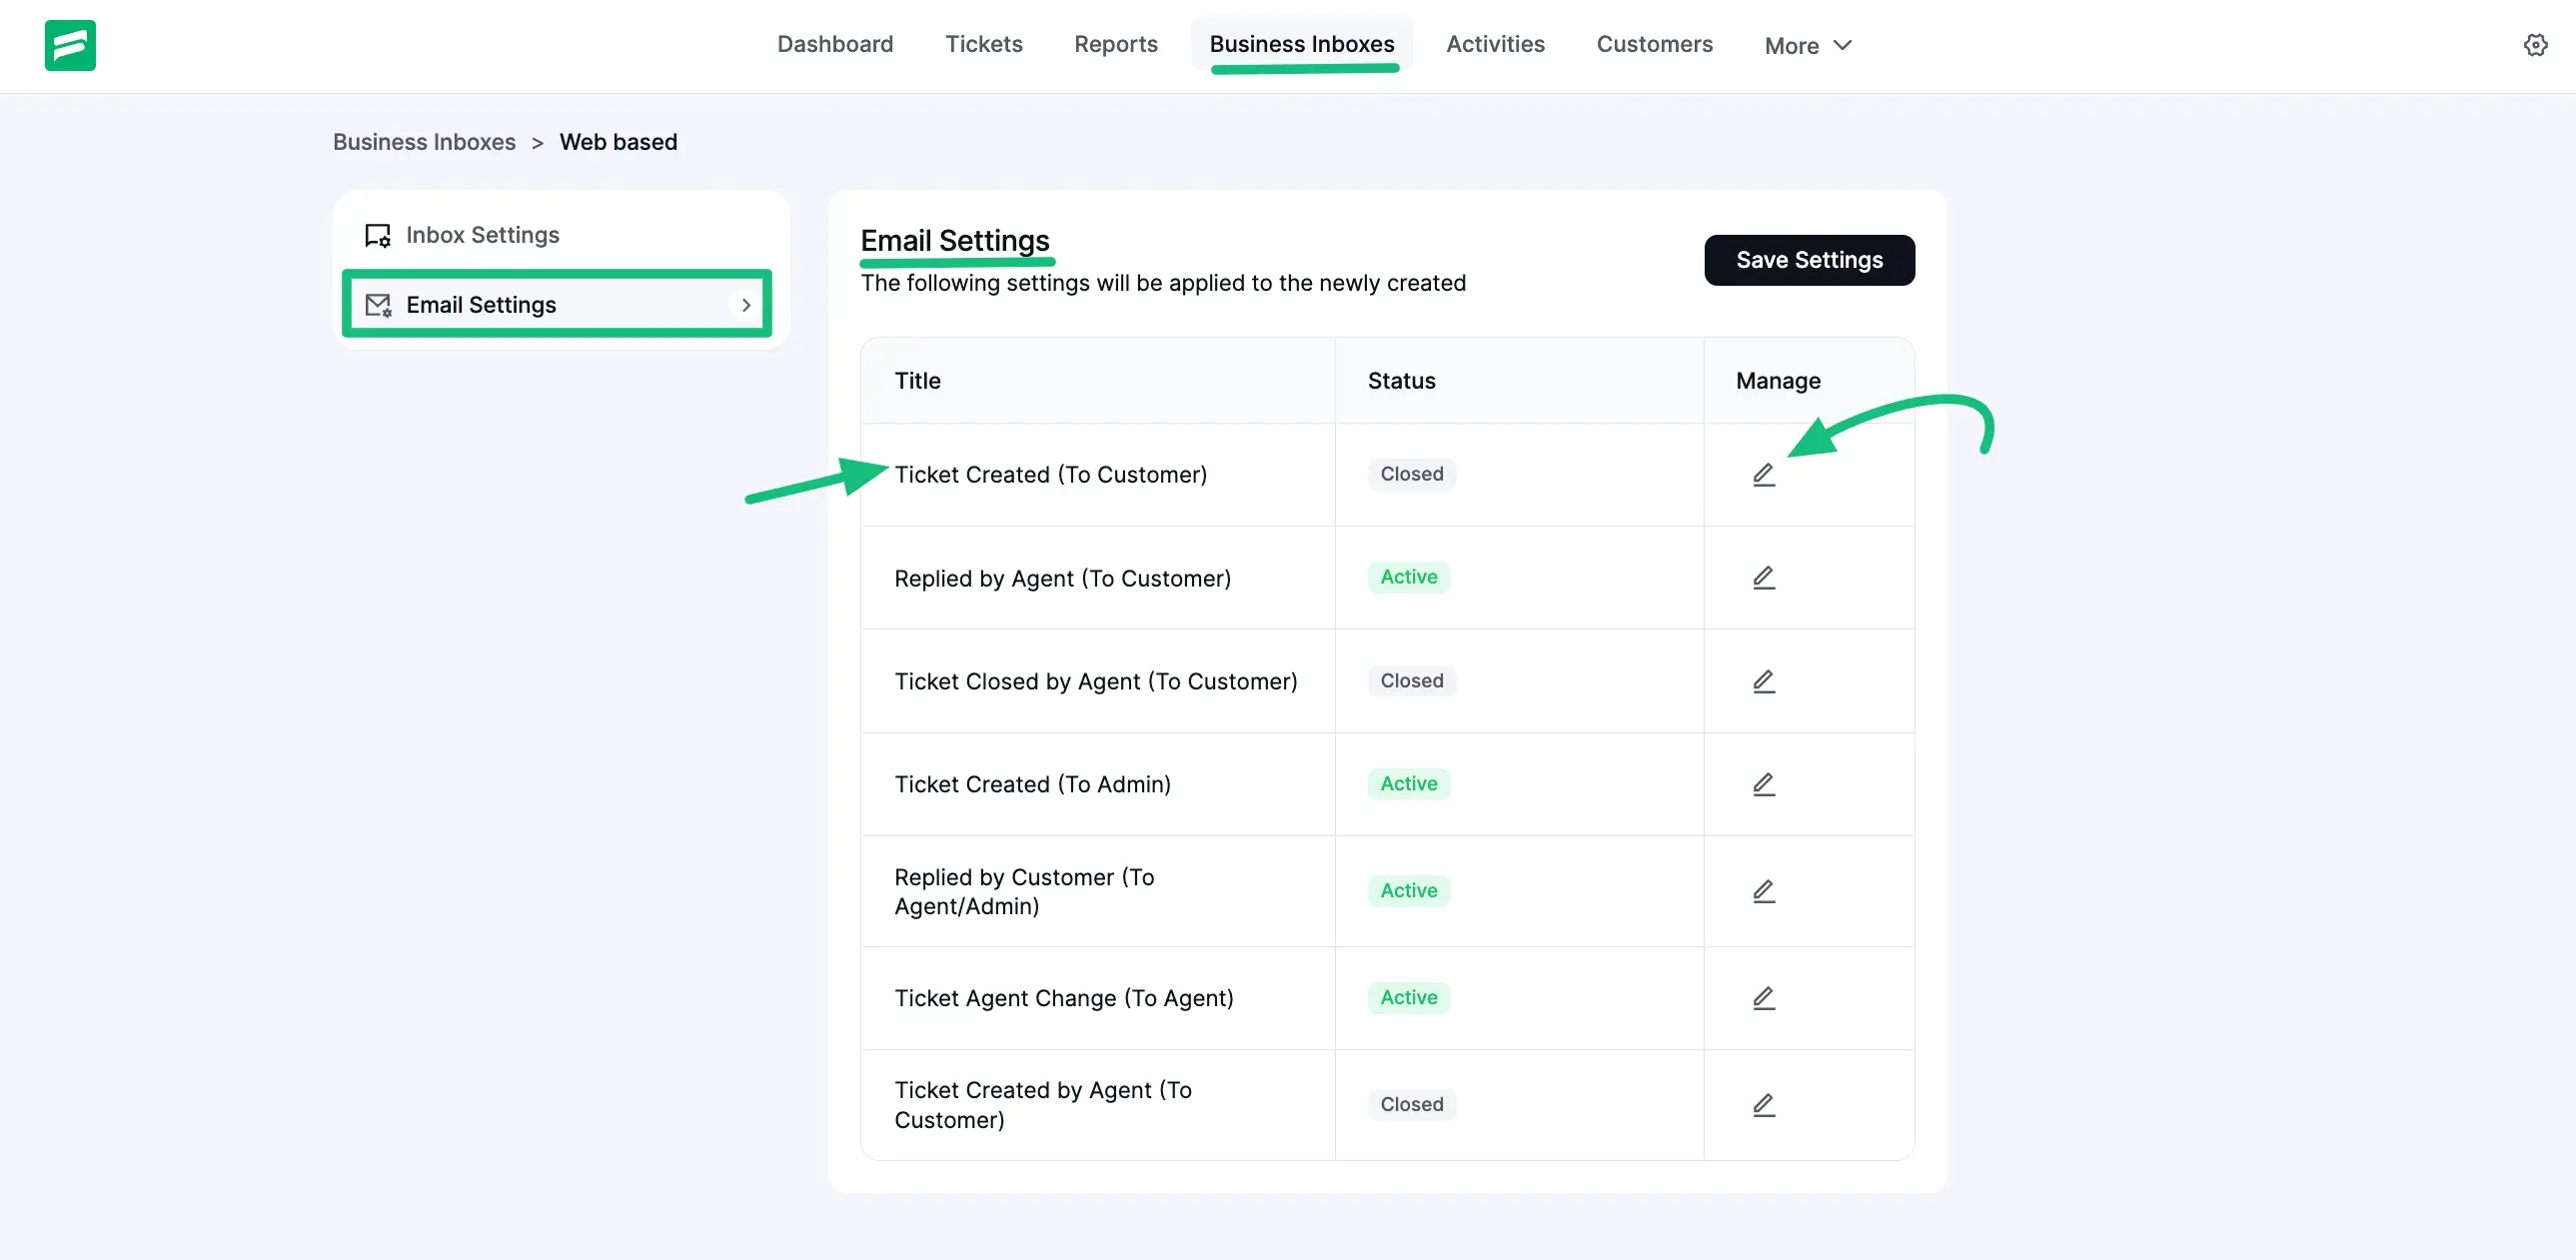
In the Email Settings, you can select to whom and when the email notifications will be delivered. Additionally, you can also customize the content of the email as well.
You will see certain options are enabled by default which can be modified at any time, and can add more options for sending and receiving email notifications as well.
First, select any option you want to add, customize or modify. Then, click on the Pencil Icon and a pop-up box will appear where you can enable notifications and customize email settings.
For instance, I selected the Ticket Created (To Customer) option to send email notifications right after a customer submits a support ticket; but, you can choose any option to suit your needs.
To enable this option, click on Enable This Email Notification and press Save Settings to send this email notification to customers.
Click on the Send Attachments (Not Recommended) button to attach files to your email notifications.
NOTE
Why is this button suggested as (Not Recommended)?
Sometimes when you attach any files to your email, it may face some delivery failure. To avoid this situation and ensure that any kind of email is delivered without any hassle, we recommend using the FluentSMTP plugin.
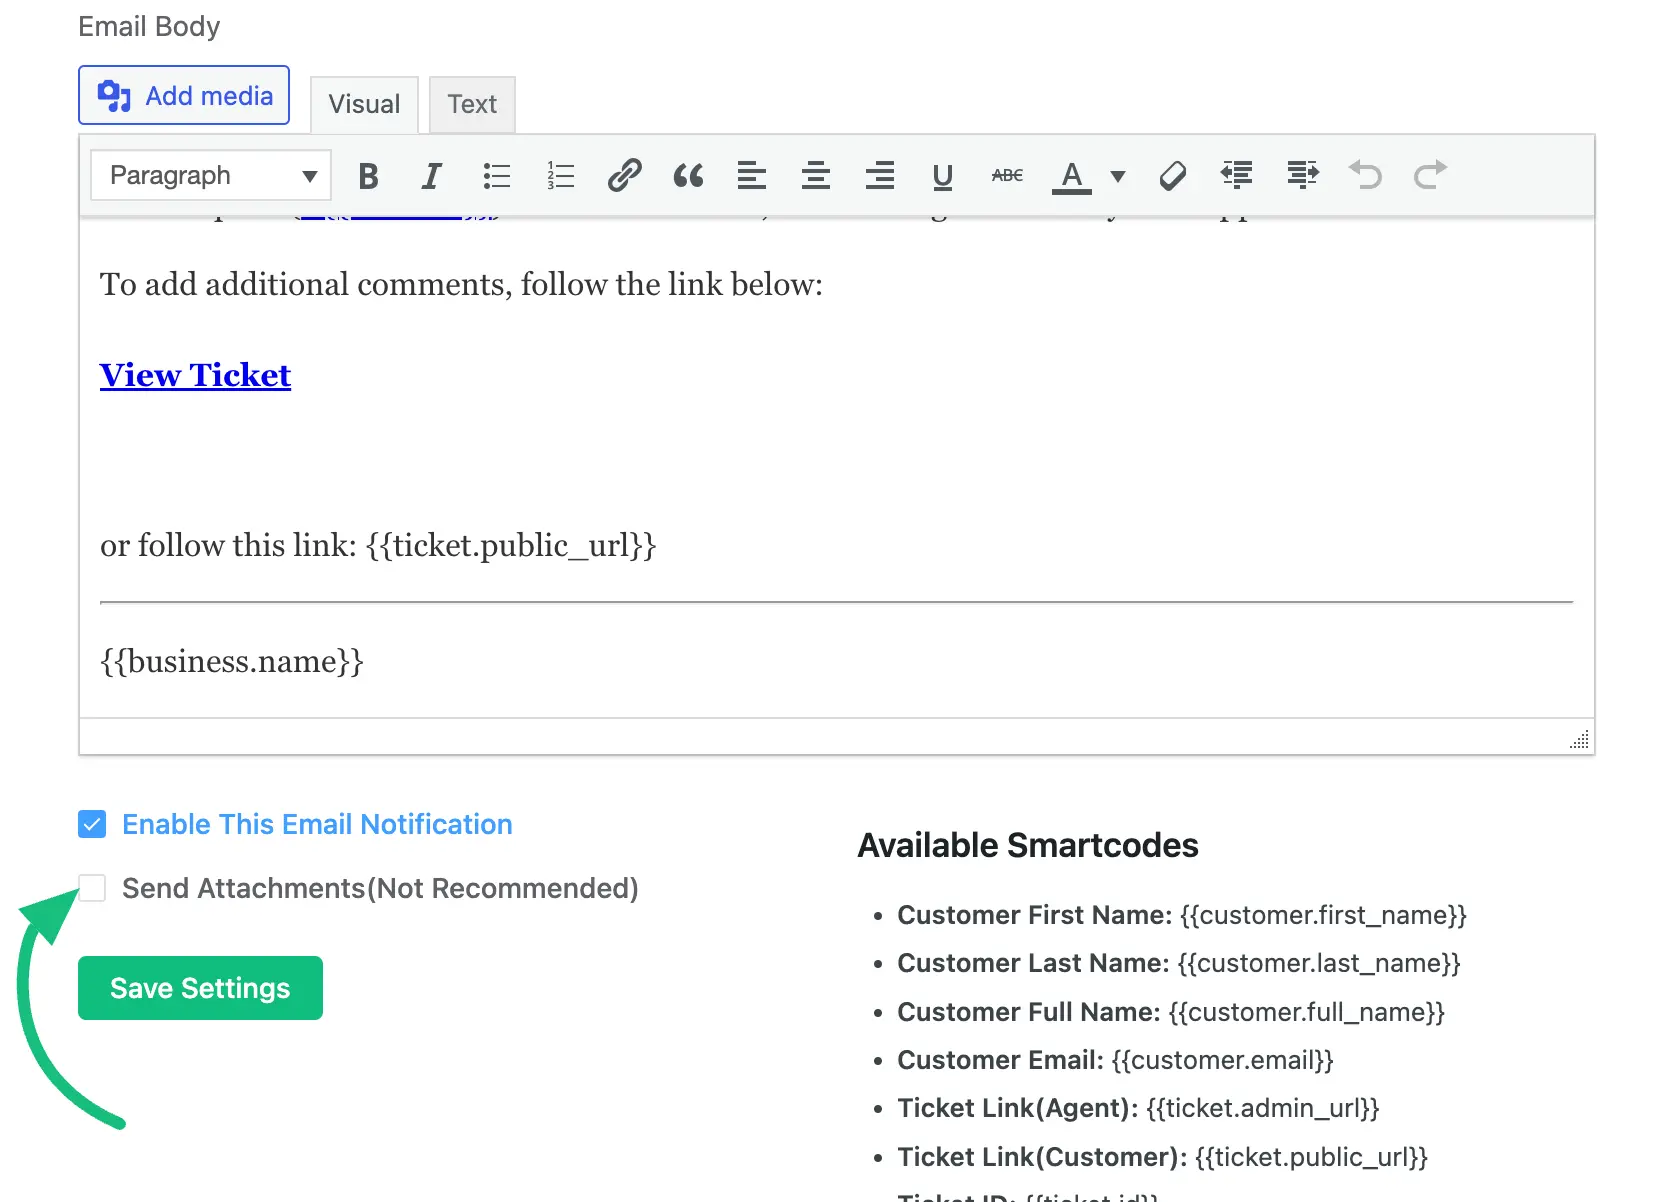
You can customize the subject name and body content of your email using the Email Subject field and Email Body box. Also, use the shortcodes from the Available Smartcodes list within the Email body or subject which will dynamically fetch various information like the Customer name, email, ticket ID, etc.
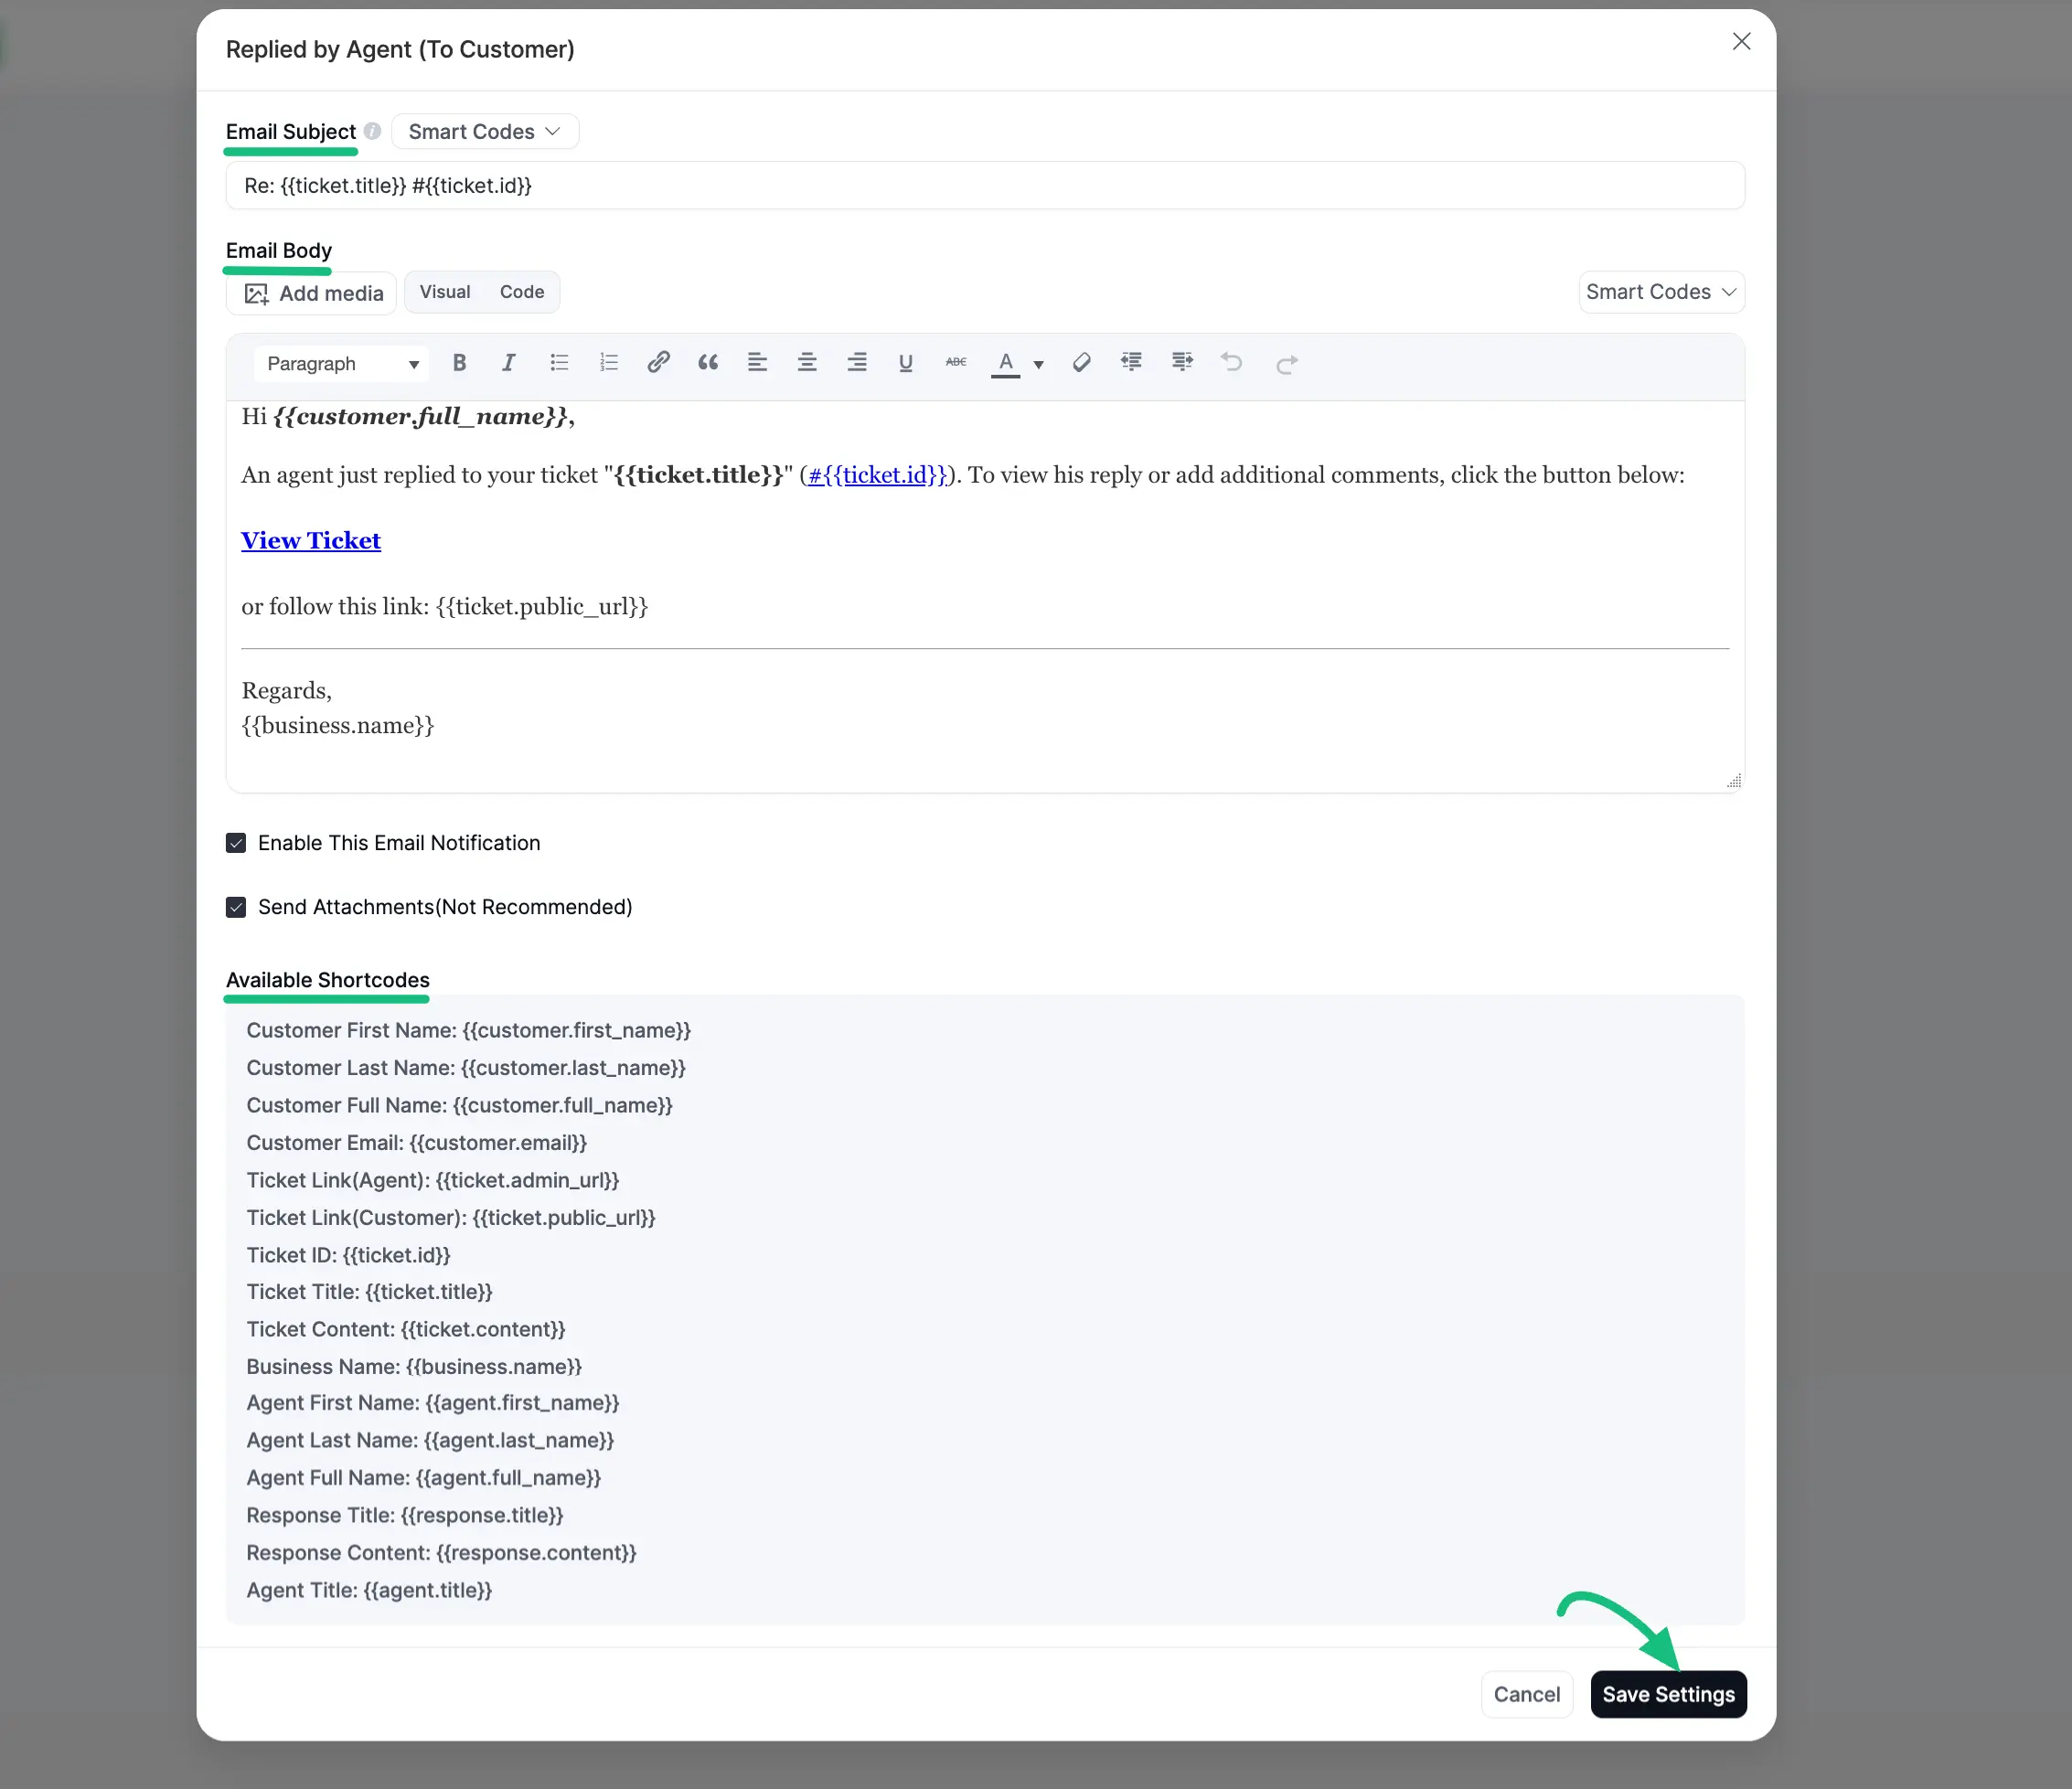
Always press Save Settings after finishing all the customization in your emails to save it, otherwise changes will not appear in your emails.
Set as Default
- “Set as Default” is another feature that allows you to set up one of your web-based business inboxes as the default inbox, i.e., automatically receive all emails from your business in one specific inbox by default.
This “Set as Default” feature is available for Web-Based Business Inboxes only.
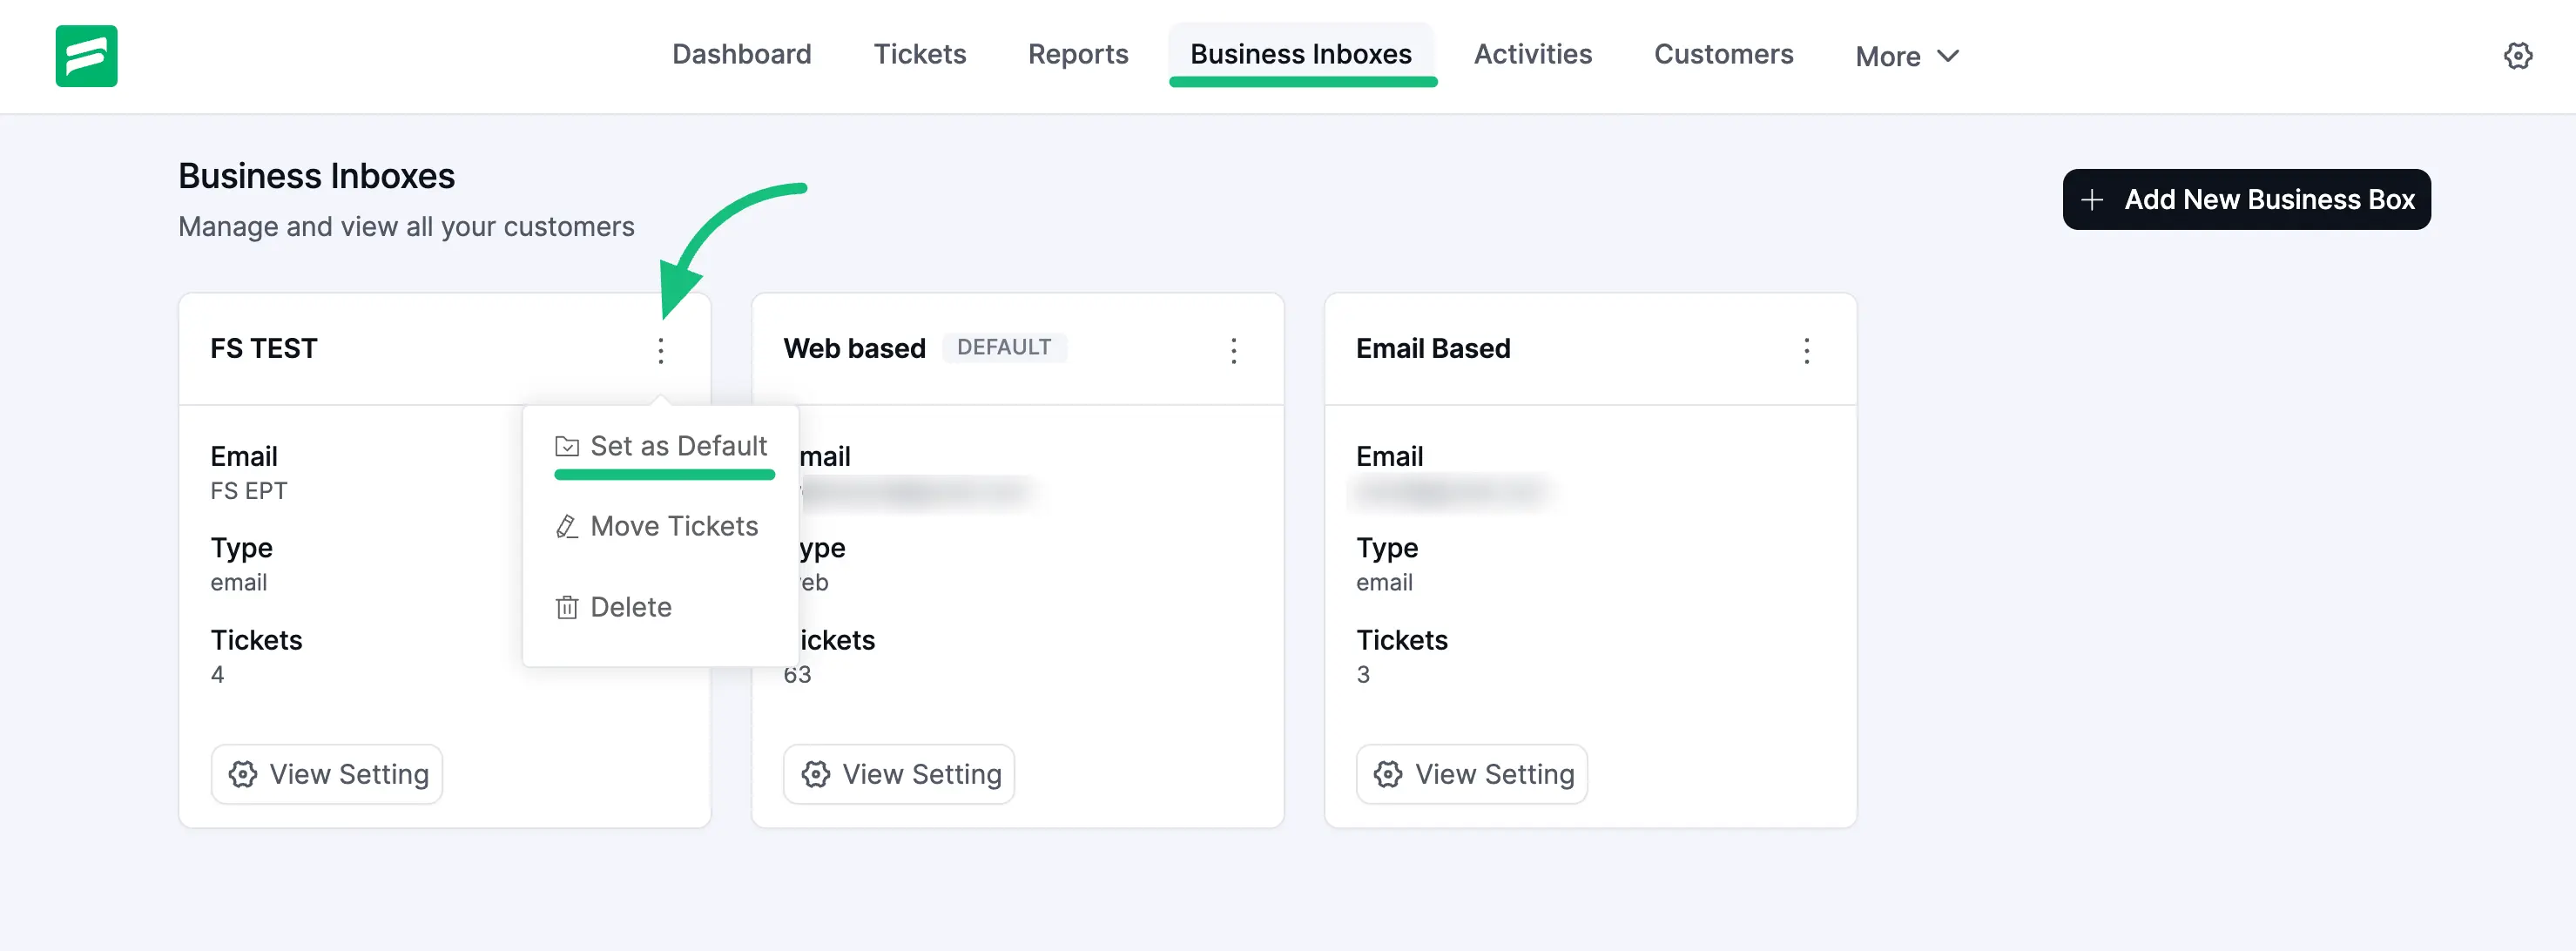
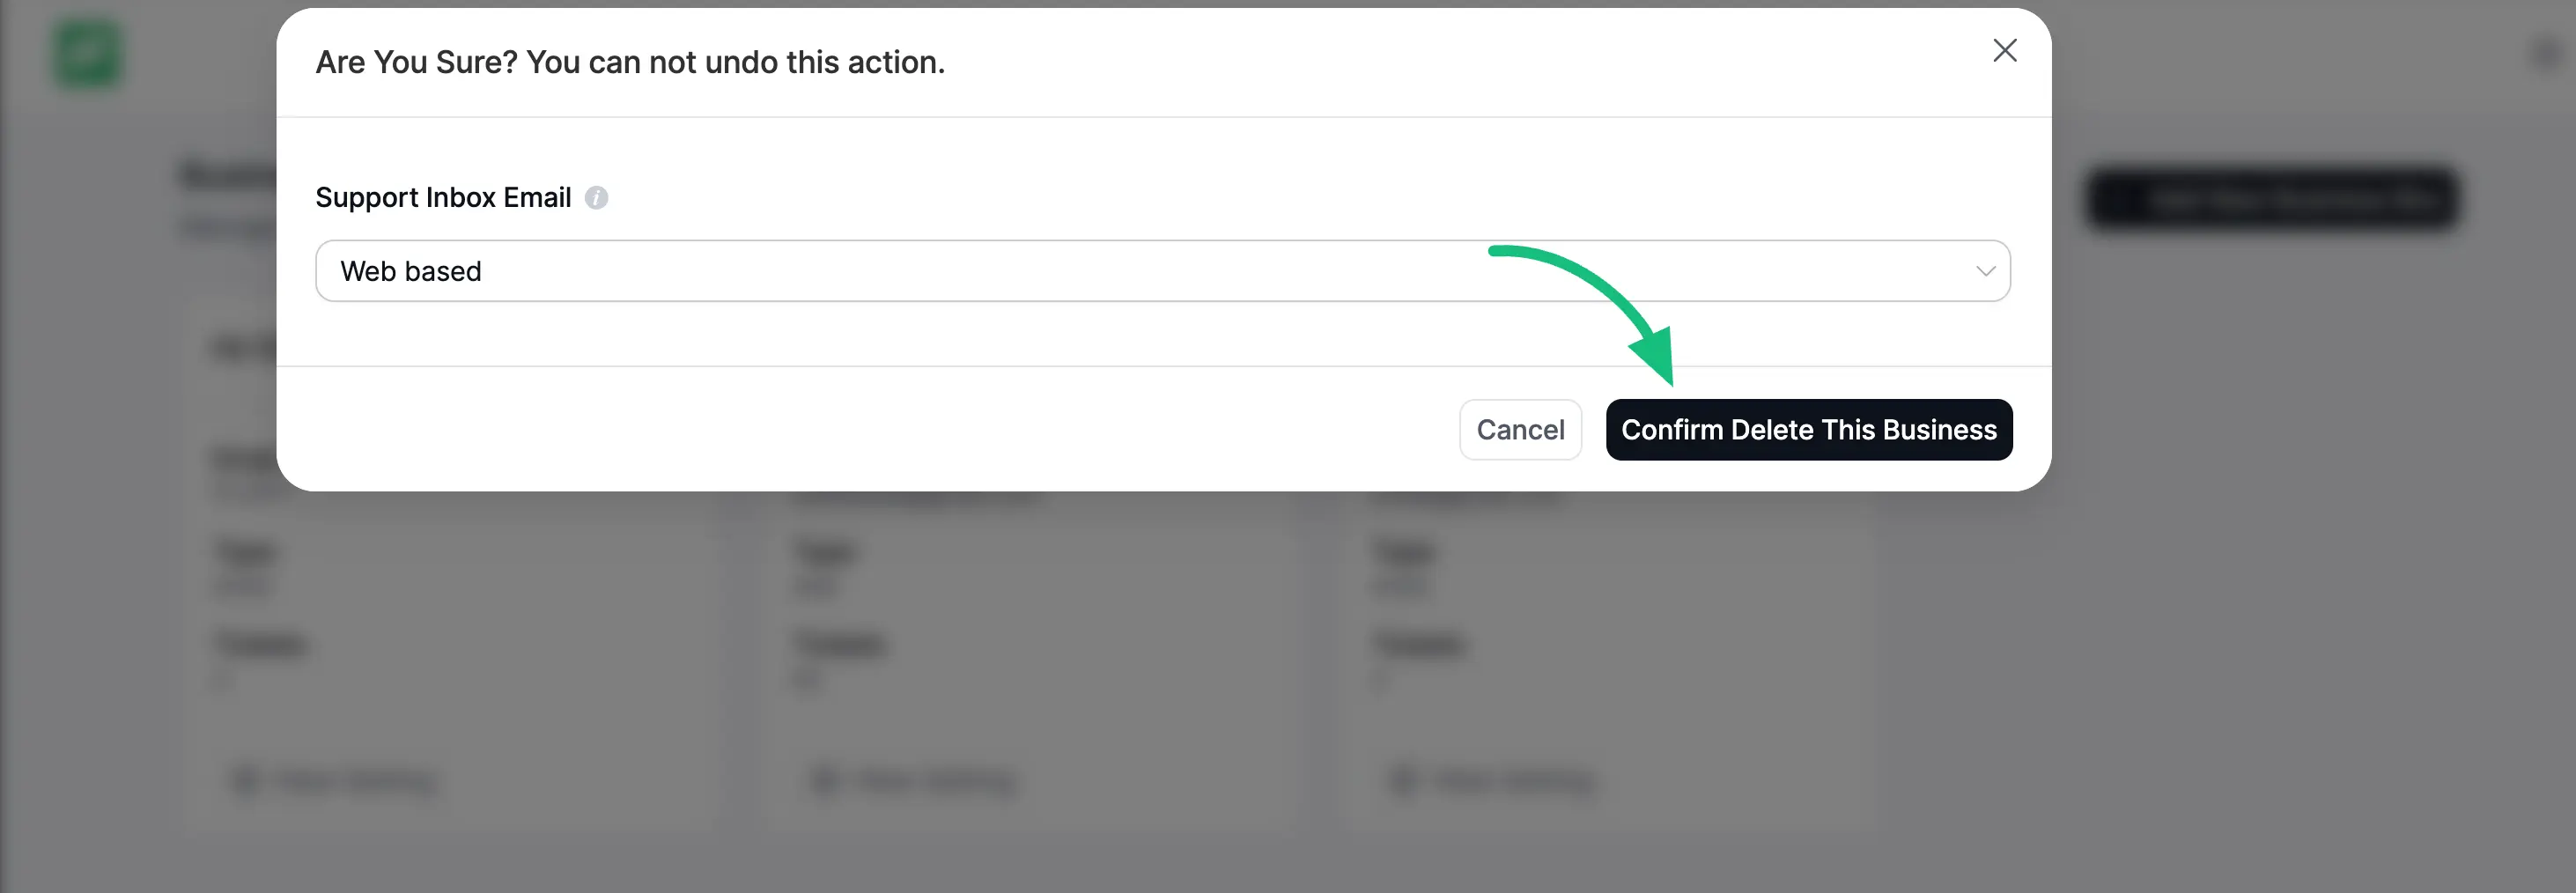
Delete Business Inboxes
The “Delete” setting option allows you to delete any business inbox and transfer all support tickets easily to another inbox.