Appearance
Adding Support Staff/Agents
Fluent Support allows you to add Agents/Staff to manage your tickets, as well as define specific Permissions and Settings for them. This article will guide you through the steps of adding new Support Staff/Agents and configuring their access levels.
Add Support Staff/Agents
Go to Settings from your Fluent Support Dashboard and click on Support Staff from the left sidebar.
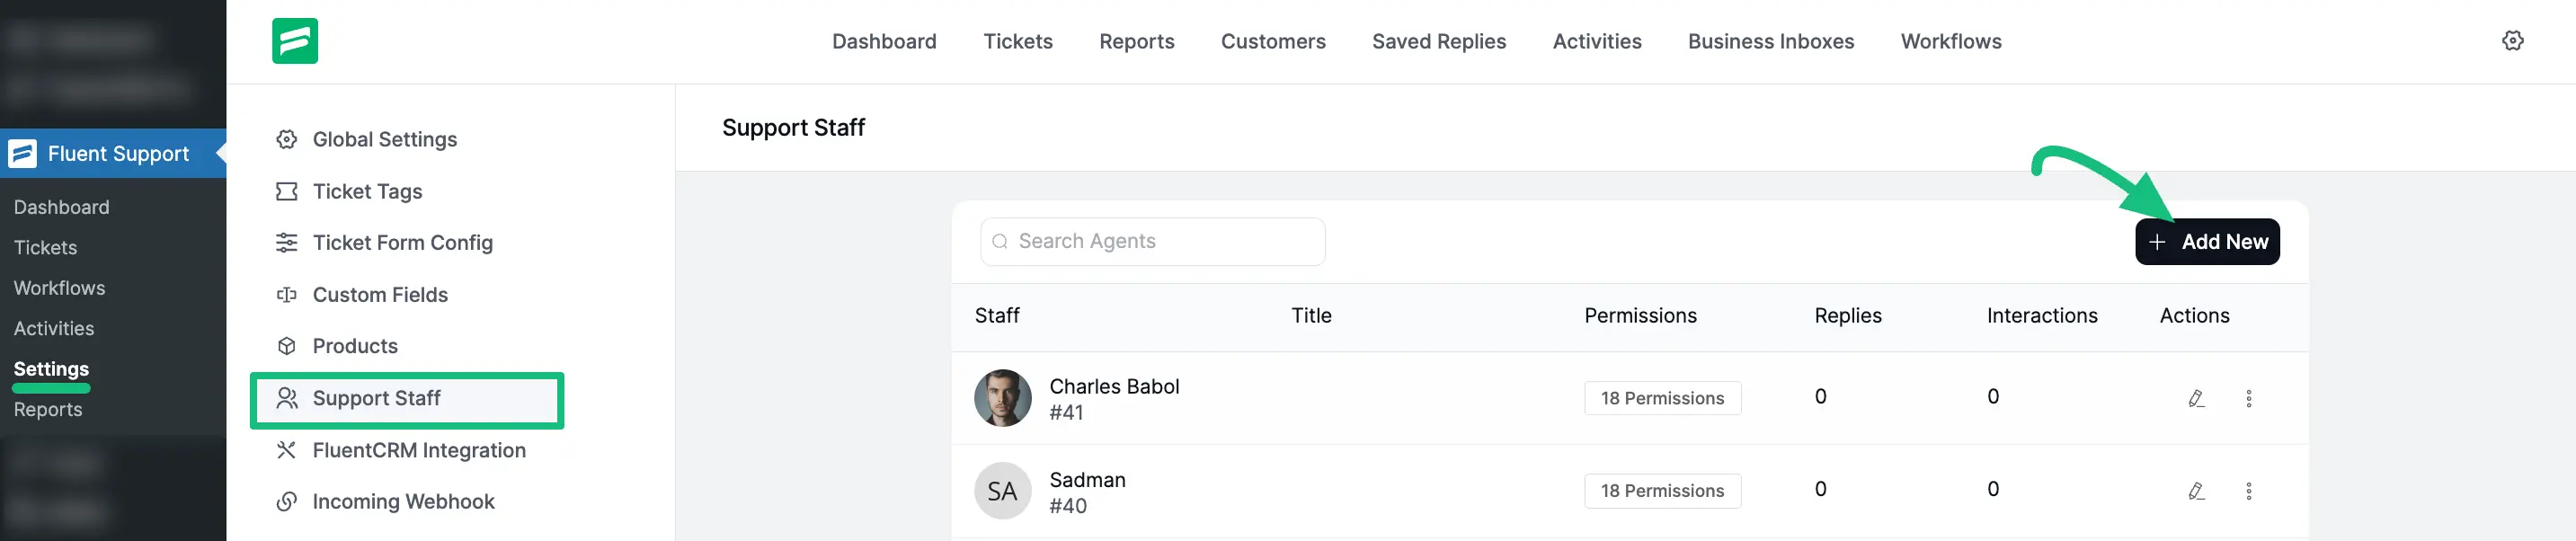
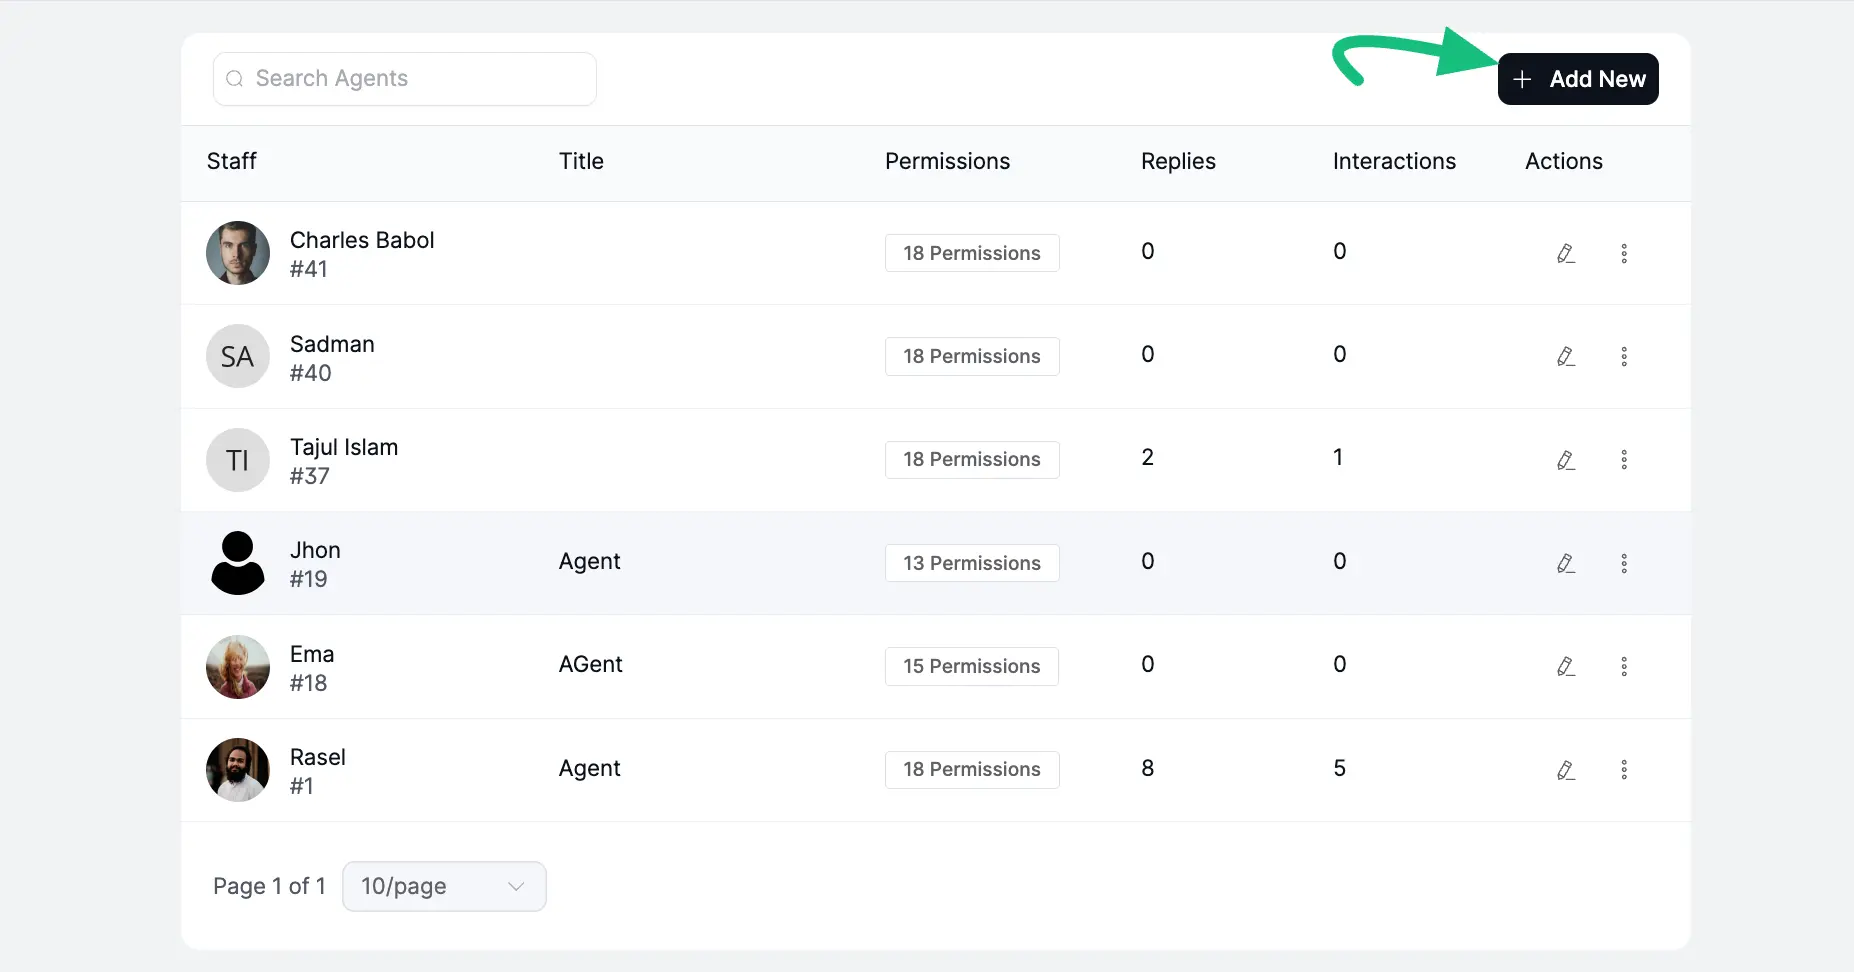
Click the Add New button to add a Support Agent/Staff. A pop-up window will appear for adding information about the Agent.
Configuring Agent Information
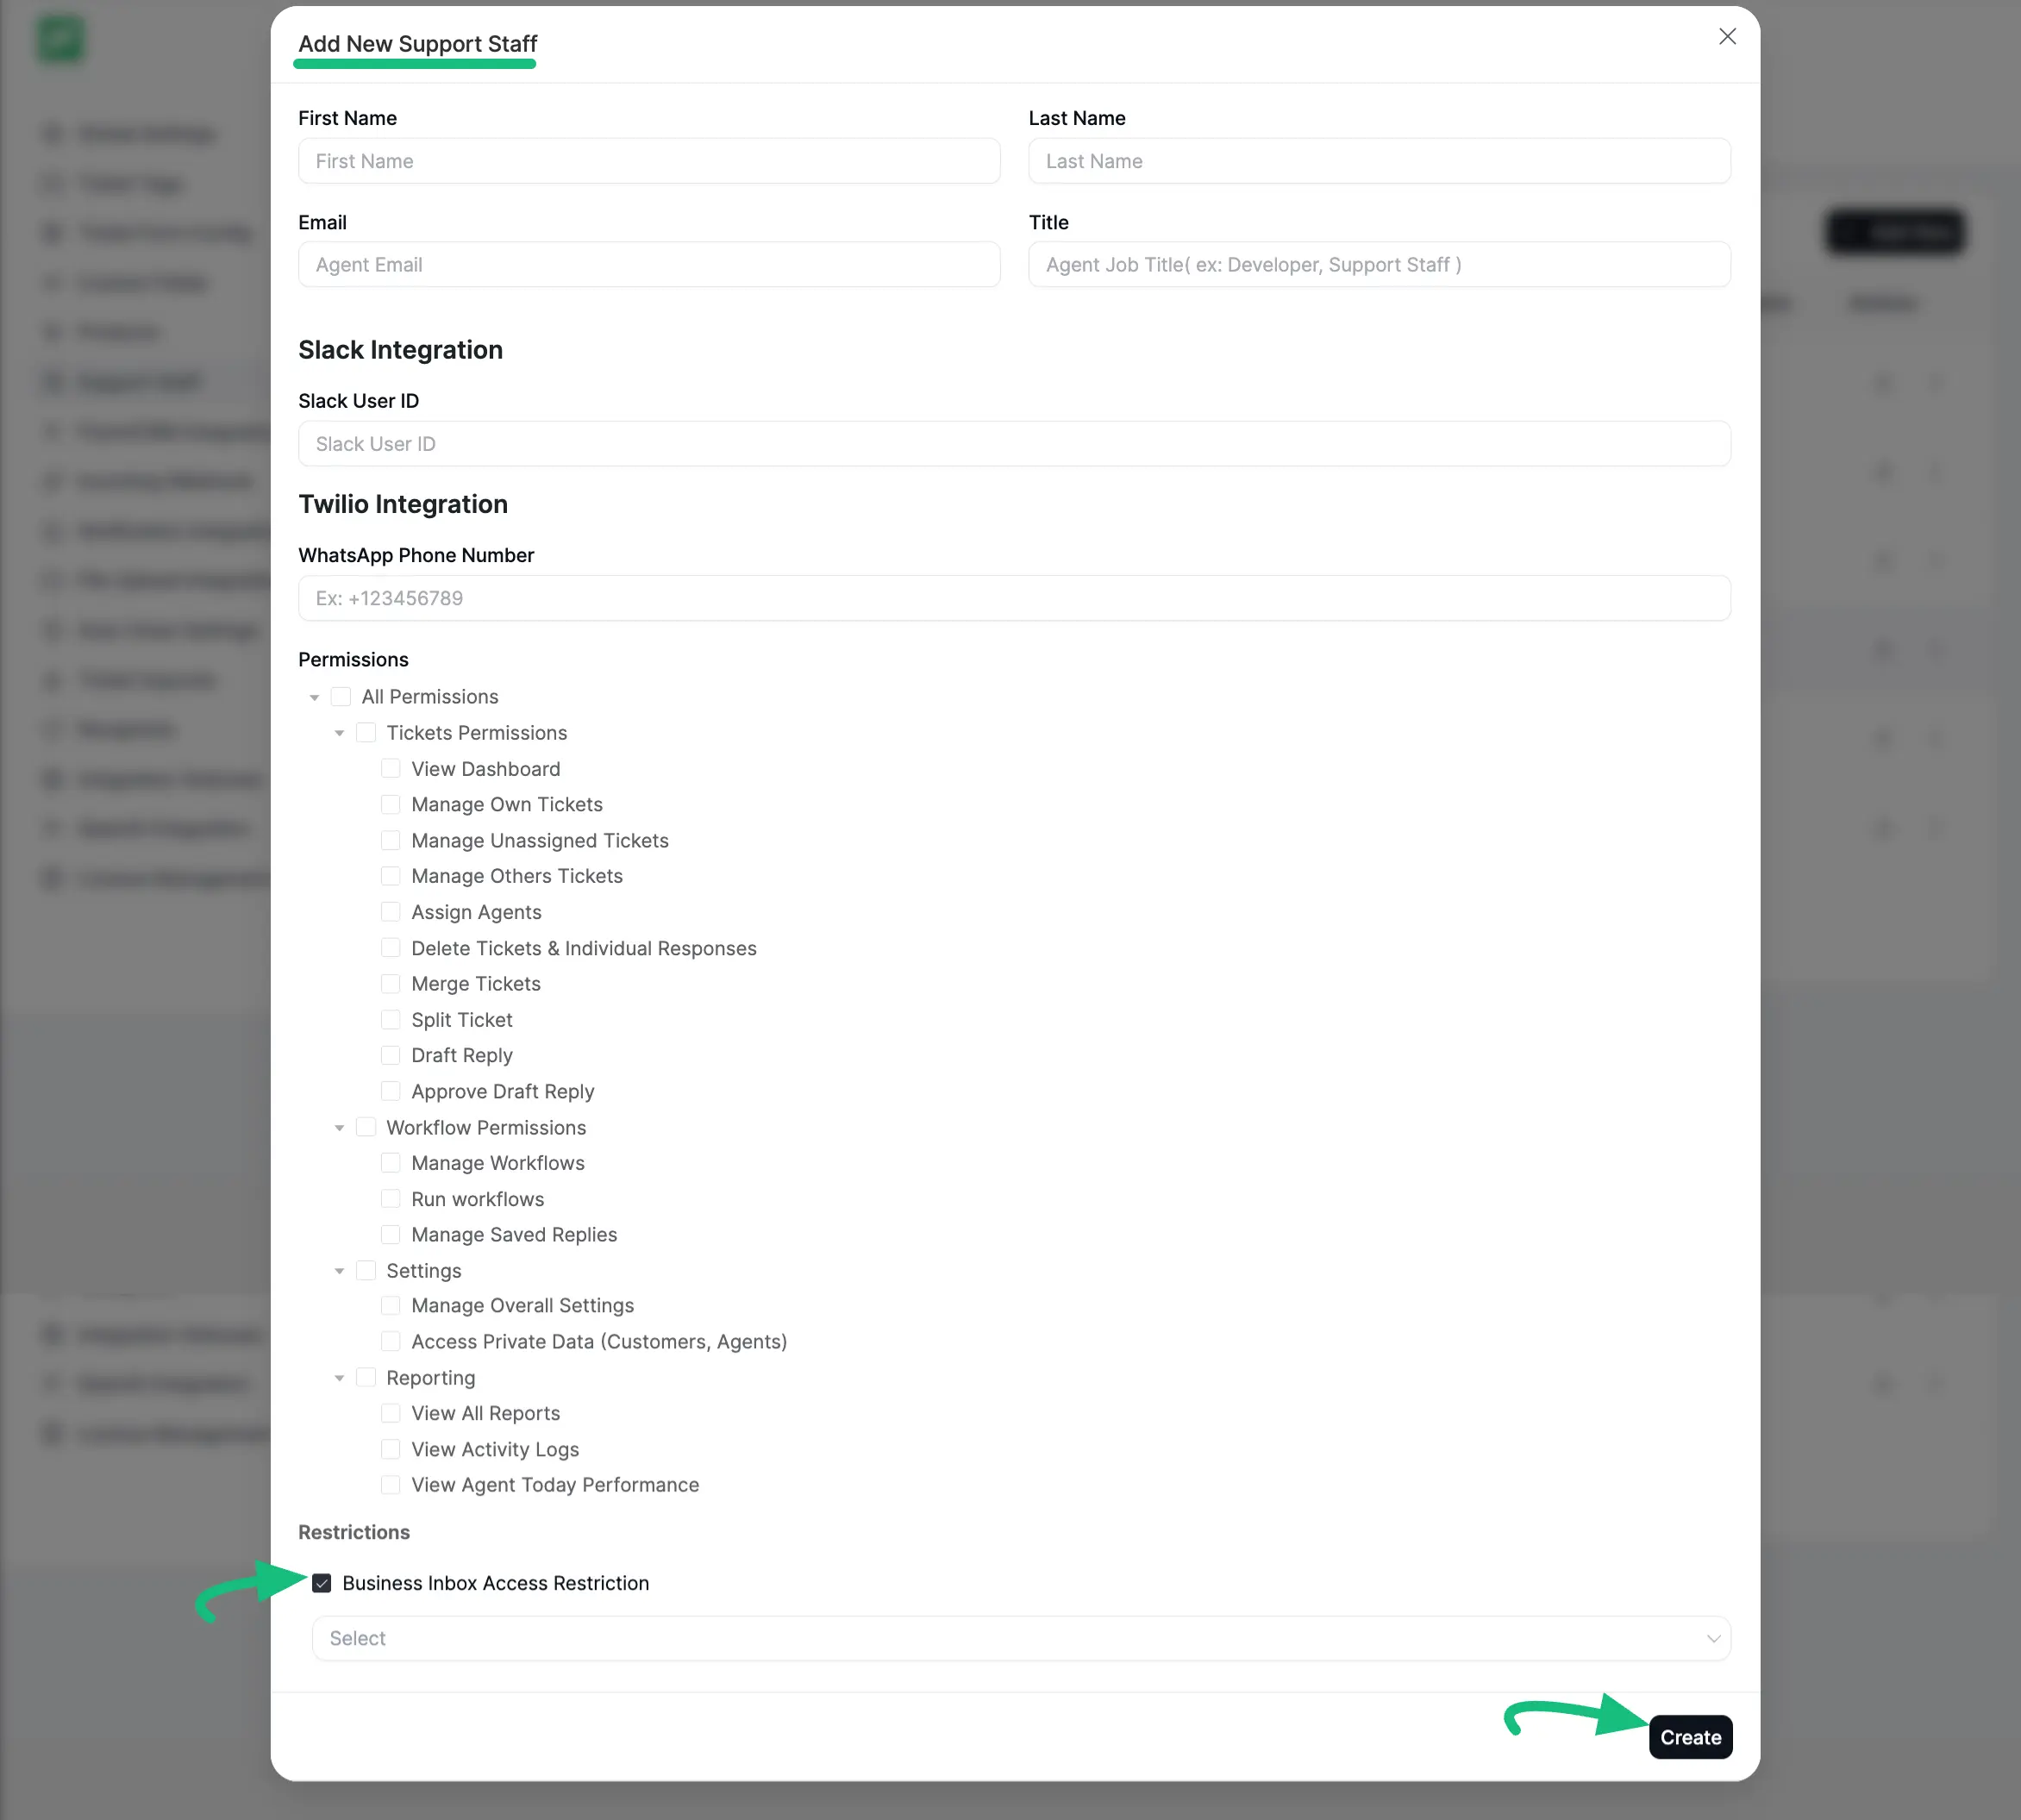
In the pop-up window, you will need to fill in the following details:
- Basic Information: Enter the First Name, Last Name, Email, and Title (Job Title, e.g., Support Staff, Developer).
- Slack Integration: If you use Slack notifications, enter the Slack User ID here.
- Twilio Integration: Enter a WhatsApp Phone Number if you are using Twilio integration.
- Permissions: Check the boxes to grant specific permissions. These are categorized into:
- Tickets Permissions: (e.g., View Dashboard, Manage Own Tickets, Delete Tickets).
- Workflow Permissions: (e.g., Manage Workflows).
- Settings: (e.g., Manage Overall Settings).
- Reporting: (e.g., View All Reports).
- Restrictions: You can check Business Inbox Access Restriction if you want to limit this agent to specific business inboxes.
Once you have filled in the necessary information and selected the permissions, click on the Create button to finish the process.
This is how you can add as many new staff/agents as you need!