Appearance
Automatic Workflow
A Workflow/Automation is a sequence of tasks that can be done Manually or Automatically using certain triggers and conditions to avoid performing the same actions repeatedly.
This article will guide you through the process required to learn how to create the Automatic Workflow in Fluent Support.
Create An Automatic Workflow
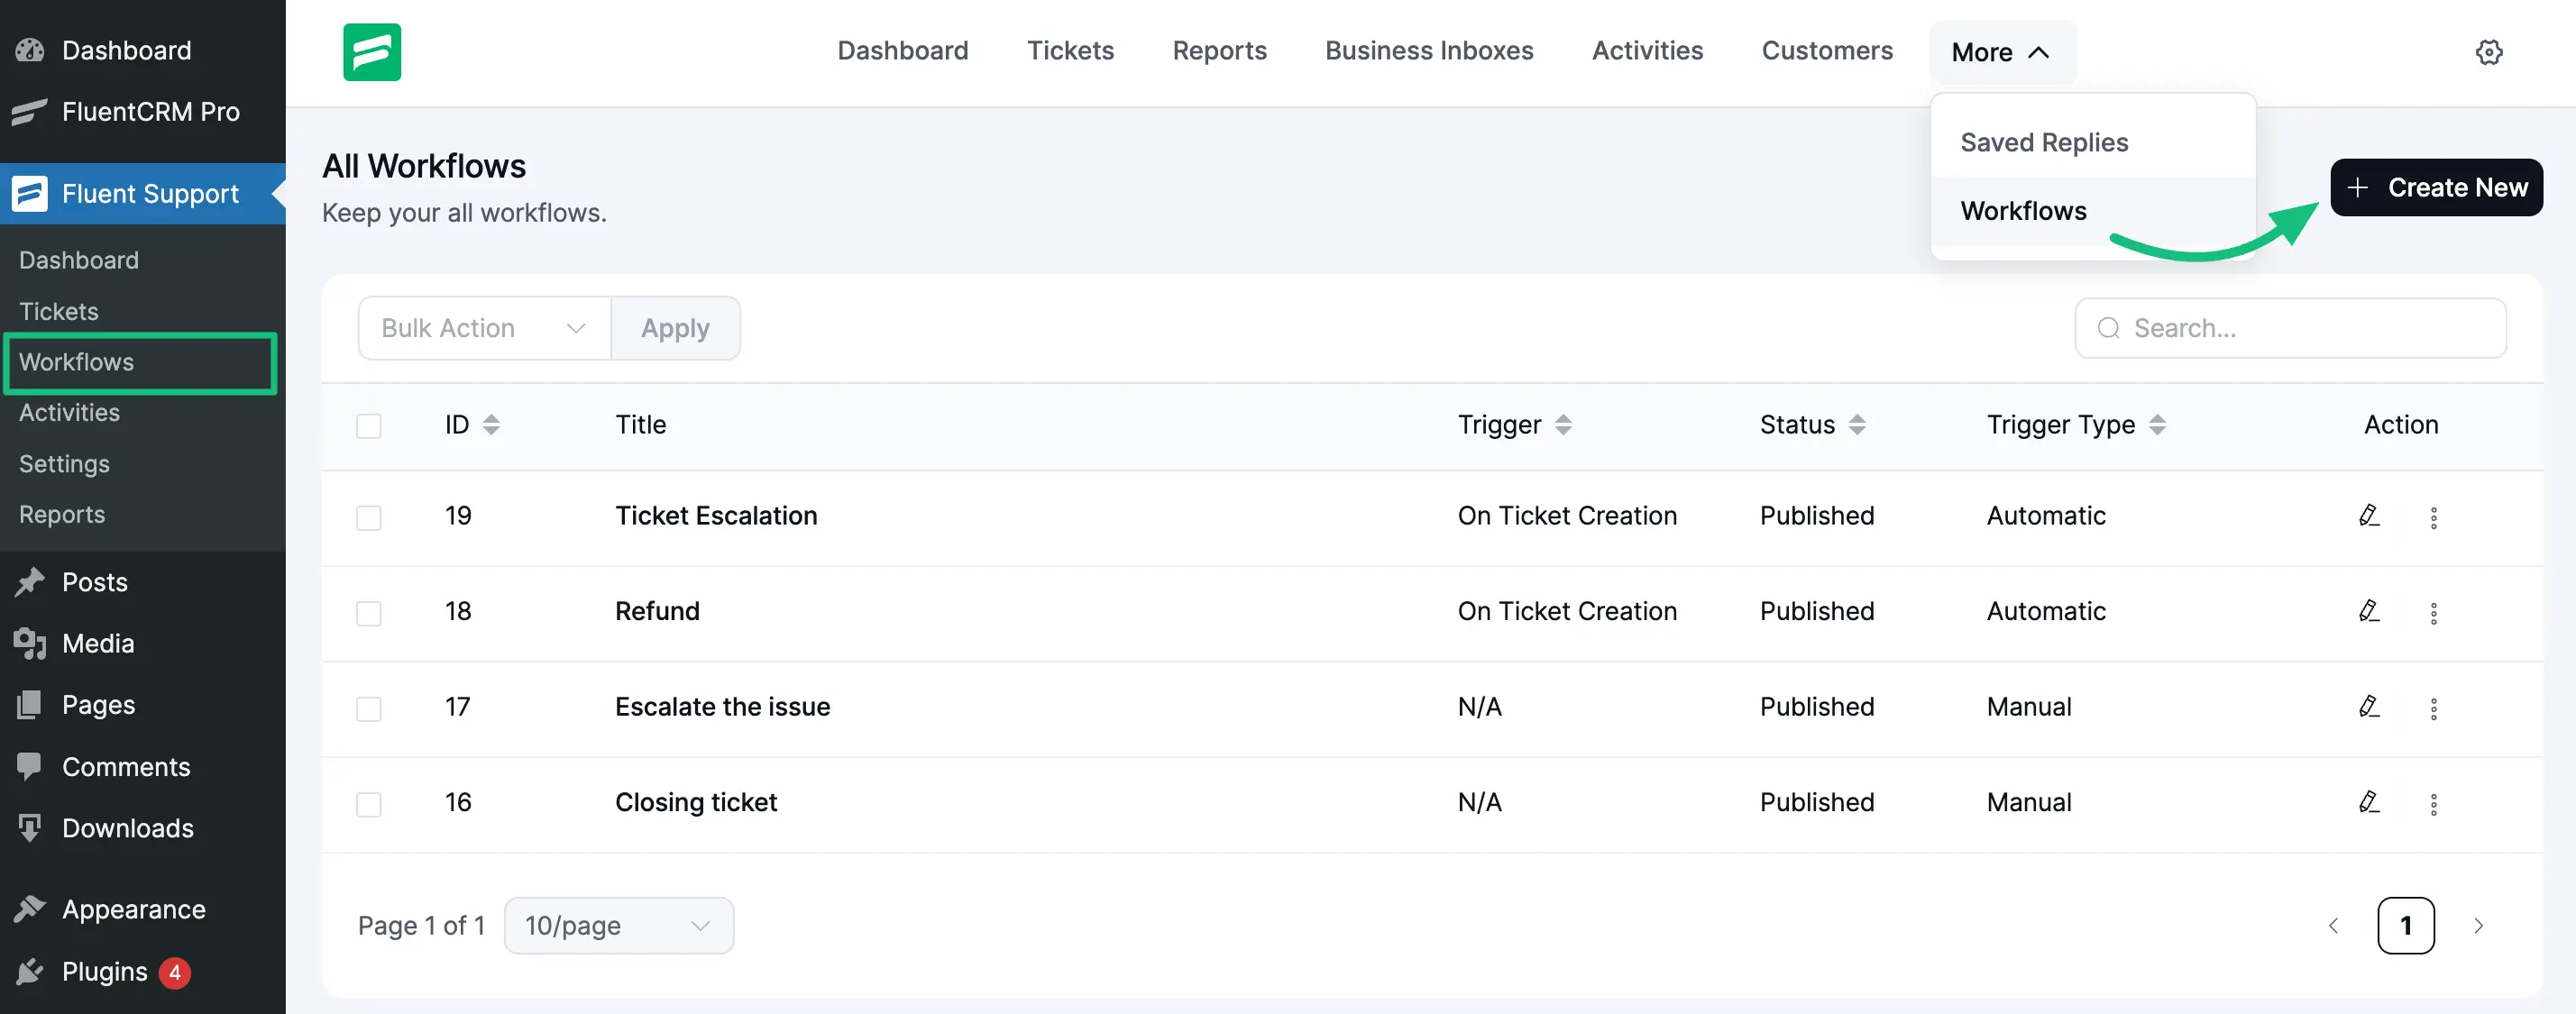
From the Fluent Support Dashboard, go to Workflows and click the + Create New button to create a new workflow.
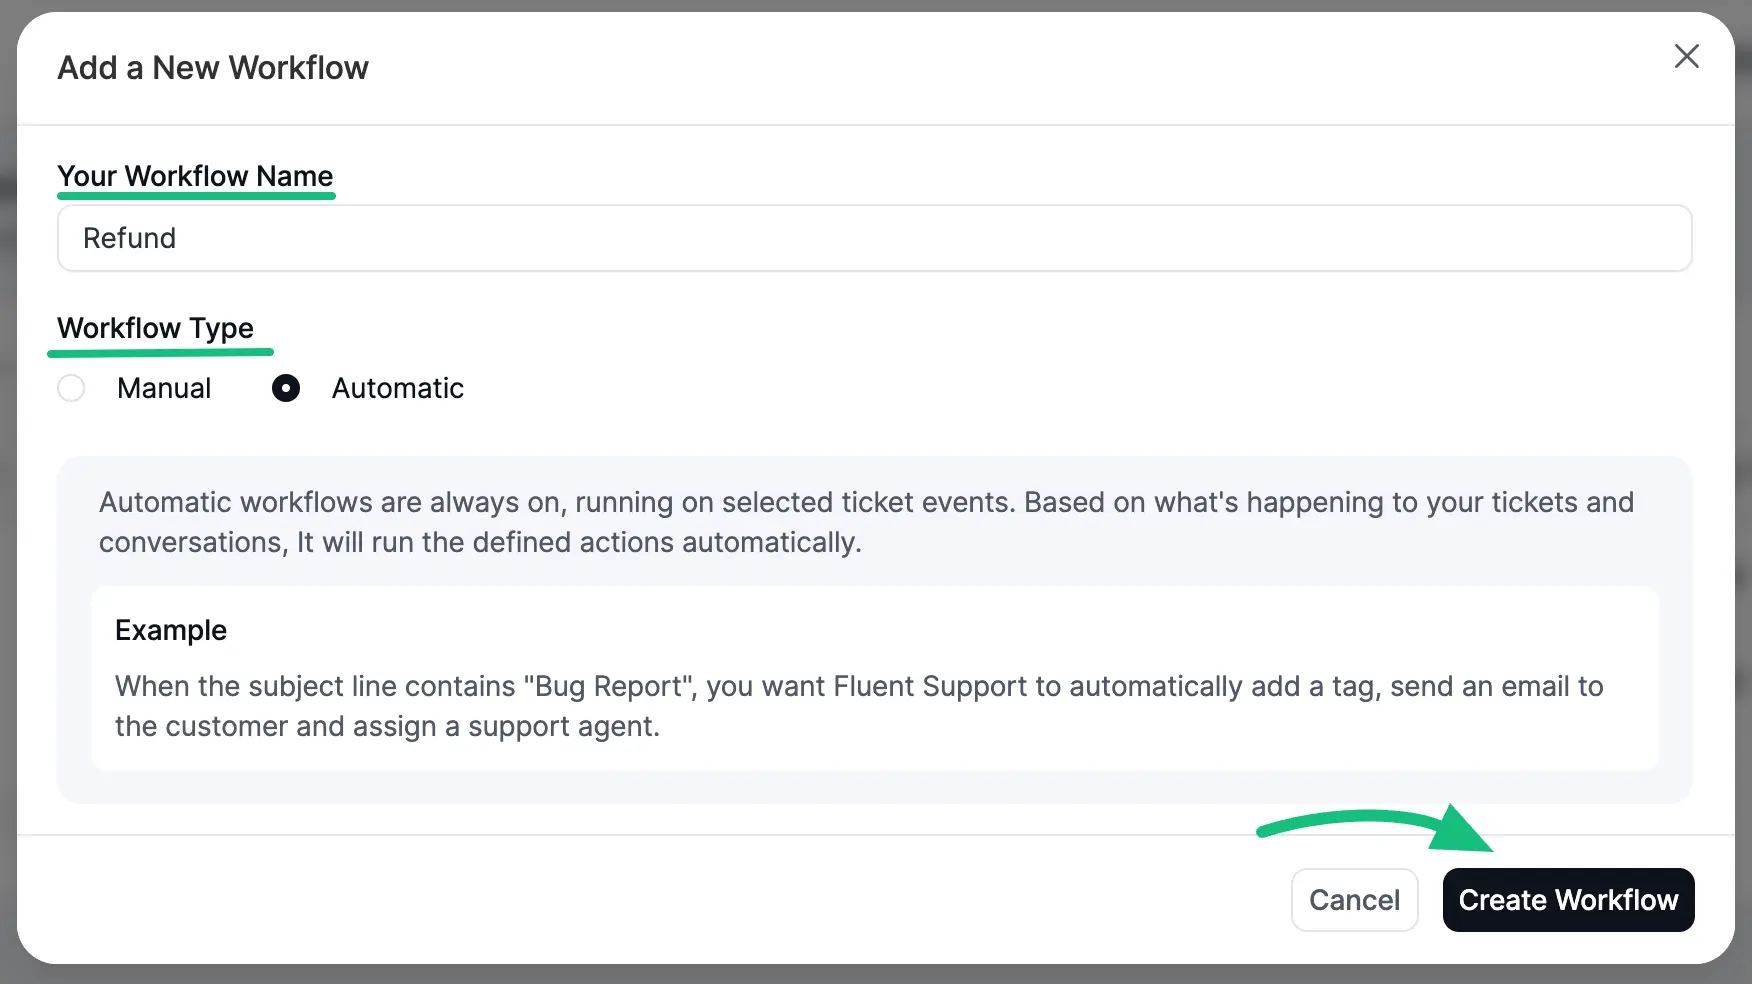
Give a Name to your workflow and choose workflow type Automatic, and click on the Create Workflow button to create it.
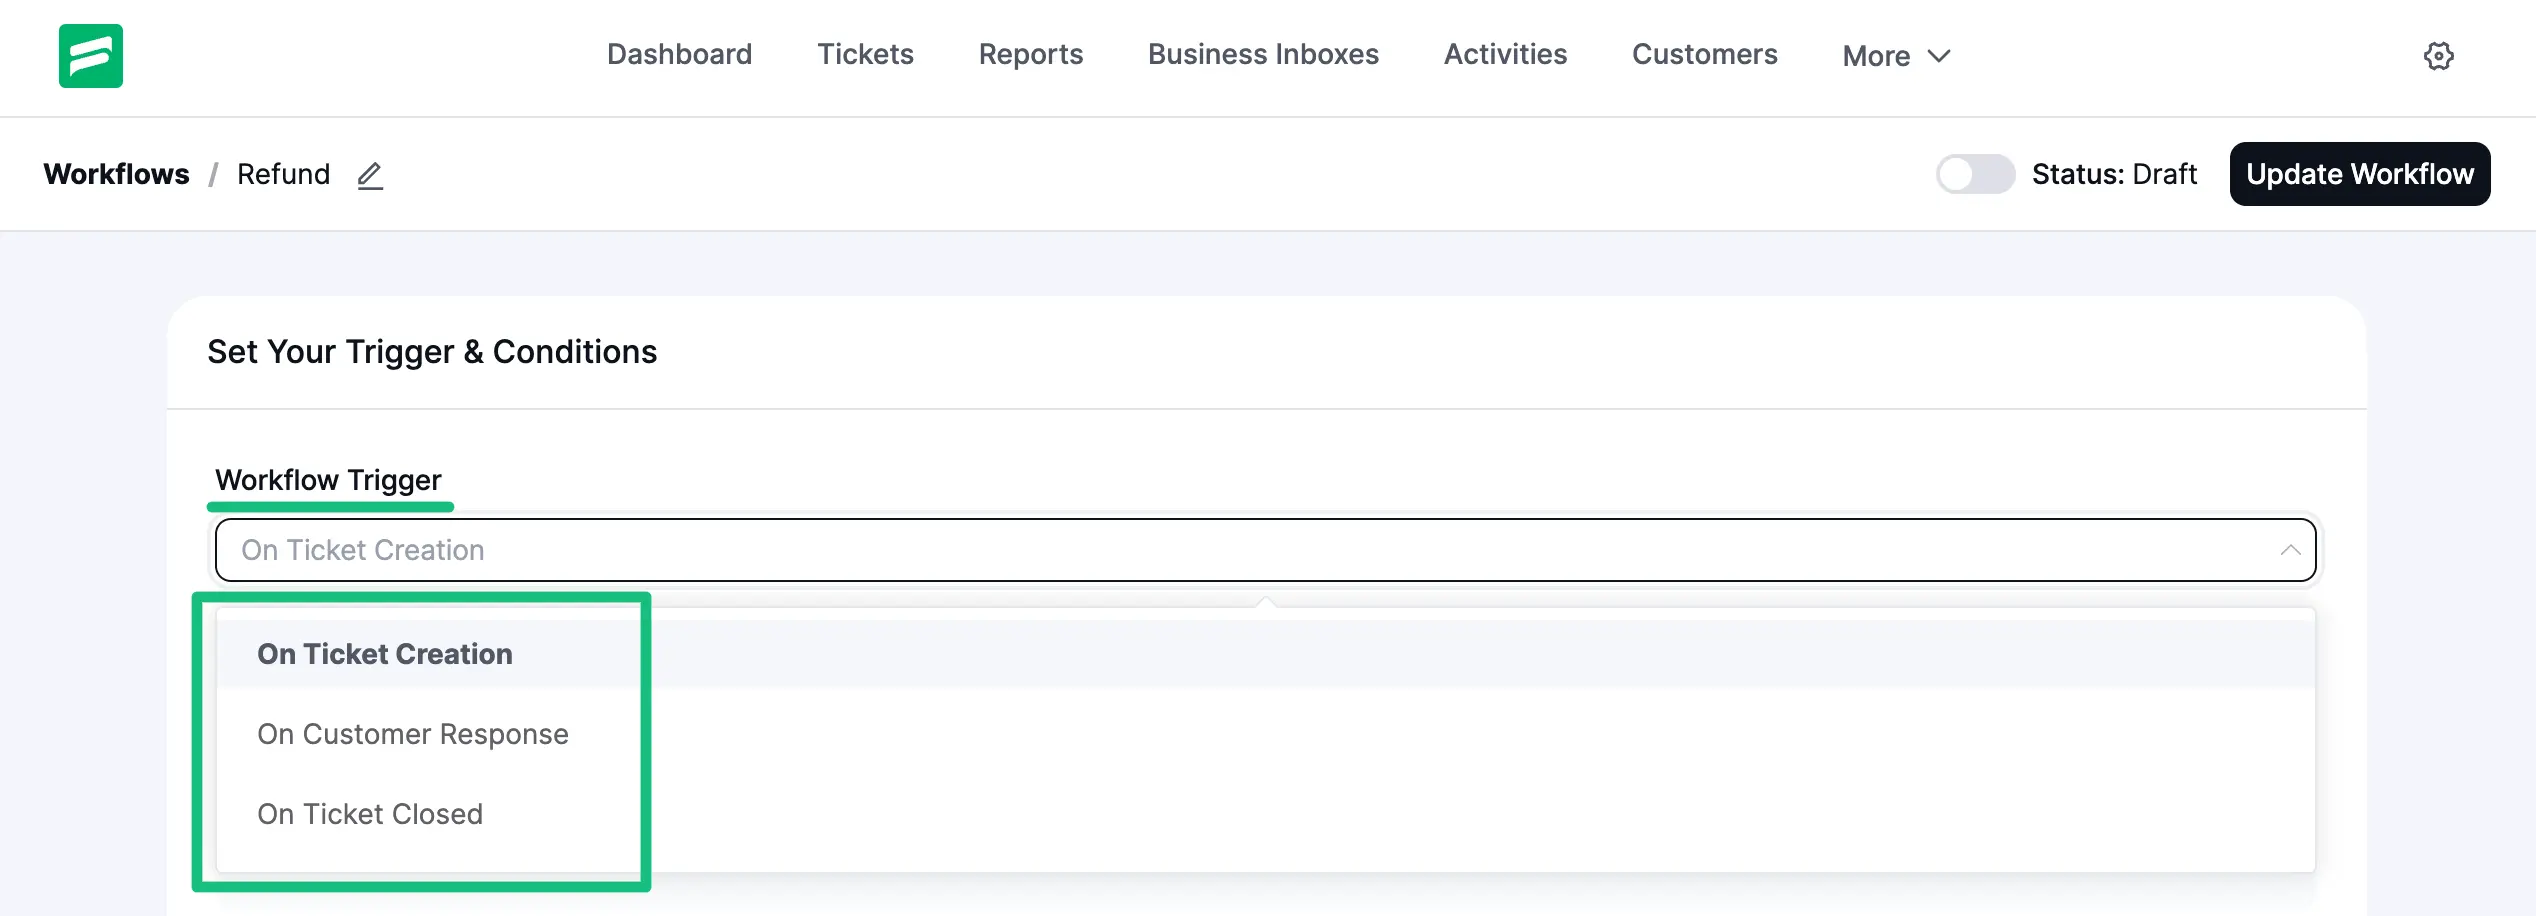
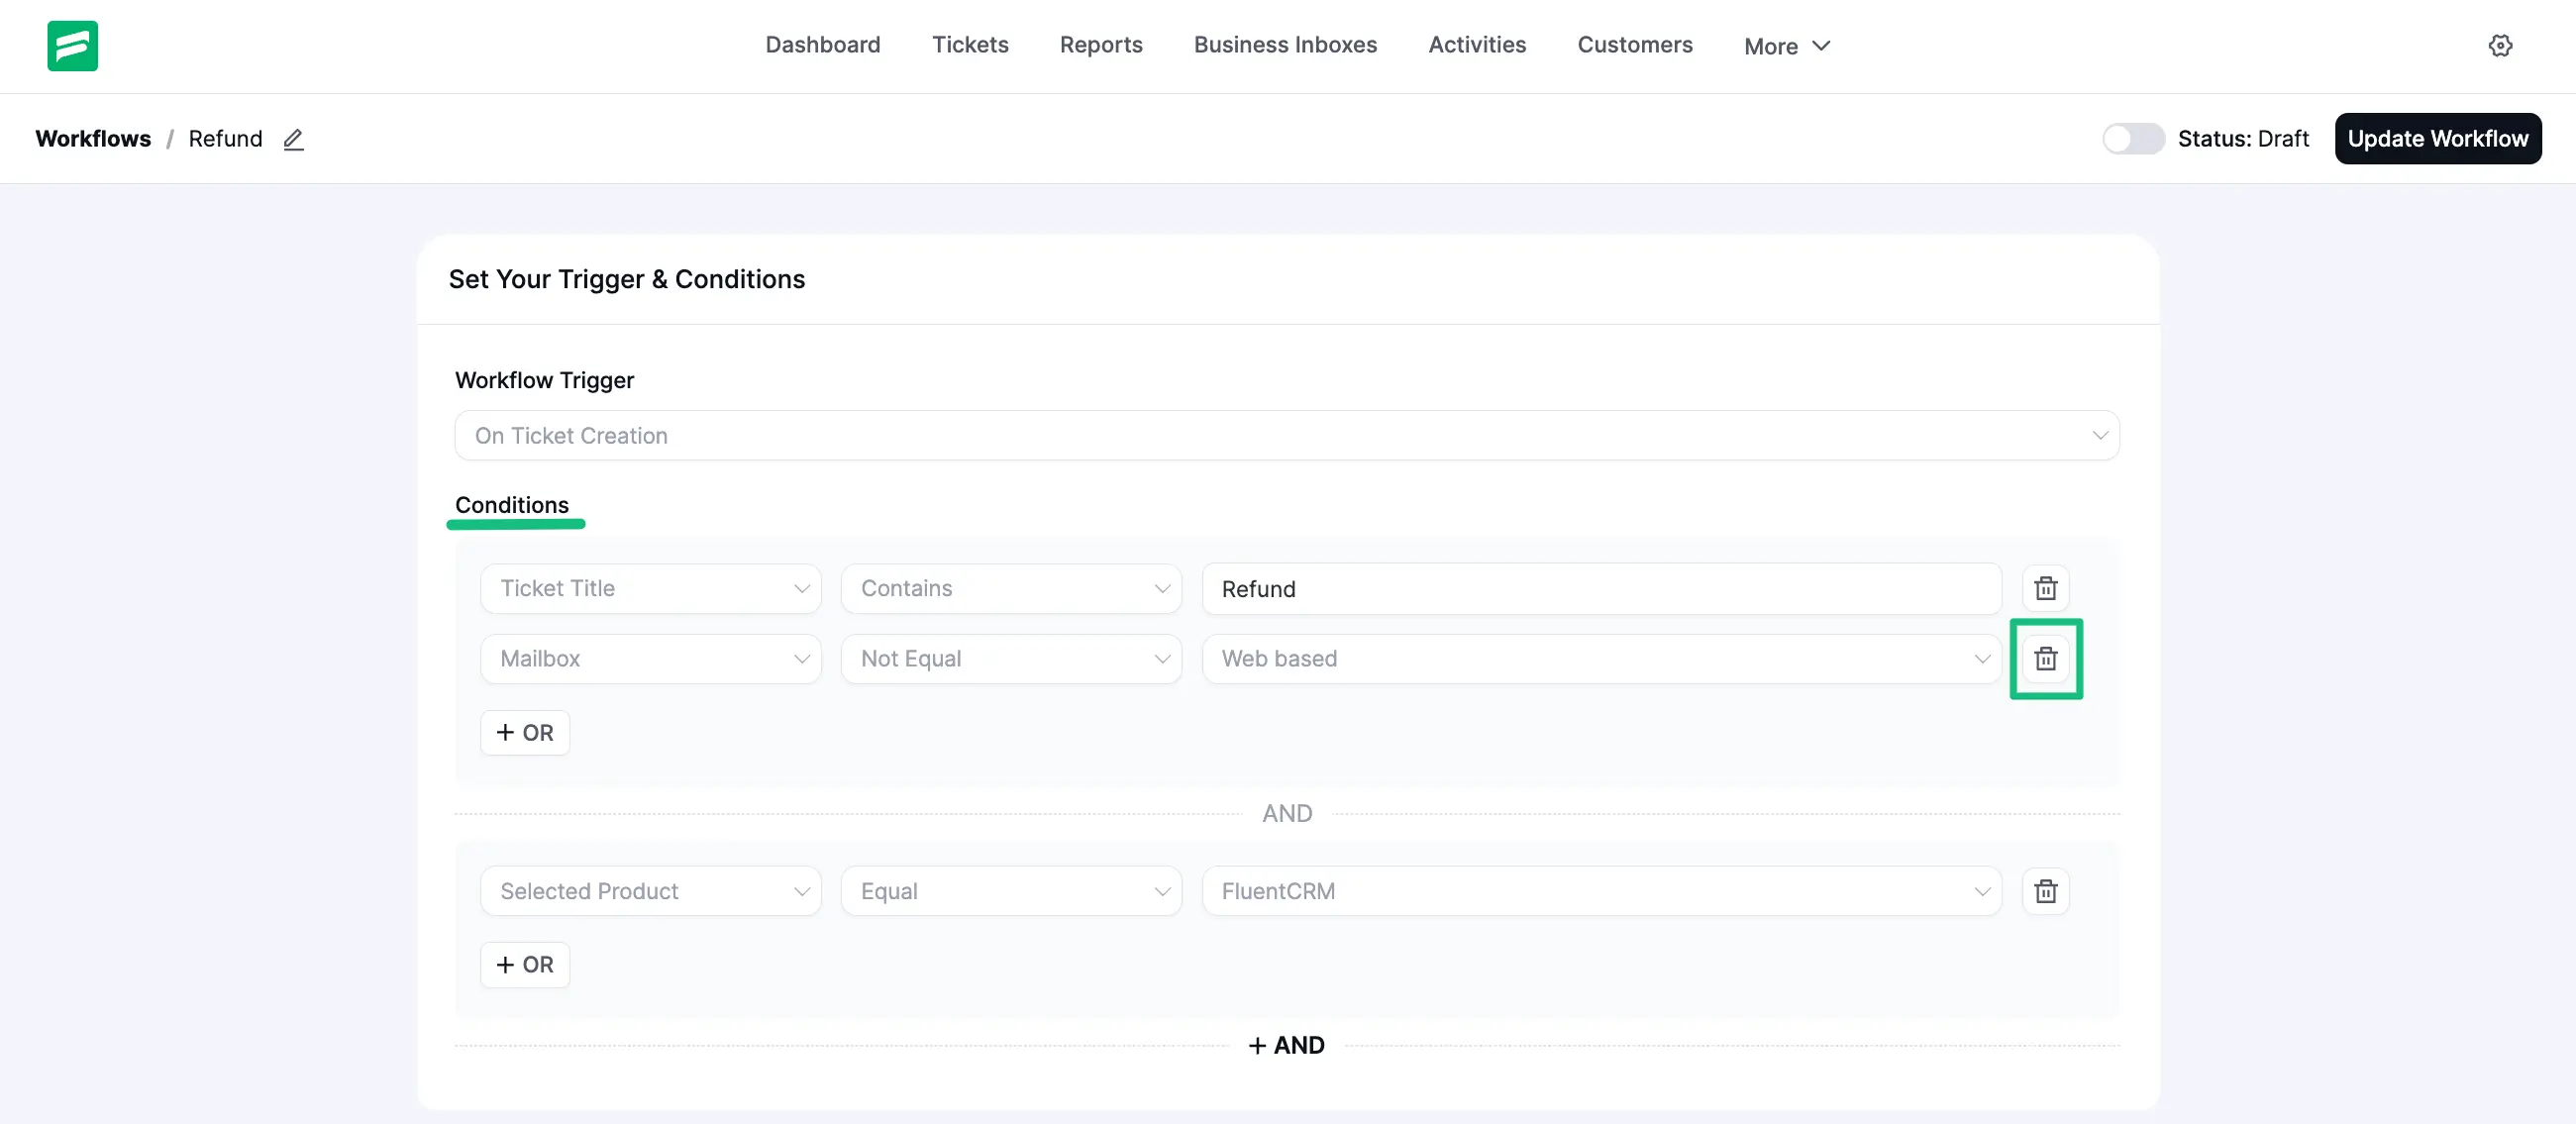
Now choose a Trigger from the dropdown list to decide when your Workflow will run.
For example, if you choose the On Ticket Creation trigger, the Workflow will automatically run each time a ticket is created.
Then, you have to set a Condition that will trigger the Workflow. Multiple conditions can be set using the +OR and +AND options.
You will get the following options to set the Condition for your Workflow –
Customer
- Customer First Name
- Customer Last Name
- Customer Email
Message
- Ticket Title
- Message Content
- Attachments
- Added Time Range
- Added Date Range
Ticket
- Ticket Priority (Client)
- Selected Product
- Mailbox
Custom Fields
Here, all of your existing custom fields will appear.
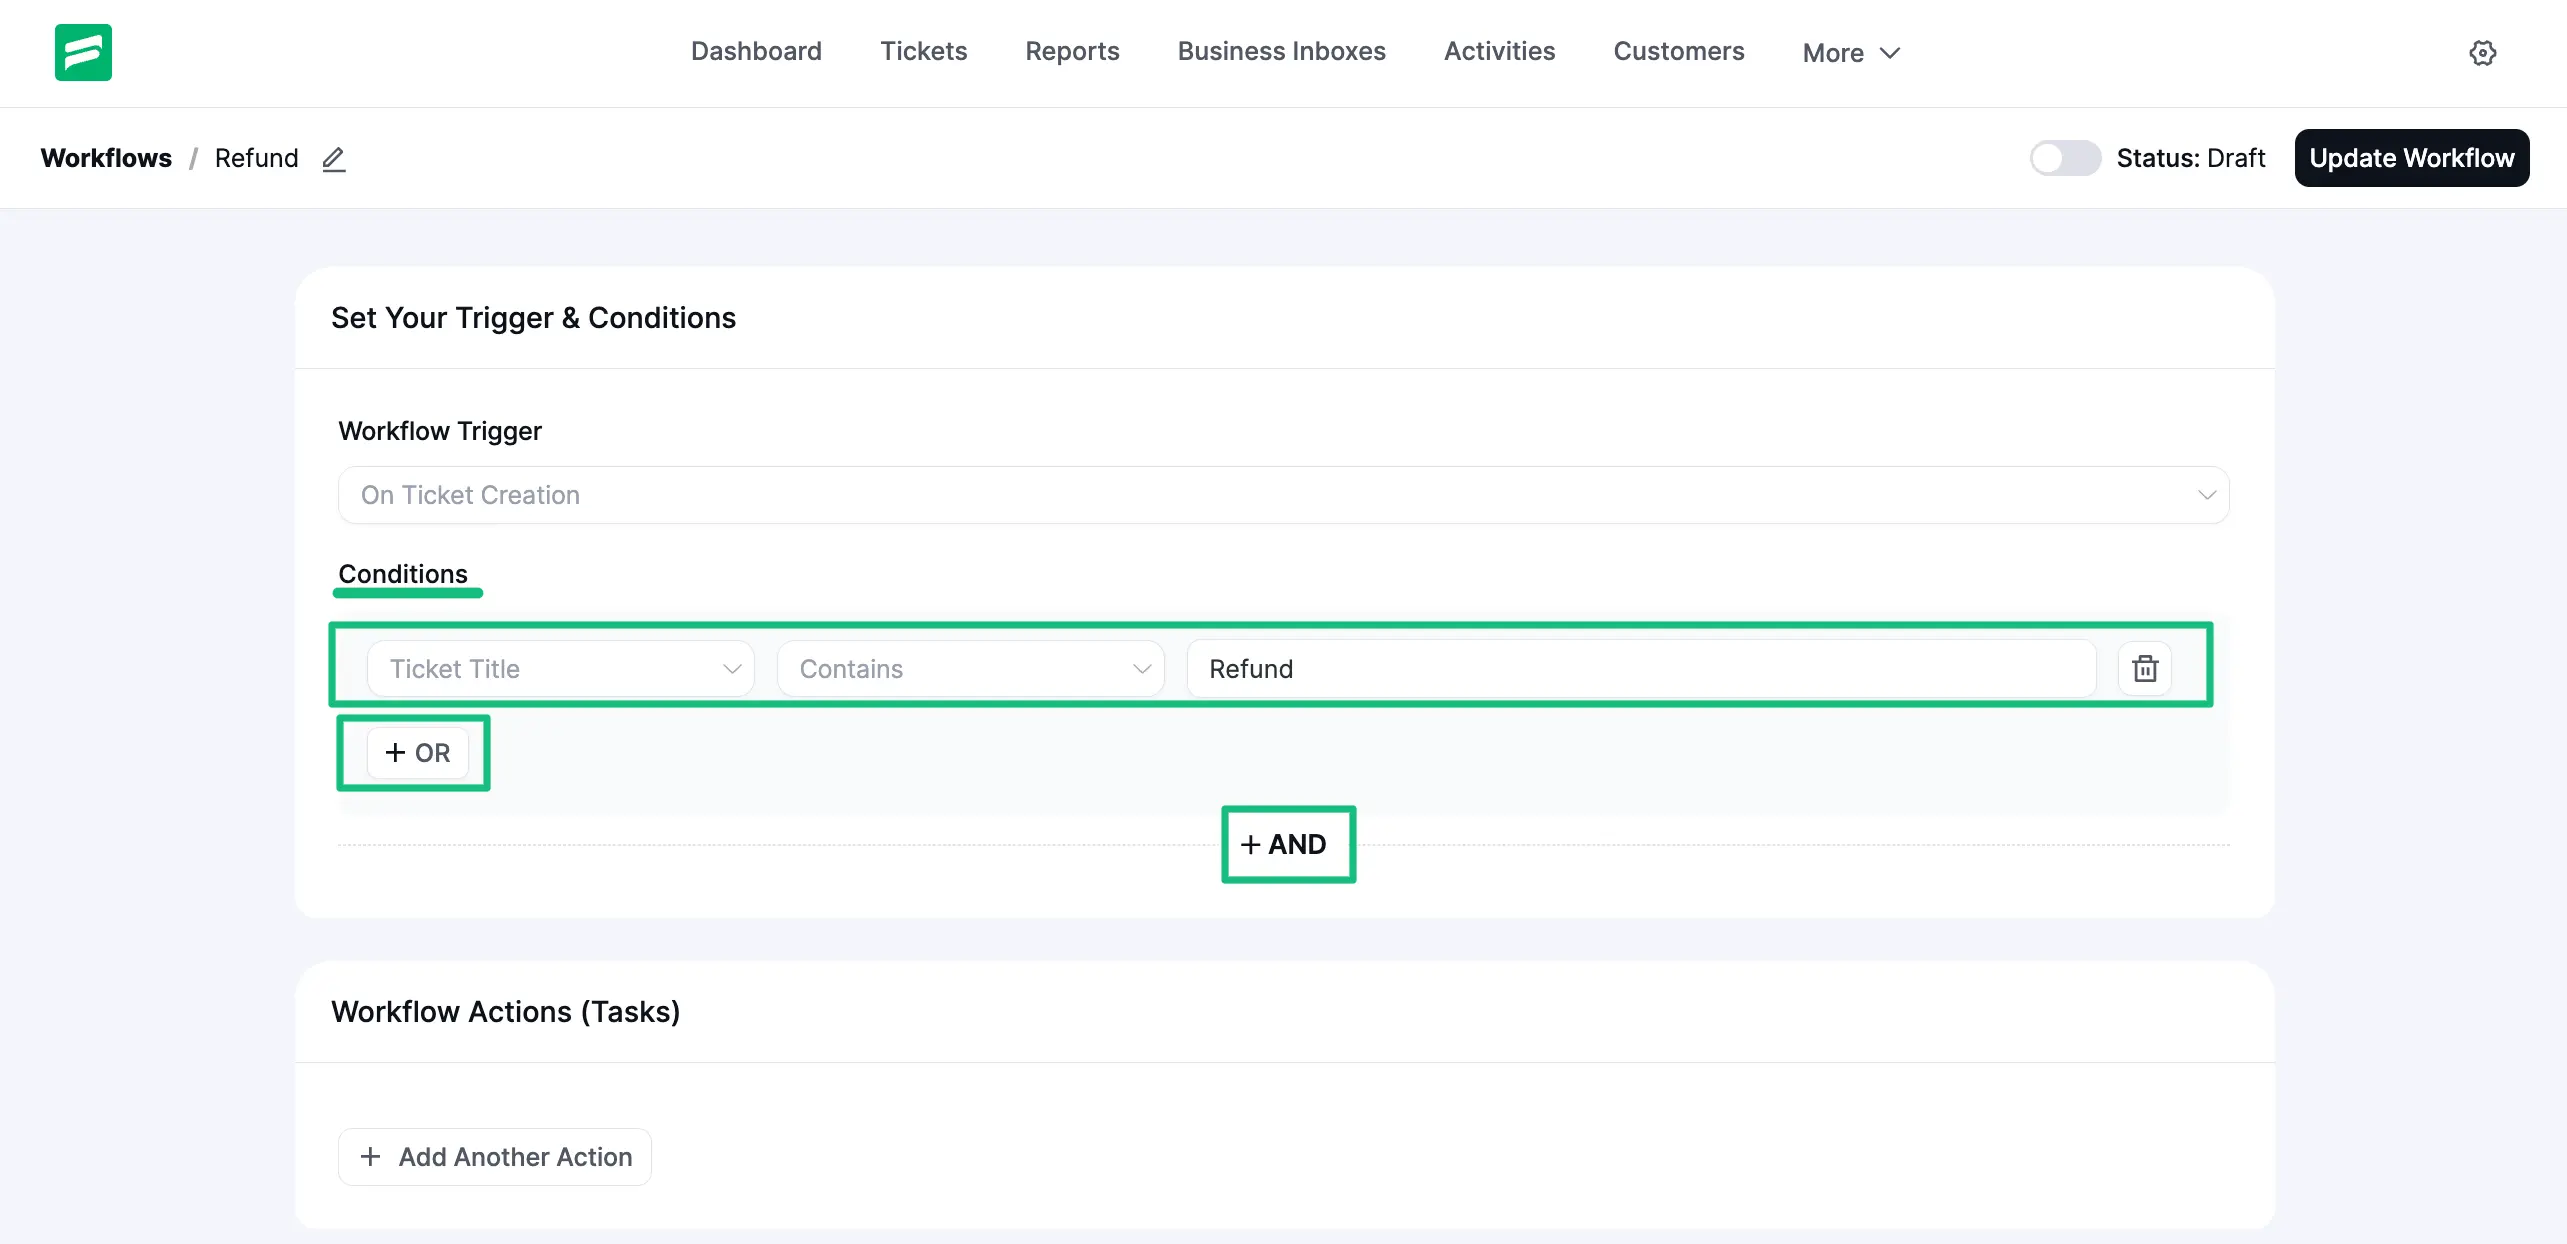
You can also Delete any existing condition by clicking the Trash Icon.
Now, set the Action/s (Task) from the dropdown list for Workflow to perform. Once you fill in all the necessary fields, click the Save button.
You will get the following Actions from the Dropdown List –
- Add Response
- Assign Agent
- Add Internal Note
- Close Ticket
- Add Tag(s)
- Remove Tag(s)
- Delete Ticket
- Block Ticket Submitter (customer)
- Trigger Outgoing Webhook
- Add Bookmarks
- Remove Bookmarks
- Change Mailbox
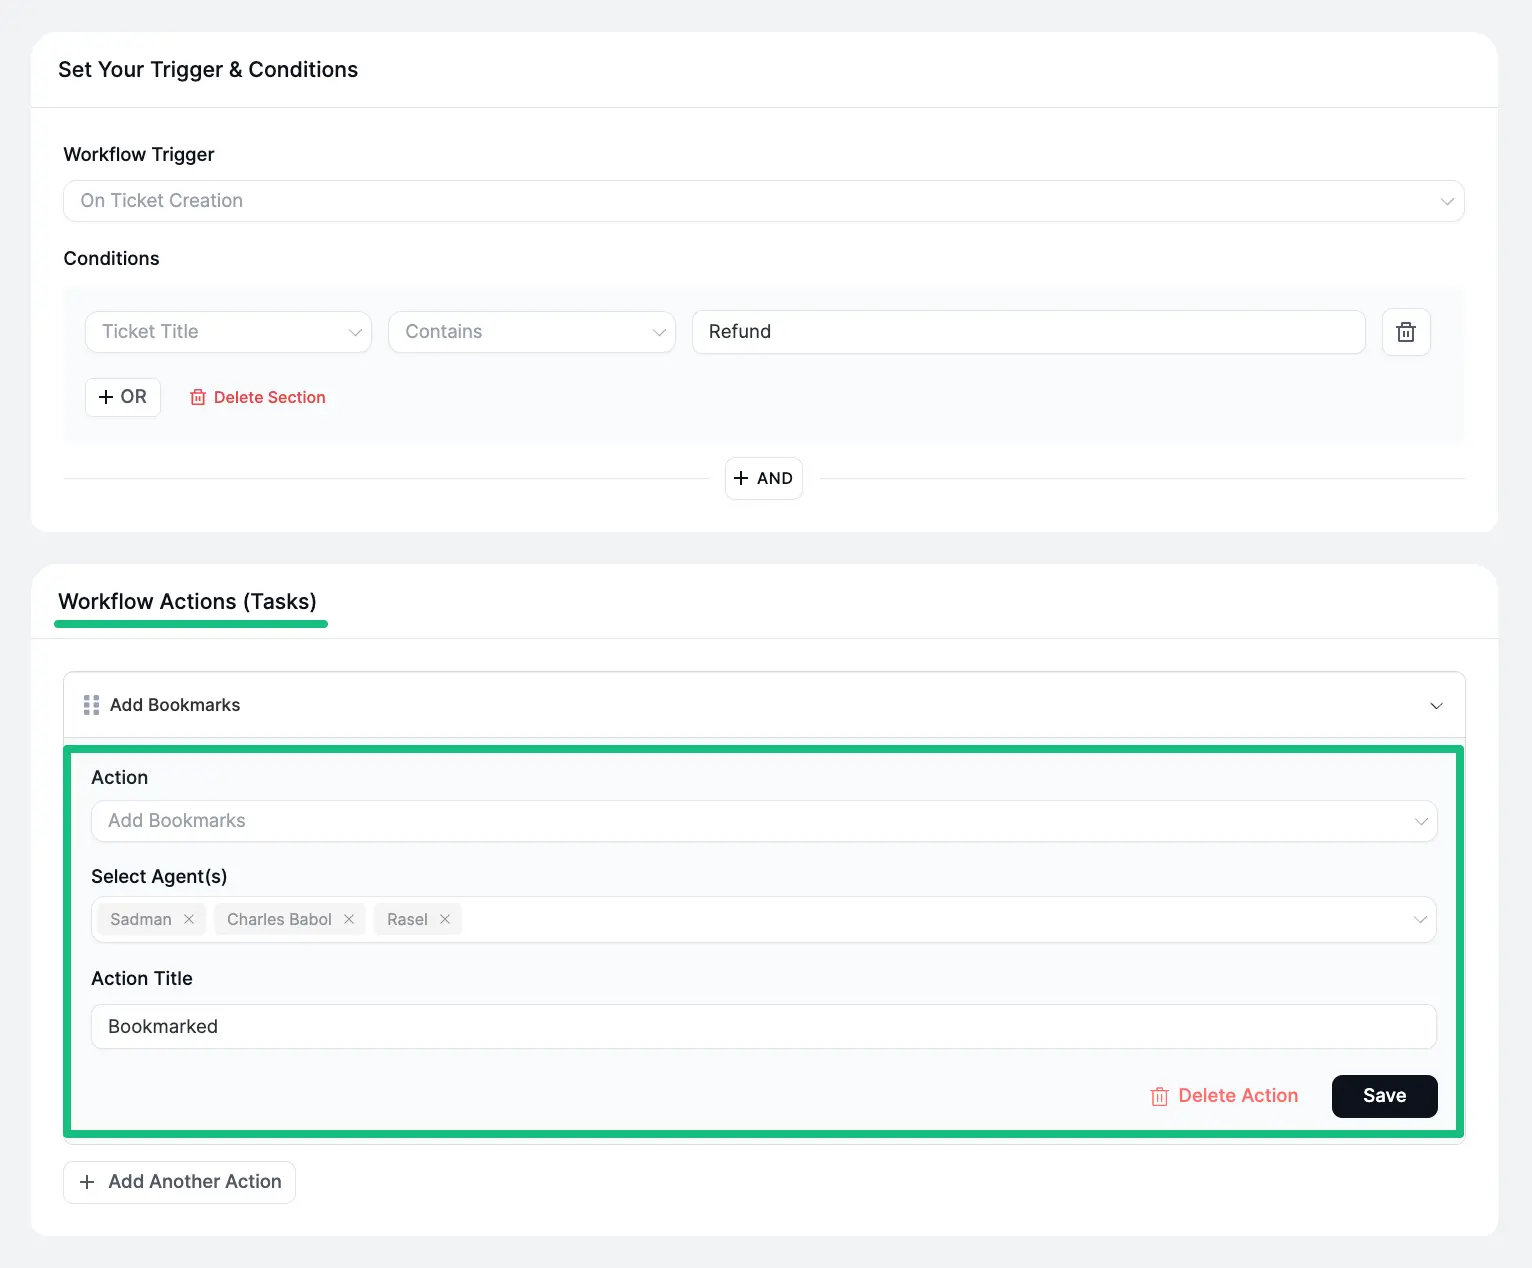
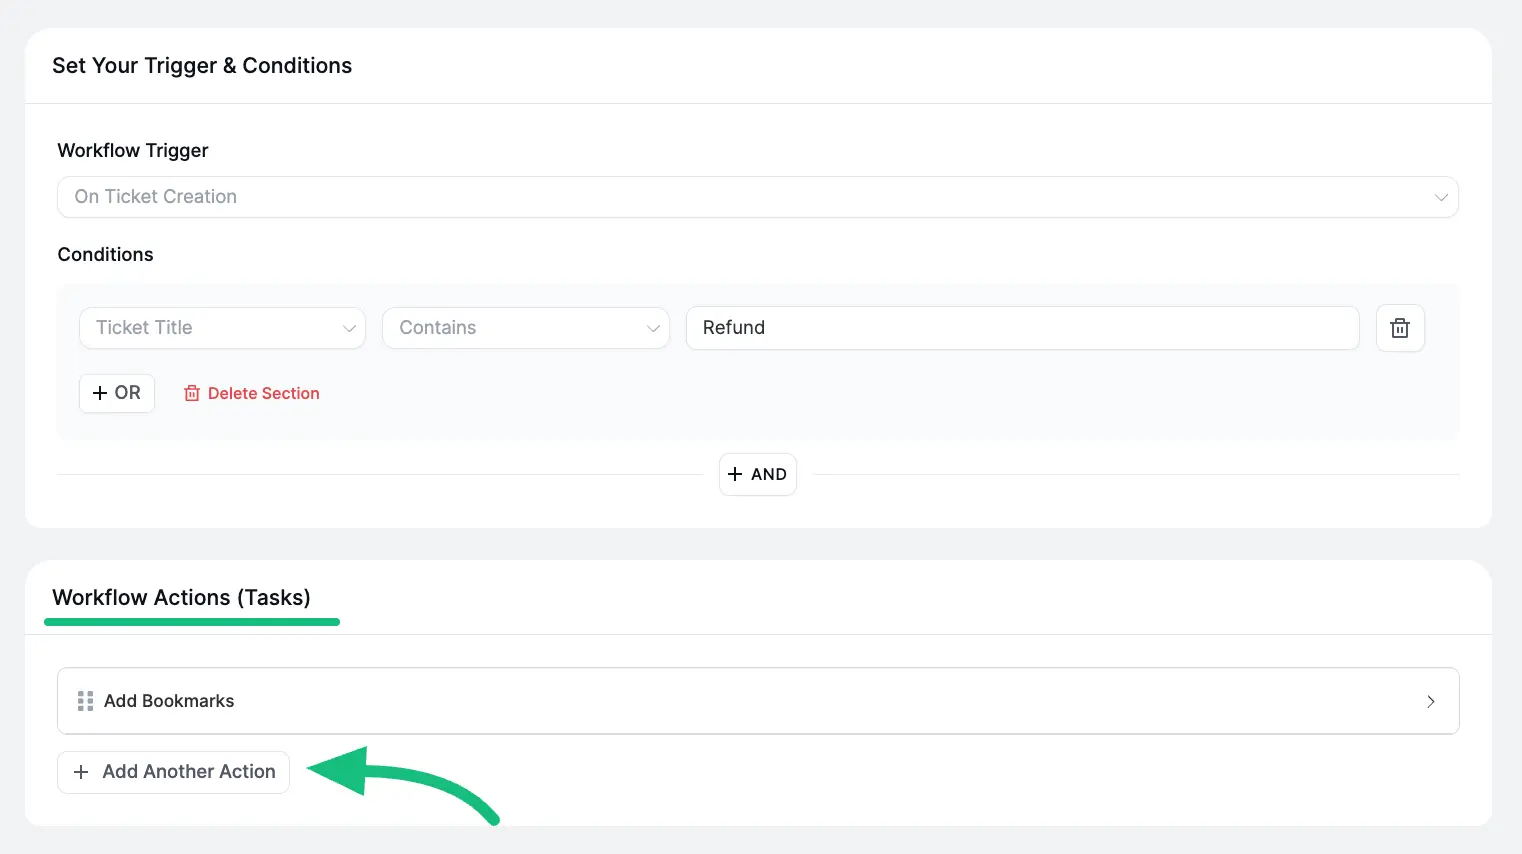
Multiple actions can be set if needed. To do this, click the + Add Another Action button and follow the same process.
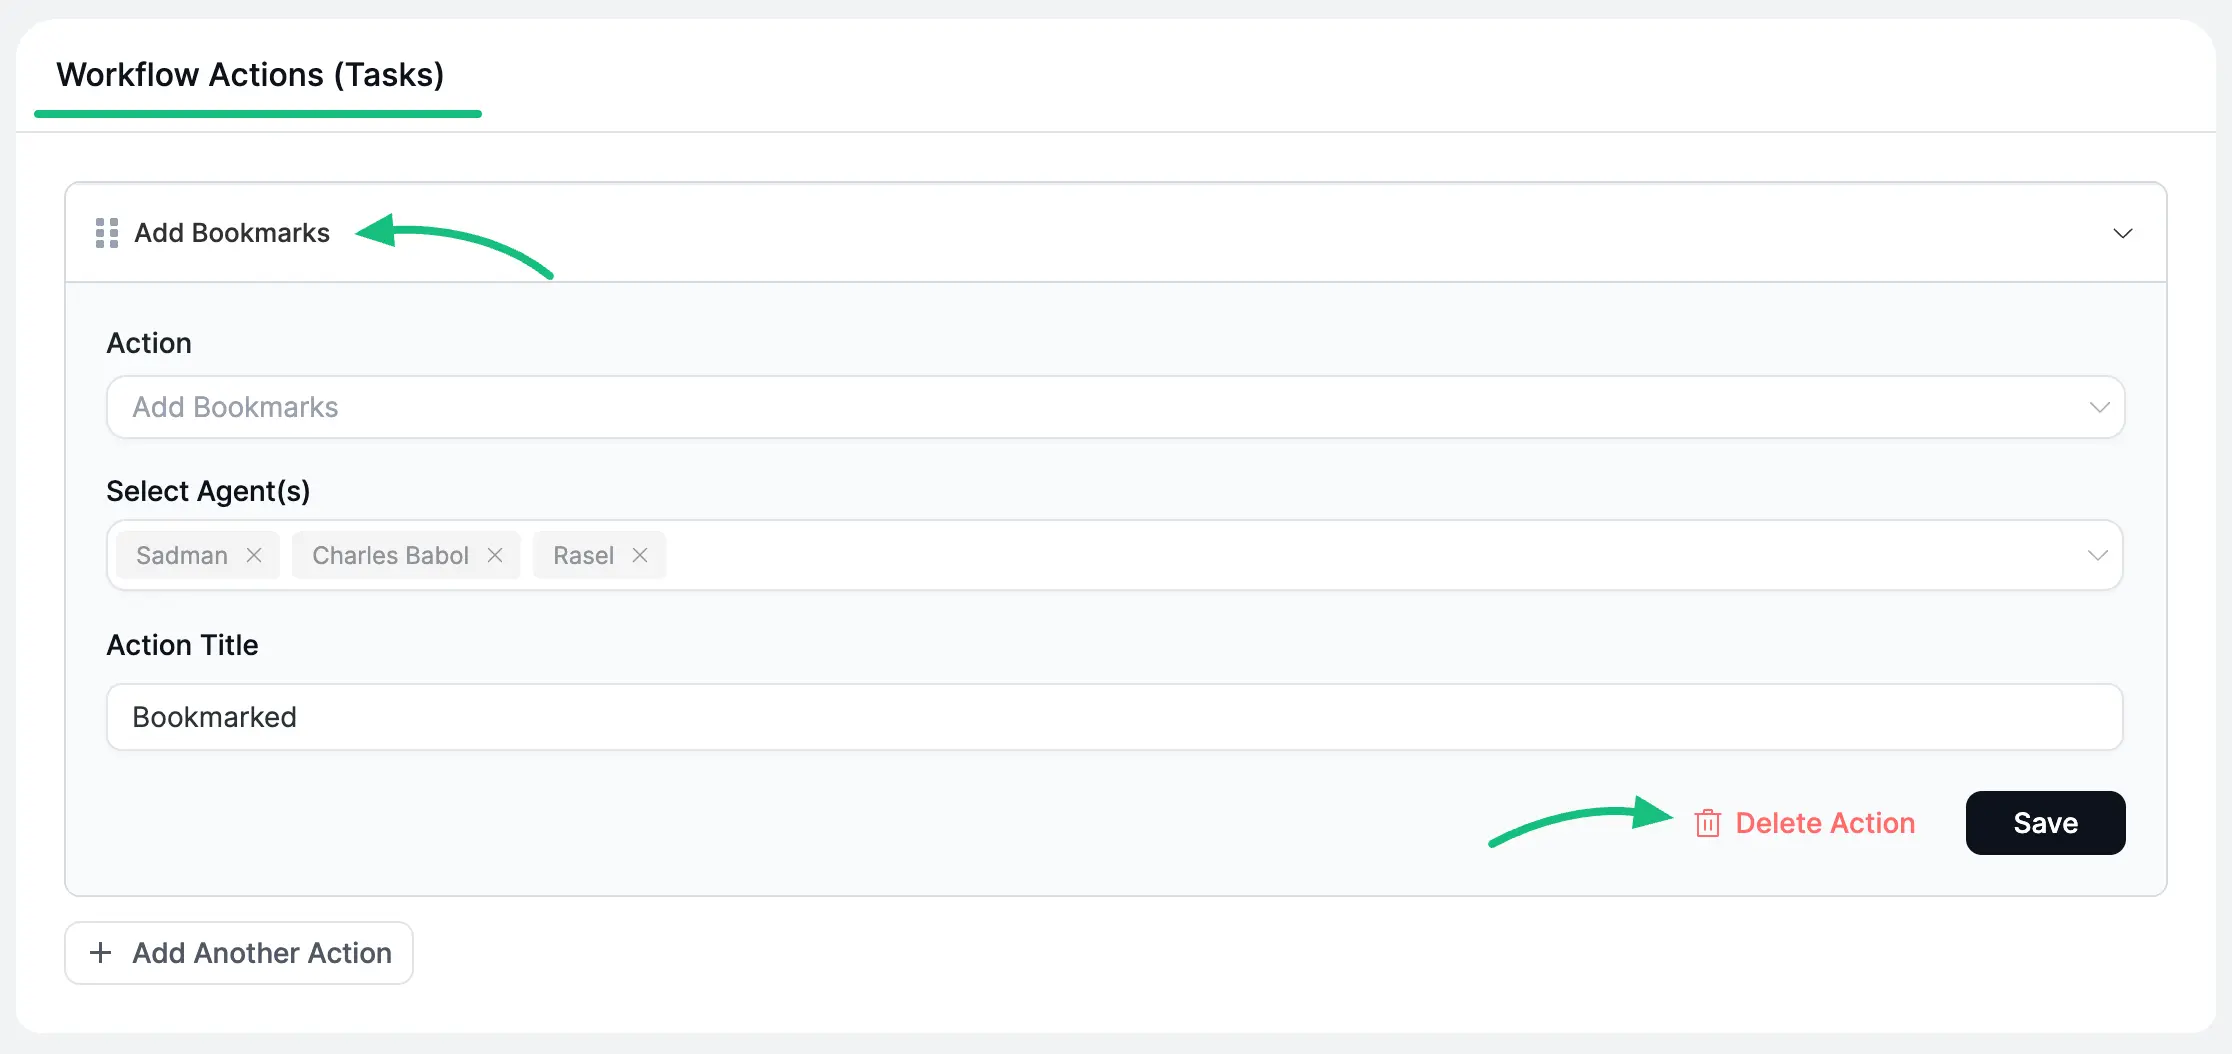
You can also Delete any existing action. To do this, expand the desired action by pressing it and then click the Delete Action.
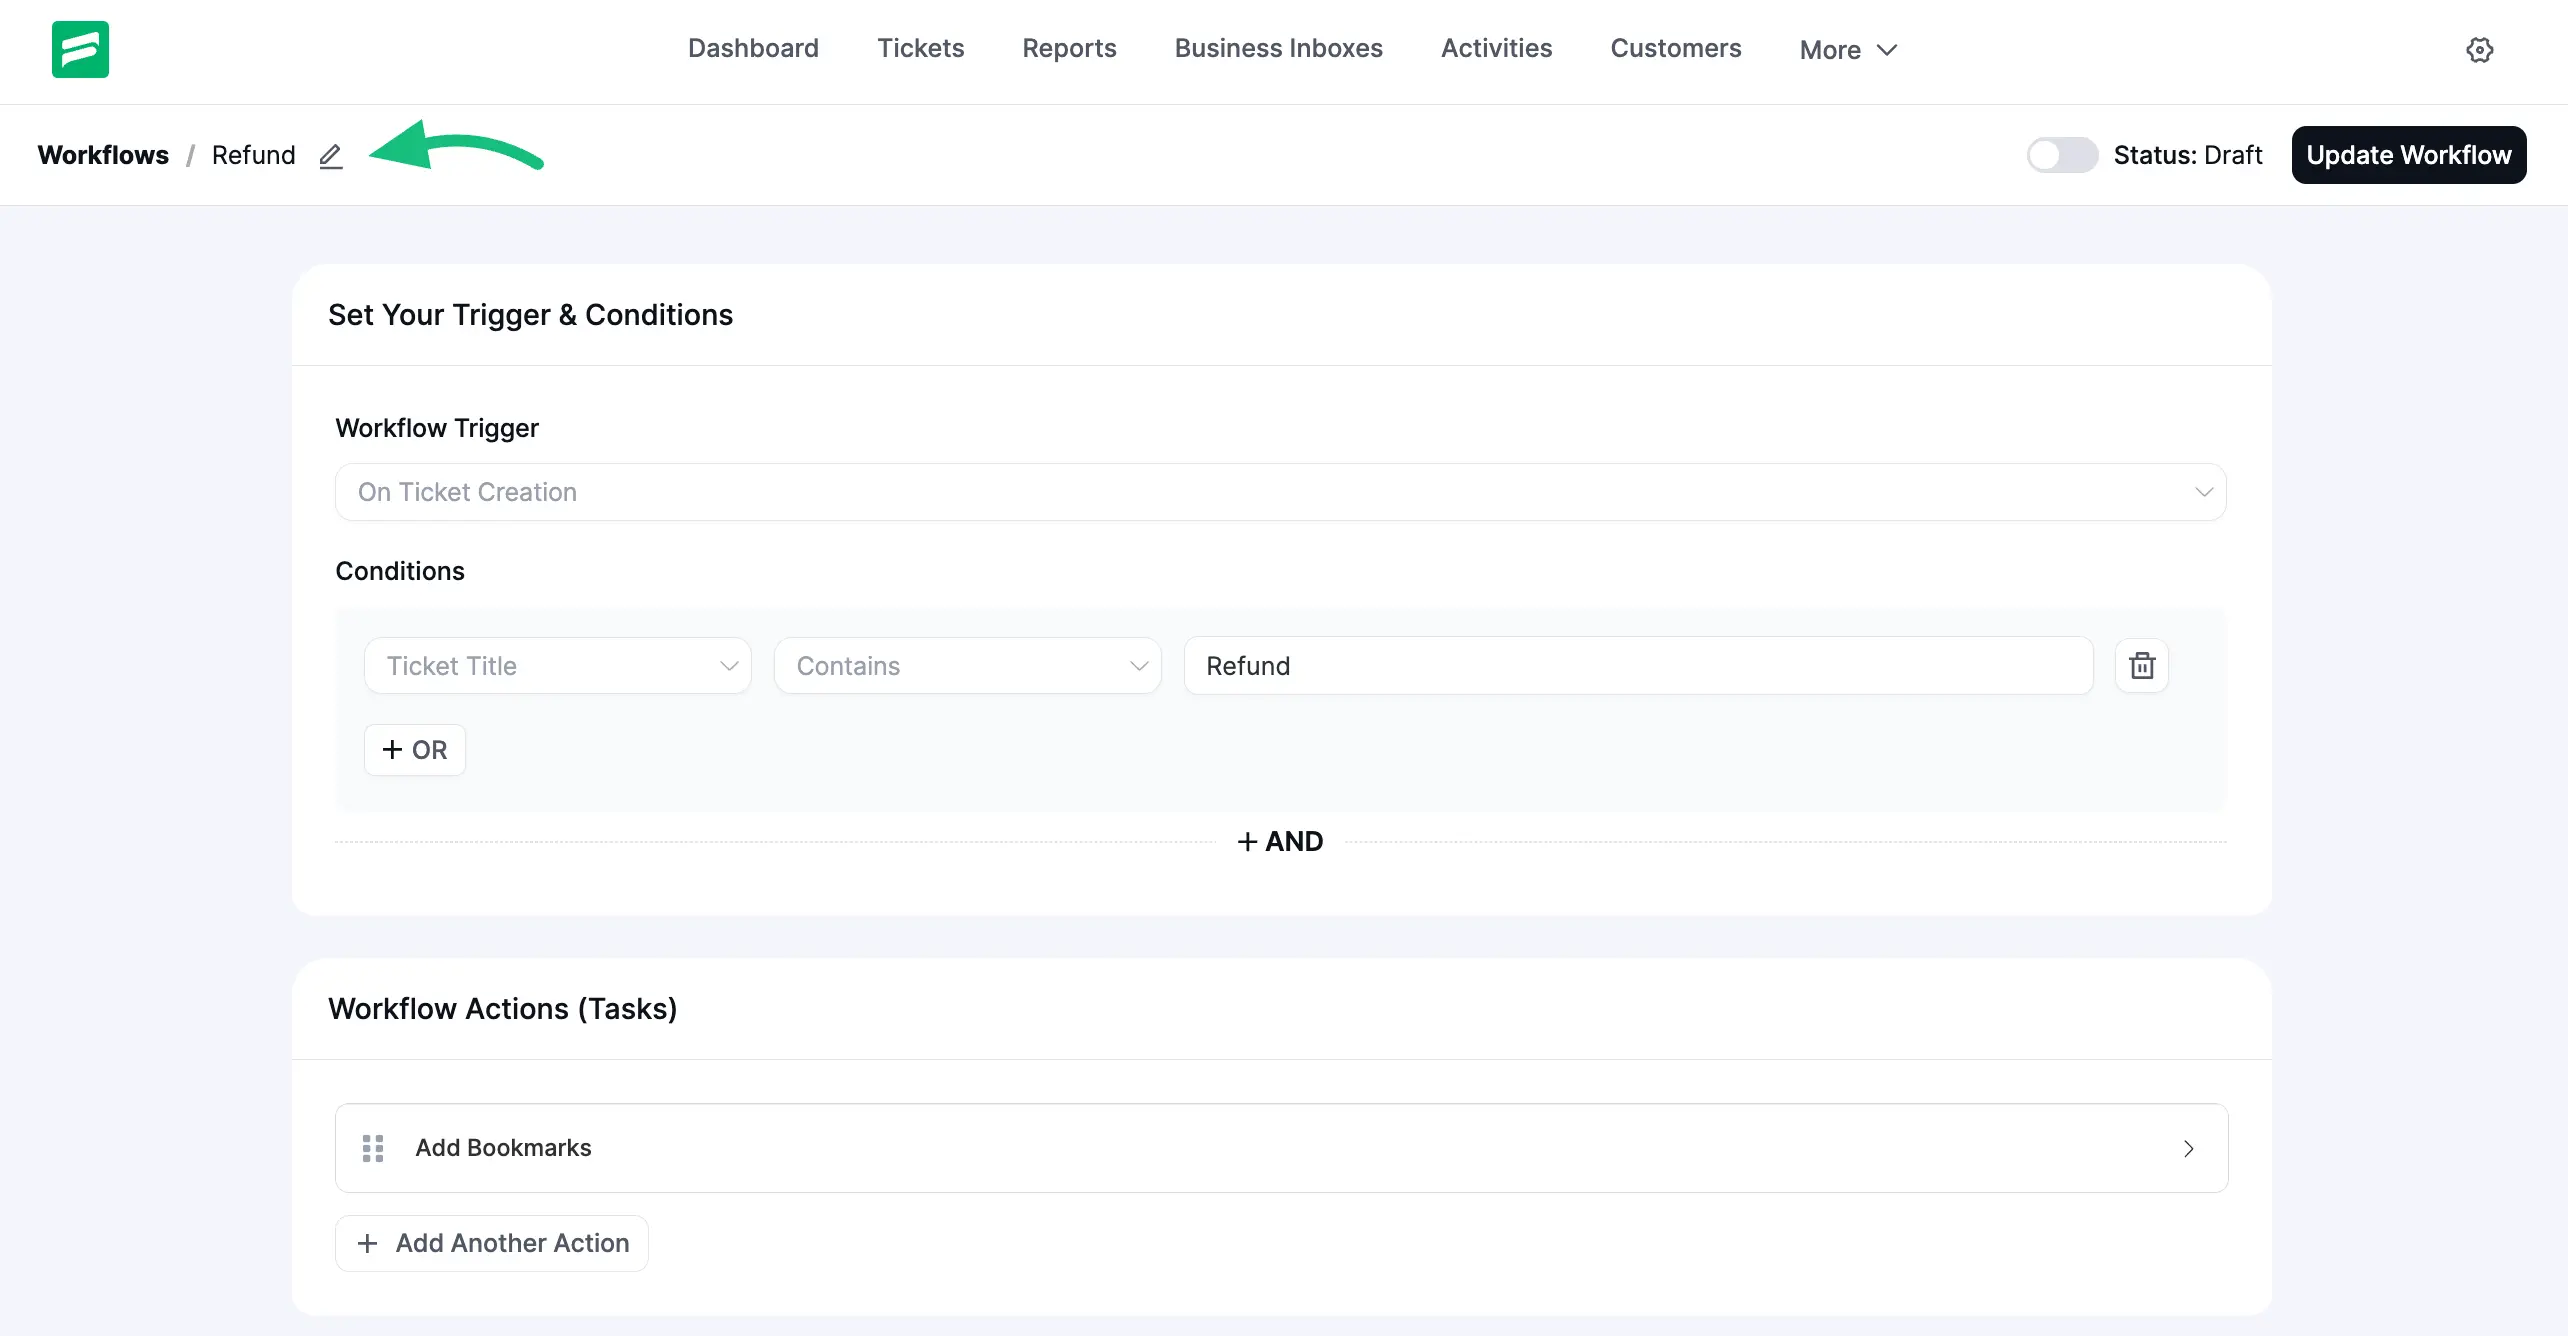
You can change the name of your workflow anytime from here as shown below.
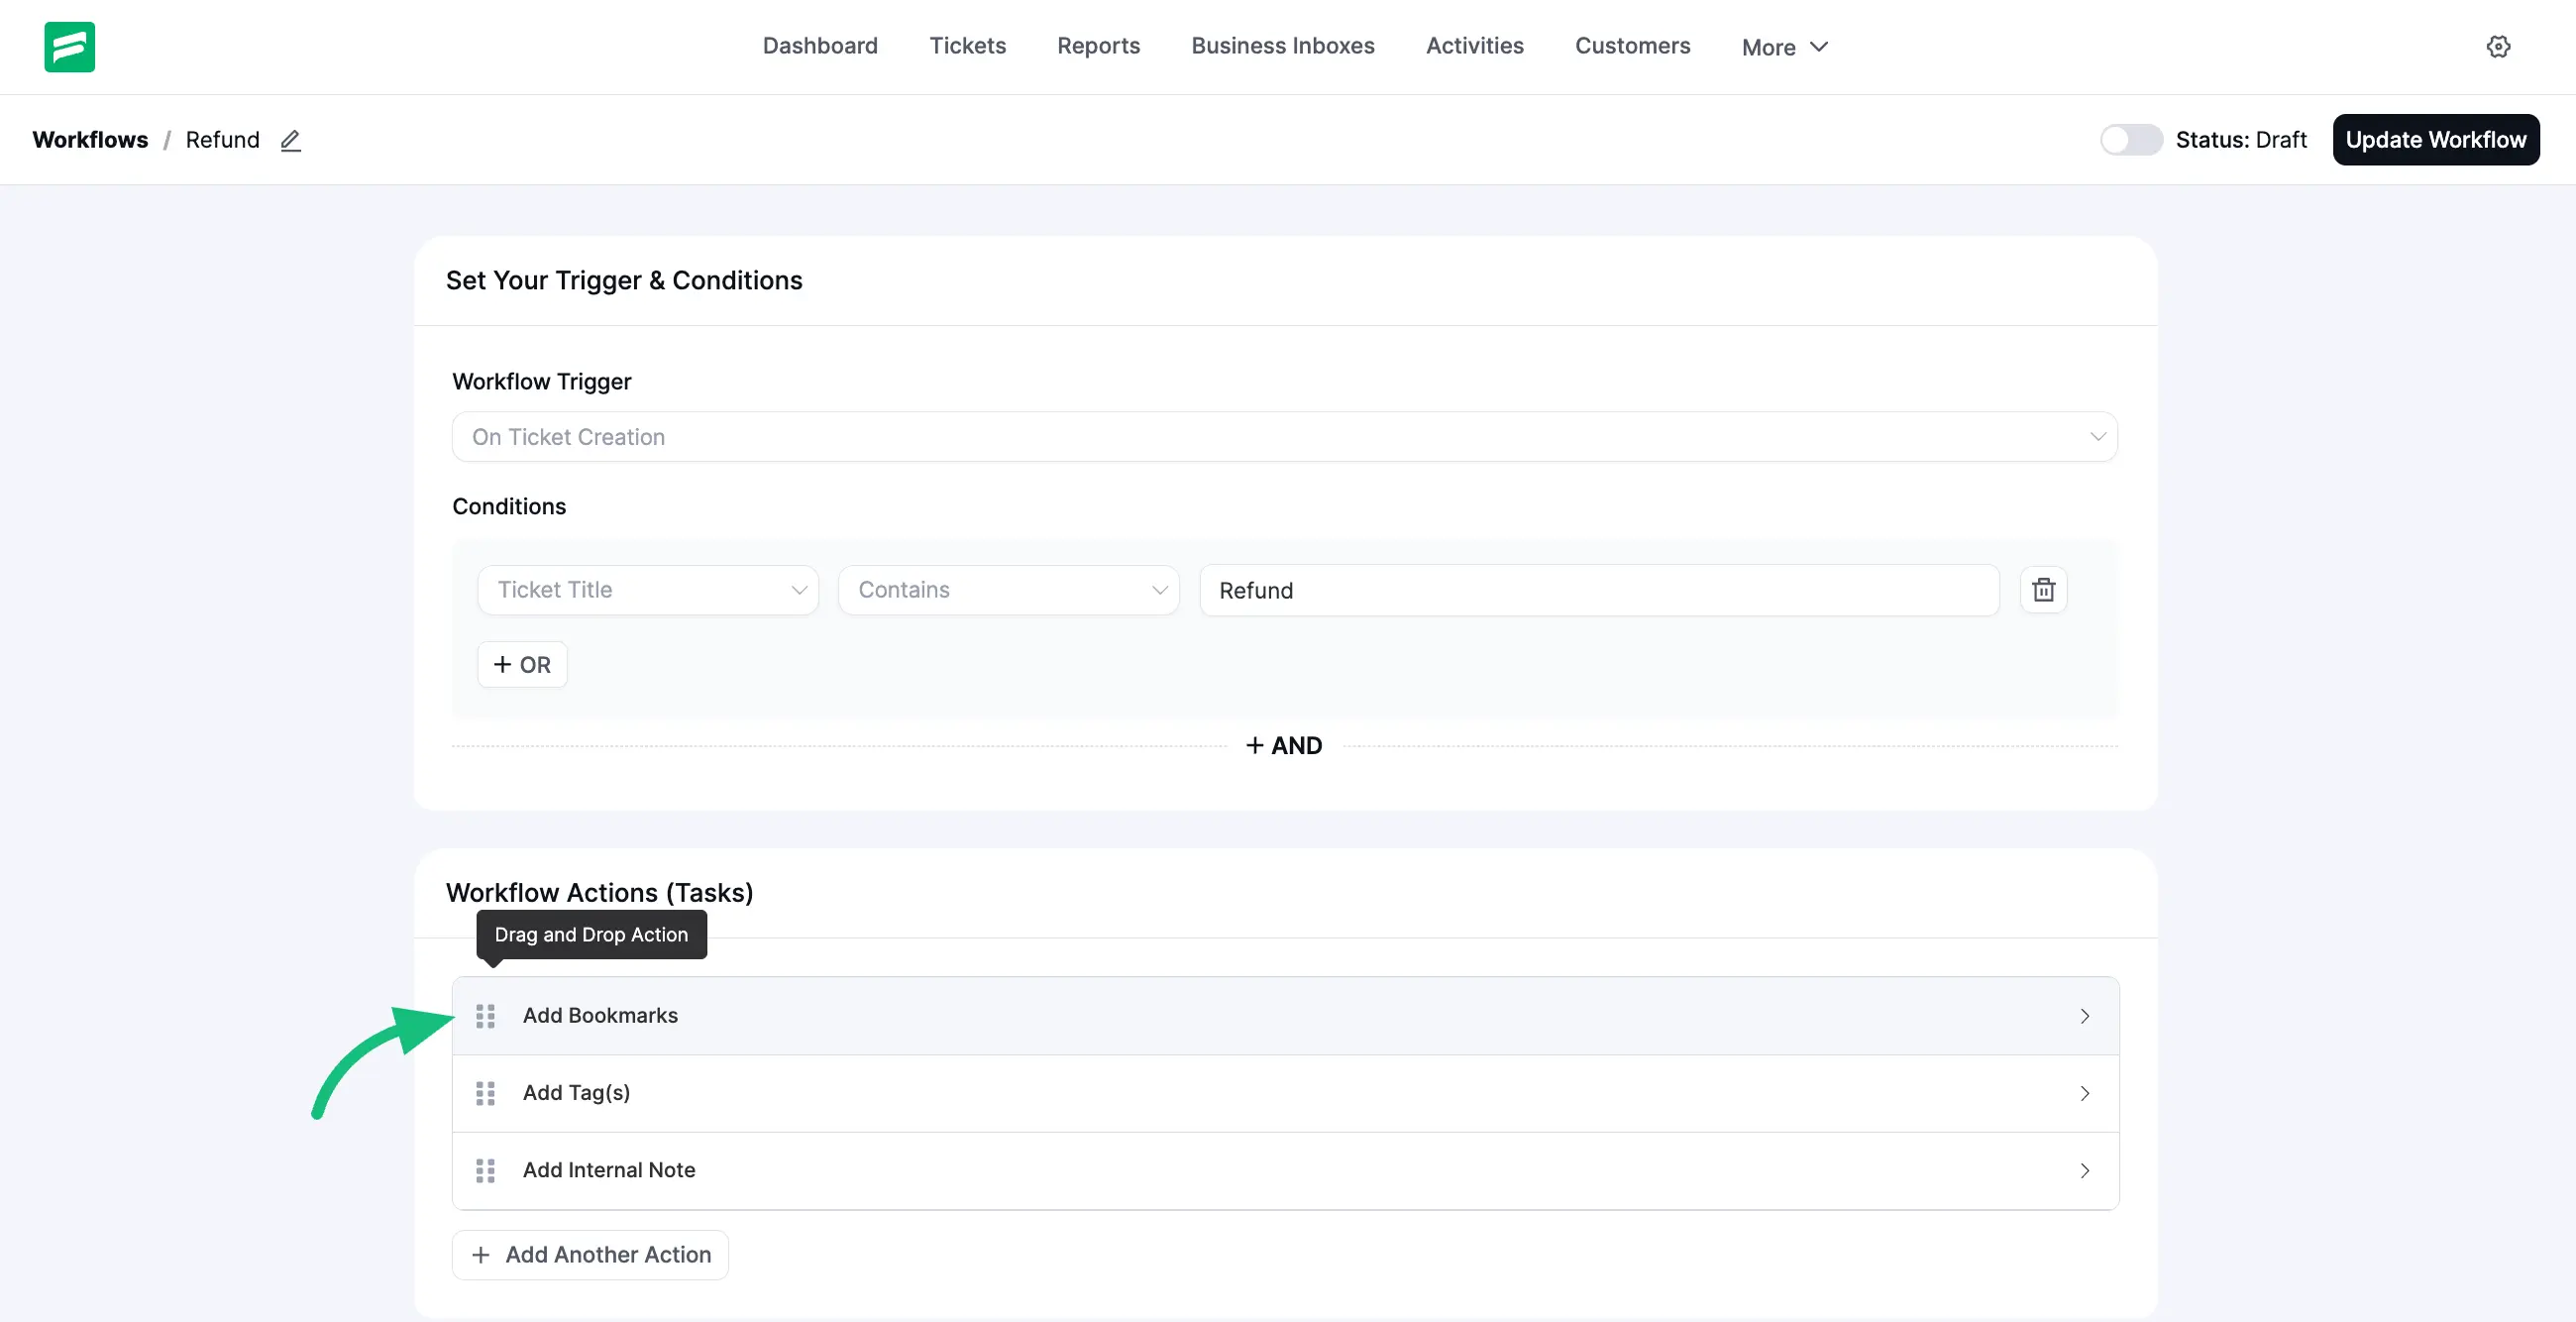
Also, you can set the sequence of your added workflow actions/tasks using the Drag and Drop Action icon.
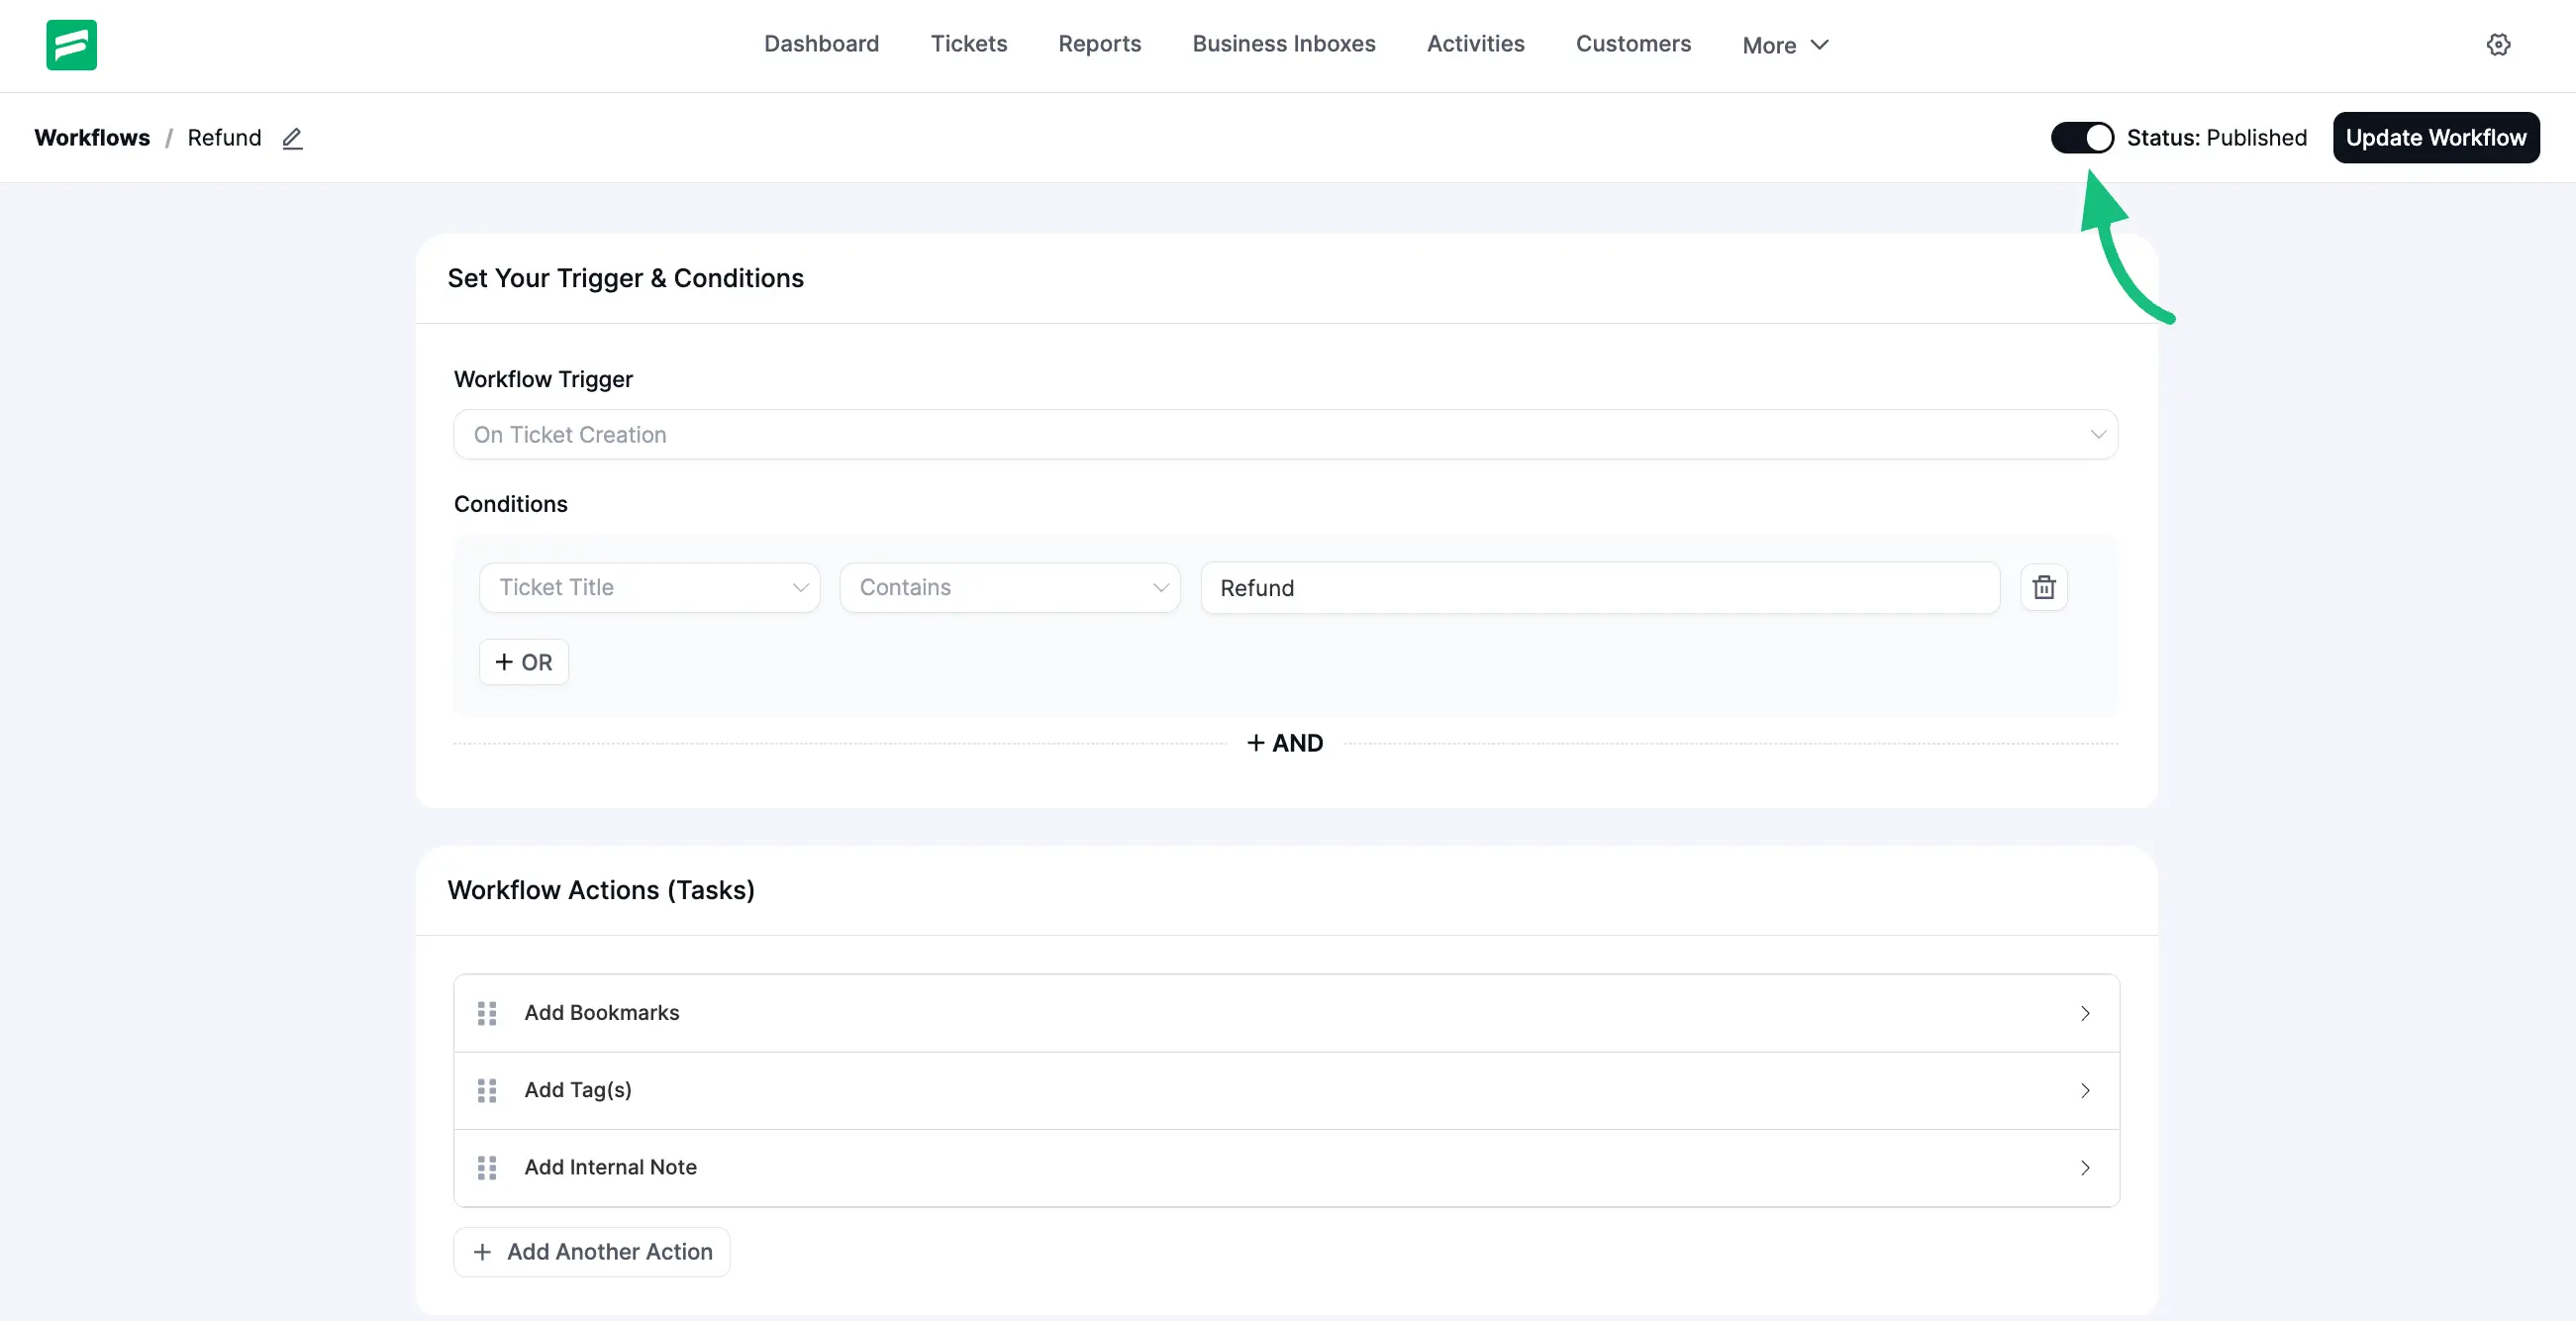
Once you set up the actions, Publish it by enabling the Toggle button at the top right corner to run the Workflow. Otherwise, it will be saved as a draft only.
To save any new changes always press the Update Workflow button right next to the toggle.
See How Automatic Workflow Runs
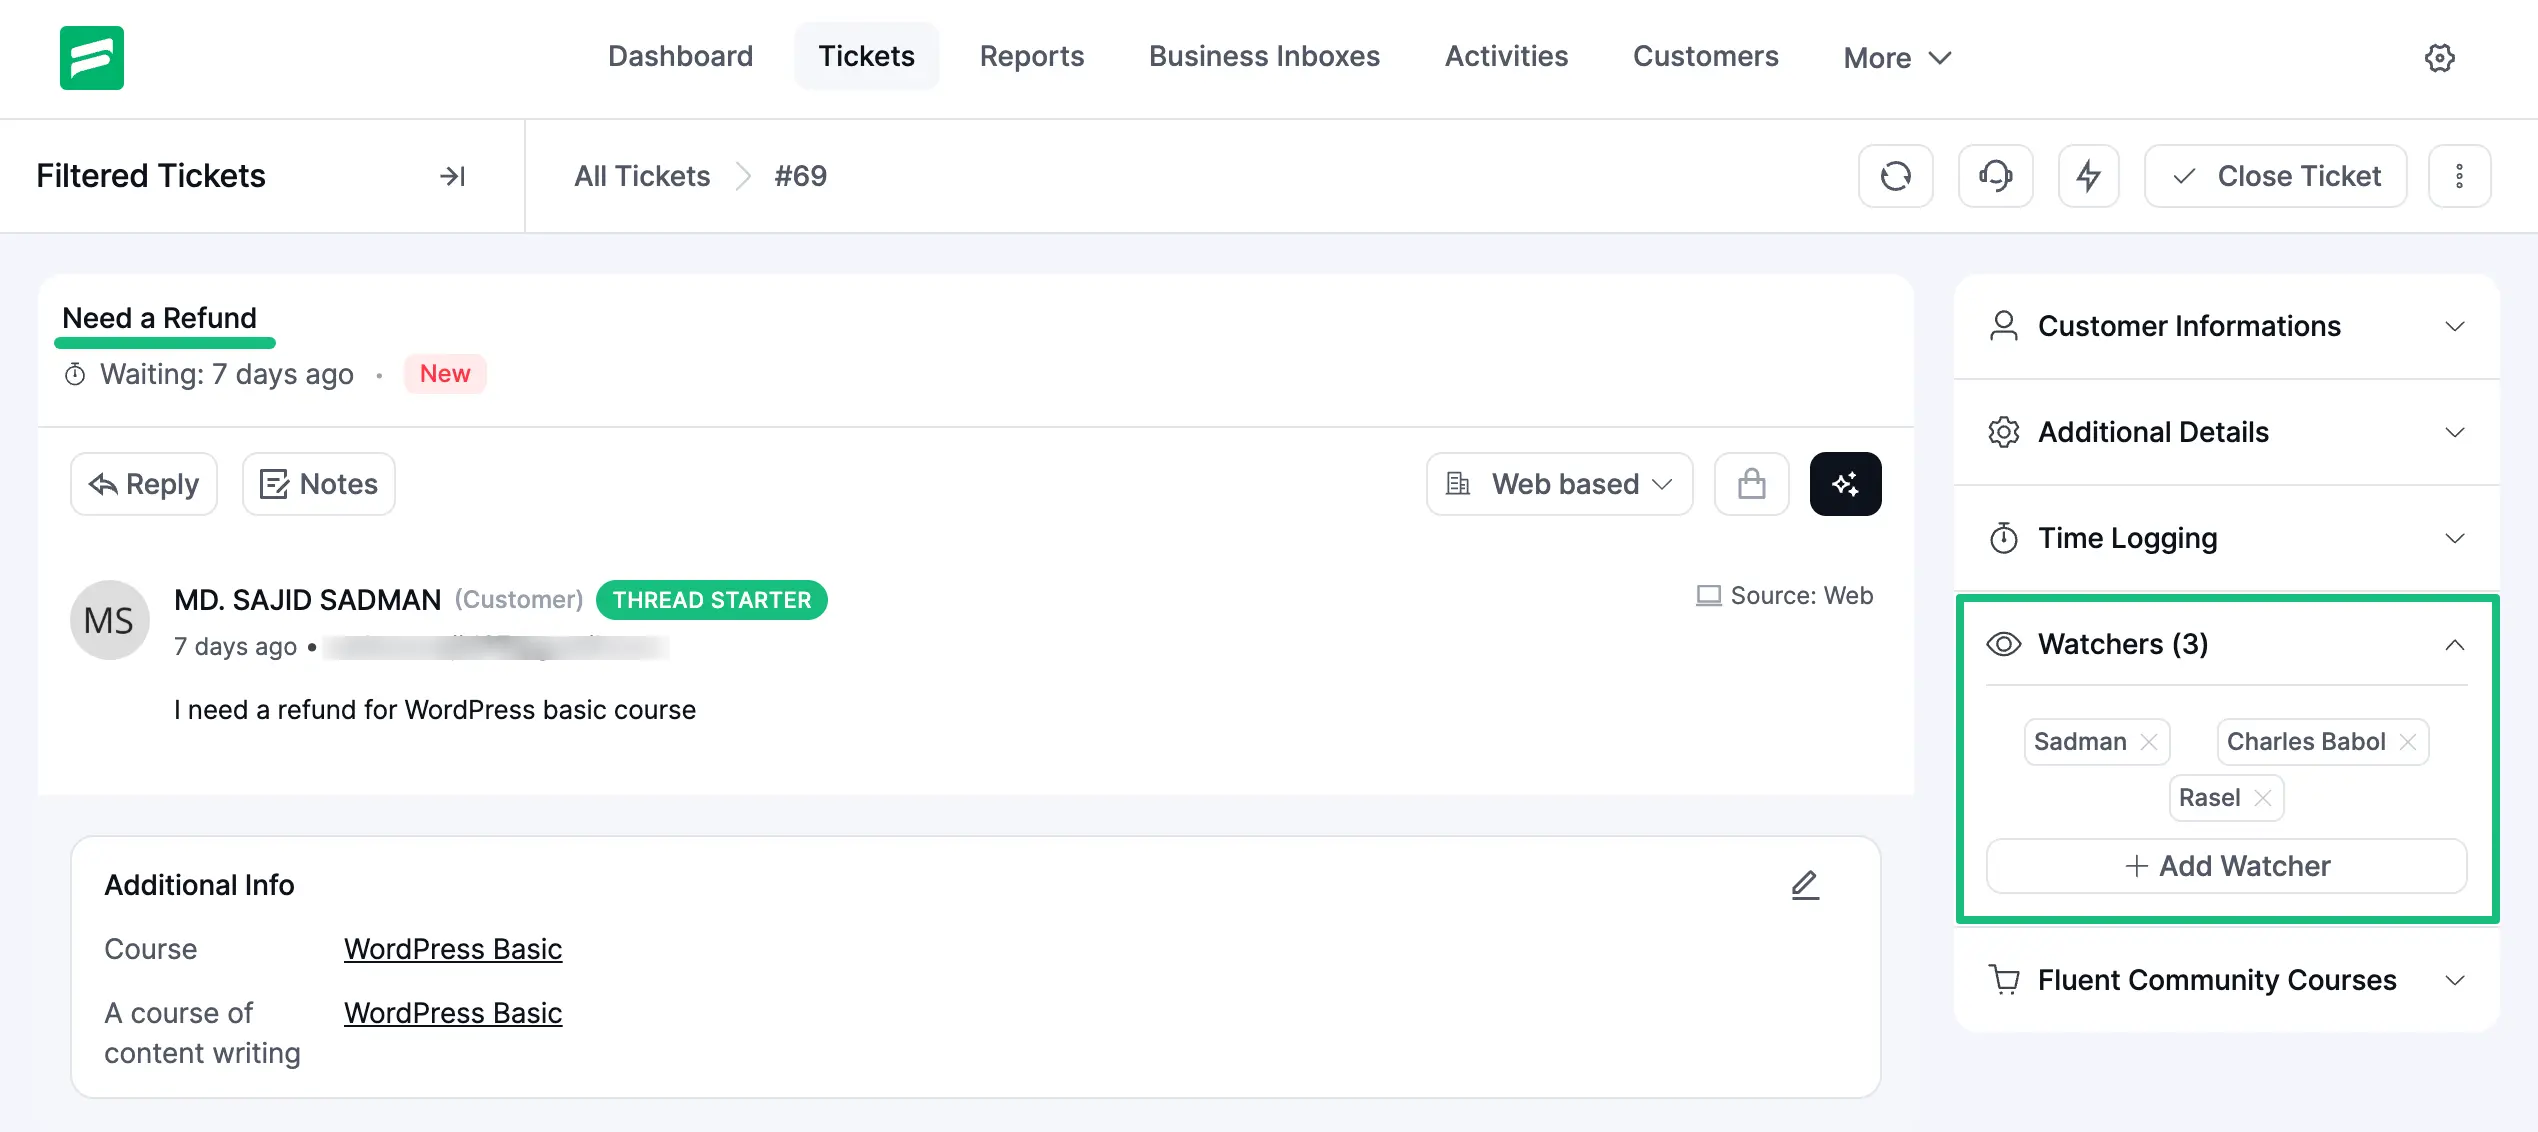
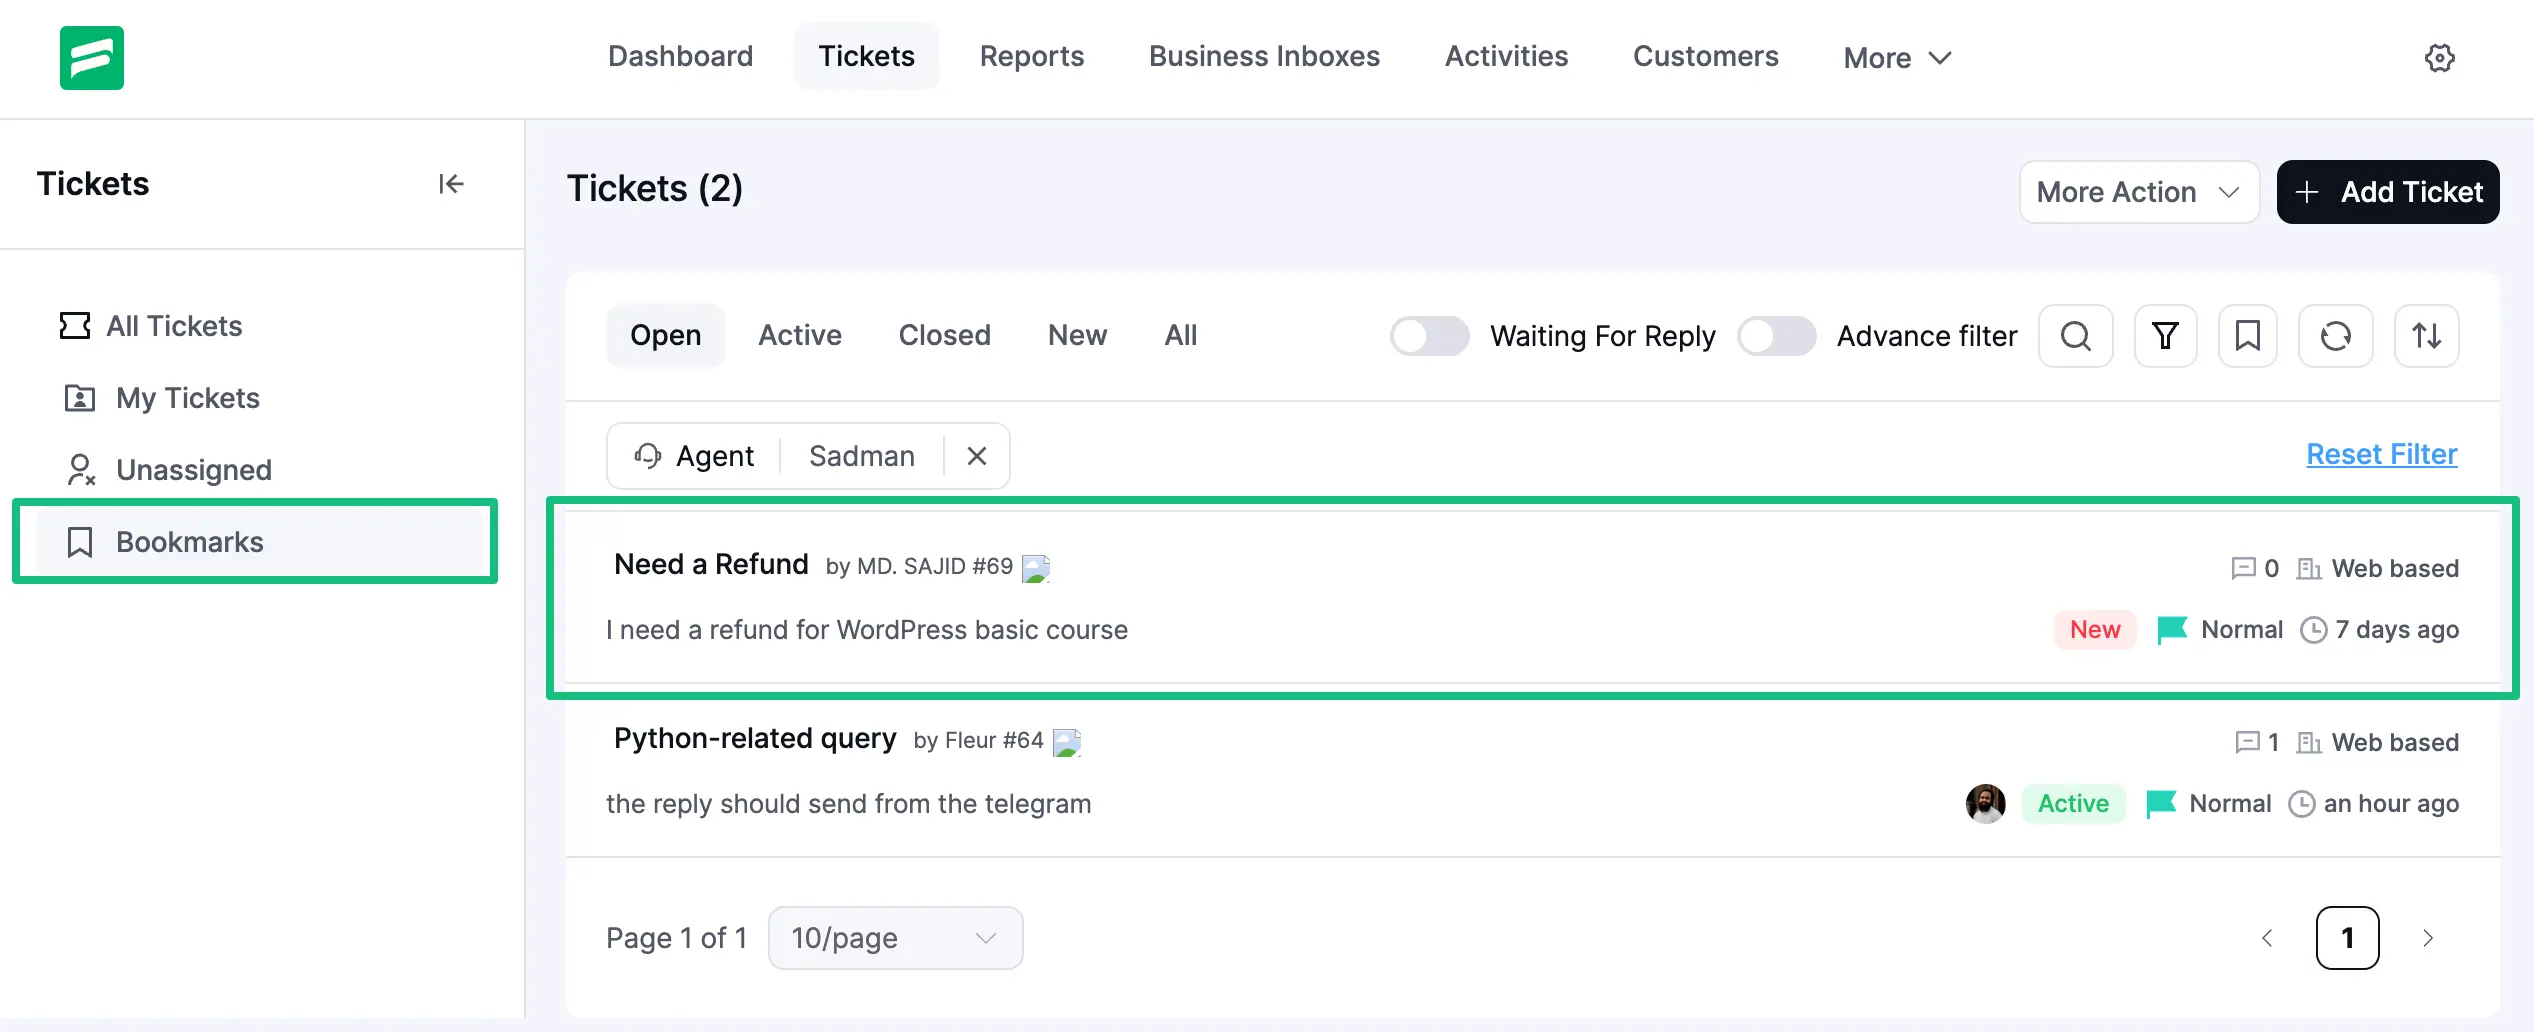
For example, I set the Trigger as “On Ticket Creation” , Condition as “Ticket Title that contains Refund word ”, and Action as “Add Bookmarks ” in this Workflow.
Now, you can see that the Ticket shown in the screenshot below is Automatically Bookmarked after the Creation as it has the Refund word in the Title.
NOTE
When you bookmark a ticket and select another agent, you’ll see the selected agent in the Watchers list.
NOTE
You can easily get all of your bookmarked tickets under the Bookmarks option placed in the left sidebar of Fluent Support’s Tickets.
This is how you can create and run Automatic Workflow in Fluent Support!